What is a dedicated IP?
By default, emails sent through Direct Mail use a shared IP pool.
To provide an enhanced sending service for professional customers, Alibaba Cloud Direct Mail offers dedicated IPs as a value-added service. Using a dedicated IP isolates your email sending from other users. This isolation protects your sending domain and IP reputation and significantly improves your delivery rate.
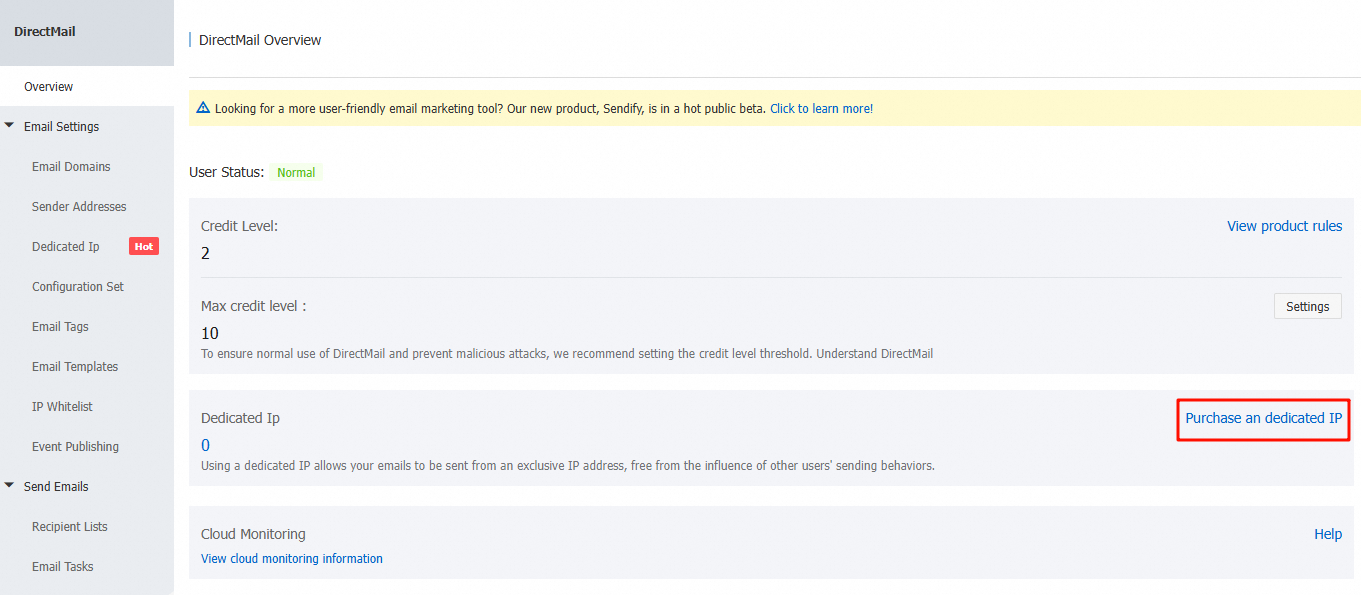
How to purchase a dedicated IP
From the Direct Mail console homepage, go to the purchase page.
Select the region where you want to use the dedicated IP, choose the quantity, and then submit the order.
Note: To avoid service interruptions, we recommend selecting Auto-renewal when making your purchase.
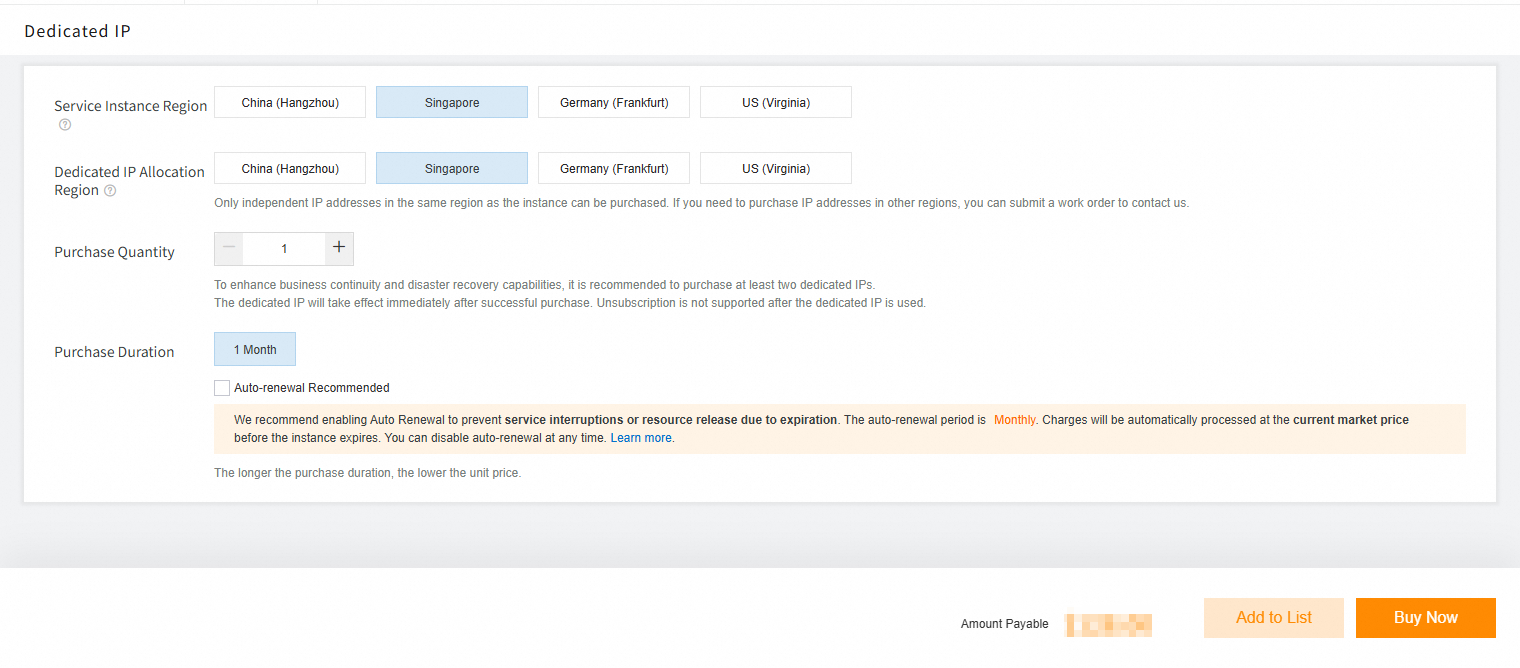
If you encounter insufficient stock or exceed the purchase limit, submit a ticket to request an increase.
After completing the purchase, configure your dedicated IP in the Direct Mail console. The resource typically becomes available within 1 to 5 minutes.

How to use a dedicated IP
IP warm-up
Email delivery is complex. Email service providers (ESPs) typically set daily sending limits based on the reputation of the sending domain and IP address. Therefore, you should avoid sending large volumes of email from a new domain or IP that has not yet established a sending reputation.
To ensure a high delivery rate, you need to gradually increase your sending volume each day until you reach your target volume. This process is known as IP warm-up.
Alibaba Cloud Direct Mail provides two warm-up modes:
Manual warm-up
When you purchase a new dedicated IP, the default warm-up mode is "Manual warm-up". You must control and gradually increase your daily sending volume until you reach your target volume.
Automatic warm-up
When a dedicated IP has not yet met the warm-up criteria, the system automatically allocates a portion of your email traffic to the dedicated IP to warm it up. This currently covers major ESPs such as Gmail, Yahoo, Outlook, and iCloud. The process is fully automated.
If your actual sending volume exceeds the daily warm-up threshold, the excess traffic is automatically routed through the shared IP pool. You can view the real-time warm-up progress of your IP in the console.
The following table compares the two warm-up modes:
Warm-up mode | Trigger method | Source of sending traffic | Can you immediately send emails with the dedicated IP? | Is the warm-up process automated? | Can warm-up progress be viewed? | Typical use cases |
Manual warm-up | You control the sending volume. | Your own email traffic. | Yes (You must control the sending volume). | No (You must manually adjust the daily sending volume). | You must monitor your sending performance independently. | For users who want flexible control over the warm-up pace and have previous email sending experience. |
Automatic warm-up | The system automatically performs the warm-up based on the daily threshold. | Your own email traffic (automatically allocated to the dedicated IP by the system). | Yes. Emails exceeding the warm-up threshold are automatically routed to a shared IP. | Yes (The system automatically allocates and increases traffic). | Yes. You can view the progress in the console. | For users who want to avoid complex configurations and let the system optimize the warm-up process automatically. |
Create an IP pool
If you have purchased multiple dedicated IP addresses, you can group them into an IP pool. You can then specify this IP pool when sending emails to control which IPs are used.
In the upper-right corner of the console, click New IP Pool.
Enter the IP Pool Name and the Associated IPs to create the pool. Note: IP pool names must be unique, and each dedicated IP can only be added to one IP pool. You cannot create more IP pools than the number of dedicated IPs you have purchased.

A common use for an IP pool is to create one pool specifically for sending marketing email and another for sending transactional email.
This practice separates the IP reputation of your different mail streams so they do not affect each other. With this configuration, even if a marketing campaign results in a high number of complaints, the delivery rate of your transactional email will not be impacted.
Using a dedicated IP
There are two methods:
Method 1
In the console, bind a sending address to a configuration set. After binding, all sending methods automatically use the dedicated IP, so you do not need to specify the IP pool ID when sending. For more information, see Sending configuration (configuration set).
Method 2
Specify the IP pool parameter when sending emails through the console, API, or SMTP.
Use a dedicated IP in the console
When you create a new email sending task, select an IP Pool. The system then uses IPs from this pool to send the emails.

Use a dedicated IP with API or SMTP
Obtain the IP pool ID (not the instance ID or the IP address):

API examples:
SMTP example:
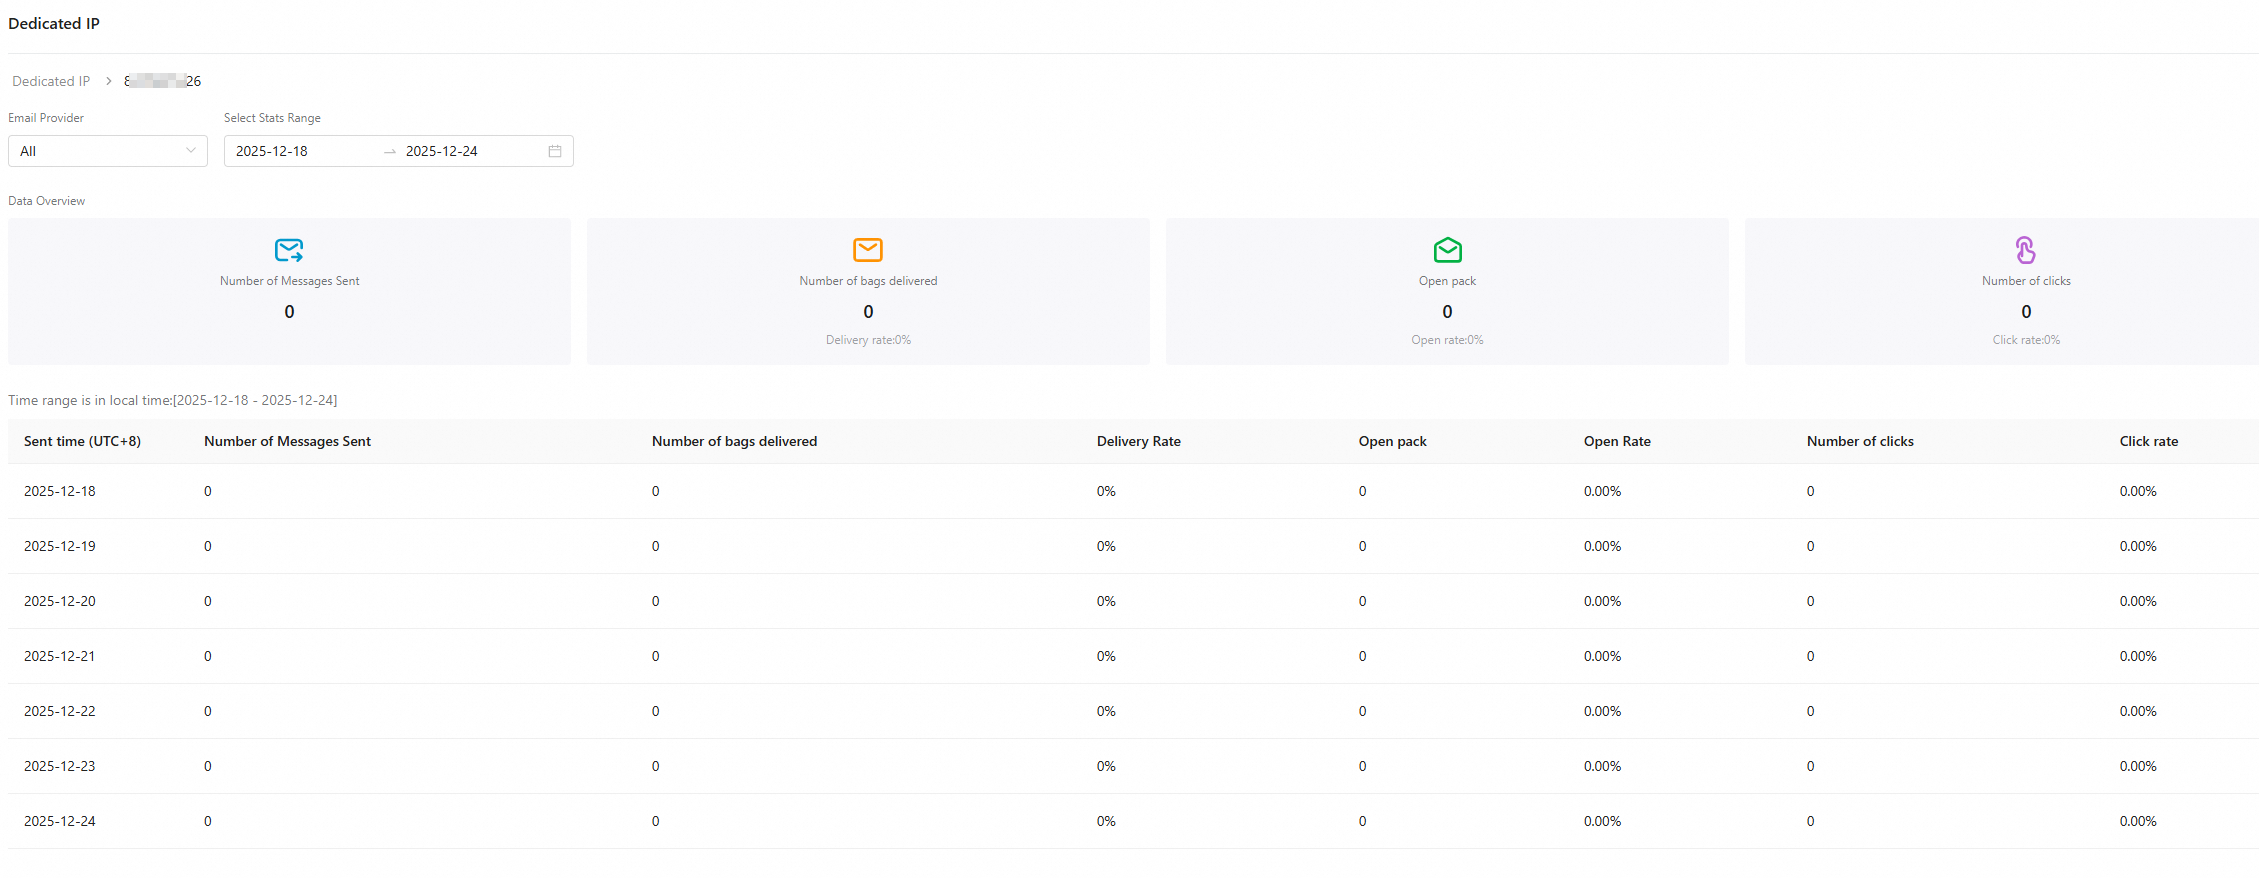
Analytics
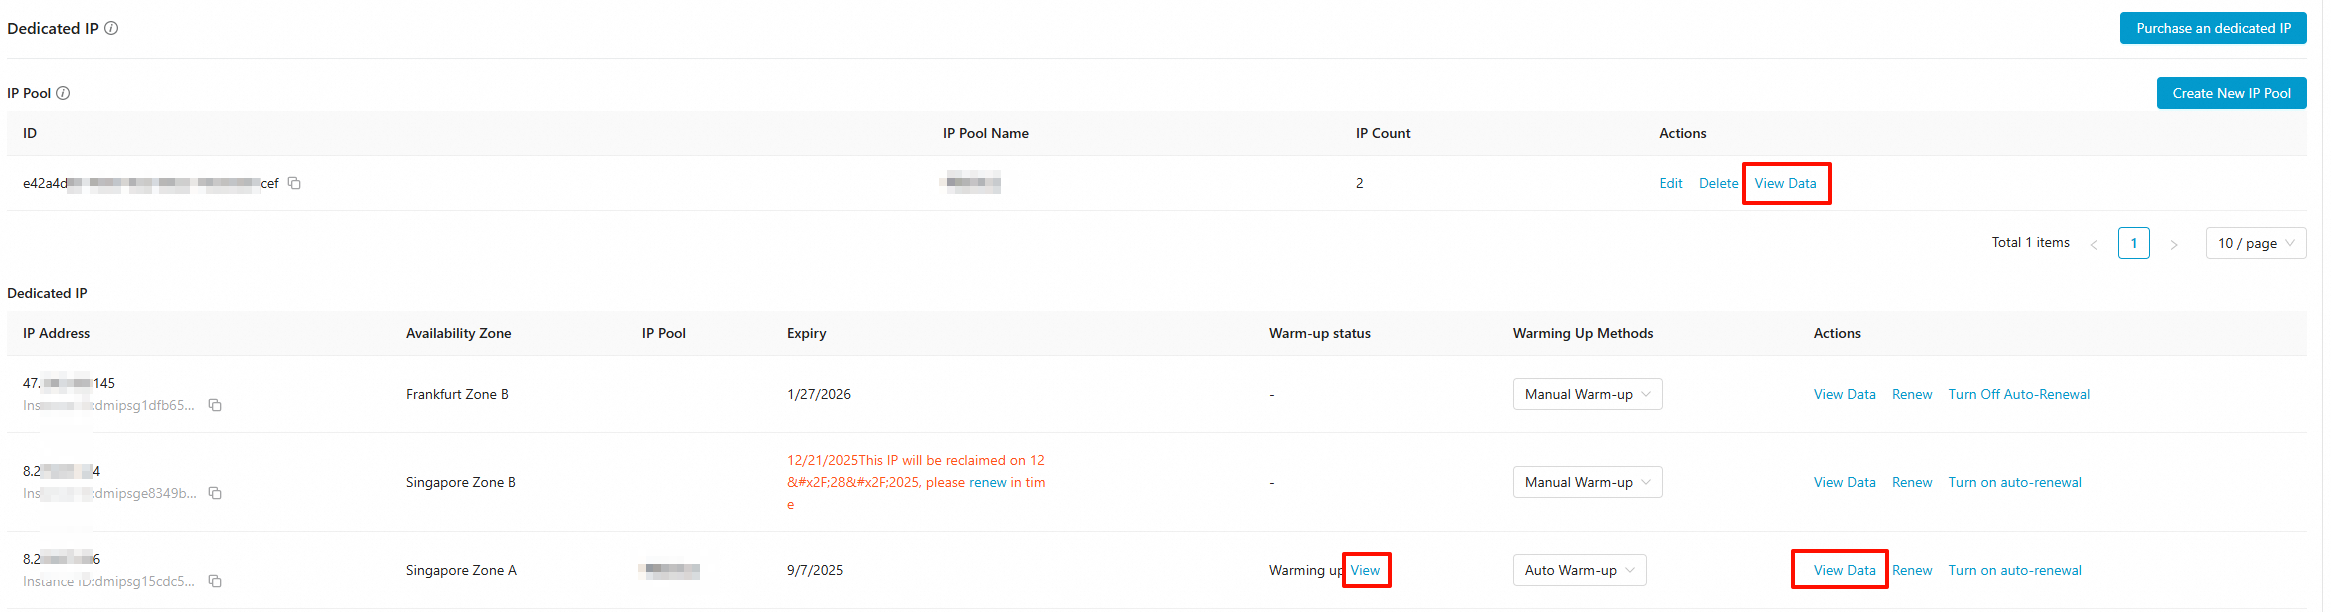
1. View Data (IP Pool): Displays data for the specified IP pool. An IP pool can include multiple dedicated IPs.
2. View Data (Dedicated IP): Displays data for the specified dedicated IP.
Microsoft personal mailbox domains include outlook.com, hotmail.com, live.com, live.cn, msn.com, and others.
Microsoft business email refers to business email on a custom domain hosted by Microsoft (such as Microsoft 365/Exchange).
Different email services use different throttling policies for sending rates (which are not disclosed by the providers). In the dedicated IP analytics filters, Outlook refers only to personal mailboxes.
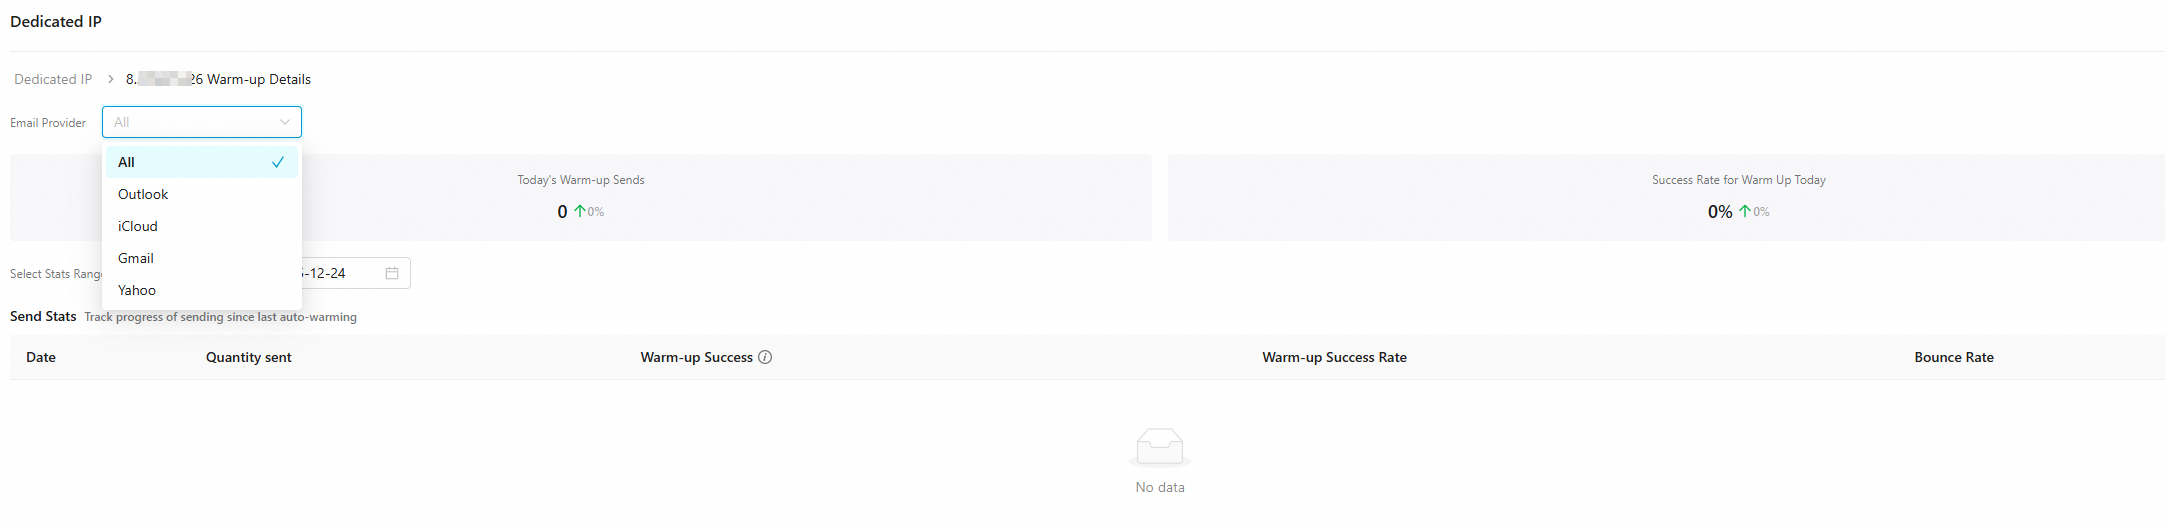
3. View (Warm-up): Displays data for service providers that support automatic warm-up, such as Outlook, iCloud, Gmail, and Yahoo.
FAQ
Other questions: Dedicated IP-related questions