Create and manage data integration tasks directly in the DataStudio module, unifying extraction, transformation, and loading in a single view.
Overview
Define and manage Data Integration tasks in the DataStudio module alongside other task nodes. The full ETL/ELT pipeline runs in a single view with no module switching.

A single-table batch synchronization task can be added as a workflow node with dependency configuration. Other integration tasks run as standalone nodes.
Core mechanism:
-
Configuration consistency: The configuration interface, parameters, and underlying functions are identical whether you create a task in Data Studio or in the Data Integration module.
-
Bidirectional synchronization: Tasks created in the Data Integration module auto-sync to the
data_integration_jobsdirectory in Data Studio, categorized bysource-type-destination-typechannel.
Prerequisites
-
Data source preparation
-
Source and destination data sources are configured. Data source management.
-
Your data sources support real-time synchronization. Supported data sources and synchronization solutions.
-
For data sources that require logging (such as Hologres and Oracle), logging is enabled. Data source list.
-
-
Resource group: You have purchased and configured a serverless resource group.
-
Network connectivity: You have established network connectivity between the resource group and your data sources.
Create an integration task in Data Studio
The following example creates a single-table batch synchronization task from MySQL to MaxCompute.
-
Create a node
-
Go to the Workspaces page in the DataWorks console. In the top navigation bar, select a desired region. Find the desired workspace and choose in the Actions column.
-
Click the + icon at the top of the page, or in the toolbar of the workflow canvas, select .
-
Configure basic information
Choose batch or real-time synchronization based on your data latency, volume, and complexity requirements. Then select a compatible synchronization solution that matches your source and destination database types, network environment, and feature requirements.
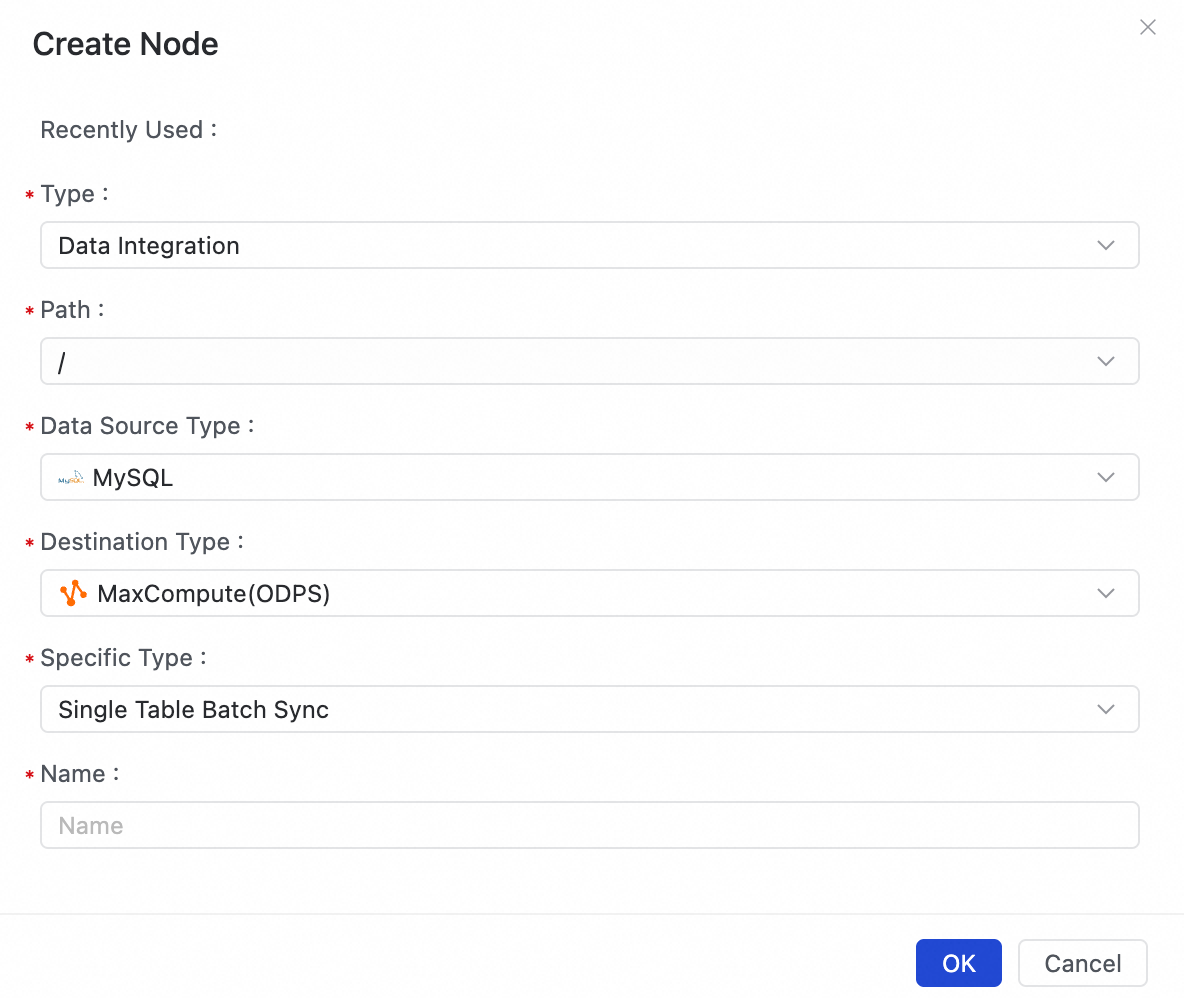
In the New Node dialog box, configure the following settings:
-
Path: Select where to store the task node in the Data Studio directory tree.
-
Data Source Type: Select your source data source, for example,
MySQL. -
Data destination type: Select your destination data source, for example,
MaxCompute. -
Specific Type: Select a synchronization solution based on your needs, such as
full-database real-time,full-database batch,full-incremental for an entire database, orsingle-table batch. -
Name: Enter a name for the task node, for example,
mysql_to_mc_user_table.
-
-
Click Confirm. The task is created and its visual configuration page opens.
-
-
Configure task details
The remaining configuration is identical to the Data Integration module.
-
Configure scheduling (single-table batch synchronization only)
Configure node properties such as schedule time, scheduling dependencies, and scheduling policies for automatic execution. Set scheduling parameters to pass dynamic variables to node instances at runtime.
-
Publish and maintain the task
-
Click Publish in the toolbar to deploy the task to production. The task is then managed by Operation and Maintenance Center.
-
After publishing, view run status, logs, alerts, and dependencies in Operation Center. Task O&M and tuning covers instance management, rerunning failed tasks, performance tuning, and dirty data handling.
-
Task types
Data Integration supports multiple synchronization modes. Each mode differs in scheduling, dependency support, and use cases.
Single-table batch synchronization
Configuration: Wizard mode configuration | Script mode configuration.
-
Description: Periodically synchronizes data between a single source and destination table on a defined schedule (daily, hourly, etc.).
-
Use cases:
-
Daily T+1 synchronization of business data to build the ODS or DWD layers of a data warehouse.
-
Periodically archiving business tables from a production database to a data lake or data warehouse.
-
Periodically migrating report data across data sources.
-
Single-table real-time synchronization
Configuration: Single-table real-time task configuration.
-
Description: Captures real-time data changes (inserts, updates, deletes) from a single source table and synchronizes them to a destination table using CDC or a message queue.
-
Use cases:
-
Synchronizing real-time data changes from a business database to MaxCompute or Hologres to build a real-time data warehouse.
-
Providing data for real-time monitoring dashboards or recommendation systems.
-
Replicating a single table in real time between database instances.
-
Full-database batch synchronization
Configuration: Full-database batch synchronization task.
-
Description: Performs a one-time or periodic batch synchronization of all or multiple tables from a source database.
-
Use cases:
-
Migrating an entire business database to a cloud data warehouse for the first time.
-
Performing regular full or incremental backups of an entire database.
-
Initializing a new data analytics environment by importing all historical data at once.
-
Full-database real-time synchronization
Configuration: Full-database real-time synchronization task.
-
Description: Captures schema and data changes in real time from all or specified tables in a source database and synchronizes them to a destination.
-
Use cases:
-
Replicating a production OLTP database to an analytical database in real time for read/write splitting and real-time analytics.
-
Building a real-time disaster recovery solution for a database.
-
Maintaining real-time data consistency between a data lake or data platform and multiple upstream business systems.
-
Full-incremental database synchronization
Configuration: Full-incremental synchronization task for an entire database.
-
Description: CDC data includes
Insert,Update, andDeleteoperations. Append-only storage systems (such as non-Delta MaxCompute tables) cannot natively applyUpdate/Delete, which causes data inconsistencies. This mode addresses the issue by creating abase table(full snapshot) and alog table(incremental logs) at the destination. -
Use cases:
-
When the destination is a non-Delta MaxCompute table and the source lacks an auto-incrementing column, batch incremental synchronization is not available. Full-incremental synchronization writes incremental data to the log table in minutes, with the merged state visible on a T+1 basis.
-
Feature comparison
|
Task type |
Creation location |
Workflow orchestration |
Scheduling configuration |
Data Studio debugging |
Data source isolation |
|
Single-table batch synchronization |
Data Studio only |
|
|
|
|
|
Single-table real-time synchronization |
Data Studio / Data Integration |
(Runs as a standalone node only) |
|
(Requires publishing to Operation Center to run) |
|
|
Full-database batch synchronization |
Data Studio / Data Integration |
(Runs as a standalone node only) |
(You can set separate schedules for sub-tasks) |
(Requires publishing to Operation Center to run) |
|
|
Full-database real-time synchronization |
Data Studio / Data Integration |
(Runs as a standalone node only) |
|
(Requires publishing to Operation Center to run) |
|
|
Full-incremental synchronization for an entire database |
Data Studio / Data Integration |
(Runs as a standalone node only) |
(You can set separate schedules for sub-tasks) |
(Requires publishing to Operation Center to run) |
|