Manage MaxCompute resources
The MaxCompute Resources pane in DataStudio lists every resource in your MaxCompute compute engine and lets you sync resources into a Schedule Workflow with one click.
Limitations
Only resources uploaded through the MaxCompute client (odpscmd) are supported.
Resources must be no larger than 500 MB.
Supported resource types: JAR, Archive, File, and Python.
Understand your resources
Resources reach MaxCompute through two channels: DataWorks (the Schedule Workflow pane) and external tools such as odpscmd or MaxCompute Studio. The upload channel determines where the resource is visible and which node types can use it.
| Scenario | Schedule Workflow (DataStudio) | MaxCompute Resources pane |
|---|---|---|
| Use in an ODPS SQL node | Yes — must be uploaded to MaxCompute | Yes |
| Use in an ODPS MR node | Yes — must be uploaded to MaxCompute | No |
| Use in a Shell node | Yes | No |
| Use in an ad hoc query | Yes — must be uploaded to MaxCompute | Yes |
| Create a function in a workflow | Yes — must be uploaded to MaxCompute | No |
Resources uploaded outside DataWorks (via odpscmd or MaxCompute Studio) appear in the MaxCompute Resources pane but not in the Schedule Workflow pane. There may be a short delay before they appear. To verify that a resource is available, run the appropriate command. For more information, see Appendix 1: Manage resources using commands.
The MaxCompute Resources pane and the Schedule Workflow pane are not automatically kept in sync. A resource added to one pane does not automatically appear in the other.
View resources
Go to the DataStudio page. Log on to the DataWorks console. In the top navigation bar, select the target region. In the left-side navigation pane, choose Data Development and O\&M > Data Development. Select the target workspace from the drop-down list, then click Go to Data Development.
In the left-side navigation pane, expand MaxCompute and click MaxCompute Resources.
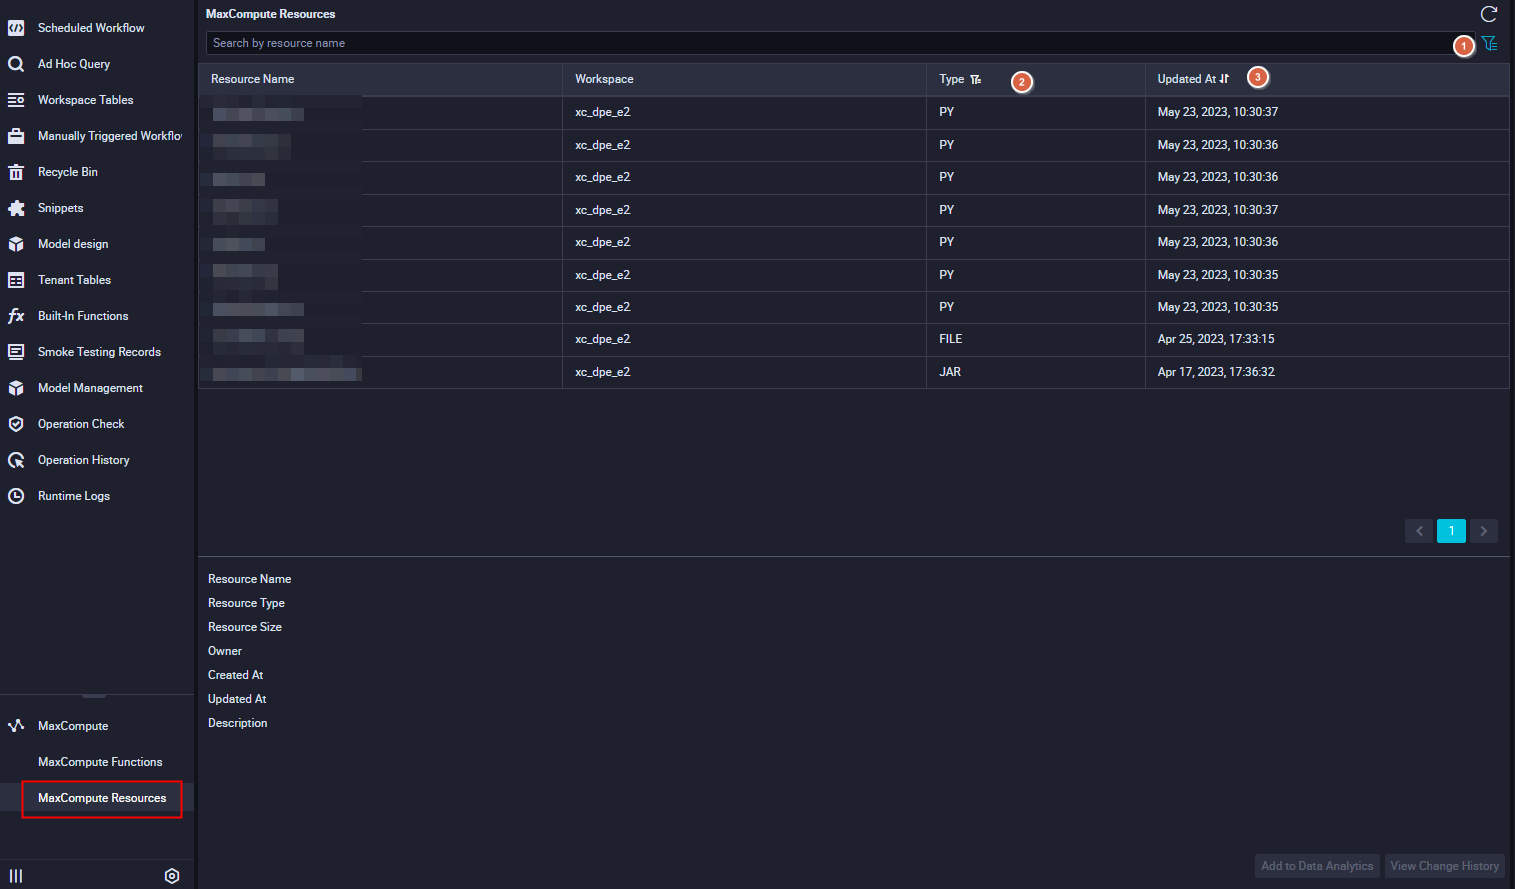
The pane opens with the following controls:
Icon Description Environment toggle By default, the pane shows resources in Production Env. Click the icon to switch to the development environment and see resources that are committed but not yet published. Workspaces in basic mode have only a production environment. Resource type filter Click to filter the list by resource type: JAR, Archive, File, or Python. Sort order Click to change the sort order. Resources are sorted by update time in descending order by default. Click a resource to view its Resource Name, Resource Type, and Resource Size.
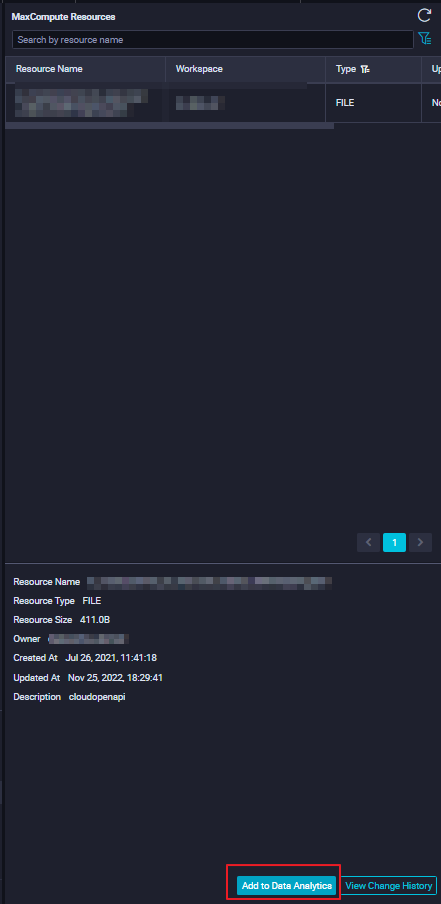
Add a resource to a workflow
Use this procedure to sync a resource from the MaxCompute Resources pane into a Schedule Workflow so that you can manage and use it in DataStudio.
Find the resource and click Add To Data Analytics.
In the Create Resource dialog box, enter a Resource Name, select a Path, click Re-Upload, and then select the file to upload. During the upload, you can:
Rename the resource.
Select a different destination folder to move the resource to a different workflow.
During the upload, you cannot:
Change the resource type.
Toggle the Upload as ODPS Resource option.
Re-upload the file again.
Click Create.
After creating the resource, manually save, submit, and publish it — the same process as for any other resource in a workflow. Submitting and publishing also uploads the resource to the MaxCompute development and production environments, and updates the corresponding entry in the MaxCompute Resources pane. For details, see Create and use MaxCompute resources.
Resource names must be unique within a MaxCompute project. Adding a resource with a name that already exists overwrites the original resource. If the original resource belongs to a different workflow, it is overwritten and moved to the new workflow.
View change history
Click View Change History on a resource to see its creation and modification records.
What's next
Create and use MaxCompute resources — upload resource files through the Schedule Workflow pane and configure them for use in nodes.
Appendix 1: Manage resources using commands — verify and manage resources using odpscmd when resources uploaded outside DataWorks are not yet visible in the pane.