In DataWorks Data Integration, you can add a data masking component to Single-Table Real-Time tasks. This component masks specific source fields before writing the data to a destination table.
Step 1: Configure a single-table real-time task
-
Create a data source. For more information, see Data source management.
-
Create a Data Integration task. For more information, see Configure a single-table real-time synchronization task.
NoteFor single-table real-time Data Integration tasks, you can add a data processing component between the source and destination components. For more information, see Supported data sources and synchronization solutions.
Step 2: Add the data masking component
-
In the single-table real-time synchronization task, turn on the Data Processing switch, click +Add Node, and select the Data Masking node.
-
Enter a name and description for the node.
-
Add: Click Add to define a masking rule for a data field.
-
Upstream Field: Select the source field to mask.
-
Data Masking Rule: Select an existing masking rule or create a new one.
-
Click New Desensitization Rule to open the configuration panel and define the rule.
For more information, see the following instructions:
-
For Sensitive Data Type, select Existing Data Type or New Type, and then set a masking method for the field. The following sections describe the available masking methods.
Alias
The alias method replaces a value with a pseudonym that preserves the original data format.
You must configure the Security domain. The valid values are
0~9. Different security domains use different masking policies. The same input data produces different masked results in different security domains.Hashing
Hashing encrypts original data into a fixed-length value. The hashing method requires you to select a security domain. Different security domains use different masking rules, so the same input data produces different hashed results in different security domains.
Example: If the original data is
a123, the masked result isea9da0c87fb455df9013be83bdc20014when the security domain is set to0, and9738f2cce017c52099ea530fa34eb128when the security domain is set to1. If the original data and the security domain are both the same, the masked result is also the same.Redaction
Redaction masks partial information by replacing characters at specific positions with asterisks (*). You can select one of the following redaction methods:
-
Recommended method.
-
Show the first and last characters only.
-
Show the first three and last two characters only.
-
Show the first three and last four characters only.
-
-
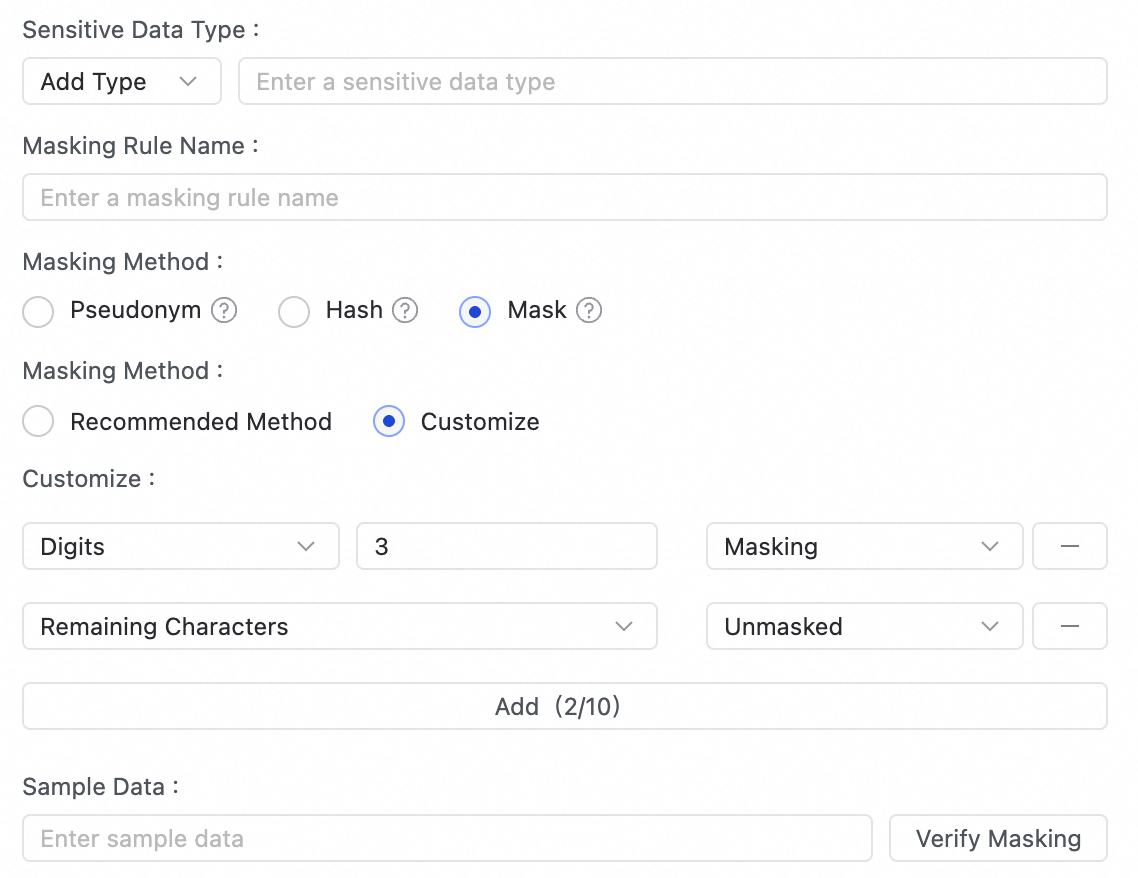
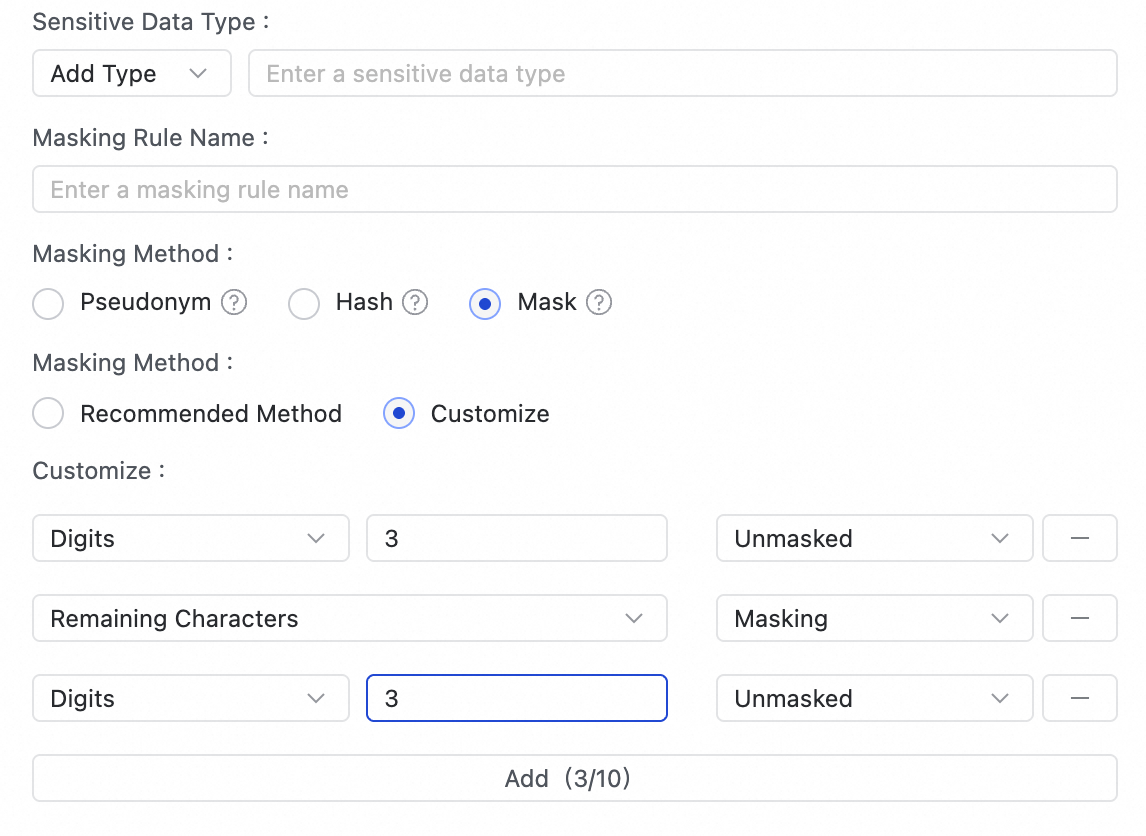
Custom: Provides flexible configuration. You can specify whether to mask characters in the beginning, middle, and end segments, as well as the number of characters to mask in each segment. You can add up to 10 segments, and at least one segment must contain the remaining digits.
-
Configuration instructions:
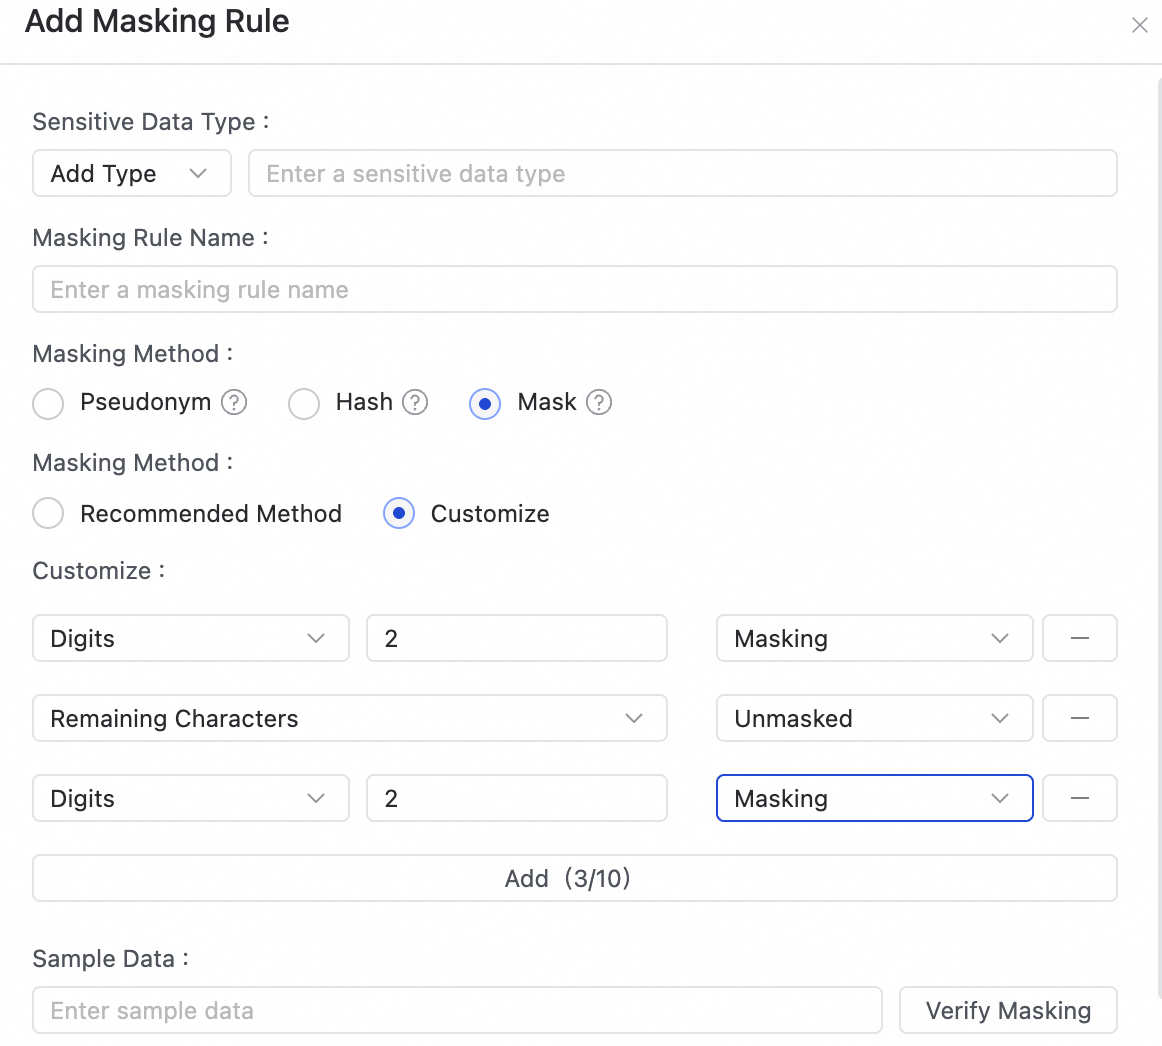
Icon
Description
①
You can select a fixed number of digits or the remaining digits.
②
The valid range is [1, 100].
③
You can select to mask or not mask the segment.
-
Example:
Configuration
Illustration
Mask the first three characters. The remaining characters are not masked.
Mask the last three characters. The remaining characters are not masked.

Keep the first three and last three characters, and mask all characters in between.
-
-
-
Verify the masking rule: Enter sample data before masking, click Test, and view the masked result in the Data Masking Effect section.
-
After the configuration is complete, click Determine to create the data masking rule.
-
-
-
Next step
After you configure the Data Source and masking rule, you can click Preview Data Output to check whether the output data of the current node meets your requirements.