DataWorks DataStudio allows you to import data in on-premises CSV files or custom text files to a MaxCompute table. This topic describes how to import data to a MaxCompute table.
Prerequisites
A MaxCompute table is created in the development environment. For more information, see Create and manage MaxCompute tables.
Limits
DataStudio allows you to import only data in on-premises CSV files or text files to a MaxCompute table. DataStudio does not allow you to import data in SQL files to a MaxCompute table.
If you want to use more data upload-related features, you can use the Upload and Download service of DataWorks. The data upload feature provided by the Upload and Download service allows you to upload on-premises files, DataAnalysis workbooks, and Object Storage Service (OSS) objects to MaxCompute, E-MapReduce (EMR) Hive, and Hologres. For more information, see Upload data.
Entry points for data import
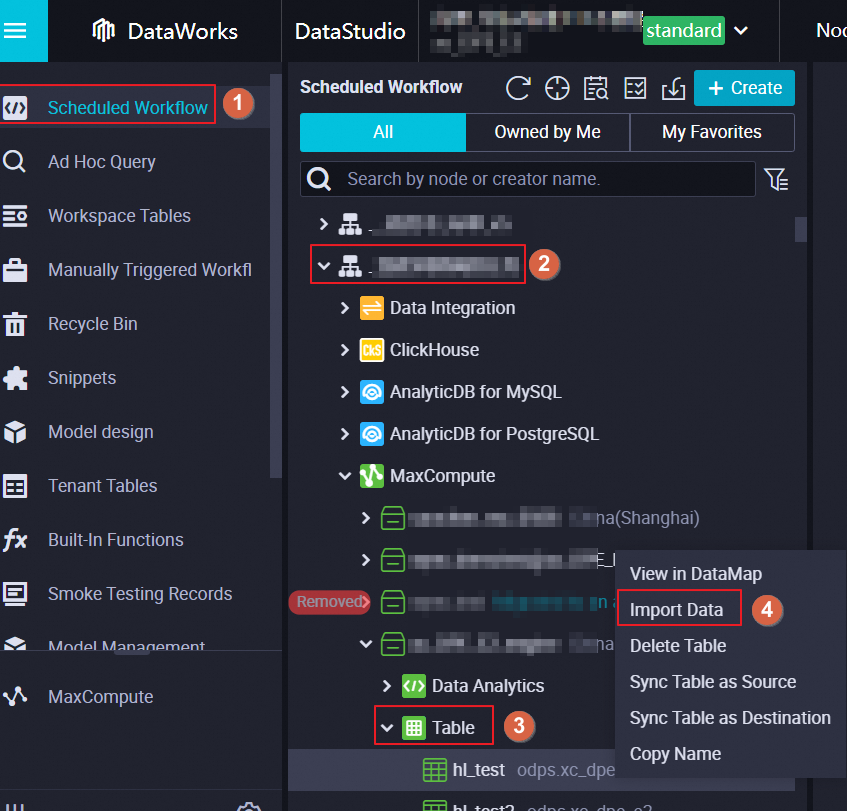
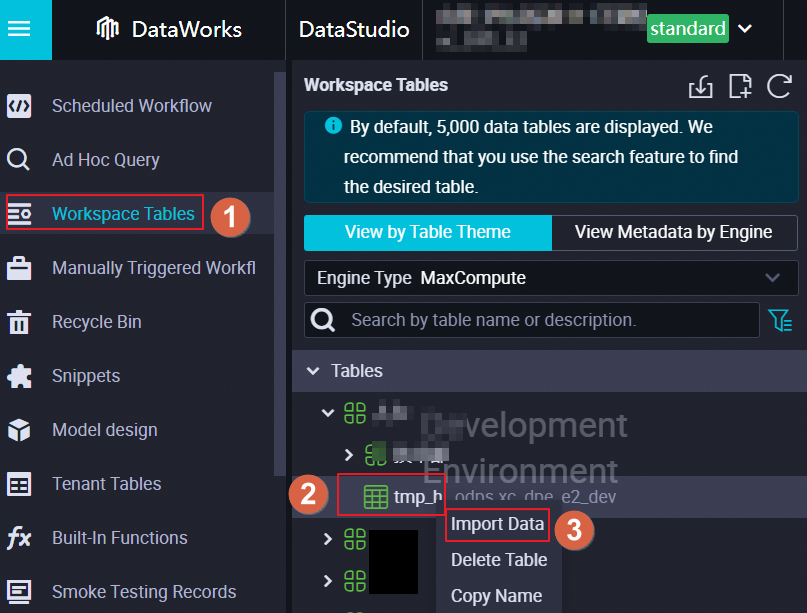
You can import data to a MaxCompute table through the following entry points: the top toolbar of the Scheduled Workflow pane, the MaxCompute folder of the Business Flow section in the Scheduled Workflow pane, and the Workspace Tables pane. The following figures show the entry points for data import.
Click the Import Data icon in the top toolbar of the Scheduled Workflow pane.

In the Scheduled Workflow pane, find the desired workflow, right-click the name of the table to which you want to import data in the MaxCompute folder, and then select Import Data.
In a workspace in standard mode, click Workspace Tables in the left-side navigation pane of the DataStudio page, right-click the name of the table to which you want to import data, and then select Import Data.
Import data
DataStudio allows you to import only data in on-premises CSV files or text files to a MaxCompute table. DataStudio does not allow you to import data in SQL files to a MaxCompute table.
Use one of the preceding methods to open the Data Import Wizard dialog box.
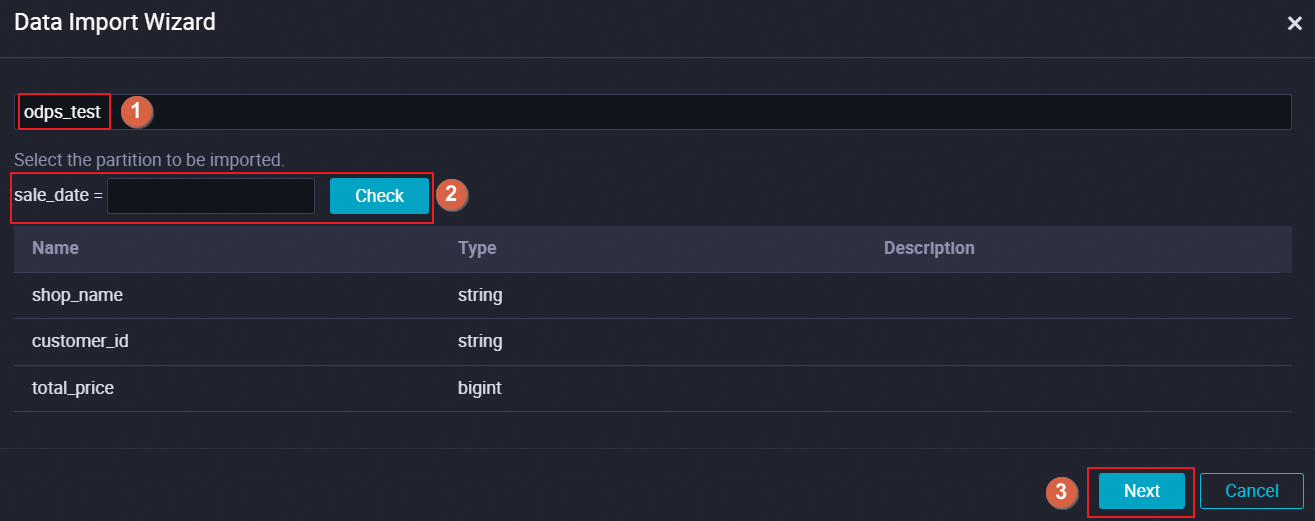
In the Data Import Wizard dialog box, enter or check the name of the table to which you want to import data, confirm table information, and then click Next.
If you select a partitioned table, you can specify the partition to which you want to import the data. Then, click Check to check whether the partition exists.
If the specified partition does not exist, the system creates a partition for subsequent operations and the data will be imported to the created partition.
If the specified partition exists, the data will be imported to this partition.
Specify the file format and select a file whose data you want to import.
Upload the file and configure parameters such as Select Delimiter and Original Character Set. Then, click Next.
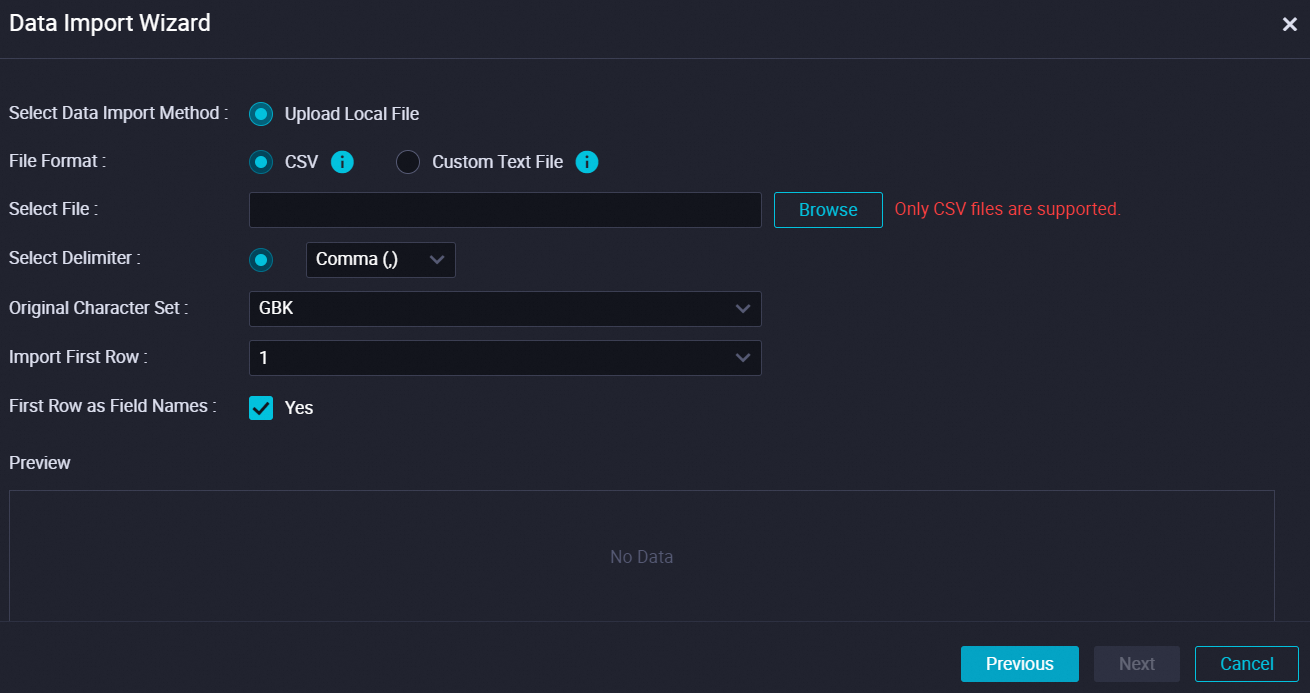
The following table describes the parameters.
Parameter
Description
File Format
The format of the file that you want to upload. Valid values: CSV and Custom Text File. If you set this parameter to Custom Text File, you can upload
.txt,.csv, and.logfiles.Select File
The file that you want to upload. You can click Browse and select a file as prompted.
Select Delimiter
The delimiter that you want to use to separate fields. Valid values:
Comma (,),Tab,Semicolon (;),Space,|,#, and&.NoteIf you set the File Format parameter to Custom Text File, you can enter a character or string in the Select Delimiter field as the delimiter to separate fields.
Original Character Set
The encoding format of the file that you want to upload. Valid values: GBK, UTF-8, CP936, and ISO-8859-1.
Import First Row
The row from which the data is imported.
First Row as Field Names
Specifies whether to set the first row of the file that you want to upload as the header row.
If you select Yes, the first row of the file is not imported.
Otherwise, the first row of the file is imported.
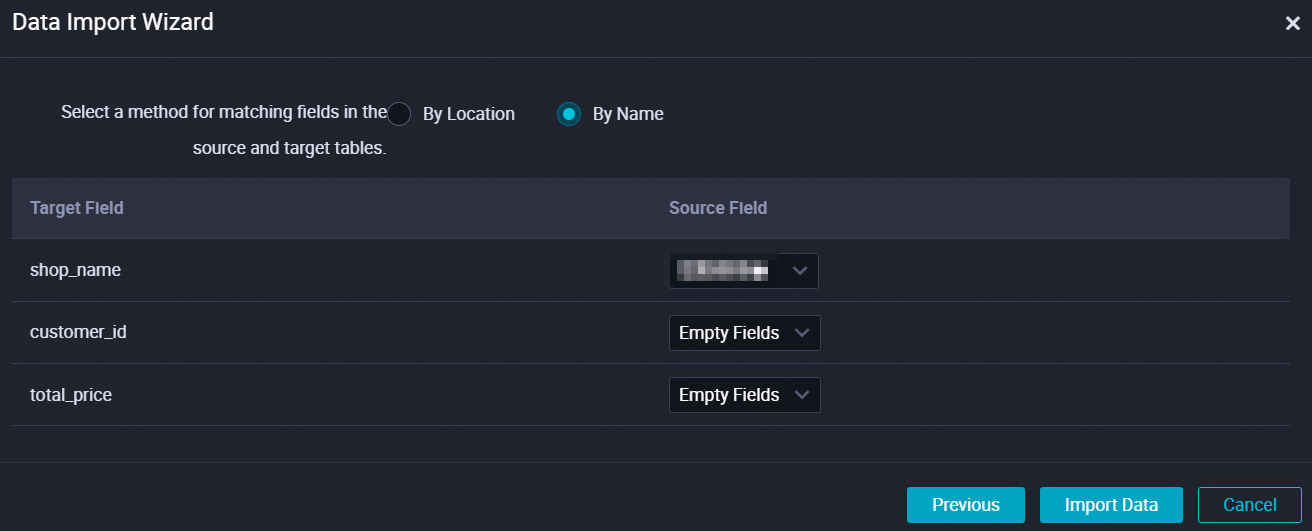
Specify a method that is used to match the fields between the uploaded file and the MaxCompute table. Then, click Import Data.
You can select By Location or By Name to match the fields between the uploaded file and the MaxCompute table.
After the operation is complete, a message appears, which indicates that the data of the on-premises file is imported to the MaxCompute table. You can view the imported data by running an ad hoc query. For more information, see Create an ad hoc query.
References
If you want to use more data upload-related features, you can use the Upload and Download service of DataWorks. The data upload feature provided by the Upload and Download service allows you to upload on-premises files, DataAnalysis workbooks, and Object Storage Service (OSS) objects to MaxCompute, E-MapReduce (EMR) Hive, and Hologres. For more information, see Upload data.