If your code or function requires a MaxCompute resource, you must first create the resource or upload it to the target workspace. After the resource is uploaded, you can use it in tasks within that workspace. You can upload resources by using MaxCompute SQL commands or the visual tools in DataWorks. This document explains how to use the DataWorks visual tools to create a resource, use it in a node, and register a function based on it.
Overview
You can use MaxCompute resources to implement user-defined functions (UDFs) or MapReduce in MaxCompute. DataWorks provides a visual interface to upload locally developed or OSS-stored resource packages. You can also create new resources directly in DataWorks. These resources can be read and used by UDF and MapReduce jobs. The following table describes the resource types that you can create in DataWorks.
Resource type | Description | Supported creation methods |
Python | Stores Python code used to register Python UDFs. The file extension is .py. | Create by using the codeless editor (online editing). |
JAR | A compiled Java Archive (JAR) package used to run Java programs. The file extension is .jar. |
|
Archive | Supports uploading compressed files such as .zip, .tgz, .tar.gz, and .tar as resources. The compression type is identified by the file extension. |
|
File | Supports uploading .zip, .so, and .jar files as File resources. |
|
For more information about resource operations and management, see Manage resources, Manage resources by using commands, and Add resources to DataWorks for management.
Limitations
Resource size
Online editing: Python resources support a maximum size of 10 MB. File resources support a maximum size of 500 KB.
Upload local file: Supports uploading resources up to 500 MB.
Upload OSS file: Supports uploading resources up to 500 MB.
Resource deployment
If you use a workspace in standard mode, you must deploy the resource to the production environment.
NoteThe development and production environments use different compute engine instances. Before you perform operations such as querying tables or resources in an environment, be aware of the compute engine information for that environment. For more information about how to view the MaxCompute compute engines for different environments, see Data Studio (legacy version): Associate a MaxCompute compute engine.
Resource management
DataWorks lets you view and manage only the resources uploaded through its visual interface. If you add a resource to MaxCompute by using other tools, such as MaxCompute Studio, you must manually load the resource into DataWorks by using MaxCompute Resource. Once loaded, you can view and manage it in DataWorks. For more information, see MaxCompute resource management.
Billing
DataWorks does not charge fees for creating or uploading resources. However, MaxCompute charges fees for storing these resources. For more information, see Storage fees.
Prerequisites
You have associated a MaxCompute compute engine to perform development tasks.
(Optional) To create a resource by uploading an OSS file, complete the following preparations:
Activate OSS and create a bucket. Ensure the file you want to upload is in the bucket. For more information, see Create a bucket and Upload objects.
Grant the required permissions to access the target bucket to the Alibaba Cloud account used for the upload. To prevent permission errors, grant these permissions in advance. For more information, see Overview of access control.
Go to the resource creation page
Go to the Data Studio page.
Log on to the DataWorks console. In the top navigation bar, select the desired region. In the left-side navigation pane, choose . On the page that appears, select the desired workspace from the drop-down list and click Go to Data Development.
Right-click the target workflow, select Create Resource, and select a resource type under the MaxCompute directory.
NoteIf no workflow is available, see Create a workflow to create one.
Step 1: Create or upload a resource
DataWorks lets you upload resource packages that you developed locally or stored in OSS. For example, if you have a locally developed UDF, you must package it and upload it to DataWorks before you can register the function. For some resource types, such as Python and File resources smaller than 500 KB, you can also create them directly in DataWorks.
For resources that are created or uploaded through the DataWorks visual interface:
If the resource has not been uploaded, you must select Upload to MaxCompute. If the resource has already been uploaded to MaxCompute, you must clear this checkbox. Otherwise, the upload fails.
If you select Upload to MaxCompute during the upload, the resource is stored in both DataWorks and MaxCompute. If you later delete the resource from MaxCompute by using a command, the resource in DataWorks still exists and can be viewed.
The resource name does not have to match the uploaded file name.
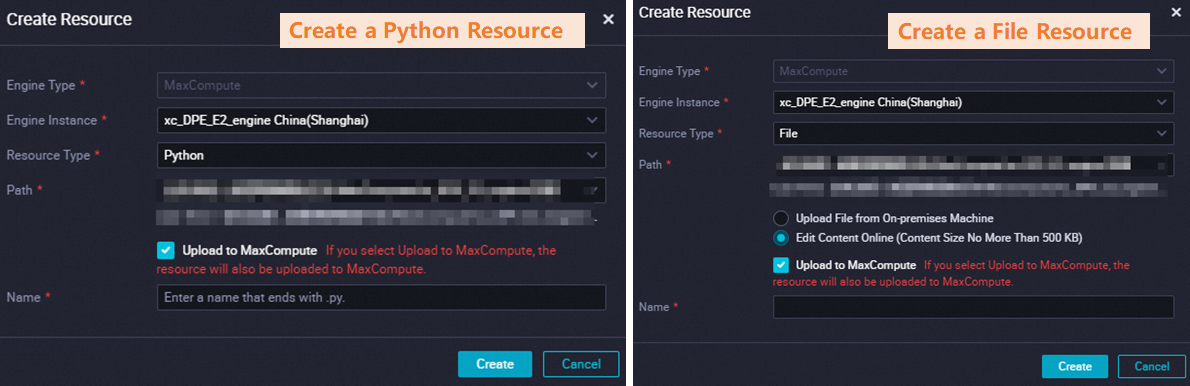
Method 1: Create a resource by using the codeless editor
The following figure shows the configuration for creating a resource by using the DataWorks visual interface.
For Python resources larger than 10 MB or File resources larger than 500 KB, use Method 2: Upload a local resource or Method 3: Upload an OSS resource.
For a practical example of creating a Python resource and registering a function in DataWorks, see Analyze IP sources by using a MaxCompute UDF.
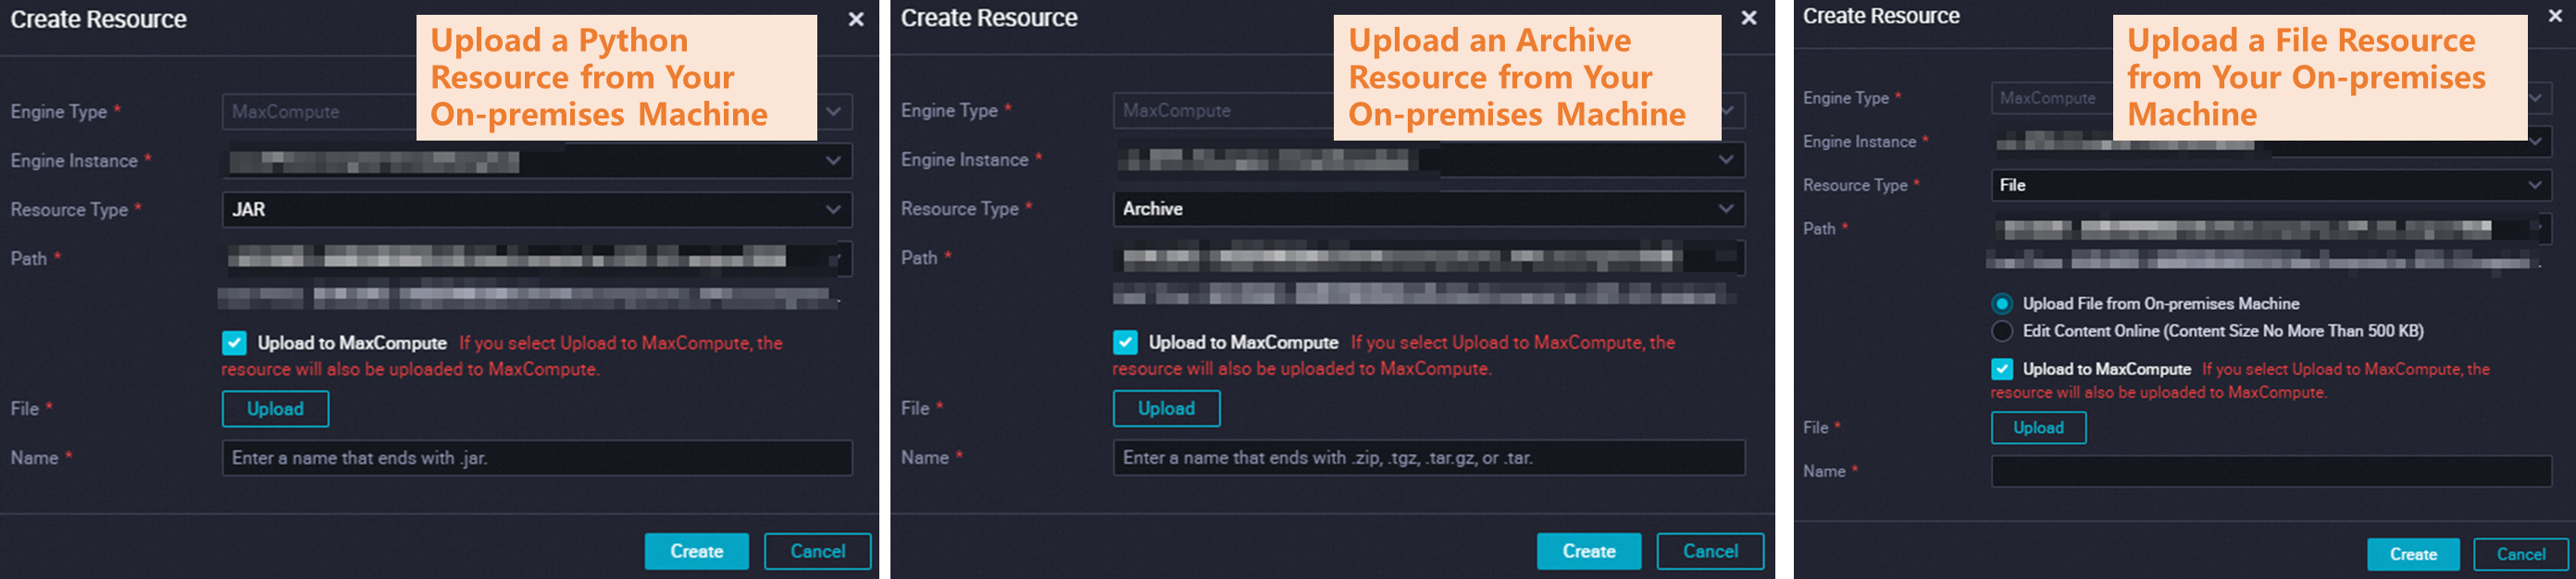
Method 2: Upload a local resource
The following figure shows the configuration for uploading a local resource from the DataWorks visual interface.
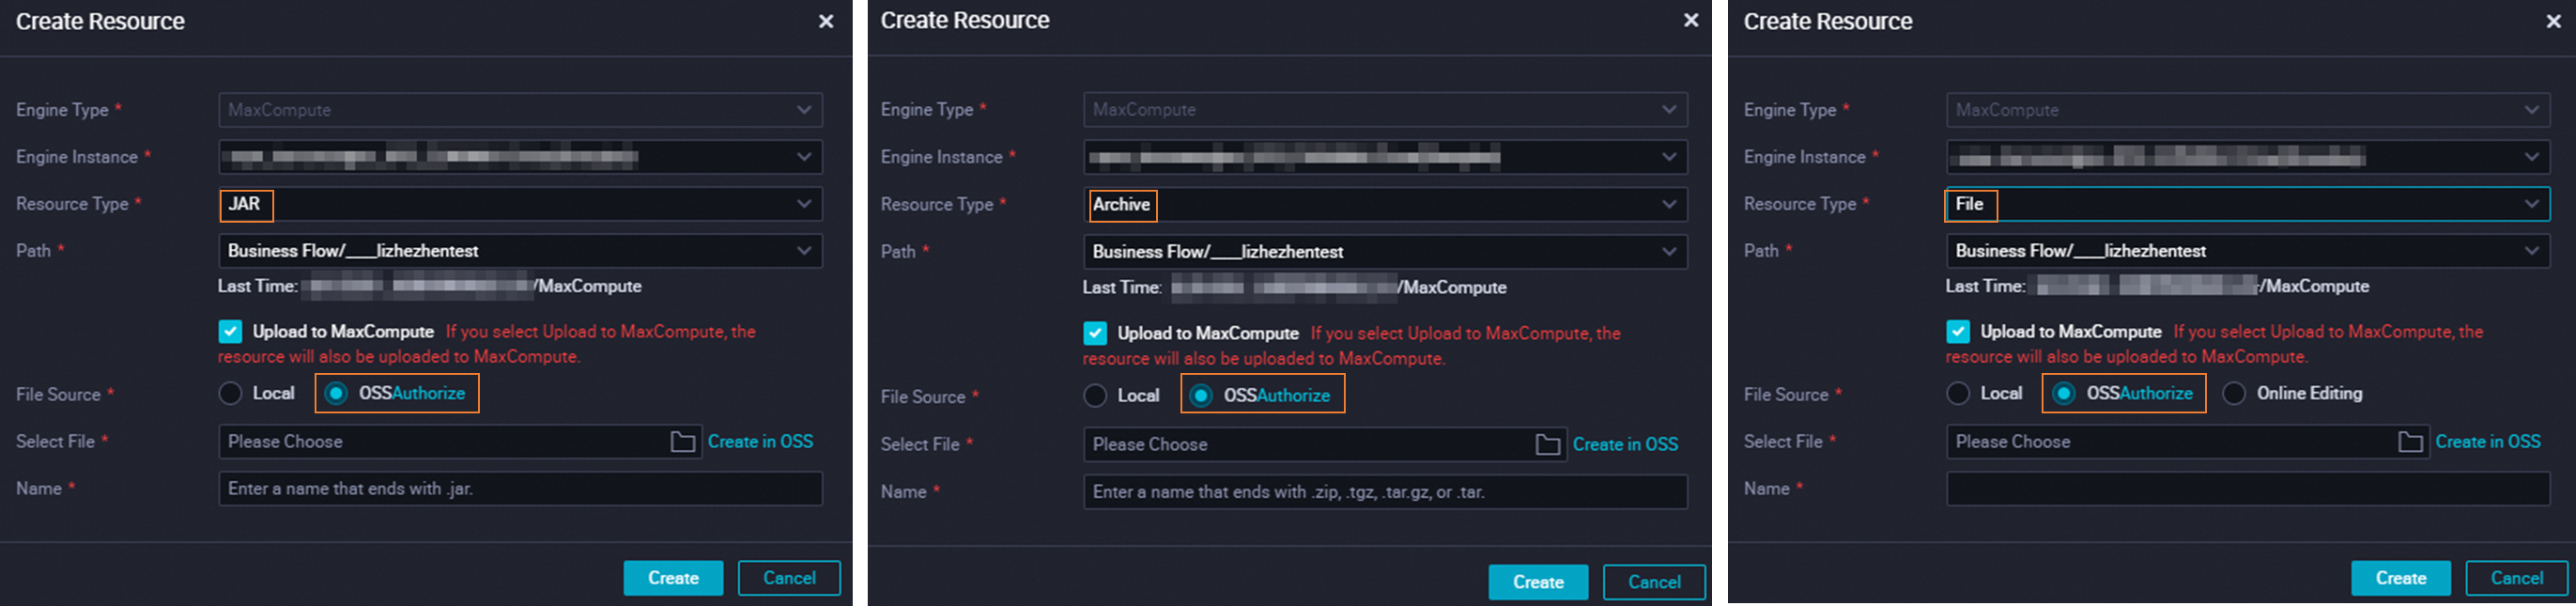
Method 3: Upload an OSS resource
The following figure shows the configuration for uploading an OSS resource from the DataWorks visual interface.
You can use this method to upload resources of up to 500 MB.
The Alibaba Cloud account used for the upload operation must be granted the AliyunDataWorksAccessingOSSRole permission. Follow the on-screen instructions to grant the permission.
Step 2: Submit and deploy the resource
After creating a resource, click the ![]() icon in the toolbar of the resource editor to submit the resource to the scheduling server in the development environment.
icon in the toolbar of the resource editor to submit the resource to the scheduling server in the development environment.
If a production task needs to use this resource, you must also deploy the resource to the production environment. For more information, see Deploy a task.
Step 3: Use the resource
Use case 1: Use a resource in a node
After creating a DataWorks resource, you must reference it in a node. After a node successfully references the resource, code in the following format appears on the node's configuration tab: @resource_reference{"Resource Name"}.
The display format varies depending on the node type. For example, a PyODPS 2 node displays the reference as follows: ##@resource_reference{"Resource Name"}.
If you have not created a node, see Create a compute node to create one.
If your PyODPS code has third-party dependencies, use a custom image to install them into the runtime environment. Then, you can run the PyODPS code in that environment. For more information about custom images, see Custom images.
The following figure shows the steps to reference a resource.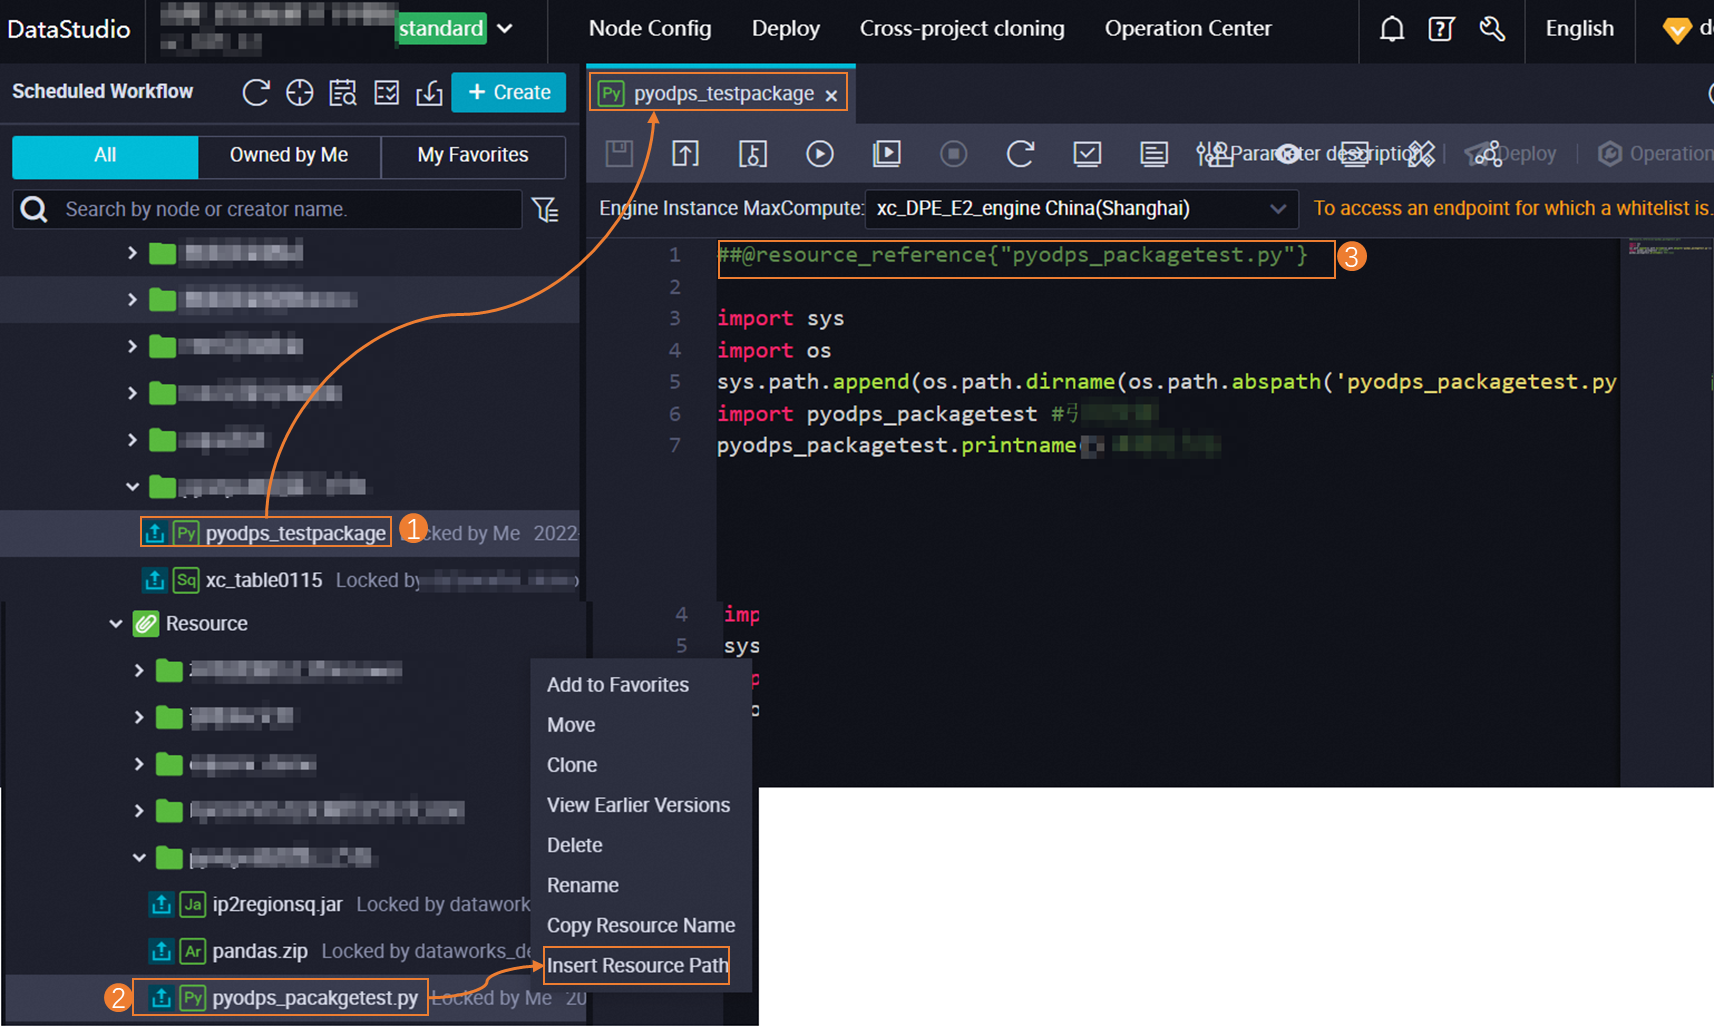
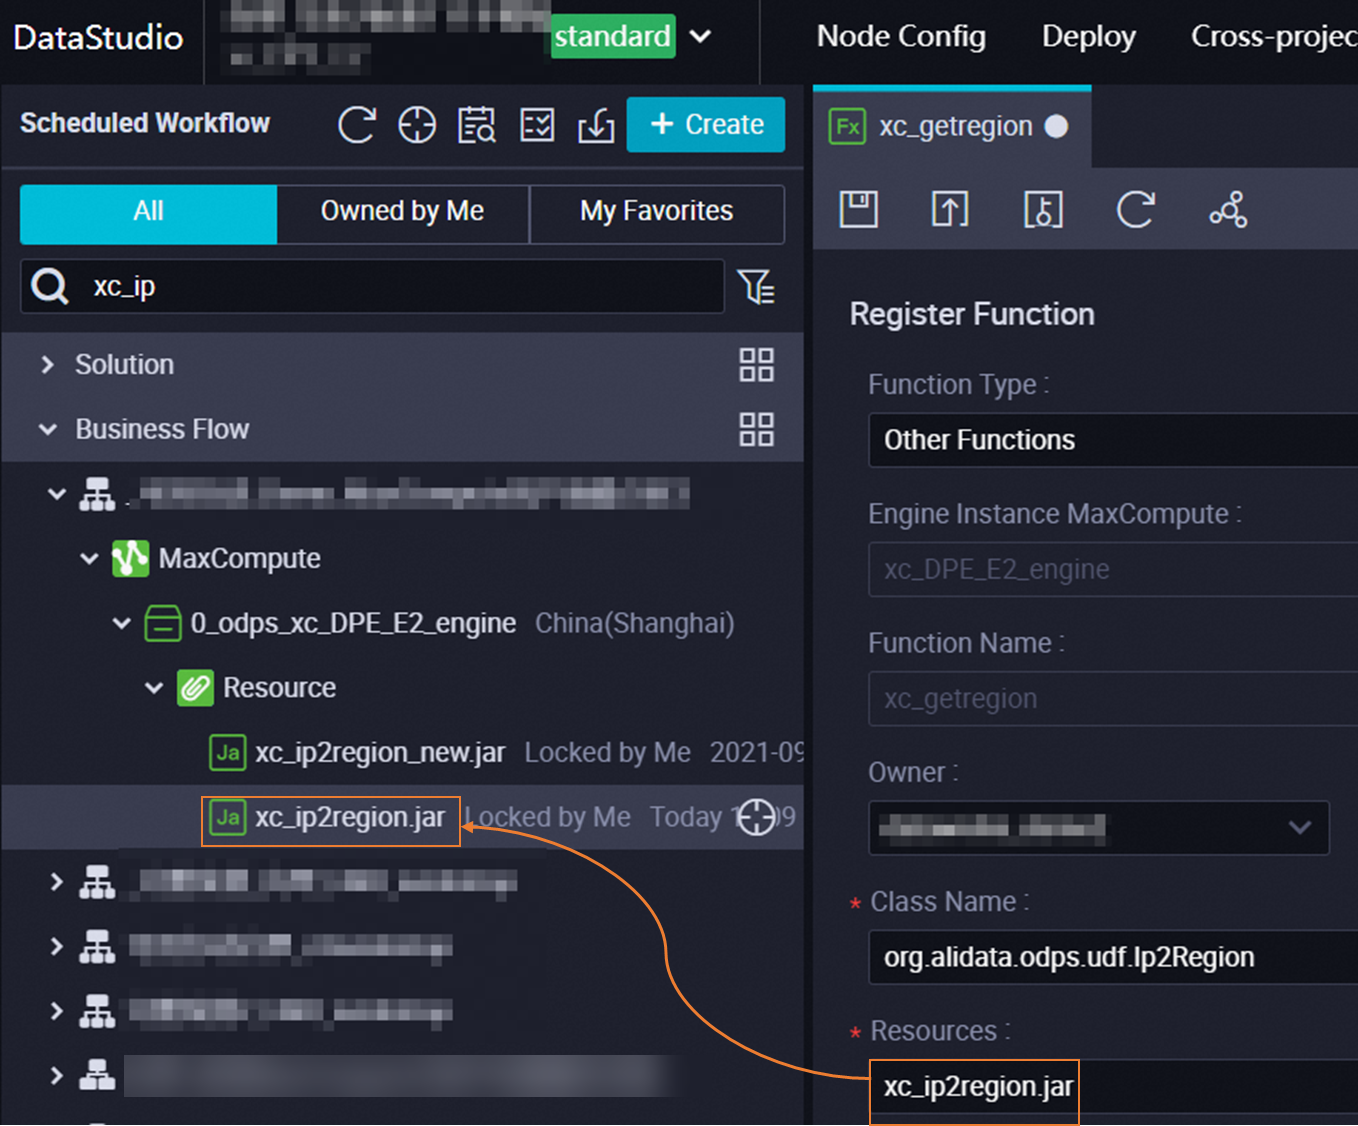
Use case 2: Register a function using a resource
Before registering a function using a resource, you must create the function. For more information, see Create and use a custom function. On the function configuration page, enter the name of the resource that you created, as shown in the following figure.
Before you register a function using a resource, make sure the resource has been submitted. For more information about how to submit a resource, see Step 2: Submit and deploy the resource.
To view the built-in functions that are included with MaxCompute, see Use built-in functions.
To view functions that exist in a MaxCompute compute engine, check the change history of functions, or perform other related operations, see Manage MaxCompute functions.
Manage resources
To manage a resource, right-click it in the resource directory under the workflow and select an operation:
View history: You can view and compare saved or submitted versions of the resource to see the changes between different versions.
NoteYou must select at least two versions to compare.
Delete resource: This action deletes the resource from the development environment only. To delete it from the production environment, you must deploy the deletion. Deploying this change removes the resource from the production environment. For more information, see Deploy a task.
How can I manage MaxCompute resources using command-line statements?
The following table summarizes common resource management commands.
Operation type | Function | Role | Operation platform |
Adds a resource to a MaxCompute project. | A user with | You can run these commands on the following platforms: | |
Views the details of a specific resource. | A user with | ||
Lists all resources in the current project. | A user with | ||
Creates an alias for an existing resource. | A user with | ||
Downloads a resource from a MaxCompute project to your local machine. | A user with | ||
Deletes an existing resource from a MaxCompute project. | A user with |
For example, to list resources in DataWorks, you can use the LIST RESOURCES; command.
To list all resources in the current project:
When this command is run in Data Studio, it queries the MaxCompute compute engine associated with the development environment by default.
list resources;To list all resources in a specific project:
First, switch to the target project using the
USEcommand.use MaxCompute_project_name; list resources;
For a complete guide to all resource-related commands, see Resource operations.
How do I import resources created outside of DataWorks for management in the UI?
Use the MaxCompute Resource feature in DataWorks. This allows you to load and visually manage resources that were created externally (for example, via MaxCompute Studio or the command line).
Note that this method only supports resources up to 500 MB in size.
For detailed steps on how to load your resources, see Manage MaxCompute resources.