In the blueprint editor, a global variable is shared across the entire blueprint and passes parameters between widgets. Its value can be updated dynamically at runtime, enabling dynamic responses in your interaction logic.
Preparations
Prerequisites
You have created a PC data dashboard project.
Go to the global variables page
Access the DataV console.
-
On the All Applications page, hover over the target dashboard and click Edit.
-
On the dashboard editor page, click the
 icon in the top menu bar to open the blueprint editor. On the left of the main canvas, click Global Variables to open the Global Variables configuration pane.
Before you configure global variables, learn about the interface layout and operations of the blueprint editor.
Configure global variables
Create a global variable
Click New Variable and configure the following parameters.
|
Parameter |
Description |
|
Variable Name |
The name of the global variable. |
|
Description |
The description of the global variable. |
|
Source |
The source of the global variable. Options include Static Value, Data Source Request, and Get from URL Query. Note
For more information about how to use different source types, see Global variables. |
|
Initial Value |
The initial value of the global variable. |
|
Filter |
Optional. Adds a data filter to refine the returned data. For more information, see Configure and use filters. |
|
Data Response |
The response returned after the global variable parameters are set. The response varies by variable type. |
|
Controlled Mode |
If you enable this mode, the initial value of the variable is ignored. |
|
Auto Update |
If you enable this option, you can set up dynamic polling and specify the polling frequency. |
Manage global variables
Click the name of an existing global variable to expand or collapse its details.
-
Hover over a variable and click the
 icon on the right to rename the variable.
 -
Hover over a variable and click the
 icon on the right to copy the variable.
 -
Hover over a variable and click the
 icon on the right to delete the variable.
 -
Hover over a variable and click the
 icon on the right to add the variable to the main blueprint canvas.Important
-
Deleted variables cannot be recovered. Proceed with caution.
-
Before you delete a variable, you must remove all references to it. For more information, see Configure widget interactions.
-
Use a global variable
-
Add the required layers, such as the Tab List and Common Title widgets, to the main canvas. Then, click the
 icon in the top menu bar to open the blueprint editor.
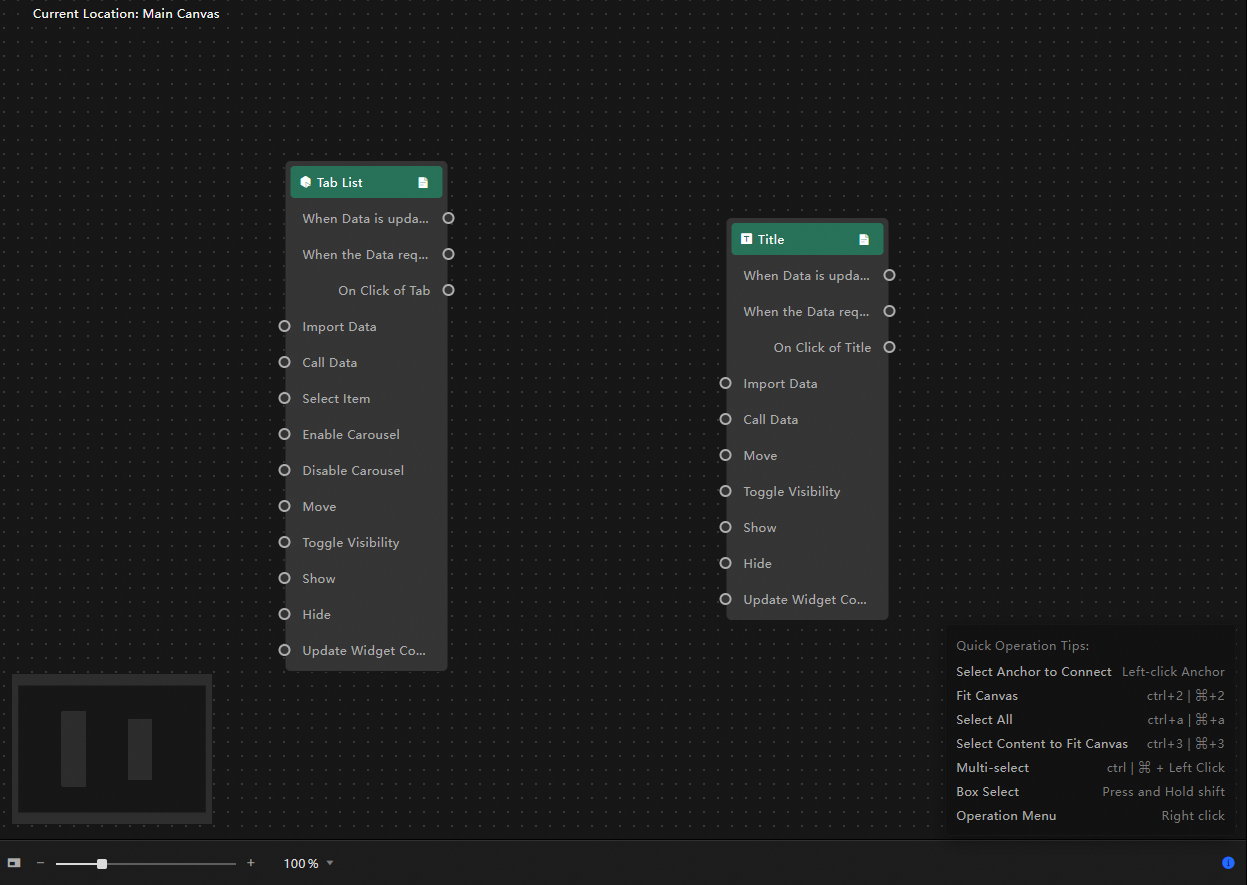
-
In the navigation pane on the left, click Global Variables to open the global variables page.
-
In the global variable list, create a global variable.
-
Click the
icon to add the global variable to the main blueprint canvas and connect it to other nodes. For example, you can connect the Tab List widget to the global variable to pass an event. After the global variable processes the event, the resulting data is imported into the Common Title widget through a data API.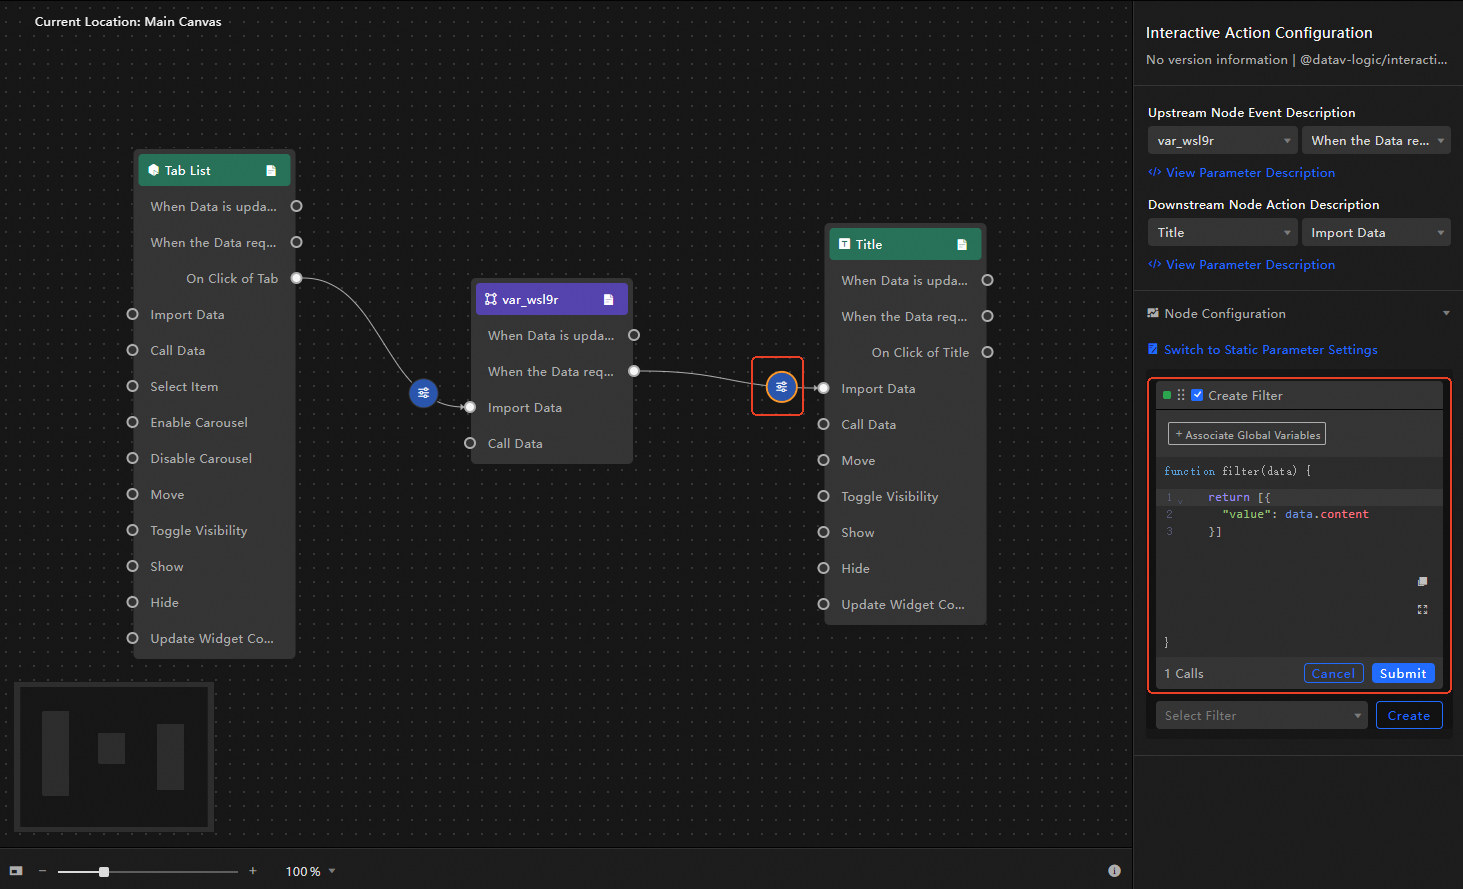
-
Preview or publish your dashboard to view the interaction.

Examples
For more information about global variables, see the following examples: