This topic describes the common features of Blueprint Editor to help you get started.
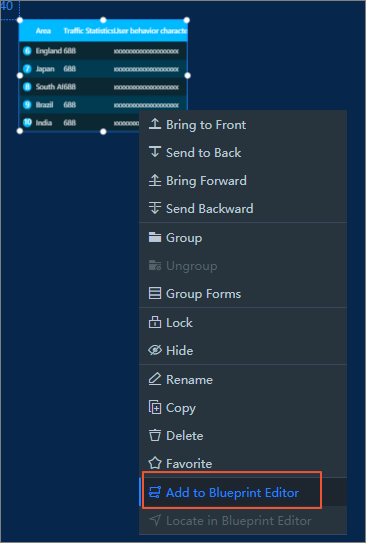
Add to Blueprint Editor
You can configure interactions for a group asset only after it has been imported into the Blueprint Editor.
In Canvas Editor, right-click an asset in the left-side layer pane or the middle canvas area and select Export to Blueprint Editor to export the asset to Blueprint Editor.
After a widget is added, switch to Blueprint Editor, and view this widget in the Added Nodes panel. All nodes in the Added Nodes panel can be used for subsequent interaction configuration.
Remove a widget from Blueprint Editor
If you no longer need to configure interactions for an asset that has been imported into Blueprint Editor, you can cancel the export of the asset to Blueprint Editor.
After the export is canceled, related interactions that have been configured for the asset are unavailable.
In Blueprint Editor, click the Canvas Editor icon ( ) in the upper-left corner. In Canvas Editor, right-click the asset in the left-side layer pane or the canvas area and select Cancel Export to Blueprint Editor.

The removed widget is dimmed and marked with a red exclamation point in Blueprint Editor. In this situation, the widget is in the unavailable state, but can be added again and restored to its original configuration.

Locate a widget in Blueprint Editor
To quickly locate an asset that has been imported to Blueprint Editor, you can use Blueprint Editor to locate the asset.
In Blueprint Editor, click the Canvas Editor icon () in the upper-left corner. In Canvas Editor, right-click the asset in the left-side layer pane or the middle canvas area and select Locate in Blueprint Editor.

After you locate the asset, you are redirected to the Blueprint Editor page. Then, you can locate and select the asset.
Show or hide configuration panels
The configuration pane of the Blueprint Editor includes the Added Nodes panel, Logical Nodes panel, Right-side Panel, and Toolbar. The following figure shows the icons of these panels. You can click one of these icons to show or hide a specific panel.

Import Node: In the Import Node panel, you can view all asset nodes that are imported from Canvas Editor. To add a node, you can drag it to the canvas. To remove a node, you can right-click it and select Remove from canvas.
ImportantIf you remove a node, its line connections are also removed and cannot be restored. Exercise caution when you perform this operation.
Logical Nodes panel: In this panel, you can drag a node to the canvas and configure this node in the right-side panel. For more information, see Configure logical nodes. Right-click a node in the canvas and select Delete to delete this node.
ImportantIf you delete a logical node, its line connections are also deleted and cannot be restored. Exercise caution when you perform this operation.
Right-side panel: The right-side panel displays the contents of two configuration panels in Blueprint Editor: the default blueprint interactive effect configuration panel style and the logical node configuration panel style.
Click a blank area on the canvas. In the right-side pane, you can set the Effective Time and Timeout Period of the blueprint configuration effect.
Parameter
Description
Effective Time
Specify the effective time during preview after the blueprint configuration interaction. The selected time may affect the sequence between the default data of the asset and the interaction. Optional timing:
Page Loading: When the page starts to load.
Page Initialization Complete: After all assets are rendered.
When data loading is complete: After the data of all assets is returned.
Timeout(second)
After the configuration is complete, the blueprint may fail to take effect due to some reasons, such as asset loading failure, asset rendering error, and interface data return failure. If the asset data fails to be loaded or the asset fails to be rendered, you can customize the Timeout Period to force the blueprint interaction effect to take effect. Unit: seconds.
On the canvas, click a logical node. In the right-side pane, you can configure the node name, events, actions, and processing methods. For more information, see Configure logical nodes.
Toolbar: It is located above the canvas and provides shortcut icons for you to fit, clear, zoom in, and zoom out on the canvas. It also enables nodes, disables nodes, searches for nodes, deletes unavailable nodes, and switches the canvas selection type.

Operation
Description
Adapt to canvas
Click the Adapt to Canvas icon (
 ) in the toolbar to display nodes in the canvas.
 Disable /Enable
On the canvas, right-click a node and select Disable /Enable. Alternatively, select a node and click the Disable /Enable icon (
 ) in the toolbar to temporarily disable or enable a node, a layer, or a rule group.
 Clear canvas
Click the Clear Canvas icon (
 ) in the toolbar to delete all nodes and lines from the canvas and restore blank canvas configurations with one click. Important
The deleted nodes or lines cannot be restored. Exercise caution when you perform this operation.
Delete Unavailable Nodes
If you no longer use an asset node that is unexported to Blueprint Editor, you can click the Delete Unavailable Nodes icon (
 ) in the toolbar to delete the node and clear all interaction configurations of the node. Important
The deleted nodes or lines cannot be restored. Exercise caution when you perform this operation.
Search for nodes
In the toolbar, select a node from the Search for nodes drop-down list. The node is quickly located and displayed in the middle of the canvas.
Switch the frame selection mode
Click the Switch Frame Selection Mode icon (
 ) in the toolbar to switch the canvas selection mode to radio or frame selection.
 One-click selection: allows you to click a node or line to select it. Windows users use the shortcut key Ctrl (Mac users use the Command) plus mouse click to realize the multi-selection function of nodes or connections.
Box selection: allows you to use your mouse pointer to select one or more nodes or lines in the canvas.
Scale canvas
Click the + or-icon in the toolbar, or use the shortcut key Ctrl (Mac users use the Command) while the mouse wheel to zoom in or out the canvas. You can also enter a specific percentage to precisely zoom in or zoom out on the canvas.
Get started with AIRec
Click the Beginner Guide icon (
 ) in the toolbar. A guide box appears in Blueprint Editor to help you quickly understand how to use Blueprint Editor.
Perform operations in a canvas
In the canvas of Blueprint Editor, you can connect, move, and copy nodes, and select node lines and anchor lines. In the canvas of Canvas Editor, you can also select nodes and lines.
Operation | Description |
Move canvas | In the radio mode, click Move in a blank area of the canvas to move the canvas. |
Scale canvas | Windows users can scale the canvas using the shortcut key Ctrl (Mac users use the Command) plus the mouse wheel. |
Move Node | Select a node and drag it. |
Connection and Delete Connection | You can use the line feature to trigger data interaction between two nodes. Click the anchor of the source node to connect it to the anchor of the target node. Note The source node is a start anchor because it can trigger events. The target node is an end node because its actions can only be triggered. Right-click a line and select Delete to delete the line. |
Change the connection end point | You can click the end point of the selected line and drag the end point of the line to the anchor point of another target node. |
Logging and Unlogging | Right-click a line and select Log or Cancel Log. You can specify whether to record all logs that pass through the interaction link in the Blueprint Logs&Err Reporting panel on the Debugging Preview page. Note You can select multiple lines to enable or disable logging. You can also right-click a line in the canvas and select Disable Logging for All. |
Enable and disable | Right-click a node, line, or form group on the canvas and select Enable or Disable to temporarily enable or disable the node, line, or form group. |
In Canvas Editor, select | Right-click an import node on the canvas and select Select in Canvas Editor. In the Canvas Editor dialog box, select the asset. |
Select Associated Edges | Right-click a logical node in the canvas and select Select Associated Edge to select the associated edges on the left and right sides of the logical node. |
Select upstream and downstream links | Right-click an imported node on the canvas and select Select Upstream /Downstream Links to select the upstream and downstream nodes that are associated with the current node. |
Remove from the canvas | Right-click an imported node in the canvas and select Remove from Canvas to remove the node from the canvas. Important If you remove a node, its line connections are also removed and cannot be restored. Exercise caution when you perform this operation. |
Delete | Right-click a logical node or line in the canvas and select Delete to delete the node or line from the canvas. Important If you delete a logical node, its line connections are also deleted and cannot be restored. Exercise caution when you perform this operation. |
Copy | Right-click a logical node on the canvas and select Copy to copy the node. Except for upstream and downstream events and actions, the copied node inherits all other configurations of the source node, including the node name and processing method. |
Marshalling | Right-click a node in the canvas and select Group to create a group box.
|