An offline single pipeline is a pipeline script that handles offline integration tasks. It can sync single or multiple tables from one or more source data sources to one or more target data sources. This topic describes how to configure an integration task through an offline single pipeline.
Prerequisites
The required data sources are configured. Before configuring the integration task, you need to configure the data sources and target database that you want to integrate. This allows you to select data sources for your development components during the offline single pipeline configuration process to control the integration task's read and write operations to the database. For details about the data sources supported by offline pipelines, see Supported data sources.
Procedure
Step 1: Create an offline single pipeline
On the Dataphin home page, click Development > Data Integration in the top menu bar.
Follow the instructions below to enter the Create Pipeline Development Script dialog box.
Select the project (Dev-Prod mode requires selecting the environment) > Click Batch Pipeline -> Click
 New icon -> Click Batch Pipeline.
In the Create Offline Pipeline dialog box, configure the pipeline-related parameters.
Parameter
Description
Pipeline Name
Enter the pipeline name. Supports up to 64 characters. Special characters are not supported:
|\/:?<>*".Schedule Type
Select the scheduling type of the pipeline. Schedule Type includes:
Recurring Task Node: Refers to tasks that need to be executed regularly.
Manual Node: Refers to tasks without dependencies that need to be manually triggered.
Description
Enter a brief description of the offline single pipeline, within 1000 characters.
Select Directory
The default selection is the offline pipeline. You can also create a target folder on the offline pipeline page and then select that target folder as the directory for the offline pipeline task.
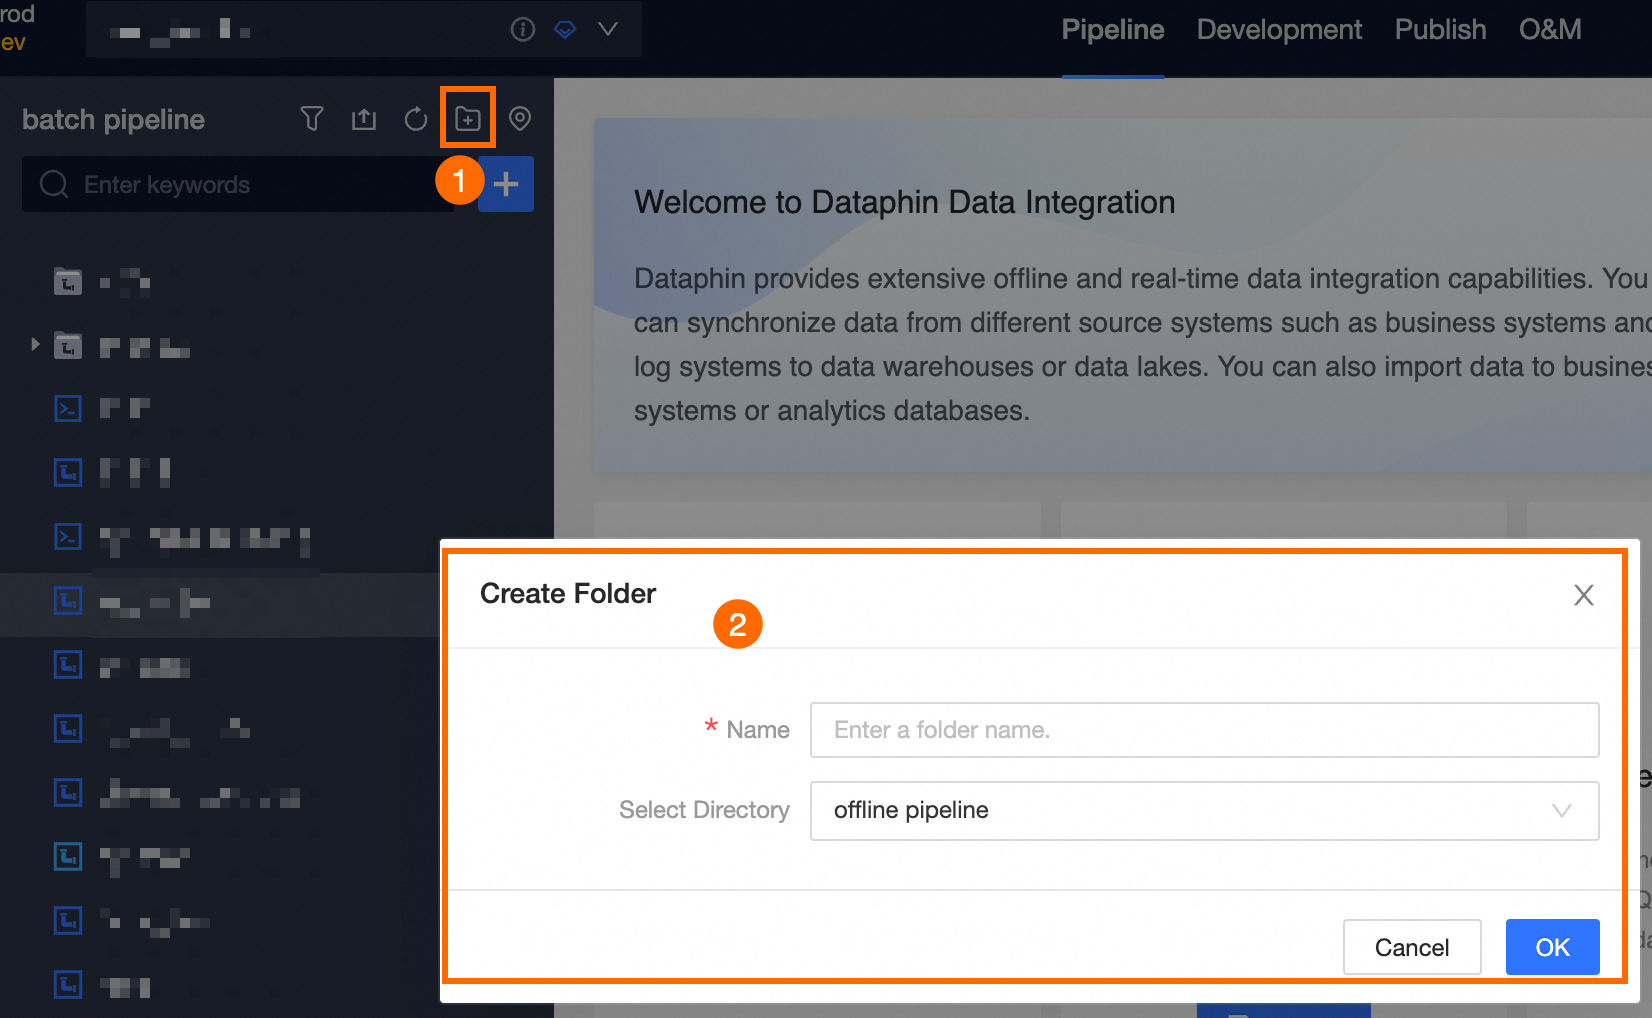
Click OK.
Step 2: Develop offline pipeline script
The offline single pipeline uses a visual component development approach. You can click the Component Library in the canvas sidebar, select the required component type, and then drag and drop the component onto the pipeline development canvas to develop the pipeline script. The following figure shows the components:
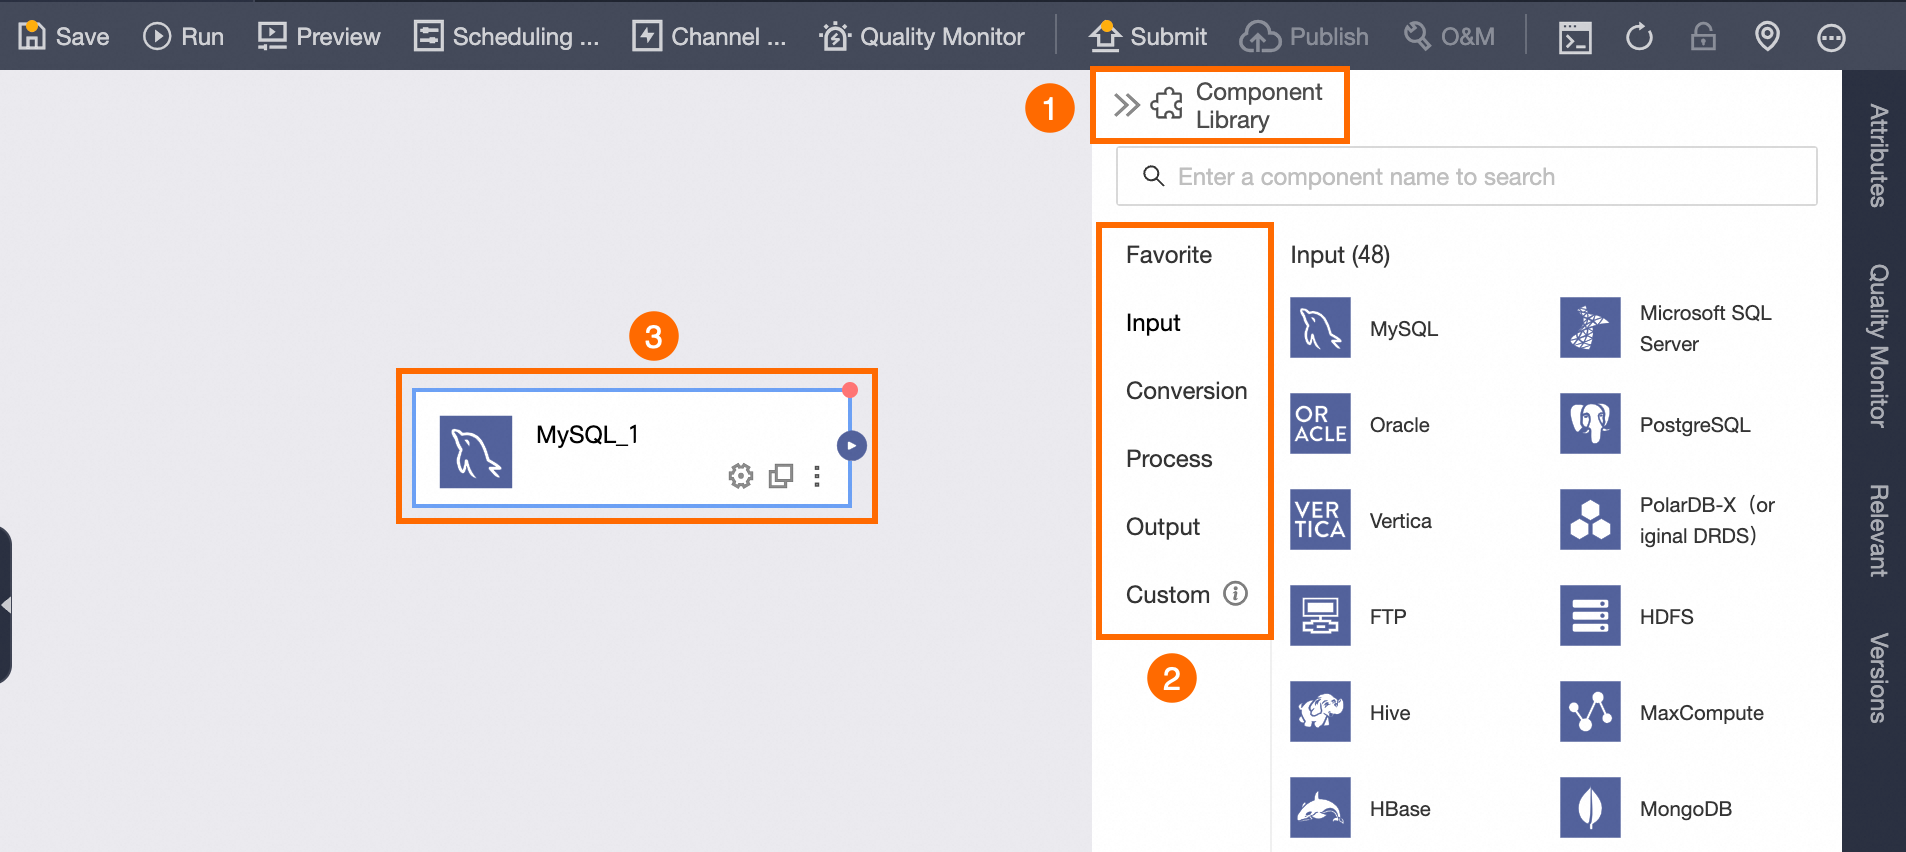
Component Type: The component library is divided into five types of components, including Input, Transform, Flow, Output, and Custom. Each component type has different usage scenarios. You can select the required component type for development based on business needs. For more information, see Integration component library development instructions.
Component: The functional modules for developing pipeline scripts. Each component corresponds to different functions. You can select the required components for development based on business needs. For more information, see Details of each component configuration.
Step 3: Pipeline scheduling configuration
Click the
 button in the canvas menu bar to configure the schedule.
On the scheduling configuration page, configure the Basic Information, Schedule Configuration, Schedule Dependency, Schedule Parameters, Run Configuration, and Resource Configuration of the integration pipeline. The configuration instructions are as follows:
Basic Information: Through the basic information of the integration pipeline, you can configure the development owner, operation owner, and description of the integration pipeline task. For configuration instructions, see Configure basic information of offline integration pipeline.
Schedule Configuration: For Recurring task nodes, the schedule configuration is used to define the scheduling method of the integration pipeline task in the production environment. You can configure the scheduling type, scheduling cycle, scheduling logic, and execution of the integration pipeline task through scheduling properties. For configuration instructions, see Offline integration pipeline schedule configuration.
Schedule Dependency: For Recurring task nodes, schedule dependency is used to define the dependency nodes of the integration pipeline task in the scheduling task. Dataphin uses the configuration results of the scheduling dependencies of each node to orderly run each node in the business process, ensuring the effective and timely output of business data. For configuration instructions, see Offline integration pipeline schedule dependency configuration.
Run Configuration: You can configure task-level run timeout and rerun policy when the task fails for the integration pipeline task according to the business scenario. This prevents resource waste caused by long-term resource occupation of computing tasks while improving the reliability of computing task execution. For configuration instructions, see Offline integration pipeline run configuration.
Resource Configuration: You can configure the resource group to which the current offline integration task belongs. This offline integration task will use the resources of the resource group for task scheduling. For configuration instructions, see Configure offline integration pipeline task resources.
Step 4: Save and submit the offline integration task
Click the
 icon above the canvas to save the pipeline task.
Click the
 icon above the canvas. In the Submit Remarks dialog box, enter the remarks information, and then click OK And Submit.
When submitting, Dataphin will perform lineage analysis and submission checks for the task. For more information, see Integration task submission instructions.
What to do next
If your development mode is Dev-Prod mode, you need to publish the task. For more information, see Manage published tasks.
If your development mode is Basic mode, the task can participate in production environment scheduling after successful submission. You can go to the Operation Center to view the tasks you have published. For more information, see Operation Center.