This topic outlines the process for creating the order purchase logical fact table (Fct_order_buy_di) as demonstrated in this tutorial.
Step 1: Create a logical fact table
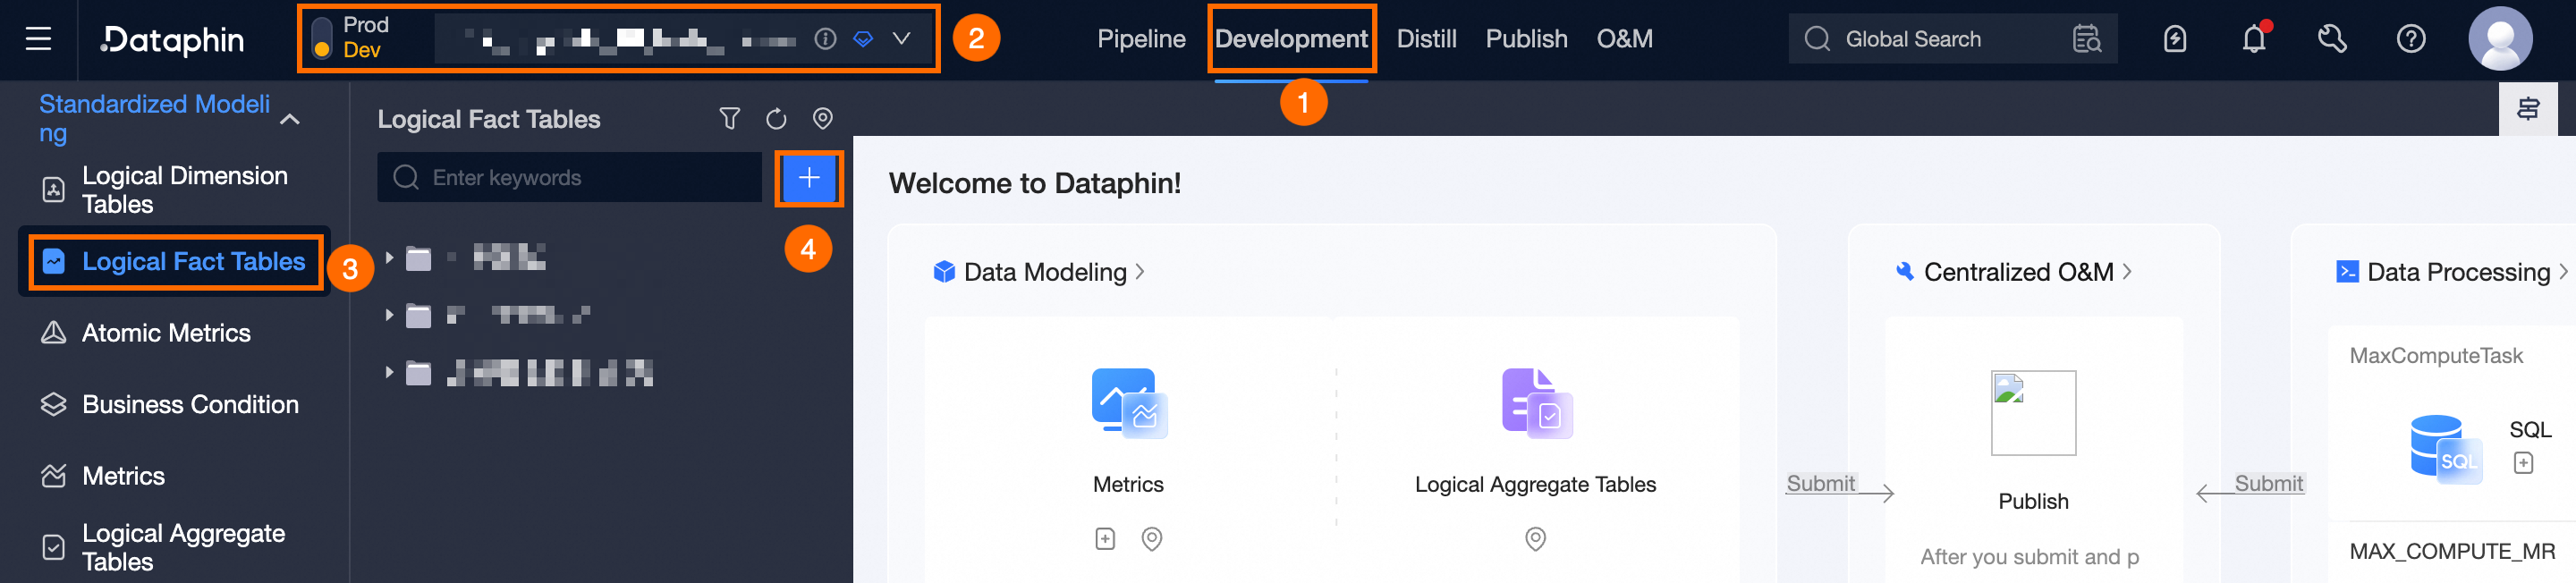
Navigate to the Dataphin home page and single click the Develop menu bar at the top.
Refer to the instructions in the figure below to access the Create Logical Fact Table dialog box.
In the Create Logical Fact Table page, set the necessary parameters.
Parameter
Description
Business Activity
Choose the Order Purchase business object.
Data Timeliness
By default, it is set to Offline T+1.
Chinese Name
Input Order Purchase Logical Fact Table.
Description
Provide a concise description of the logical fact table, such as Order Purchase Logical Fact Table.
Single click OK.
Step 2: Configure logical table fields
On the Table Structure configuration page, single click Import From Table.
In the Add Field From Table dialog box, select the dataphin_tutorial.orders source table and include the order_time and payment_amount fields.
NoteNote: Primary keys and associated dimension fields are automatically included and need not be manually selected.
Single click Add.
Back on the Table Structure page, single click Save And Next.
Step 3: Configure logical table computation logic
On the computation logic configuration page, single click Source Configuration to open the Source Configuration dialog box.
Within the Source Configuration dialog box, single click Add Source Object and set the source parameters.
Parameter
Description
Source Table Name
Choose the dataphin_tutorial.orders source table.
Associated Primary Key Field
Select the order_id field.
Single click OK.
Drag the configured data source column to a logical computed column.
Single click Save And Next.
Step 5: Configure logical fact table schedule
On the Schedule & Parameter Configuration page, retain the system's default settings.
Single click Save And Submit.
Step 5: Save and submit logical table
Single click Save And Submit. The system will validate the configurations of the Table Structure, Computation Logic, Schedule Dependency, and Runtime Parameter. Review the Check Results for any issues, verify the configuration details, and finalize the setup.
Once all checks are successful, single click OK And Submit.