A Job processes one-off tasks to ensure that the pods in the tasks terminate with success. This topic introduces Jobs and describes how to create a Job in the Container Service for Kubernetes (ACK) console or by using kubectl.
Introduction to Jobs
Deployments, StatefulSets, and DaemonSets are designed to ensure a certain number of running pods for an application. A Job creates pods and ensures that a specified number of pods terminate with success. You can configure the spec.completions parameter of a Job to specify the number of successful pod completions. You can configure the spec.parallelism parameter of a Job to specify the number of pods that can run in parallel during Job execution.
Scenario |
|
| Job behavior |
You want to run one-time tasks, such as database initialization. | 1 | 1 | Runs only one pod at a time until the pod terminates with success. |
You want to run multiple pods in parallel, but only a specific number of pods are required to terminate with success. For example, you can run tasks in multiple zones to ensure high availability. However, only one task is required to return output. | M (M < N) | N | Runs N pods in parallel until M pods terminate with success. |
Compute resources are insufficient to run the specified number of pods in parallel. | N | M (M < N) | Runs M pods in parallel until N pods terminate with success. |
Compute resources are sufficient to run tasks, such as data processing tasks, in parallel. | N | N | Runs N pods in parallel until N pods terminate with success. |
The sample images used in this topic are public images. Your cluster or nodes must have public network access to pull them:
Enable an existing ACK cluster to access the Internet (recommended): Create a public NAT gateway for the virtual private cloud (VPC) hosting the cluster. All cluster resources will gain public access.
Assign static public IP addresses to nodes: Nodes with public IPs can pull public images, but every node running workloads must be assigned a public IP.
Create a Job
ACK console
Log on to the ACK console. In the navigation pane on the left, click Clusters.
On the Clusters page, find the cluster you want and click its name. In the left-side pane, choose .
On the Jobs page, click Create from Image in the upper-left corner.
In the Basic Information step, configure the basic settings of the application. Then, click Next to go to the Container step.
In the General section, enter
registry.cn-hangzhou.aliyuncs.com/acs-sample/nginx:latestin the Image Name field. In the Start part of the Lifecycle section, enter/bin/shin the Command field and enter["-c", "echo 'starting...'; COUNTER=0; while [ $COUNTER -lt 5 ]; do sleep 2; COUNTER=$((COUNTER+1)); echo $COUNTER; done; echo 'finished'; exit 0"]in the Parameter field, as shown in the following figure. Then, click Next to go to the Advanced step.ImportantBefore pulling the
registry.cn-hangzhou.aliyuncs.com/acs-sample/nginx:latestimage, you need to enable Internet access for the cluster. If you keep the default value for the Configure SNAT for VPC parameter when you create a cluster, the cluster can access the Internet. For more information about how to enable Internet access for an existing cluster, see Enable an existing ACK cluster to access the Internet.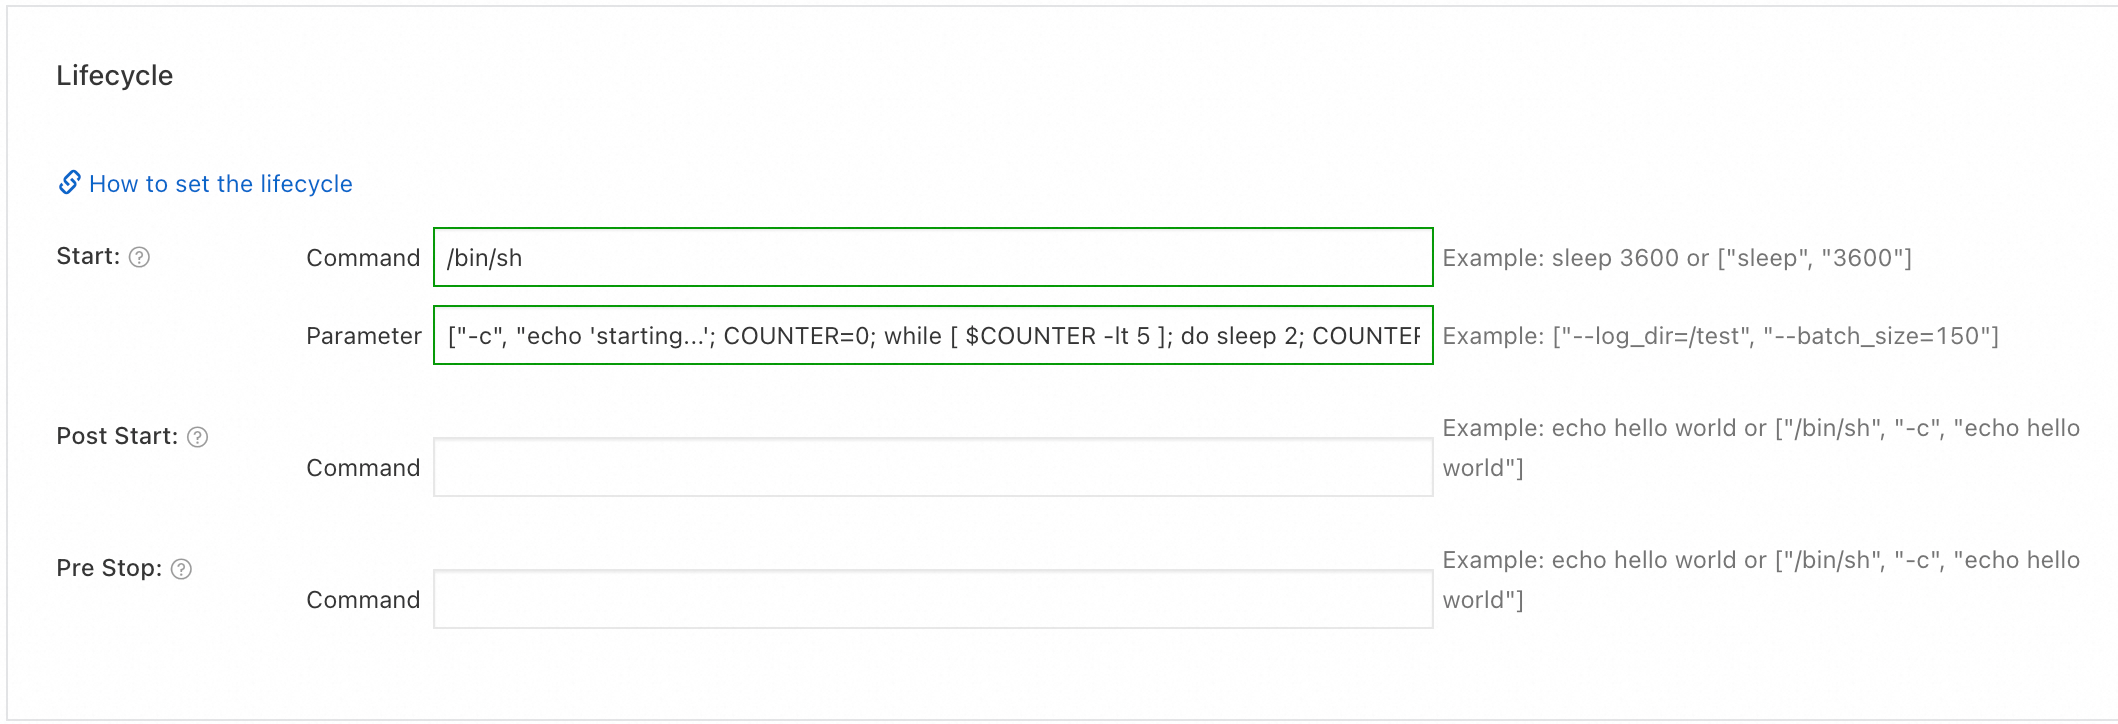
In the Advanced step, configure the
CompletionsandParallelismparameters. In this example, Completions is set to 2. For more information about the preceding parameters, see Introduction to Jobs. Then, click Create in the lower part of the page.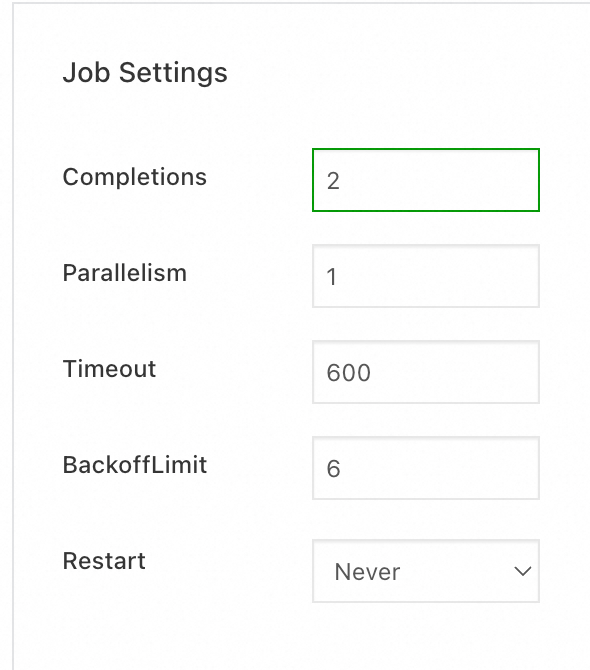
Section
Parameter
Description
Job Settings
Completions
The number of pods that must terminate with success. This parameter corresponds to the
spec.completionsparameter of the Job configurations.Parallelism
The number of pods that can run in parallel. This parameter corresponds to the
spec.parallelismparameter of the Job configurations.Timeout
The timeout period of the Job execution. This parameter corresponds to the
spec.activeDeadlineSecondsparameter of the Job configurations. If the Job execution times out, the Job is terminated, regardless of whether the number of pods that terminate with success reaches the specified value. This parameter is suitable for tasks that are strictly time-sensitive or may encounter infinite loop execution. Default value:600. Unit: seconds.BackoffLimit
The maximum number of retries that are performed by the Job upon pod failures. This parameter corresponds to the
spec.backoffLimitparameter of the Job configurations. Default value:6.Restart
The pod restart policy. This parameter corresponds to the
template.spec.restartPolicyparameter of the Job configurations. Valid values:Never: When a container in a pod exceptionally exits, the system tries to restart the pod. In this case, the system does not create a new pod. The restart does not count toward the retry limit specified by the
spec.backoffLimitparameter.On Failure: When a pod fails, the system creates a new one to replace the failed pod.
Labels, Annotations
Pod Labels
Add a label to each pod to which the workload belongs. All resources in the cluster, including workloads and services, are matched with pods by using labels. By default, ACK adds labels in the format of
app:(application name)to pods.Pod Annotations
Add an annotation to each pod to which the workload belongs. Some features in ACK use annotations. You can configure the annotations when you use these features.
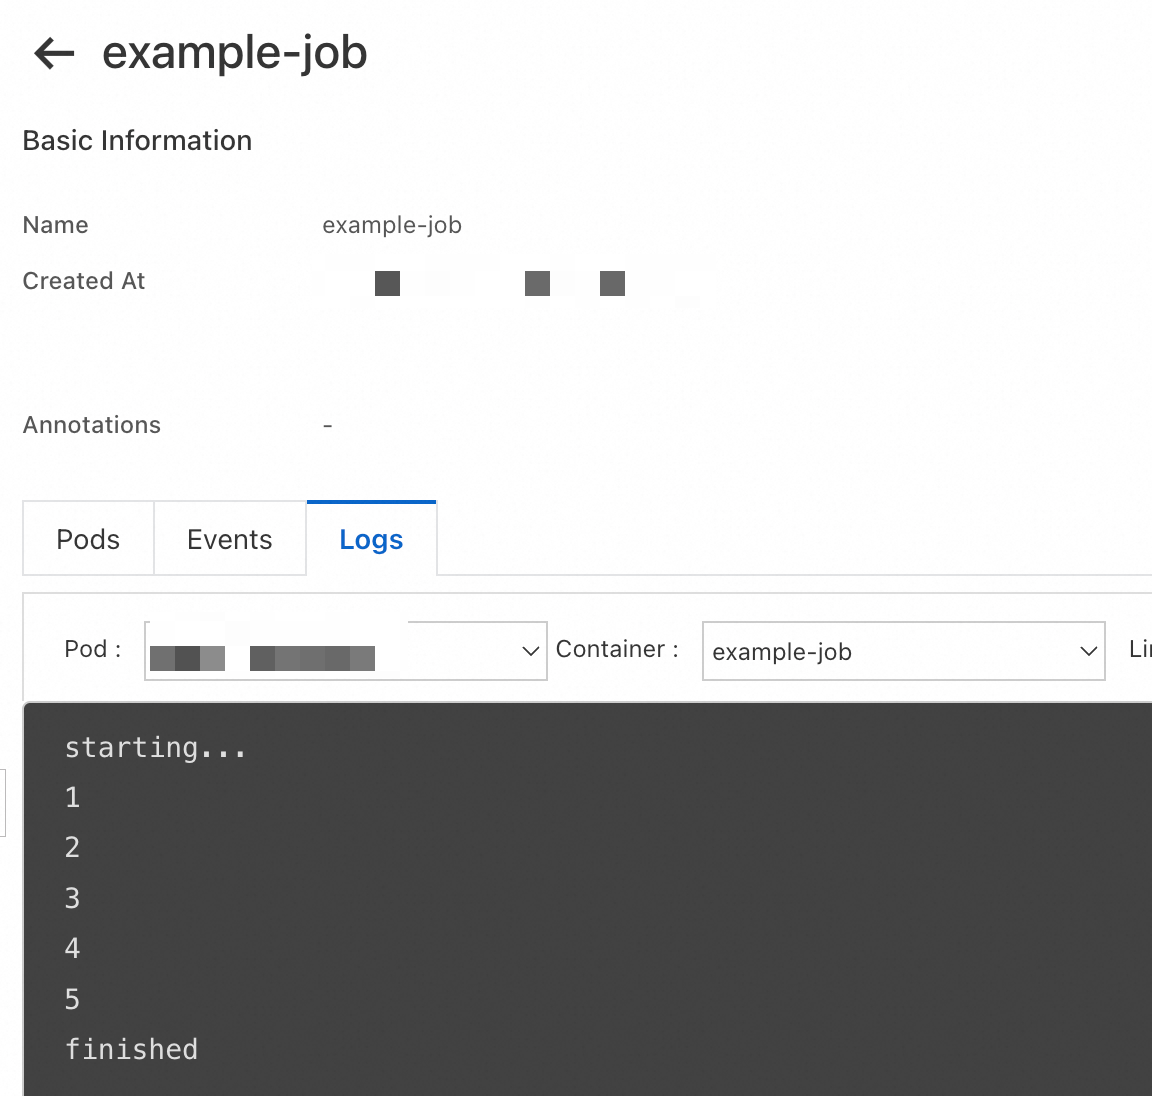
After you create the Job, you can view the logs of the Job in the ACK console. The logs show that the two pods created by the Job return the same output.
kubectl
Before you create a workload, make sure that you have connected to the cluster by using kubectl. For more information, see Obtain the kubeconfig file of a cluster and use kubectl to connect to the cluster.
Create a file named job.yaml and copy the following YAML template to the file:
apiVersion: batch/v1
kind: Job
metadata:
  name: example-job
spec:
  completions: 2 # Stop the Job after two pods terminate with success.
  parallelism: 1 # Run only one pod at a time.
  template:
    spec:
      containers:
      - name: counter
        image: registry.cn-hangzhou.aliyuncs.com/acs-sample/nginx:latest
        command:
        - /bin/sh
        - -c
        - |
          echo "starting...";
          COUNTER=0;
          while [ $COUNTER -lt 5 ]; do
            sleep 2;
            COUNTER=$((COUNTER+1));
            echo "${COUNTER}";
          done;
          echo "finished";
          exit 0
      restartPolicy: Never # Use the Never pod restart policy.
Run the following command to create the Job:
kubectl apply -f job.yamlExpected output:
job.batch/example-job createdAfter the Job is created, wait 15 seconds and run the following command to query the Job status:
kubectl get job example-jobThe following output shows that one pod has terminated with success and the Job is in the
Runningstate.NAME STATUS COMPLETIONS DURATION AGE example-job Running 1/2 16s 16sAfter the Job is created, wait 40 seconds and run the following command to query the Job status:
kubectl get job example-jobThe following output shows that the Job is complete.
NAME          STATUS     COMPLETIONS   DURATION   AGE
example-job   Complete   2/2           27s        37s
Run the following command to query the logs of the Job:
kubectl logs -l job-name=example-jobExpected output:
starting...
1
2
3
4
5
finished
starting...
1
2
3
4
5
finished
References
A CronJob creates Jobs based on a specified schedule. CronJobs are suitable for running scheduled tasks. For more information, see Create a CronJob.
For more information about how to resolve the issues that occur when you create a workload, see FAQ about workloads.
For more information about how to troubleshoot pod exceptions, see Pod troubleshooting.