This topic answers frequently asked questions (FAQs) about Bastionhost scenarios.
How does Bastionhost manage hosts from other sources across clouds?
For assets that are not on Alibaba Cloud or are in on-premises data centers, you can import the host assets by creating new hosts in Bastionhost if the hosts and Bastionhost can connect over a network, such as for O&M over the Internet. For more information, see Create a host.
If your assets are in different VPCs or accounts and are not connected by a leased line, you can use the network domain feature of Bastionhost. For more information, see Best practices for hybrid O&M scenarios.
Does Bastionhost support O&M for assets across accounts and VPCs?
Yes, it does. If a Bastionhost instance and a server are in different accounts or VPCs, you can manage the assets over the Internet. You can also connect the networks with a leased line to manage assets over an internal network.
To perform O&M on assets over an internal network but the networks cannot be connected, you can configure and use the network domain feature of Bastionhost. For more information, see Best practices for hybrid O&M scenarios.
How do I perform O&M on assets in a classic network?
If an Alibaba Cloud Elastic Compute Service (ECS) server is in a classic network, you can use ClassicLink to connect the Bastionhost VPC to the classic network. For more information about the ClassicLink feature, see ClassicLink overview.
Does Bastionhost support database O&M?
Yes, it does. Bastionhost Enterprise Dual-engine Edition provides security control for O&M on assets such as ApsaraDB RDS for MySQL, SQL Server, and PostgreSQL instances, and self-managed databases. For more information, see Best practices for database O&M.
Only Bastionhost V3.2 supports the Enterprise Dual-engine Edition.
What assets does Bastionhost support for O&M?
Bastionhost supports O&M for host assets on Linux and Windows, and database assets of the MySQL, SQL Server, and PostgreSQL types. You can import Alibaba Cloud ECS and ApsaraDB RDS database assets with a single click. You can also import assets from on-premises data centers or heterogeneous clouds in batches. For more information, see O&M overview.
Is data encrypted during transmission and storage in Bastionhost?
All data transmitted to or stored in Bastionhost is encrypted. Bastionhost uses multiple mainstream encryption protocols, such as HTTPS (TLS), RDP, and SSH, to ensure the security of data in transit.
Does Bastionhost support servers that use public IP addresses for private communication?
Yes, you can. If you have deployed a public IP address for private use in your network environment, you can configure it in the Bastionhost console. For more information, see Configure Bastionhost.
Does Bastionhost support remote command-based O&M?
Yes, it does. Bastionhost supports the ssh -J command, which is used to connect to a target host through a jump server or Bastionhost. This provides a secure way to access an internal network.
Method for remote command-based O&M
ssh -J is a command parameter that was introduced in OpenSSH 7.3. It is used to connect to a host through a jump server or Bastionhost. The connection command is as follows:
ssh -J <bastionhost_user>@<bastionhost_address>:60022 <host_username>@<host_ip>For example, the following command first connects to Bastionhost B and then connects to the target host C from Bastionhost B using SSH.
ssh -J user@B user@CScenario for remote command-based O&M
Remote Command Execution lets you connect to a specified host through Bastionhost using SSH in command-line mode and executing commands. You can navigate to to restrict the use of Remote Command Execution.
How do I configure a server as an HTTP and SOCKS5 proxy server?
This section uses an Alibaba Cloud server that runs CentOS 8.3 as an example to describe how to configure the server as an HTTP and SOCKS5 proxy server.
Log on to the Alibaba Cloud server.
Run the yum install 3proxy command to install the 3proxy tool.
Run the vim /etc/3proxy.cfg command to modify the configuration file.
Configure the host account and password for the proxy server.

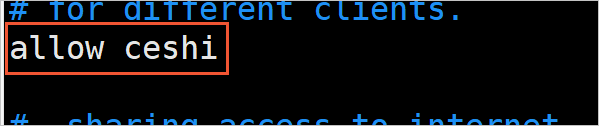
Configure access control parameters.
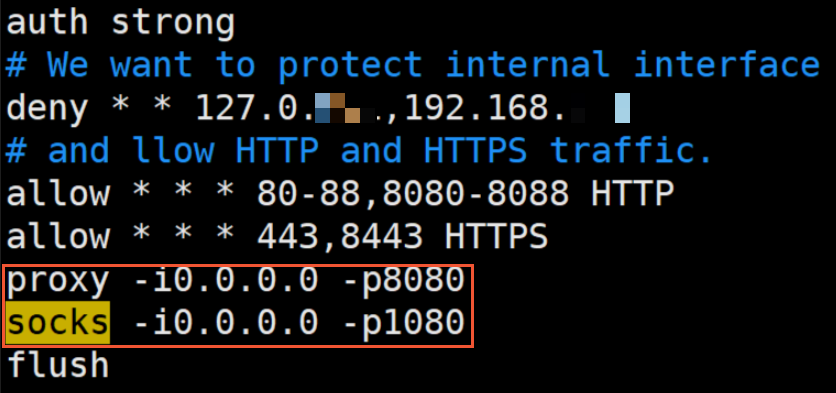
Enable the HTTP and SOCKS5 proxies, and specify the listener port and the source IP address for accessing the proxy server.
Run the systemctl start 3proxy.service command to enable the proxy service.
Run the iptables -F command to disable the server's firewall to ensure that the server can be accessed.
Add a security group rule for the server. For more information, see Add a security group rule.
ImportantWhen you add the security group rule, set the port range to the listener port that you configured in Step 3 and set the authorization object to the egress IP address of the Bastionhost instance. You can find the egress IP address of the Bastionhost instance on the Instances page in the Bastionhost console.
After you add the security group rule for the server, the proxy server is configured.
How do I configure a server as an HTTPS proxy server?
This section uses the GOST tool as an example to describe how to configure an ECS instance that runs CentOS 8.3 as an HTTPS proxy server.
Prepare a server certificate (server.crt), a server certificate private key (server.key), and a CA root certificate (ca.crt). You can use one of the following methods to obtain the certificates:
Use a tool such as OpenSSL to generate a self-signed certificate.
Obtain a free personal test certificate from Alibaba Cloud or purchase a commercial certificate. For more information, see SSL certificate selection guide.
Install GOST on your ECS instance. For more information, see Install GOST.
Upload the certificate files to the GOST installation folder, and then configure and start the GOST proxy server.
Command line: Modify the parameters and then start GOST.
gost -L="https://admin:123456@:8843?cert=./server.crt&key=./server.key"admin:123456: A custom GOST username and password. This corresponds to the Host Account and Password for the HTTPS proxy in the Bastionhost network domain.8443: A custom proxy port. This corresponds to the Server Port for the HTTPS proxy in the Bastionhost network domain.You must configure an inbound security group rule for this port on the ECS instance. Set the Port Range to 8443 and the Authorization Object to the egress IP address of the Bastionhost instance. You can find the IP address on the Instance page in the Bastionhost console. For more information about how to add a security group rule for the ECS instance, see Add a security group rule.
./server.crt: The server certificate../server.key: The private key of the server certificate.
JSON file: Modify the parameters and then start GOST.
JSON configuration file (You must create this file. In this topic, gost.json is used as an example.)
{ "ServeNodes": [ "https://admin:123456@:8843?cert=./server.crt&key=./server.key" ] }admin:123456: A custom GOST username and password. This corresponds to the Host Account and Password for the HTTPS proxy in the Bastionhost network domain.8443: A custom proxy port. This corresponds to the Server Port for the HTTPS proxy in the Bastionhost network domain.You must configure an inbound security group rule for this port on the ECS instance. Set the Port Range to 8443 and the Authorization Object to the egress IP address of the Bastionhost instance. You can find the egress IP address on the Instances page in the Bastionhost console. For more information about how to add a security group rule for an ECS instance, see Add a security group rule.
./server.crt: The server certificate../server.key: The private key of the server certificate.
Start GOST
gost -C gost.json