When alerts fire in a complex production environment, you often need to trigger automated actions -- such as automated remediation or ticketing system integration. Application Real-Time Monitoring Service (ARMS) Alert Management integrates with EventBridge to forward alert lifecycle events (triggered, claimed, commented on, and cleared) to a custom event bus. From there, EventBridge routes events to downstream consumers based on rules you define.
How it works
ARMS publishes alert events to your EventBridge custom event bus through a notification integration.
Each event follows the CloudEvents 1.0 specification and is compatible with the open-source Alertmanager webhook format.
You can consume EventBridge events to connect to a third-party platform, allowing you to implement automated remediation or ticketing system integration.
Step 1: Create EventBridge resources
Before you configure the ARMS integration, set up an event bus and event source in EventBridge.
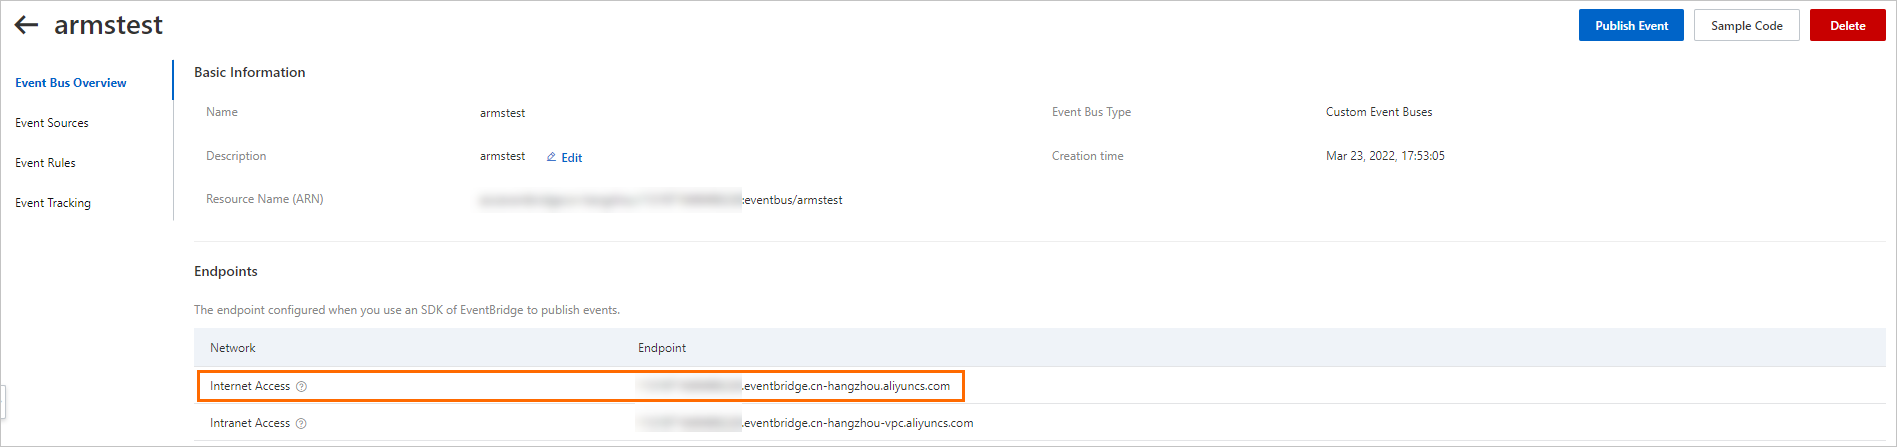
Create a custom event bus. For details, see Manage custom event buses. After you create the event bus, copy the public endpoint from the Event Bus Overview page. You need this value in Step 2.
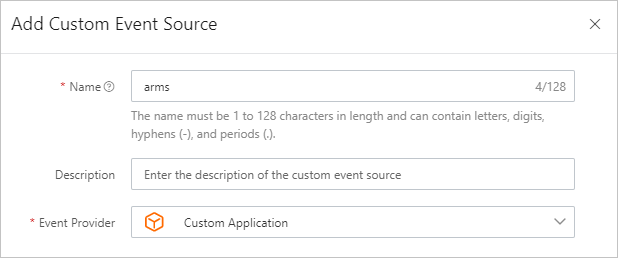
Add a custom event source to the event bus. For details, see Manage custom event sources. Note the event source name. You also need this value in Step 2.
Step 2: Configure the EventBridge integration in ARMS
Log on to the ARMS console.
In the left-side navigation pane, choose Alert Management > Integrations.
Click the Notification Integration tab, then click EventBridge.
In the Add Integration dialog box, configure the following parameters, and then click Save.
Parameter Description Example Name A display name for this integration. EventBridge integrationDescription Optional. A short description of the integration. -- Endpoint The public endpoint of the event bus you created in Step 1. https://xxxx.eventbridge.cn-hangzhou.aliyuncs.comAccessKey The AccessKey ID of your Alibaba Cloud account. For details, see Obtain an AccessKey pair. LTAI5tXxxAccessKey Secret The AccessKey secret of your Alibaba Cloud account. For details, see Obtain an AccessKey pair. xXxXxXxMessage Bus Name The name of the event bus you created in Step 1. armstestregionId The region ID where the event bus resides. cn-hangzhouEvent Source Name The name of the event source you created in Step 1. arms
Step 3: Configure a notification policy
Wire the EventBridge integration to a notification policy so that matching alerts are forwarded to EventBridge.
In the ARMS console, go to your notification policy configuration.
Create or edit a notification policy. In the Ticket System field, select the EventBridge integration you created in Step 2.
For details, see Create and manage a notification policy.
Verify the integration
After you complete the setup, confirm that events reach EventBridge:
Log on to the EventBridge console.
Open your custom event bus and check for incoming events. For details, see Query events.
Click Event Detail in the Actions column to inspect the event payload.
Event types
ARMS sends one event per alert lifecycle action. Each event uses a distinct type value.
| Event code | Alert action |
|---|---|
aliyun:arms:alarm:create | Alert triggered |
aliyun:arms:alarm:claim | Alert claimed |
aliyun:arms:alarm:comment | Comment added to alert |
aliyun:arms:alarm:close | Alert cleared |
Repeat notifications configured in a notification policy are sent only to notification recipients, such as a DingTalk group or a webhook. Repeat notifications do not trigger a new event delivery to EventBridge. EventBridge delivers an event only when the status of an alert changes, and a repeat notification reflects the ongoing state of the same alert rather than a status change.
Event payload reference
All events follow the CloudEvents 1.0 specification. The data.data object is compatible with the open-source Alertmanager webhook format.
Top-level fields
| Field | Type | Description |
|---|---|---|
id | string | Unique event ID. |
source | string | Event source. Always arms. |
type | string | Event code from the table above. |
specversion | string | CloudEvents version. Always 1.0. |
datacontenttype | string | Content type. Always application/json. |
subject | string | Unique URL of the alert in the ARMS console. |
aliyuneventbusname | string | Name of the target event bus. |
aliyunregionid | string | Region ID of the event bus. |
aliyunaccountid | string | Alibaba Cloud account ID. |
aliyunpublishtime | string | Timestamp when the event was published (ISO 8601). |
aliyunoriginalaccountid | string | Original Alibaba Cloud account ID. |
aliyunpublishaddr | string | IP address of the event publisher. |
data | object | Event-specific payload. See below. |
data object fields
| Field | Type | Present in | Description |
|---|---|---|---|
owner | string | All events | Alert owner (the contact specified in the notification policy). |
handler | string | claim, comment, close | Alert handler. |
operator | string | claim, comment, close | User who performed the action. |
comment | string | comment only | Content of the comment. |
solution | string | close only | Solution recorded when clearing the alert. |
timestamp | number | All events | Unix timestamp in milliseconds. |
data | object | All events | Alertmanager-compatible alert payload. See below. |
data.data object fields (Alertmanager-compatible)
| Field | Type | Description |
|---|---|---|
status | string | firing or resolved. |
level | string | Alert severity level (for example, P2). |
dispatchRuleName | string | Name of the dispatch rule (for example, O & M team). |
startTime | string | Alert start time. |
endTime | string | Alert end time. Present only when the alert is resolved. |
externalURL | string | URL to the alert detail page in the ARMS console. |
receiver | string | Receiver identifier. |
alerts | array | Array of individual alert objects. |
commonLabels | object | Labels shared by all alerts in the group. |
commonAnnotations | object | Annotations shared by all alerts in the group. |
groupLabels | object | Labels used for alert grouping. |
alerts[] object fields
| Field | Type | Description |
|---|---|---|
fingerprint | string | Unique hash identifying the alert. |
status | string | firing or resolved. |
startsAt | string | Alert start time (ISO 8601). |
endsAt | string | Alert end time (ISO 8601). |
labels | object | Key-value labels including severity, regionId, alertname, and ARMS-specific metadata. |
annotations | object | Key-value annotations including message. |
Fields specific to each event type
The Alertmanager-compatible data.data structure remains the same across all event types. The following fields in the data object vary by event type:
| Event type | Additional fields in data |
|---|---|
Alert triggered (create) | owner |
Alert claimed (claim) | owner, handler, operator |
Comment added (comment) | owner, handler, operator, comment |
Alert cleared (close) | owner, handler, operator, solution |
What's next
What is EventBridge? -- Learn about EventBridge concepts and architecture.