This topic describes how to migrate the data of a self-managed MySQL instance to an ApsaraDB RDS for MySQL instance that runs the same MySQL version as the self-managed MySQL instance. You can perform a full backup on the self-managed MySQL instance, upload the full backup file to an Object Storage Service (OSS) bucket, import the full backup file from the OSS bucket to the ApsaraDB RDS console, and then restore the data from the full backup file to a new RDS instance.
Prerequisites
The self-managed MySQL instance meets the cloud migration conditions. For more information, see Appendix 4: Limits.
An OSS bucket is created in the region in which the RDS instance resides. For more information about how to create a bucket, see Create buckets.
NoteThe OSS bucket that you create must reside in the same region as the RDS instance.
Migration process
The migration process consists of the following steps:
Step 1: Install Percona XtraBackup
Step 2: Install MySQL Backup Helper
Step 3: Back up the self-managed MySQL instance and migrate the backup data to the RDS instance
Environment
In this topic, the self-managed MySQL instance is deployed on an Elastic Compute Service (ECS) instance. The image that is used to create the self-managed MySQL instance runs CentOS Linux V8.3.2011. If the image runs other Linux distributions, you must use the required commands. For more information, see Create an instance on the Custom Launch tab.
Step 1: Install Percona XtraBackup
Percona XtraBackup is developed by Percona to help you back up MySQL databases without impacting uptime. Percona XtraBackup is compatible with various storage engines. For more information about how to install Percona XtraBackup on Ubuntu, see Appendix 1: Install XtraBackup on Ubuntu.
You must select the version of Percona XtraBackup based on the MySQL version.
MySQL 5.7
wget https://downloads.percona.com/downloads/Percona-XtraBackup-2.4/Percona-XtraBackup-2.4.29/binary/redhat/8/x86_64/percona-xtrabackup-24-2.4.29-1.el8.x86_64.rpm
yum localinstall percona-xtrabackup-24-2.4.29-1.el8.x86_64.rpm
MySQL 8.0
wget https://downloads.percona.com/downloads/Percona-XtraBackup-8.0/Percona-XtraBackup-8.0.35-31/binary/redhat/8/x86_64/percona-xtrabackup-80-8.0.35-31.1.el8.x86_64.rpm
yum localinstall percona-xtrabackup-80-8.0.35-31.1.el8.x86_64.rpm
Step 2: Install MySQL Backup Helper
Prerequisites
The Go programming language is installed. If Go is not installed, run the following command in the CLI to install Go:
sudo yum install -y goThe Unzip utility is installed. If Unzip is not installed, run the following command in the CLI to install Unzip:
sudo yum install -y unzip
The preceding commands are supported only for CentOS. If you use Ubuntu, install the utility based on Appendix 2: Install Go and Unzip in an Ubuntu operating system.
Procedure
Download the source code package of MySQL Backup Helper.
wget https://github.com/aliyun/mysql-backup-helper/archive/refs/heads/master.zipNoteYou can download the source code package of MySQL Backup Helper from the mysql-backup-helper page.
Decompress the source code package of MySQL Backup Helper.
unzip master.zipGo to the mysql-backup-helper-master folder and compile the main.go file into an executable file named backup_helper.
cd mysql-backup-helper-master
go build -a -o backup_helper main.go
Go to the oss_stream folder and compile the oss_stream.go file into an executable file named oss_stream.
cd oss_stream
go build -a -o oss_stream oss_stream.go
Step 3: Back up the self-managed MySQL instance and migrate the backup data to the RDS instance
Use MySQL Backup Helper to check whether the self-managed MySQL instance supports backups.
cd ~/mysql-backup-helper-master && ./backup_helper -host <The IP address of the host in which the self-managed MySQL instance resides> -port <The port that is used to connect to the self-managed MySQL instance> -user <The username of the root account that is used to connect to the self-managed MySQL instance> --password <The password of the root account that is used to connect to the self-managed MySQL instance>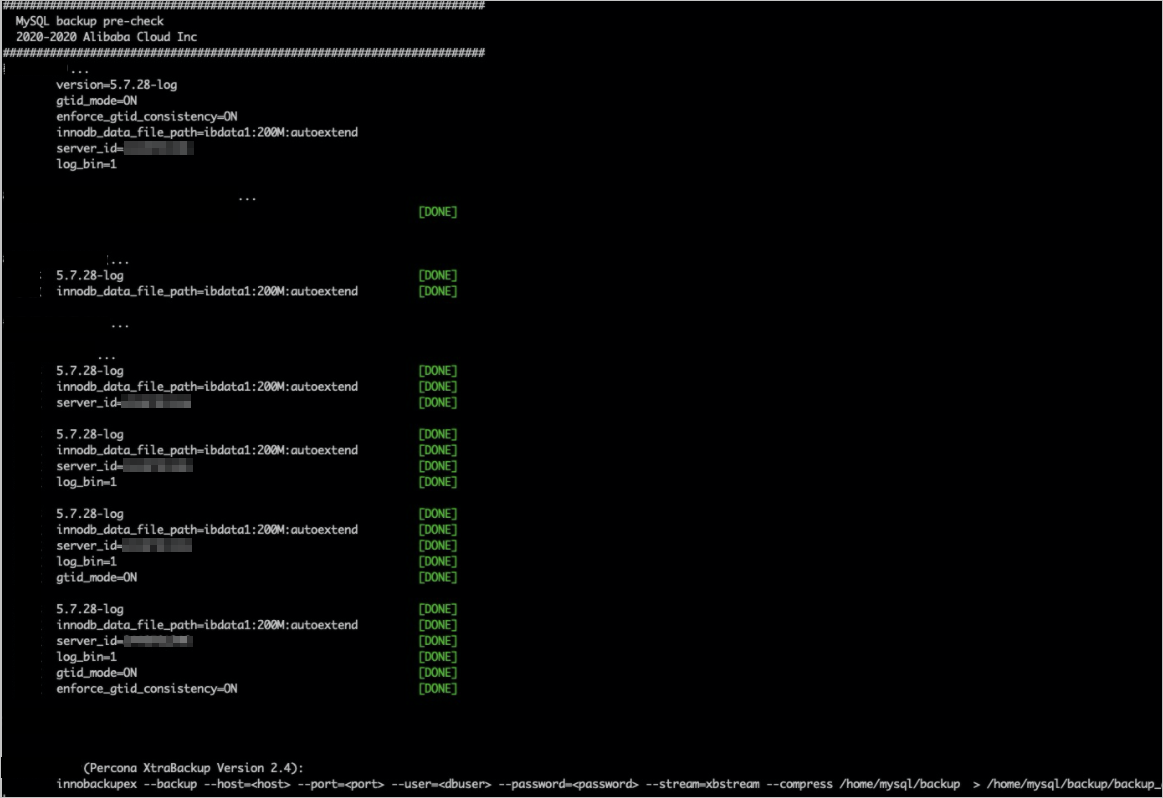
If the self-managed MySQL instance supports backups, perform a full backup on the self-managed MySQL instance and upload the full backup file to your OSS bucket. If no OSS bucket is created, create one. For more information, see Prerequisites.
You must select the command based on the MySQL version.
MySQL 5.7
innobackupex --backup --host=<The IP address of the host in which the self-managed MySQL instance resides> --port=<The port that is used to connect to the self-managed MySQL instance> --user=<The username of the root account that is used to connect to the self-managed MySQL instance> --password=<The password of the root account that is used to connect to the self-managed MySQL instance> --stream=xbstream --compress <The temporary directory that is used to store the full backup file> | ./mysql-backup-helper-master/oss_stream/oss_stream -accessKeyId <The AccessKey ID of your Alibaba Cloud account> -accessKeySecret <The AccessKey secret of your Alibaba Cloud account> -bucketName <The name of your OSS bucket> -endpoint <The endpoint that is used to connect to your OSS bucket> -objectName <The name of the full backup file>Example:
innobackupex --backup --host=127.0.0.1 --port=3306 --user=root --password=Aa123456@ --stream=xbstream --compress /root/mysql/data | ./mysql-backup-helper-master/oss_stream/oss_stream -accessKeyId LTAI**************** -accessKeySecret ****** -bucketName test -endpoint oss-********.aliyuncs.com -objectName backup_qp.xbThe amount of data in the self-managed MySQL instance also affects the time that is required to complete the full backup. A larger amount of data requires a longer period of time. If the self-managed MySQL instance has a large amount of data, we recommend that you run the nohup command to perform the full backup in the background. This way, you can prevent interruptions to the full backup in the event of unexpected logoffs. Sample command:
nohup sh -c 'innobackupex --backup --host=127.0.0.1 --port=3306 --user=root --password=Aa123456@ --stream=xbstream --compress /root/mysql/data | ./mysql-backup-helper-master/oss_stream/oss_stream -accessKeyId LTAI**************** -accessKeySecret ****** -bucketName test -endpoint oss-ap-southeast-1.aliyuncs.com -objectName backup_qp.xb' &MySQL 8.0
xtrabackup --backup --host=<The IP address of the host in which the self-managed MySQL instance resides> --port=<The port that is used to connect to the self-managed MySQL instance> --user=<The username of the root account that is used to connect to the self-managed MySQL instance> --password=<The password of the root account that is used to connect to the self-managed MySQL instance> --stream=xbstream --compress <The temporary directory that is used to store the full backup file> | ./mysql-backup-helper-master/oss_stream/oss_stream -accessKeyId <The AccessKey ID of your Alibaba Cloud account> -accessKeySecret <The AccessKey secret of your Alibaba Cloud account> -bucketName <The name of your OSS bucket> -endpoint <The endpoint that is used to connect to your OSS bucket> -objectName <The name of the full backup file>Example:
xtrabackup --backup --host=127.0.0.1 --port=3306 --user=root --password=Aa123456@ --stream=xbstream --compress /root/mysql/data | ./mysql-backup-helper-master/oss_stream/oss_stream -accessKeyId LTAI**************** -accessKeySecret ******** -bucketName test -endpoint oss-****.aliyuncs.com -objectName backup_qp.xbThe amount of data in the self-managed MySQL instance also affects the time that is required to complete the full backup. A larger amount of data requires a longer period of time. If the self-managed MySQL instance has a large amount of data, we recommend that you run the nohup command to perform the full backup in the background. This way, you can prevent interruptions to the full backup in the event of unexpected logoffs. Sample command:
nohup sh -c 'xtrabackup --backup --host=127.0.0.1 --port=3306 --user=root --password=Aa123456@ --stream=xbstream /root/mysql/data | ./mysql-backup-helper-master/oss_stream/oss_stream -accessKeyId LTAI**************** -accessKeySecret ****** -bucketName test -endpoint oss-ap-southeast-1.aliyuncs.com -objectName backup_qp.xb' &NoteThe status of the self-managed MySQL instance during the full backup affects the time that is required to complete the full backup. For example, if a large number of redo log records are generated from a large number of write operations or large transactions are run during the full backup, the time that is required increases. When the full backup is complete, the system displays the
completed OK !message.If your OSS bucket is temporarily inaccessible, we recommend that you save the full backup file to your computer. When your OSS bucket runs as expected, you can upload the full backup file to your OSS bucket. For more information, see Appendix 3: Perform a full backup, save the full backup file to your computer, and then upload the full backup file to your OSS bucket.
After you upload the full backup file to your OSS bucket, you can log on to the OSS console to check whether the upload is successful. If the upload failed, you can repeat this step.
Log on to the ApsaraDB RDS console. In the top navigation bar, select the region to which you want to restore the data of the self-managed MySQL instance. In the left-side navigation pane, click Backups.
On the User Backups tab, click Import Backup.
In the Import Guide wizard, read the messages that are displayed and click Next until you enter the 3. Import Data step.
NoteThe Import Backup wizard walks you through the migration process. For more information, see Appendix 3: Perform a full backup, save the full backup file to your computer, and then upload the full backup file to your OSS bucket.
1. Back Up Source Database: Perform a full backup on the self-managed MySQL instance.
2. Upload Backup Files to OSS: Upload the full backup file of the self-managed MySQL instance to your OSS bucket.
In the Step 3: Import the data step, configure the following parameters and click OK.
Parameter
Description
MySQL version
The value 5.7/8.0 is automatically displayed.
NoteYou can import the data of a self-managed instance that runs MySQL 5.7 or MySQL 8.0.
Region
The region that you specified in Step 1. You must set this parameter to the region of the OSS bucket that stores the full backup file.
OSS Bucket
The OSS bucket that stores the full backup file of the self-managed MySQL instance. For more information about OSS buckets, see Upload objects.
OSS file name
The full backup file that is stored as an object in the OSS bucket. You can enter the name of the full backup file in the OSS file name field to search for the file. Fuzzy match and exact match are supported.
NoteThe full backup file that is stored as an object in your OSS bucket must be in the
_QP.XBformat. Alternatively, you can compress the file in the_QP.XBformat into a package in theTAR.GZformat and then store the package as an object in the OSS bucket. For more information, see Appendix 5: Limits.Note
The description that helps you identify the full backup file.
Zone
The zone of the OSS bucket that stores the full backup file. After you select a zone, ApsaraDB RDS creates a snapshot in the zone in single-digit seconds. This greatly reduces the time that is required to import the full backup file into the OSS bucket.
NoteAfter the full backup file is imported, you can restore the data of the full backup file to a new RDS instance. The new RDS instance resides in the zone that you select.
Storage Capacity
The amount of storage that is required for the full backup file. Valid values: 20 to 6000: Unit: GB.
NoteBy default, the amount of storage that is required is 3 times the size of the full backup file. If the file size multiplied by 3 does not exceed 20 GB, this parameter defaults to 20.
NoteIf ApsaraDB RDS is not authorized to access OSS, click Authorize in the lower part of the 3. Import Data step. In the lower-left corner of the page that appears, click Confirm Authorization Policy.
For more information, read the instructions on this page.
The system creates a task to verify the full backup file on the User Backups tab. Wait until the Status parameter of the task changes from Verifying to Completed.
ImportantThe period of time that is required to verify the user backup file varies based on the status of the RDS instance when it is backed up. For example, a long period of time is required to verify the user backup file in the following scenarios: A large number of write operations are performed on the RDS instance during the instance backup and therefore a large number of redo logs are generated, or large transactions are executed on the RDS instance during the instance backup.
Find the required full backup file and click Restore in the Actions column to the right of the Backup ID/Name column.
Configure the following parameters and click Next: Instance Configuration.
Parameter
Description
Zone of Primary Node
The zone to which the primary RDS instance belongs.
NoteIf you did not select a zone for the OSS bucket that stores the full backup file when you import the file, this parameter is displayed. If you selected a zone for the OSS bucket that stores the full backup file when you import the file, this parameter is not displayed.
Storage Type
ESSD PL1: a performance level 1 (PL1) Enterprise SSD (ESSD).
Standard SSD: A standard SSD is an elastic block storage device that is designed based on the distributed storage architecture of Alibaba Cloud. You can store data on standard SSDs to separate computing from storage.
NoteFor more information, see Storage types.
Instance Type
General-purpose (Entry-level): A general-purpose RDS instance exclusively occupies the allocated memory and I/O resources. However, it shares CPU cores and storage resources with the other general-purpose RDS instances that are deployed on the same host.
NoteSelect the instance type. Each instance type supports a specific number of CPU cores, memory capacity, maximum number of connections, and maximum IOPS. For more information, see Primary ApsaraDB RDS instance types.
Storage Capacity
Configure the storage capacity for your RDS instance. The storage capacity is provisioned to store data files, system files, log files, and transaction files in the RDS instance. You can adjust the storage capacity at a step size of 5 GB.
Configure the following parameters and click Next: Confirm Order.
Parameter
Description
Network Type
The network type of the RDS instance. Select VPC. A virtual private cloud (VPC) is an isolated network that provides higher security and better performance than the classic network. If you select the VPC network type, you must also configure the VPC and vSwitch of Primary Node parameters.
NoteThe RDS instance and the ECS instance that you want to connect must reside in the same VPC. Otherwise, the RDS instance and the ECS instance cannot communicate over an internal network.
Parameter Template
The parameter template that is used by the RDS instance. You can select a system parameter template or a custom parameter template. For more information, see Use a parameter template.
Time Zone
Select a time zone for your RDS instance.
Table Name Case Sensitivity
Specifies whether table names in the RDS instance are case-sensitive. If table names in the self-managed MySQL instance are case-sensitive, we recommend that you select Case-sensitive to facilitate data migration between the RDS instance and the self-managed MySQL instance.
Confirm the configuration of the RDS instance in the Parameters section, configure the Purchase Plan parameter, read and select Terms of Service, and then click Pay Now to complete the payment.
NoteApsaraDB RDS requires 1 to 5 minutes to create the RDS instance. Wait until the instance is created.
What to do next
Configure the retention period of the full backup file
By default, the full backup file is retained for three days after it is imported into ApsaraDB RDS. You can adjust the retention period based on your business requirements.
If you no longer require a full backup file, you can delete the file.
Log on to the ApsaraDB RDS console. In the top navigation bar, select a region. In the left-side navigation pane, click Backups.
Find the required full backup file and click Set Retention Period in the Expiration Time column to the right of the Backup ID/Name column.
In the dialog box that appears, select a retention period from the drop-down list provided by ApsaraDB RDS. Alternatively, select Custom Retention Period and then enter a number. You can click the upward arrow or the downward arrow to adjust the retention period.
NoteThe Expiration Time column displays the expiration time of the full backup file. If the expiration time exceeds 2099, it is displayed as Permanent.
Click OK.
Add tags to the full backup file
After the full backup file is imported into ApsaraDB RDS, you can add tags to the file.
Log on to the ApsaraDB RDS console. In the top navigation bar, select a region. In the left-side navigation pane, click Backups.
Find the required full backup file and click +Add in the Tags column to the right of the Backup ID/Name column.
In the dialog box that appears, click Create a label, specify the Key and Value fields of the tag, click OK to the right of the parameter to create the tag, and then click OK in the lower-right corner of the dialog box.
NoteIf a tag exists, select the tag from the Select the label drop-down list to add the tag to the full backup file.
If you want to change the tag of the full backup file, move the pointer over the tag and click edit. In the tooltip that appears, repeat Step 3 to create or select a tag.
Check log data of the full backup file
If data changes are made in the self-managed MySQL instance during the full backup, the generated full backup file contains log information that records the data changes. You can use the log information to restore the incremental data. For more information, see Step 3: Back up the self-managed MySQL instance and migrate the backup data to the RDS instance.
Log on to the ApsaraDB RDS console. In the top navigation bar, select a region. In the left-side navigation pane, click Backups.
Find the required full backup file and click View Details in the Actions column to the right of the Backup ID/Name column.
In the message that appears, check the log data.
NoteThe following list describes the log information:
Master_Log_File:: the name of the first log file that stores incremental data.
Master_Log_Position:: the first log entry that contains incremental data in the first log file.
Delete the full backup file
If you no longer need the full backup file, you can delete the file to reduce costs.
Log on to the ApsaraDB RDS console. In the top navigation bar, select a region. In the left-side navigation pane, click Backups.
Find the required full backup file and click Delete in the Actions column to the right of the Backup ID/Name column.
In the message that appears, click OK.
Perform other operations
Filter Columns: You can click the icon to show or hide columns on the User Backups tab. By default, all columns are displayed.
Log on to the ApsaraDB RDS console. In the top navigation bar, select a region. In the left-side navigation pane, click Backups.
In the upper-right corner of the tab, click the
 icon. In the dialog box that appears, select the columns that you want to display or hide, and click the
  or
or  icon to manage the columns. Note
The columns in the left-side list are hidden, and the columns in the right-side list are displayed.
Click OK.
Export Instance List: You can click the icon to export the backup information as a CSV file.
Log on to the ApsaraDB RDS console. In the top navigation bar, select a region. In the left-side navigation pane, click Backups.
In the upper-right corner of the tab, click the
 icon to export the backup information.
Refresh: You can click the icon to refresh the User Backups tab.
Log on to the ApsaraDB RDS console. In the top navigation bar, select a region. In the left-side navigation pane, click Backups.
Click the
 icon to refresh the User Backups tab.