ApsaraDB RDS for PostgreSQL provides the cloud migration feature. You can use this feature to migrate the data of a self-managed PostgreSQL instance that is deployed on an Alibaba Cloud Elastic Compute Service (ECS) instance or in a data center to an ApsaraDB RDS for PostgreSQL instance. You can also use this feature to migrate data between ApsaraDB RDS for PostgreSQL instances that are created within different accounts. This topic describes how to use the cloud migration feature to migrate data between ApsaraDB RDS for PostgreSQL instances that are created within different accounts.

Prerequisites

  • The following requirements are met:
    • The source RDS instance and the destination RDS instance run the same major engine version. The supported major engine versions are PostgreSQL 10, PostgreSQL 11, PostgreSQL 12, PostgreSQL 13, PostgreSQL 14, and PostgreSQL 15.
    • The destination RDS instance is a primary instance. Read-only RDS instances do not support cloud migration.
    • The destination RDS instance is equipped with standard SSDs or enhance SSDs (ESSDs).
    • The destination RDS instance is empty. The available storage of the destination RDS instance is greater than or equal to the size of the data in the source RDS instance.
    • The CIDR block of the virtual private cloud (VPC) to which the source RDS belongs is different from the CIDR block of the VPC to which the destination RDS instance belongs.
  • The permissions on transit routers are granted to the network instances. For more information, see Grant permissions on a network instance that belongs to another account.

Precautions

When you migrate data between ApsaraDB RDS for PostgreSQL instances within different accounts, you must use Cloud Enterprise Network (CEN) to enable cross-region communication between the source RDS instance and the destination RDS instance over an internal network. You are charged for CEN-based cross-region communication. For more information, see What is CEN? and Billing.

Procedure

Note In this example, the source RDS instance belongs to account A, and the destination RDS instance belongs to account B. The following operations describe how to migrate the data of the source RDS instance to the destination RDS instance. A CEN instance is created under account B.
  1. Configure the CEN instance to enable cross-region communication between the source RDS instance and the destination RDS instance over an internal network.
    1. Create a CEN instance.
      1. Log on to the CEN console.
      2. On the Instances page, click Create CEN Instance.
      3. In the Create CEN Instance dialog box, configure the following parameters and click OK.
        ParameterDescription
        NameEnter a name for the CEN instance.

        The name must be 2 to 128 characters in length and can contain letters, digits, hyphens (-), and underscores (_). The name must start with a letter.

        DescriptionEnter a description for the CEN instance.

        The description must be 2 to 256 characters in length and cannot start with http:// or https://. You can leave this parameter empty.

    2. Add the virtual private cloud (VPC) of the source RDS instance and the VPC of the destination RDS instance to the CEN instance.
      1. On the Instances page, click the ID of the CEN instance.
      2. On the Basic Settings tab of the details page, click the Icon that is used to add network instances icon to the right of the number that is displayed below VPC. The add sign (+) below VPC
      3. On the Connection with Peer Network Instance page, configure the following parameters and click OK.
        Note You must separately add the VPC of the source RDS instance and the VPC of the destination RDS instance to the CEN instance. This example shows how to add the VPC of the source RDS instance to the CEN instance. You can use the same method to add the VPC of the destination RDS instance to the CEN instance. Take note that the values of the Region and Networks parameters for the source RDS instance and the destination RDS instance are different.
        ParameterDescription
        Instance TypeRetain the default value VPC.
        RegionSelect the region where the source instance resides.
        Transit RouterBy default, no transit routers are available in the selected region. CEN automatically creates a transit router. Select the primary zone and secondary zone of the transit router.
        Resource Owner IDSelect Different Account and enter the UID of the source RDS instance.
        Note Move the pointer over the user picture in the upper-right corner of the page and go to the Basic Information page to check the account ID of the source RDS instance.
        Attachment NameEnter a custom name.
        NetworksSelect the ID of the VPC to which the source RDS instance belongs. You can view the VPC ID on the Database Connection page of the source RDS instance in the ApsaraDB RDS console. View the VPC ID of the source RDS instance

        After you specify the VPC, select the vSwitches that are associated with the primary zone and secondary zone of the transit router.

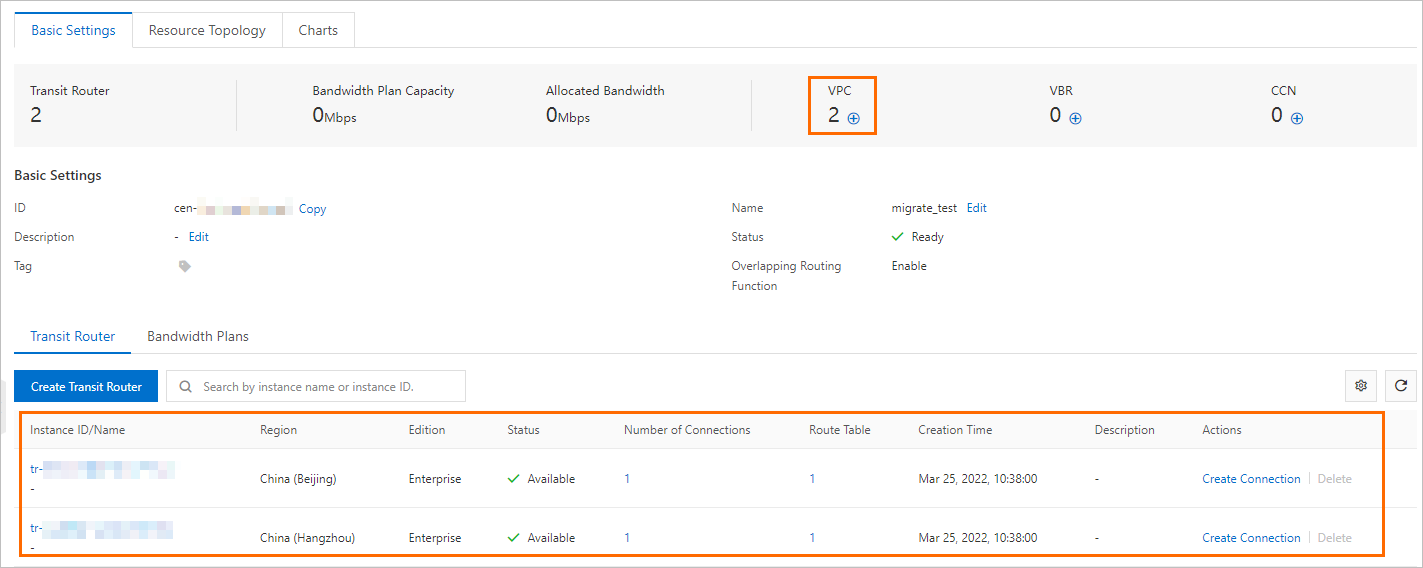
      After you add the VPC of the source RDS instance and the VPC of the destination RDS instance to the CEN instance, the page that is shown in the following figure is displayed.CEN route
    3. Optional. Purchase a bandwidth plan for the CEN instance.
      Note If the source RDS instance and the destination RDS instance reside in different regions, for example, the source RDS instance resides in China (Beijing) and the destination RDS instance resides in China (Hangzhou), you must perform this step. If the two RDS instances reside in the same region, you can skip this step and go to Step 2.
      1. On the Instances page, click the ID of the CEN instance.
      2. On the Basic Settings tab of the details page, click the Bandwidth Plans tab. On the Bandwidth Plans tab, click Purchase Bandwidth Plan (Subscription).
      3. On the page that appears, configure the following parameters and click Buy Now. Then, complete the payment.
        ParameterDescription
        CEN IDRetain the CEN instance that is displayed. After you purchase a bandwidth plan, the bandwidth plan is automatically associated with the CEN instance.
        Area ASelect an area for which you want to enable cross-region communication. In this example, select Mainland China.
        Note You cannot change the area after the bandwidth plan is purchased.
        Area BSelect the other area for which you want to enable cross-region communication. In this example, select Mainland China.
        Billing MethodSelect a billing method for the bandwidth plan. Retain the default value Pay by Bandwidth.
        BandwidthSpecify the bandwidth that is provided by the bandwidth plan. Unit: Mbit/s.
        NameEnter a name for the bandwidth plan.
        Order timeSelect a subscription duration for the bandwidth plan.

        You can select Auto-renewal to enable auto-renewal for the bandwidth plan.

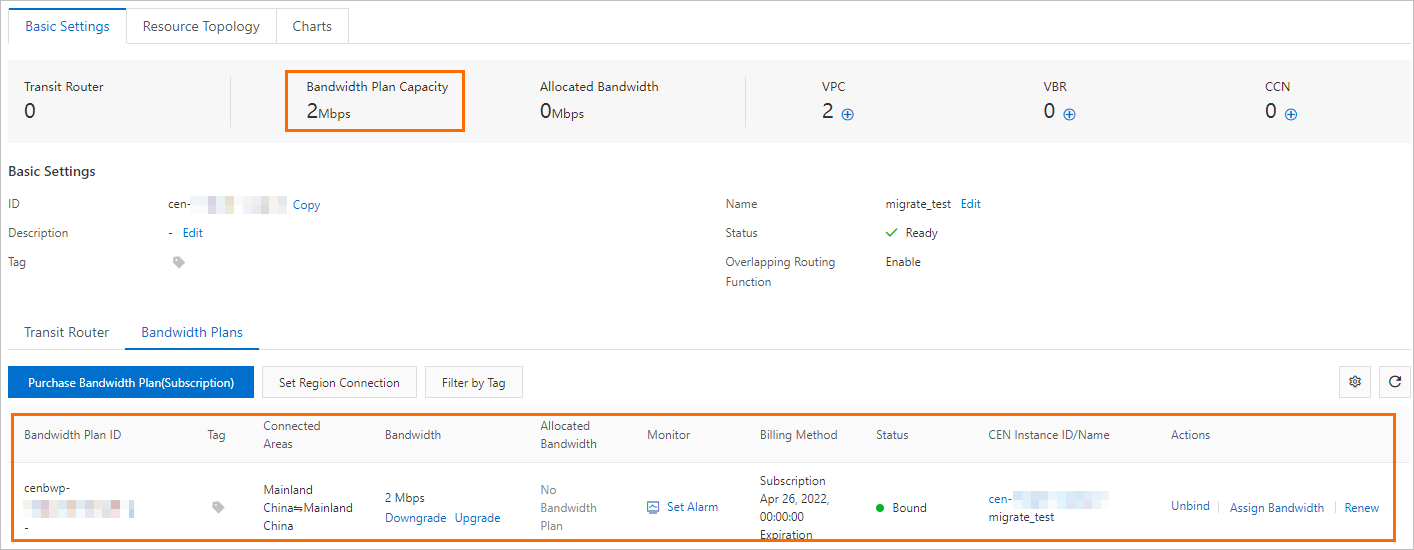
      After you purchase a bandwidth plan, the page that is shown in the following figure is displayed.Bandwidth plan created
    4. Optional. Configure the bandwidth for cross-account communication.
      Note If the source RDS instance and the destination RDS instance reside in different regions, for example, the source RDS instance resides in China (Beijing) and the destination RDS instance resides in China (Hangzhou), you must perform this step. If the two RDS instances reside in the same region, you can skip this step and go to Step 2.
      1. On the Instances page, click the ID of the CEN instance.
      2. On the Basic Settings tab of the details page, click the Bandwidth Plans tab. On the Bandwidth Plans tab, click Set Region Connection.
      3. On the Connection with Peer Network Instance page, configure the following parameters and click OK.
        ParameterDescription
        Network TypeSelect Inter-region Connection.
        RegionSelect the region in which the source RDS instance resides. In this example, select China (Beijing).
        Transit RouterCEN automatically identifies the transit router in the region in which the source RDS instance resides.
        Peer RegionSelect the region in which the destination RDS instance resides. In this example, select China (Hangzhou).
        Transit RouterCEN automatically identifies the transit router in the region in which the destination RDS instance resides.
        Bandwidth PlanSelect a bandwidth plan that is associated with the CEN instance.
        BandwidthEnter the bandwidth that is provided by the bandwidth plan. Unit: Mbit/s.
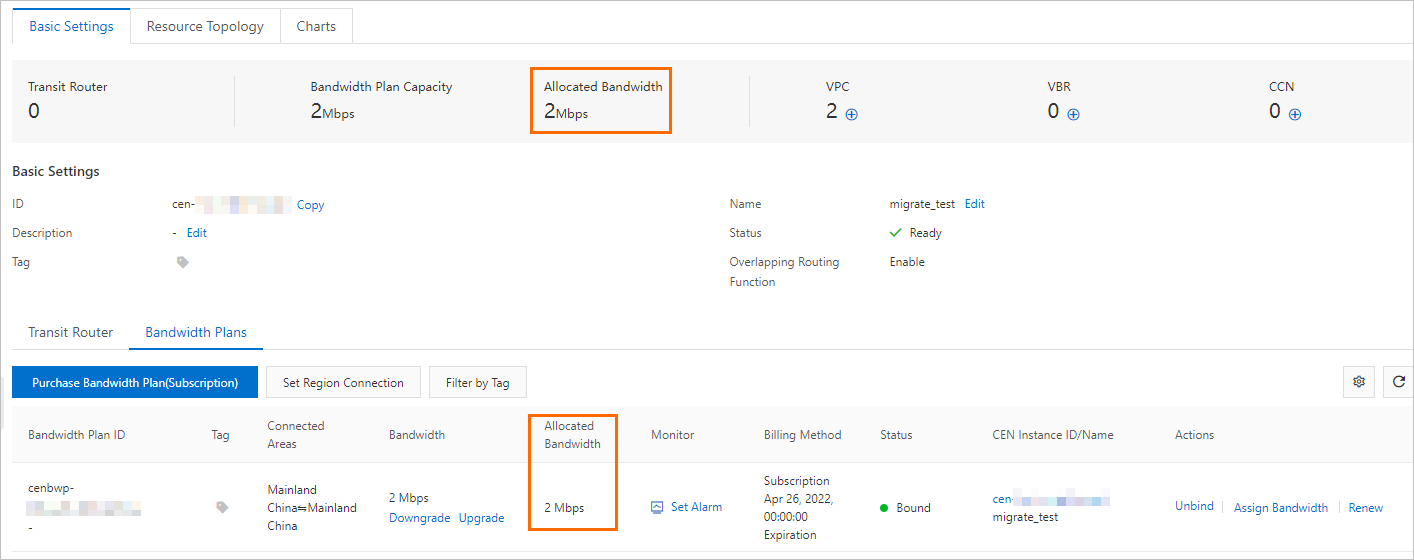
      After you configure the bandwidth for cross-account communication, the page that is shown in the following figure is displayed.Bandwidth plan configured
  2. Configure the source RDS instance.
    1. Add the CIDR block of the VPC to which the destination RDS instance belongs to an IP address whitelist of the source RDS instance.
      For more information, see Configure an IP address whitelist for an ApsaraDB RDS for PostgreSQL instance. You must set the IP Addresses parameter to the CIDR block of the VPC to which the destination RDS instance belongs.
      To view the VPC CIDR block, perform the following operations:
      1. Access RDS Instances, select a region at the top, and then click the ID of the target RDS instance.
      2. In the left-side navigation pane, click Database Connection. On the page that appears, view the value of the Netword segment parameter. VPC网段
    2. Create a privileged account for the source RDS instance.
      For more information, see Create an account on an ApsaraDB RDS for PostgreSQL instance. When you create a privileged account, you must set the Account Type parameter to Privileged Account.
      Note The privileged account is used to migrate data and must have the CREATE ROLE, REPLICATION, and pg_monitor permissions. If you have a privileged account, skip this step.
  3. Configure the destination RDS instance.
    1. Perform a cloud migration assessment.
      1. Access RDS Instances, select a region at the top, and then click the ID of the target RDS instance.
      2. In the left-side navigation pane, click Migrate to Cloud. On the page that appears, click the Migration Assessment tab.
      3. In the Select Migration Source step of the configuration wizard, select Self-managed ECS-based PostgreSQL Database or ApsaraDB RDS for PostgreSQL Instance and click Next.
      4. In the Configure Destination Database step of the configuration wizard, click Next.
      5. In the Configure Source Database step of the configuration wizard, select all listed items and click Next. Before you start the cloud migration, you must complete the preparations that are described in the listed items.
      6. In the Initiate Migration Assessment step of the configuration wizard, configure the information about the source RDS instance.
        ParameterDescription
        Migration Task NameApsaraDB RDS automatically generates a name for the cloud migration task. You do not need to modify the generated name.
        Source VPC/DNS IPEnter the internal endpoint of the source RDS instance. For more information, see View and change the internal and public endpoints and port numbers of an ApsaraDB RDS for PostgreSQL instance.
        Source PortEnter the internal port number of the source RDS instance. For more information, see View and change the internal and public endpoints and port numbers of an ApsaraDB RDS for PostgreSQL instance.
        UsernameEnter the username of the privileged account that is created for the source RDS instance.
        PasswordEnter the password of the privileged account that is created for the source RDS instance.
      7. Click Create Migration Assessment Task.
        Note During the cloud migration assessment, the status of the destination RDS instance changes to Maintaining Instance.
        After the cloud migration assessment is complete, you can view the status of the cloud migration assessment task on the Migration Assessment tab.
        • If the status of the cloud migration assessment task indicates a success, you can start the cloud migration.
        • If the status of the cloud migration assessment task indicates a failure, you can click View Report in the Actions column to view and handle the reported errors. For more information about common errors, see Introduction to cloud migration assessment reports.
    2. Migrate data to the destination RDS instance.
      1. Access RDS Instances, select a region at the top, and then click the ID of the target RDS instance.
      2. In the left-side navigation pane, click Migrate to Cloud. On the page that appears, click the Migration to Cloud tab. On the Migration to Cloud tab, click Create Cloud Migration Task.
      3. In the Create Cloud Migration Task dialog box, select the cloud migration assessment task whose status indicates a success from the Associated Assessment Task drop-down list.
        Note After you select a cloud migration assessment task from the Associated Assessment Task drop-down list, ApsaraDB RDS automatically determines the values of the Migration Source Type, Source/DNS IP, Source Port, and Username parameters. You do not need to configure these parameters.
      4. Click Initiate Migration to Cloud. ApsaraDB RDS automatically starts the cloud migration task.
        Important During the cloud migration, the status of the destination RDS instance changes to Migrating Data In. You can read data from and write data to the source RDS instance. However, do not migrate data from or to the source RDS instance, restart the source RDS instance, or change the specifications of the source RDS instance.
    3. Switch the workloads of the source RDS instance over to the destination RDS instance.
      1. Click the link in the Cloud Migration Phase column to view the progress of the cloud migration task.
      2. When the cloud migration task enters the phase for incremental data synchronization, click the button for a switchover in the Actions column of the cloud migration task to switch the workloads of the source RDS instance to the destination RDS instance.
      3. In the Switchover dialog box, configure the source RDS instance to process only read requests. Alternatively, stop the connected application from writing data to the source RDS instance.
        Note To configure the source RDS instance to process only read requests, perform the following steps:
        1. Change the value of the rds_force_trans_ro_non_sup parameter of the RDS instance to on. For more information, see Modify the parameters of an ApsaraDB RDS for PostgreSQL instance.
        2. Execute the following statement to terminate all existing sessions:
          SELECT pg_terminate_backend(pid) FROM pg_stat_activity 
          WHERE usename not in ('replicator', 'monitor', 'pgsql', 'aurora') AND pid != pg_backend_pid();
      4. Select all check boxes and click Switch Now. Then, wait until the cloud migration is complete.

        After the workloads of the source RDS instance are switched over to the destination RDS instance, the page that is shown in the following figure is displayed.