Write and execute SQL statements
This topic describes how to write and execute an SQL statement in the SQL window.
Background
The SQL window of OceanBase Developer Center (ODC) provides a GUI for data processing. You can sort, filter, add, edit, and delete data, and execute database objects in the SQL window.
This topic provides an example of creating a table named employee in the odc_test database in the SQL window.
All data in this example is for reference only. You can replace the data as needed.
Prerequisites
You have applied for the query, export, and change permissions on the database.
If you do not have permissions on the database, you can click Database Permission Application on the Tickets tab to apply for the query, export, and change permissions.
Write SQL statements
In the odc_test project, click the database name test_data to go to the SQL development window.

In the SQL window, write the following SQL statement to create a table named
employee: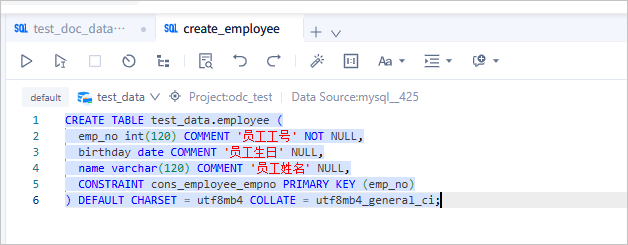
CREATE TABLE test_data.employee (
  emp_no int(120) COMMENT 'Employee ID' NOT NULL,
  birthday date COMMENT 'Birthday' NULL,
  name varchar(120) COMMENT 'Employee name' NULL,
  CONSTRAINT cons_employee_empno PRIMARY KEY (emp_no)) DEFAULT CHARSET = utf8mb4    COLLATE = utf8mb4_general_ci;
The syntax is as follows:
CREATE TABLE table_name (column_name column_type, column_name column_type,.......);The following table describes the parameters.
Parameter
Description
CREATE TABLE
The keyword that indicates the creation of a table with a specified name. You must have the permission to create tables.
table_name
The name of the table. The table name must conform to the identifier naming rules.
column_name column_type
The name and data type of each column in the table. Separate the tuples of multiple columns with commas (,).
In the SQL window, click
 to switch to another database.
 For more information about the toolbar of the SQL window, see SQL window editing area.
Execute SQL statements
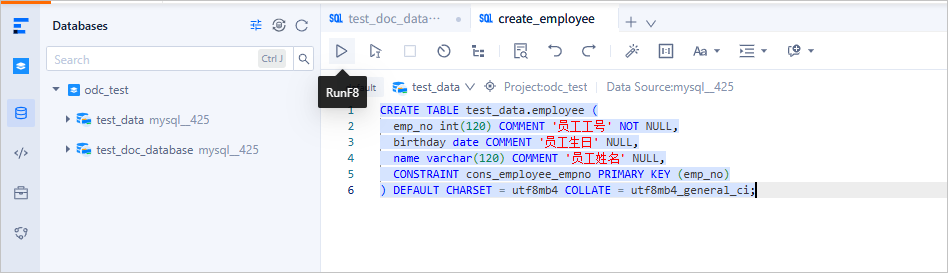
Click Run F8 in the toolbar to execute all SQL statements in the current SQL window.
Icon
Description
Run F8
Click this icon to run all SQL statements in the current SQL window. You can also press F8 to run all SQL statements in the current SQL window.
Run Current Statement F9
Click this icon to run all selected SQL statements or the statement in the line where the pointer is hovering. You can also press F9, or press Ctrl+Enter in Windows or Command+Enter in macOS to run the current statement.
Abort
Click this icon to abort the running statements.
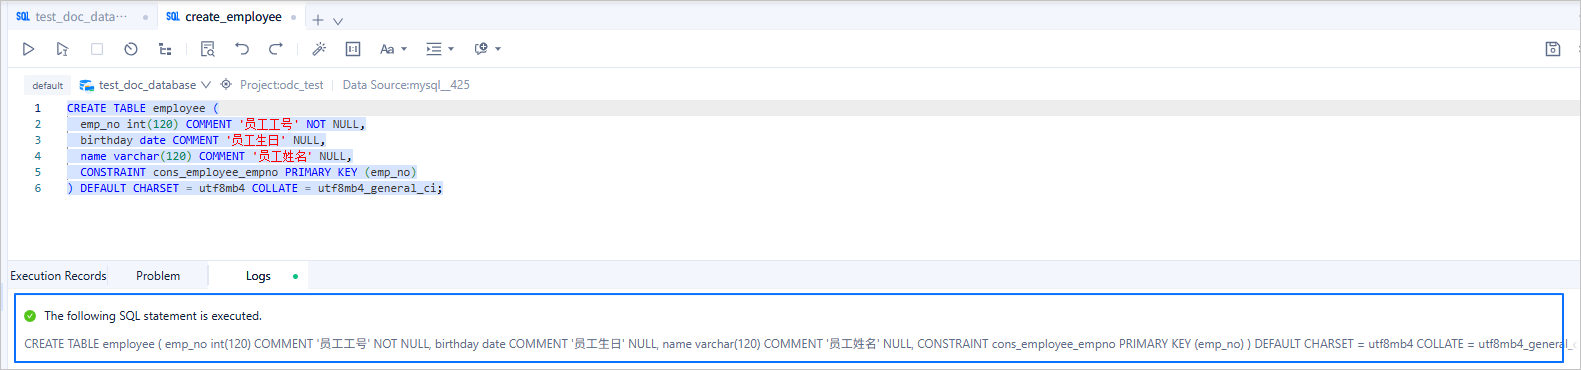
On the result tabs, view the execution status and result.
View data
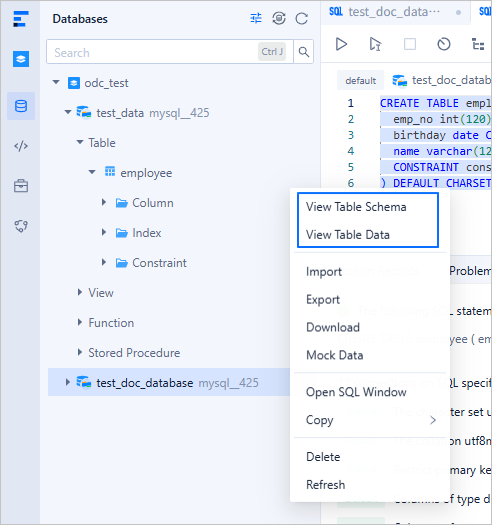
In the left-side navigation pane of the SQL window, click
 and check whether the employee table is successfully created in the test_data database in the odc_test project.
 Right-click the employee table or edit a SELECT statement in the SQL window to view the data in the table.
Click
to manually synchronize metadata such as table columns in the current project or data source. Right-click the name of a database and select Sync Metadata to manually synchronize metadata such as table columns in the current database.
 and check whether the employee table is successfully created in the test_data database in the odc_test project.
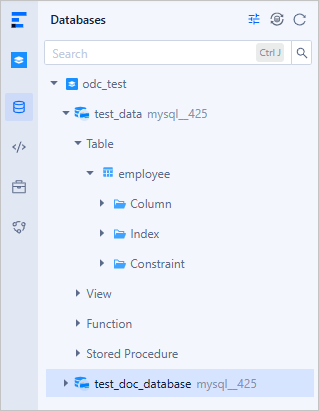
 to manually synchronize metadata such as table columns in the current project or data source.
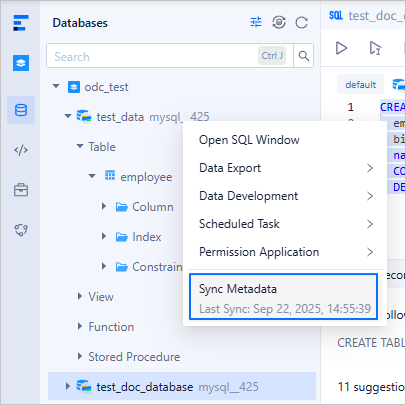
SQL scripts
In ODC, you can save edited scripts in the SQL window or anonymous block window and manage saved scripts on the Script tab.
Save a script
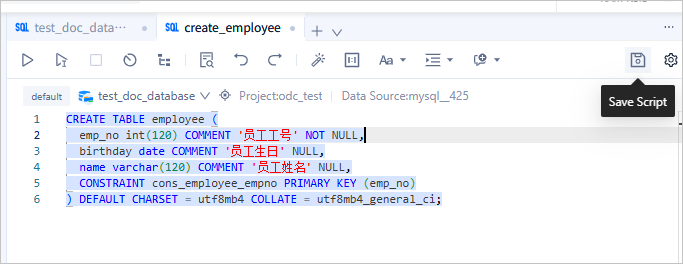
In the SQL window, save the script for creating the employee table.
Parameter | Example value |
Table name | employee |
Script name | create_employee |
In the SQL window, click the Save Script icon in the toolbar.
Specify the script name and click OK.

Manage scripts
In the left-side navigation pane of the SQL window, click
to go to the script management page. On the Script tab, you can edit, download, delete, and refresh a saved script, copy the path of a saved script, and upload a script from your local disk.
NoteYou can click the name of a script to directly reference its content in the SQL window.
You can also copy the path of a script to reference its content in the command-line window.
 to go to the script management page.

Snippets
ODC allows you to create snippets. You can query created snippets to learn the usage details about relevant statements during development.
Create a snippet
On the Code Snippet tab, you can save the snippet for creating the employee table.
Parameter | Example value |
Table name | employee |
Snippet name | create_table |
In the left-side navigation pane of the SQL window, click
. On the Code Snippet tab, click the plus sign (+) to create a snippet. On the Create Snippet page, specify the snippet information and click OK.
NoteIn ODC V4.2.3 and later, the maximum snippet length allowed is changed to 64 KB.
 . On the Code Snippet tab, click the plus sign (+) to create a snippet.

Manage snippets
On the Code Snippet tab, you can copy, edit, delete, and refresh a saved snippet.
