SQL plan task
Background
OceanBase Developer Center (ODC) can periodically execute SQL scripts created by users to complete database development and O&M tasks as required by the users. For example, ODC can periodically execute stored procedures, backup, as well as database and table schema synchronization.
After you create an SQL plan task in the Tickets panel, the administrator will approve the task in the task list. You can view the task information and approval status in the task list.
This topic describes how to create and manage SQL plan tasks in ODC.
Create an SQL plan task
Example: Create an SQL plan task to query data from the employee table on the 2nd and 29th of each month.
Parameter | Example value |
Data source | mysql_4.2.0 |
Database name | odc_test |
Table name | employee |
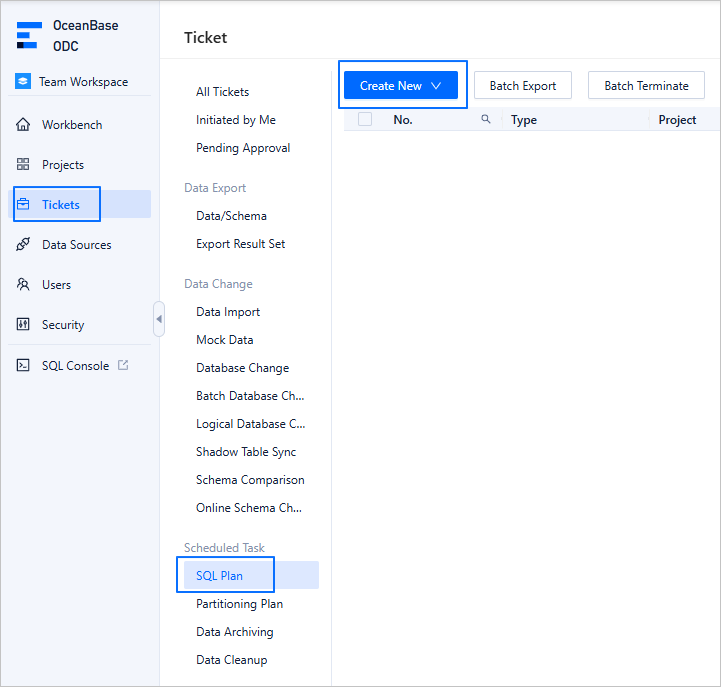
In the SQL development window, choose Tasks > SQL Plan > Create SQL Plan.
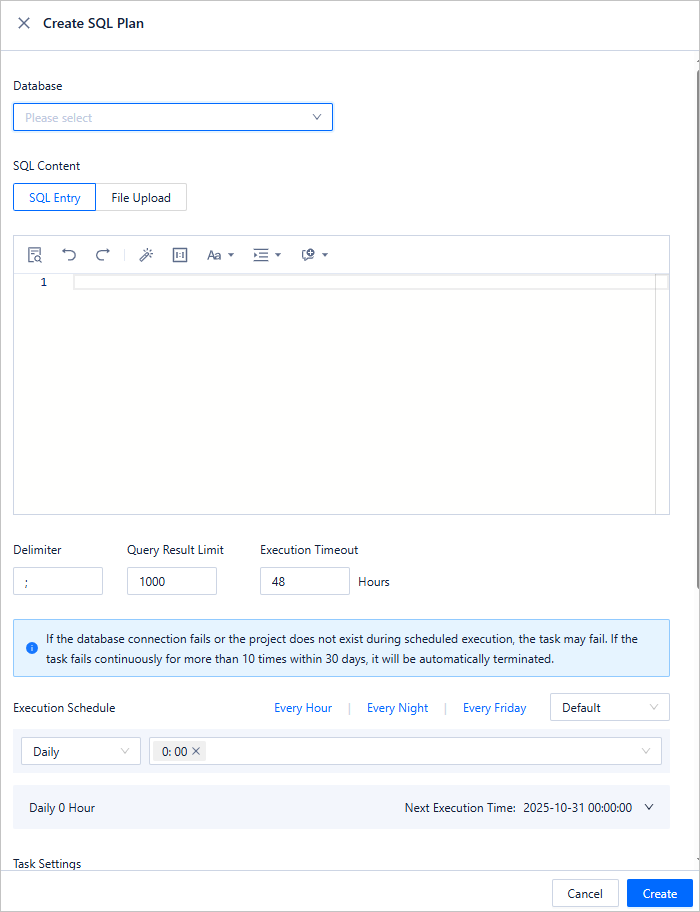
In the Create SQL Plan panel, configure the following parameters.
Parameter
Description
Database
Select the target database.
SQL Content
You can specify SQL content in either of the following ways:
SQL Entry: This is the default way to specify SQL content. You can directly write the SQL script in the editing area.
The maximum size of the SQL statements that can be entered in the SQL window is limited to 10 MB. If the content to be entered is more than 10 MB in size, you can directly upload an attachment.
You can click IN Value Conversion to convert the batch copied data into the in('A','B') format.
Column values are separated with line breaks.
Row values are separated with spaces or tabs.
Upload File: Click the file pool to go to the file explorer and select the file to be imported. You can also directly drag the file to the file pool to upload it.
You can upload up to 500 files. The total file size cannot exceed 256 MB.
By default, files are sorted by the order in which they were uploaded. You can drag and drop them to change the order. Tasks are executed in the file order.
Only SQL files suffixed with .sql are supported.
Delimiter
Delimiters are supported.
Query Result Limit
You can set the maximum number of rows allowed in the query result. Value range: 1 to 1,000,000.
Execution Timeout Value
Specify the value in Execution Timeout Value in hours. Default value: 48. Maximum value: 480.
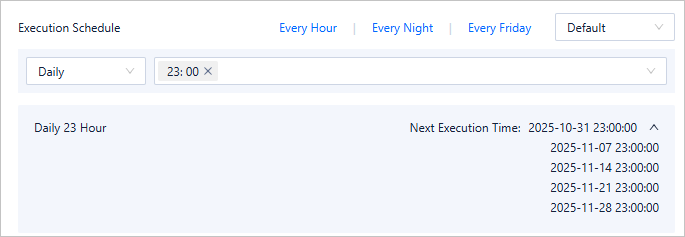
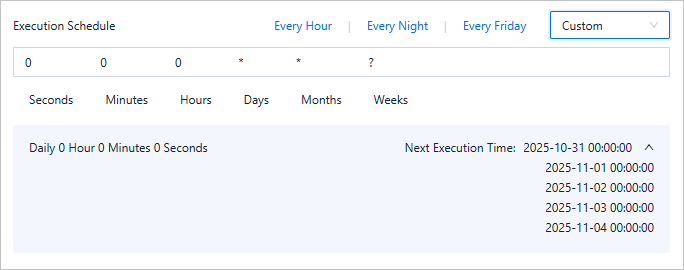
Scheduled Period
You can directly select a predefined option of Every Hour, Every Night, or Every Friday.
You can also set the scheduled execution period in either of the following modes:
Default: You can set the scheduled execution period on a daily, weekly, or monthly basis as needed.
Custom: You can set the scheduled execution period by specifying the second, minute, hour, day, month, or week as needed.
Task Settings
Two options are supported for handling task errors:
Abort Task: This is the default option. When you select this option, the task is aborted if an error occurs when you run the script.
Ignore Error and Continue: When you select this option, the system skips the statement where an error occurs and continues to execute other statements in the script.
Two options are supported for handling task execution timeouts:
Initiate Another Task When Current Task Is Completed
Ignore Current Task Status and Periodically Initiate New Tasks
Remarks (optional)
You can enter a description of up to 200 characters.
Click Create.
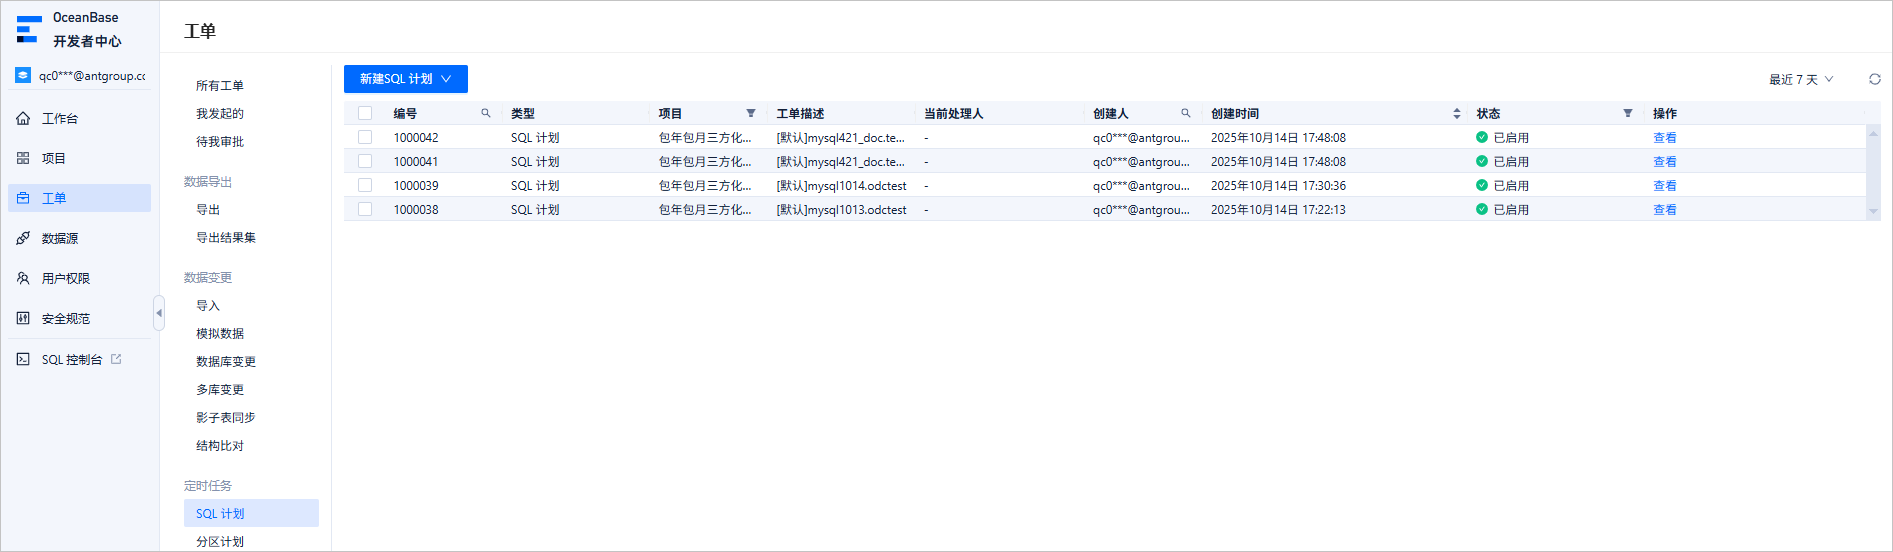
View SQL plan tasks
Task list
The task list displays the tasks created in the last 336 hours.
After a task is generated, the Tickets panel automatically appears. In the SQL Plan list, you can view the task information and approval status, and download the exported data structure file.

You can view the following information in the SQL plan task list. You can also filter and sort the tasks in the list.
Parameter | Description |
No. | The task ID. You can click the search icon |
Connection | The name of the database connection to which the task belongs. You can click the filter icon |
Execution Period | - |
Next Execution Time | The time when the SQL plan task is to be executed the next time. |
Created By | The user who created the task. You can click the search icon |
Updated At | The date and time when the task was generated. |
Status | The current status of the task. ODC provides different management operations for tasks in different states. |
Actions | The task management operations, including View, Approve/Reject, Edit, and Enable/Disable.
|


Task information
Choose Tickets > SQL Plan. On the task list tab, click View in the Actions column of the target task to go to its details page.
In the Ticket Details panel, click the Basic Information tab to view basic task information and task settings.
Parameter
Description
Basic task information
You can view the task status, task ID, task type, connection, remarks, creator, and creation time.
Task settings
You can view the SQL content, scheduled execution period, next execution time, delimiter, query result limit, error handling method, and execution timeout period.
Execution records
In the Ticket Details panel, click the Execution Records tab to view information such as the task ID, database, creation time, task status, and supported actions.
Operating records
In the Ticket Details panel, click the Operating Records tab to view information such as the approval status and approval records.
Import SQL plan tasks
You can migrate instances as well as their SQL plan tasks from ApsaraDB for OceanBase to OceanBase Cloud.
Step 1: Export SQL plan tasks from ApsaraDB for OceanBase
Log on to the ApsaraDB for OceanBase console. Click Data Development in the left-side navigation pane.
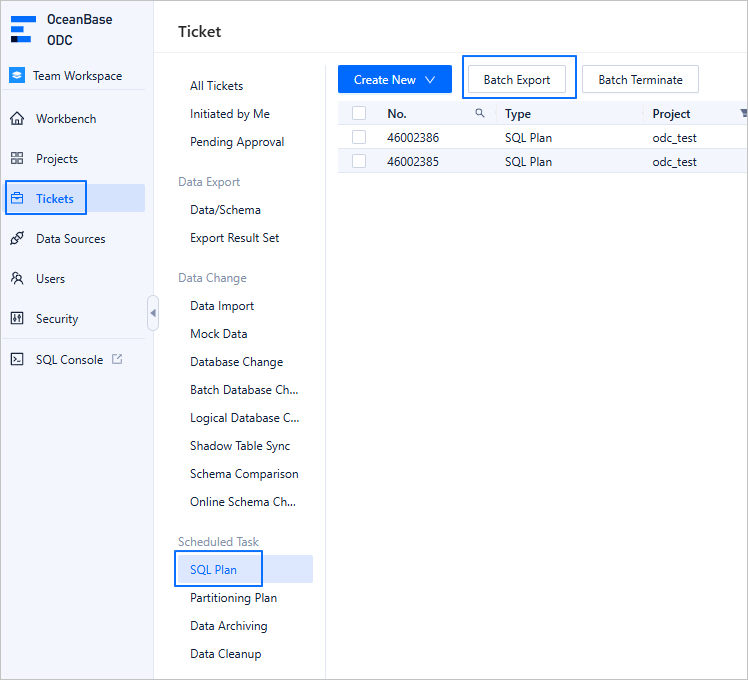
Choose Tickets > SQL Plan. On the SQL plan page, click Batch Export.

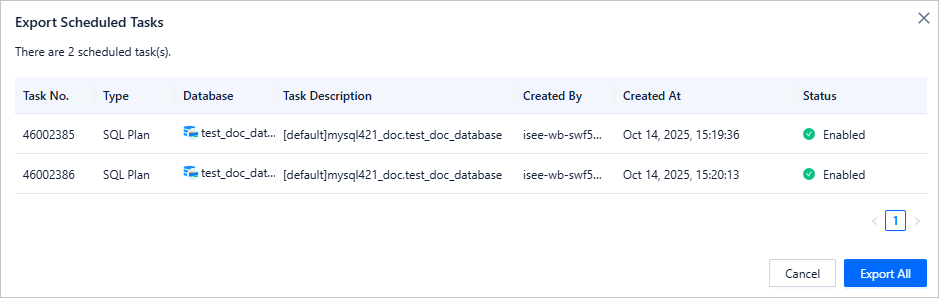
On the scheduled task export page, select the target tasks and click Export All.
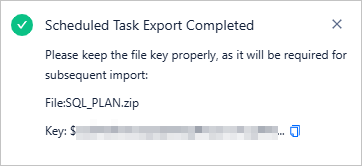
After the export, copy the key in the pop-up window and keep it properly. This key is required when you import the SQL plan tasks later.
Step 2: Import SQL plan tasks to OceanBase Cloud
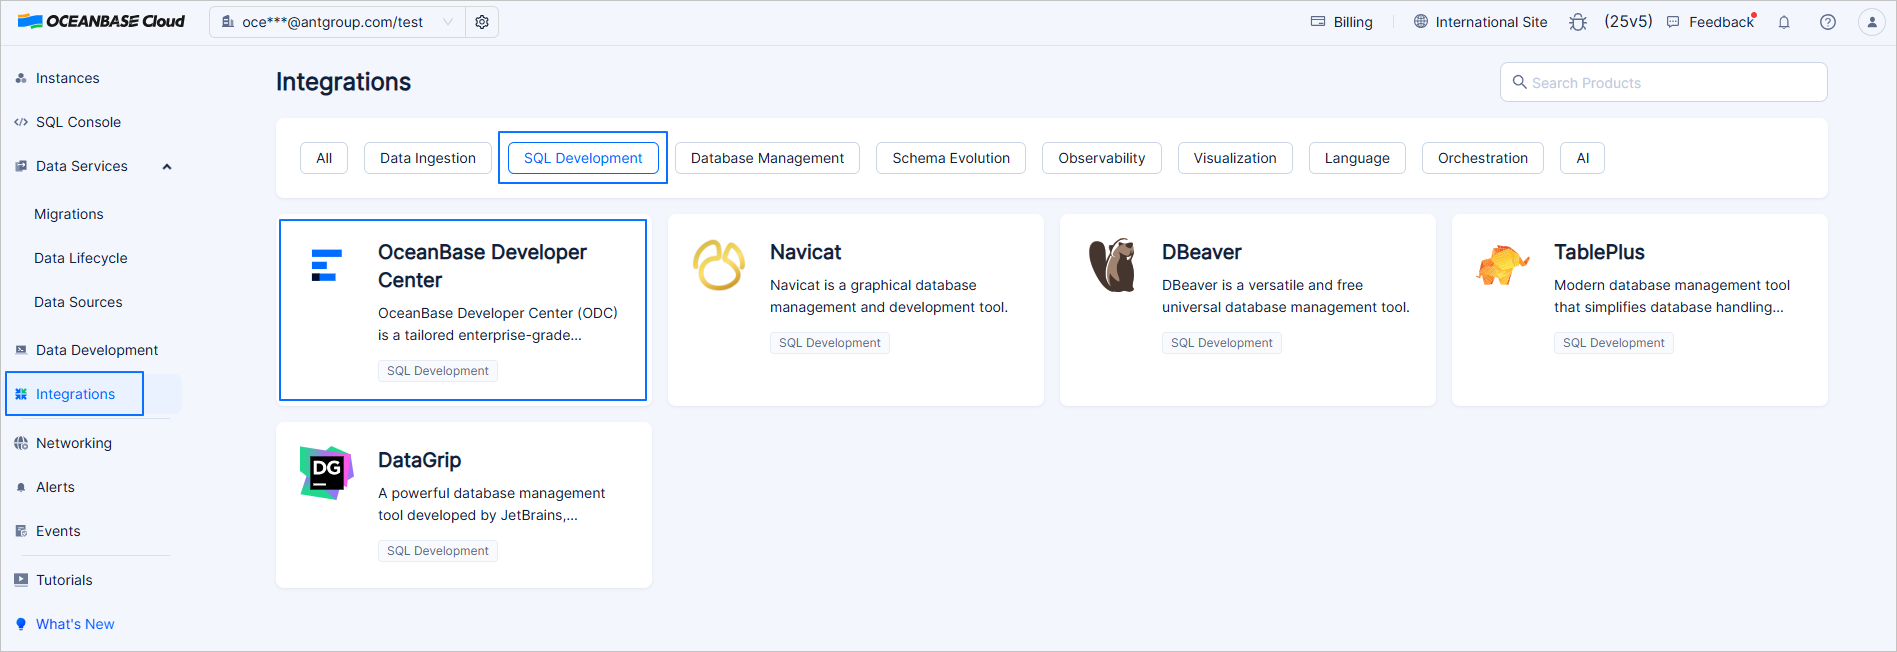
In the left-side navigation pane of the ApsaraDB for OceanBase console, click Integrations and then choose SQL Development > OceanBase Developer Center (ODC).
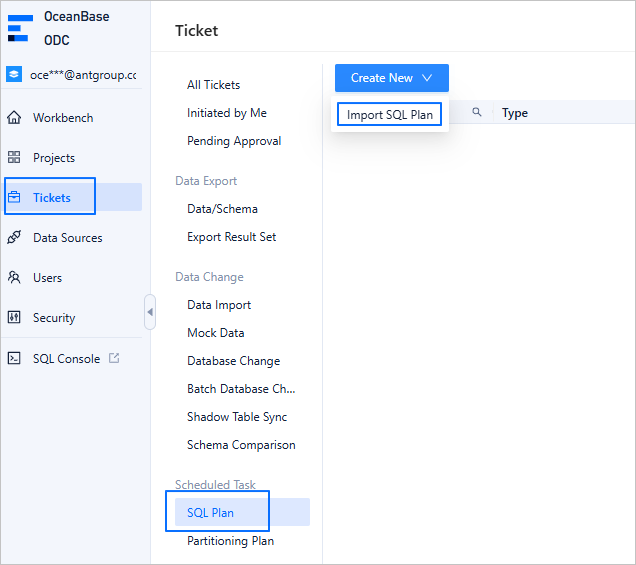
In ODC, choose Tickets > SQL Plan. On the SQL plan page, select the target tickets and click Import SQL Plan.
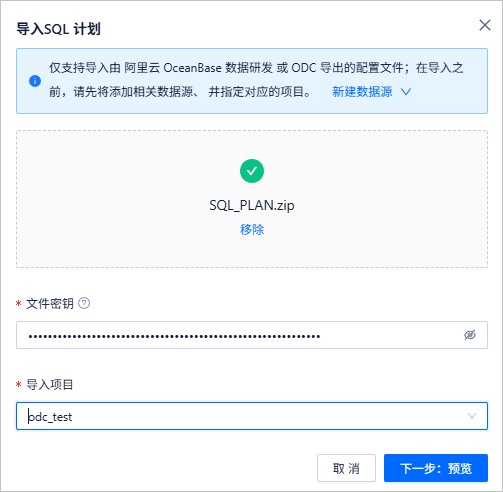
On the SQL plan import page, add the .zip file exported in Step 1, enter the file key in File Key, select the target project, and click Next: Preview.
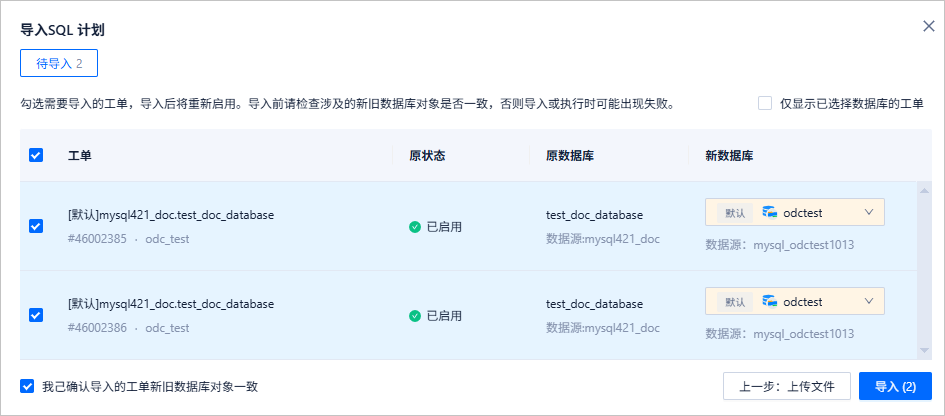
On the preview page, select the new target database, select I confirm the consistency of database objects between the old and new databases in the import ticket, and click Import.
After the import, you can view the imported SQL plans in the SQL plan list.