This topic describes how to use Alibaba Cloud Realtime Compute for Apache Flink to subscribe to full data of AnalyticDB for PostgreSQL.
Background information
AnalyticDB for PostgreSQL is a massively parallel processing (MPP) data warehouse service. It provides real-time analysis for large amounts of data. Realtime Compute for Apache Flink is a real-time big data analytics platform that is built based on Apache Flink. Realtime Compute for Apache Flink provides various upstream and downstream connectors to meet the requirements of different business scenarios and provides efficient and flexible real-time computing services. Realtime Compute for Apache Flink can read data from AnalyticDB for PostgreSQL. This fully utilizes the benefits of AnalyticDB for PostgreSQL and improves the efficiency and accuracy of data analytics.
Limits
Realtime Compute for Apache Flink cannot read data from AnalyticDB for PostgreSQL in Serverless mode.
Only Realtime Compute for Apache Flink that uses Ververica Runtime (VVR) 6.0.0 or later supports the AnalyticDB for PostgreSQL connector.
Only Realtime Compute for Apache Flink that uses VVR 8.0.1 or later supports AnalyticDB for PostgreSQL V7.0.
NoteIf you use a custom connector, perform operations by following the instructions that are described in Manage custom connectors.
Prerequisites
A fully managed Flink workspace is created. For more information, see Activate Realtime Compute for Apache Flink.
An AnalyticDB for PostgreSQL instance is created. For more information, see Create an instance.
The AnalyticDB for PostgreSQL instance and the fully managed Flink workspace reside in the same virtual private cloud (VPC).
Step 1: Configure an AnalyticDB for PostgreSQL instance
- Log on to the AnalyticDB for PostgreSQL console.
Add the CIDR block of the fully managed Flink workspace to an IP address whitelist of the AnalyticDB for PostgreSQL instance. For more information, see Configure an IP address whitelist.
Click Log On to Database. For more information about how to connect to a database, see Client connection.
Create a dimension table named adbpg_dim_table on the AnalyticDB for PostgreSQL instance and insert 50 rows of data into the table.
Sample statements:
-- Create a dimension table named adbpg_dim_table.
CREATE TABLE adbpg_dim_table(
id int,
username text,
PRIMARY KEY(id)
);

-- Insert 50 rows of data into the adbpg_dim_table table. The value of the id field is an integer from 1 to 50, and the value of the username field is the text for the current number of rows that is followed by the username string.
INSERT INTO adbpg_dim_table(id, username)
SELECT i, 'username'||i::text
FROM generate_series(1, 50) AS t(i);
Create a result table named adbpg_sink_table to which Realtime Compute for Apache Flink writes result data.
CREATE TABLE adbpg_sink_table(
  id int,
  username text,
  score int
);
Step 2: Create a Realtime Compute for Apache Flink draft
Log on to the Realtime Compute for Apache Flink console. On the Fully Managed Flink tab, find the workspace that you want to manage and click Console in the Actions column.
In the left-side navigation pane, click SQL Editor. In the upper-left corner of the SQL Editor page, click New. In the New Draft dialog box, click Blank Stream Draft on the SQL Scripts tab and click Next.
In the New Draft dialog box, configure the parameters that are described in the following table.
Parameter
Description
Example
Name
The name of the draft that you want to create.
NoteThe draft name must be unique in the current project.
adbpg-test
Location
The folder in which the code file of the draft is saved.
You can also click the
 icon to the right of an existing folder to create a subfolder.
 Draft
Engine Version
The engine version of Flink that is used by the draft. For more information about engine versions, version mappings, and important time points in the lifecycle of each version, see Engine version.
vvr-6.0.7-flink-1.15
Click Create.
Step 3: Write draft code and deploy the draft
Copy the following code of a draft to the code editor:
--- Create a Datagen source table.
CREATE TEMPORARY TABLE datagen_source (
 id INT,
 score INT
) WITH (
 'connector' = 'datagen',
 'fields.id.kind'='sequence',
 'fields.id.start'='1',
 'fields.id.end'='50',
 'fields.score.kind'='random',
 'fields.score.min'='70',
 'fields.score.max'='100'
);

-- Create an AnalyticDB for PostgreSQL dimension table.
CREATE TEMPORARY TABLE dim_adbpg(
 id int,
 username varchar,
 PRIMARY KEY(id) not ENFORCED
) WITH(
 'connector' = 'adbpg',
 'url' = 'jdbc:postgresql://gp-2ze****3tysk255b5-master.gpdb.rds.aliyuncs.com:5432/flinktest',
 'tablename' = 'adbpg_dim_table',
 'username' = 'flink****test',
 'password' = '*******',
 'maxJoinRows'='100',
 'maxRetryTimes'='1',
 'cache'='lru',
 'cacheSize'='1000'
);

-- Create an AnalyticDB for PostgreSQL result table.
CREATE TEMPORARY TABLE sink_adbpg (
  id int,
  username varchar,
  score int
) WITH (
  'connector' = 'adbpg',
  'url' = 'jdbc:postgresql://gp-2ze****3tysk255b5-master.gpdb.rds.aliyuncs.com:5432/flinktest',
  'tablename' = 'adbpg_sink_table',
  'username' = 'flink****test',
  'password' = '******',
  'maxRetryTimes' = '2',
  'batchsize' = '5000',
  'conflictMode' = 'ignore',
  'writeMode' = 'insert',
  'retryWaitTime' = '200'
);

-- Insert the join result of the dimension table and the source table into the AnalyticDB for PostgreSQL result table.
INSERT INTO sink_adbpg
SELECT ts.id,ts.username,ds.score
FROM datagen_source AS ds
 join
dim_adbpg FOR SYSTEM_TIME AS OF PROCTIME() AS ts
on ds.id = ts.id;
Modify the parameters that are described in the following table based on your business requirements.
Parameter
Required
Description
URL
Yes
The Java Database Connectivity (JDBC) URL that is used to connect to the AnalyticDB for PostgreSQL instance. The JDBC URL is in the
jdbc:postgresql://<Internal endpoint>:<Port number>/<Database name>format. Example:jdbc:postgresql://gp-xxxxxx.gpdb.cn-chengdu.rds.aliyuncs.com:3432/postgres.tablename
Yes
The name of the table in the AnalyticDB for PostgreSQL database.
username
Yes
The name of the database account that is used to connect to the AnalyticDB for PostgreSQL database.
password
Yes
The password of the AnalyticDB for PostgreSQL database account.
NoteFor more information about the parameters and data type mappings, see AnalyticDB for PostgreSQL connector.
In the upper-right corner of the SQL Editor page, click Validate to perform a syntax check.
In the upper-right corner of the SQL Editor page, click Deploy.
On the Deployments page, find the desired deployment and click Start in the Actions column.
Step 4: Query the data that Realtime Compute for Apache Flink writes to the result table
- Log on to the AnalyticDB for PostgreSQL console.
Click Log On to Database. For more information about how to connect to a database, see Client connection.
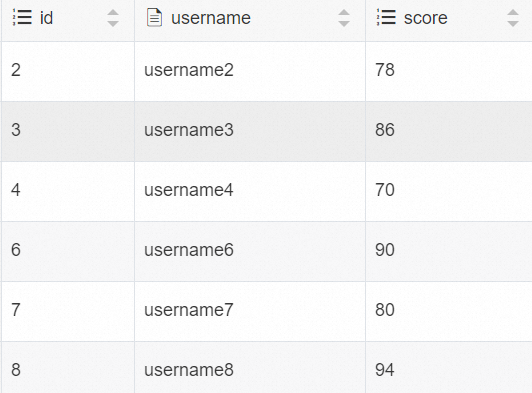
Execute the following statement to query the data that Realtime Compute for Apache Flink writes to the result table:
SELECT * FROM adbpg_sink_table;