Rolling out a new microservices version safely requires validating it in production without affecting all users at once. End-to-end canary releases route a controlled percentage of traffic to the new version across the entire call chain. You can observe real behavior before committing to a full rollout.
This guide covers:
Deploying application services and traffic lane rules with Argo CD
Verifying that traffic splits correctly between versions
Publishing additional versions by modifying YAML resources in your Git repository
Rolling back when a canary version is unhealthy
Why service mesh traffic lanes
With native Kubernetes canary deployments, the traffic percentage is coupled to the replica count. Routing 10% of traffic to a canary requires specific replica ratios, and autoscaling breaks the balance.
Service Mesh (ASM) traffic lanes decouple traffic routing from replica count. You can route 1% of traffic to a canary without maintaining 100 pods. ASM uses the ASMSwimLaneGroup and ASMSwimLane CustomResourceDefinitions (CRDs) to isolate specific versions of services into independent runtime environments. This enables fine-grained, percentage-based traffic splitting regardless of how many replicas are running.
Combined with Argo CD's GitOps model, this approach enables:
Declarative resource management: Define application resources (Deployments, Services) and traffic management resources (VirtualServices, Gateways, DestinationRules) as YAML in a Git repository.
Automated synchronization: Argo CD detects changes in Git and synchronizes them to the cluster, either automatically or on demand.
End-to-end version isolation: Traffic stays within a single version across an entire chain of microservices, not just a single service.
For more information, see Traffic lanes overview.
Prerequisites
Before you begin, make sure that you have:
An ASM instance of Enterprise Edition or Ultimate Edition, version 1.20.6.27 or later. See Create an ASM instance and Update an ASM instance
A Container Service for Kubernetes (ACK) cluster added to the ASM instance. See Add a cluster to an ASM instance
Argo CD installed and an ingress gateway created (Steps 1 through 3 in Integrate Argo CD with ASM to implement GitOps)
A kubectl client connected to the cluster. See Obtain the kubeconfig file of a cluster and use kubectl to connect to the cluster
Step 1: Deploy the application and traffic lane rules
Create an Argo CD application that synchronizes Deployment, Service, and traffic lane resources from a Git repository to your cluster.
On the Argo CD UI, click NEW APP and configure the following parameters.
Parameter Description Application Name Enter mock.SYNC POLICY Select Automaticto synchronize resource definitions from Git whenever they change. SelectPRUNE RESOURCESto delete resources whose definitions no longer exist in Git.Repository URL Enter https://github.com/AliyunContainerService/asm-labs.git. To customize the YAML resources, fork this repository first.Revision The Git branch or tag to synchronize from. Enter argocd-asm.Path The directory in the repository that contains the resource definitions. Enter argo-cd/swimlane.Cluster URL The Kubernetes API server endpoint to synchronize to. Enter https://kubernetes.default.svc(the cluster where Argo CD is installed).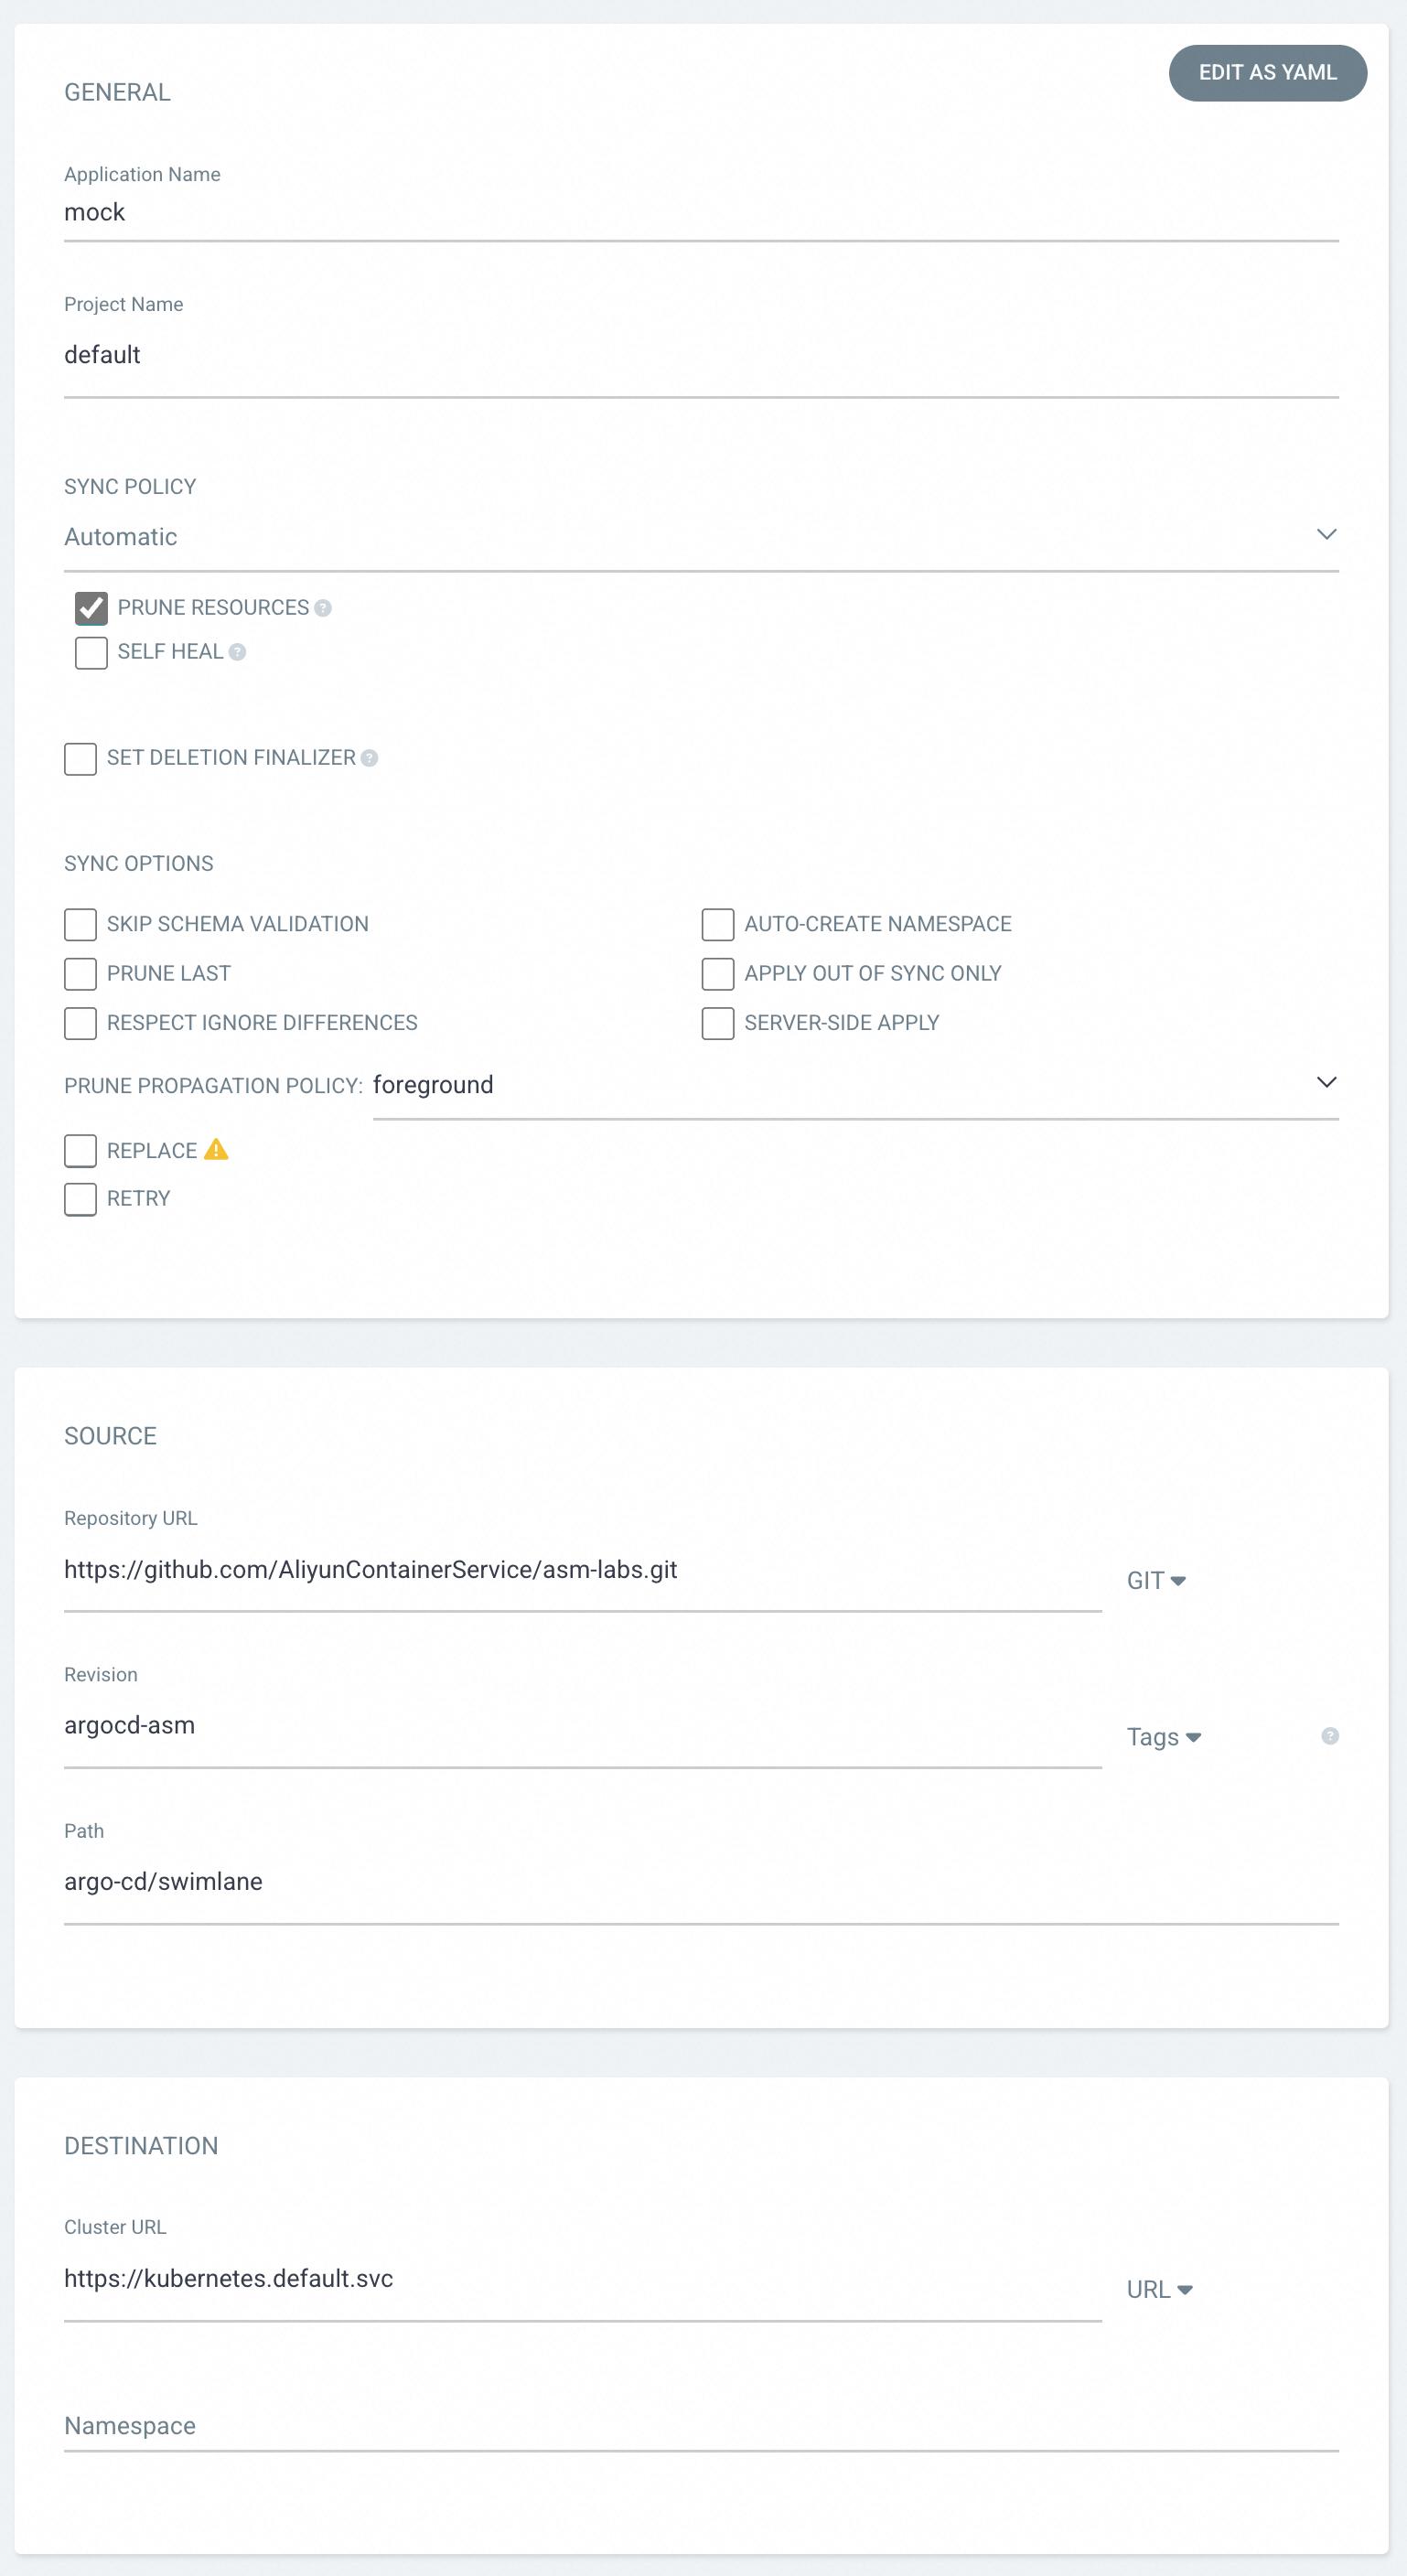
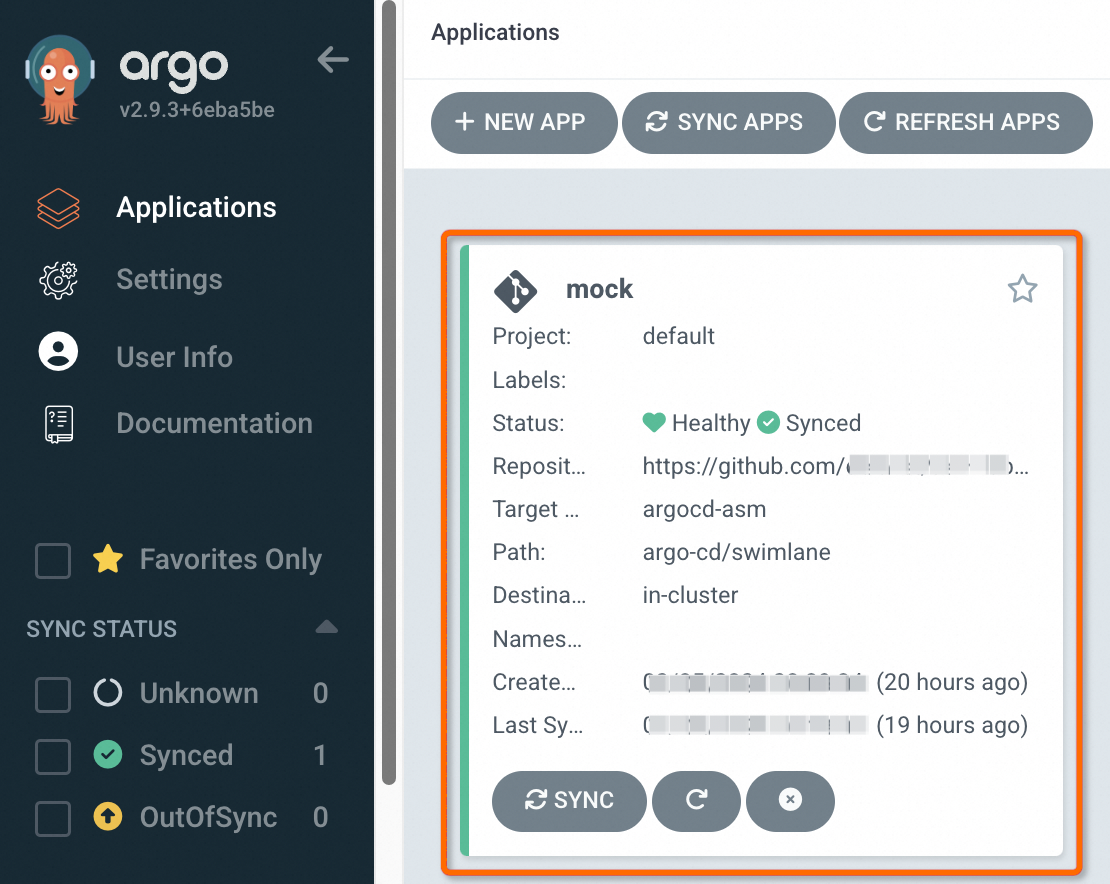
Click CREATE at the top of the page. On the Applications page, verify that the mock application appears.
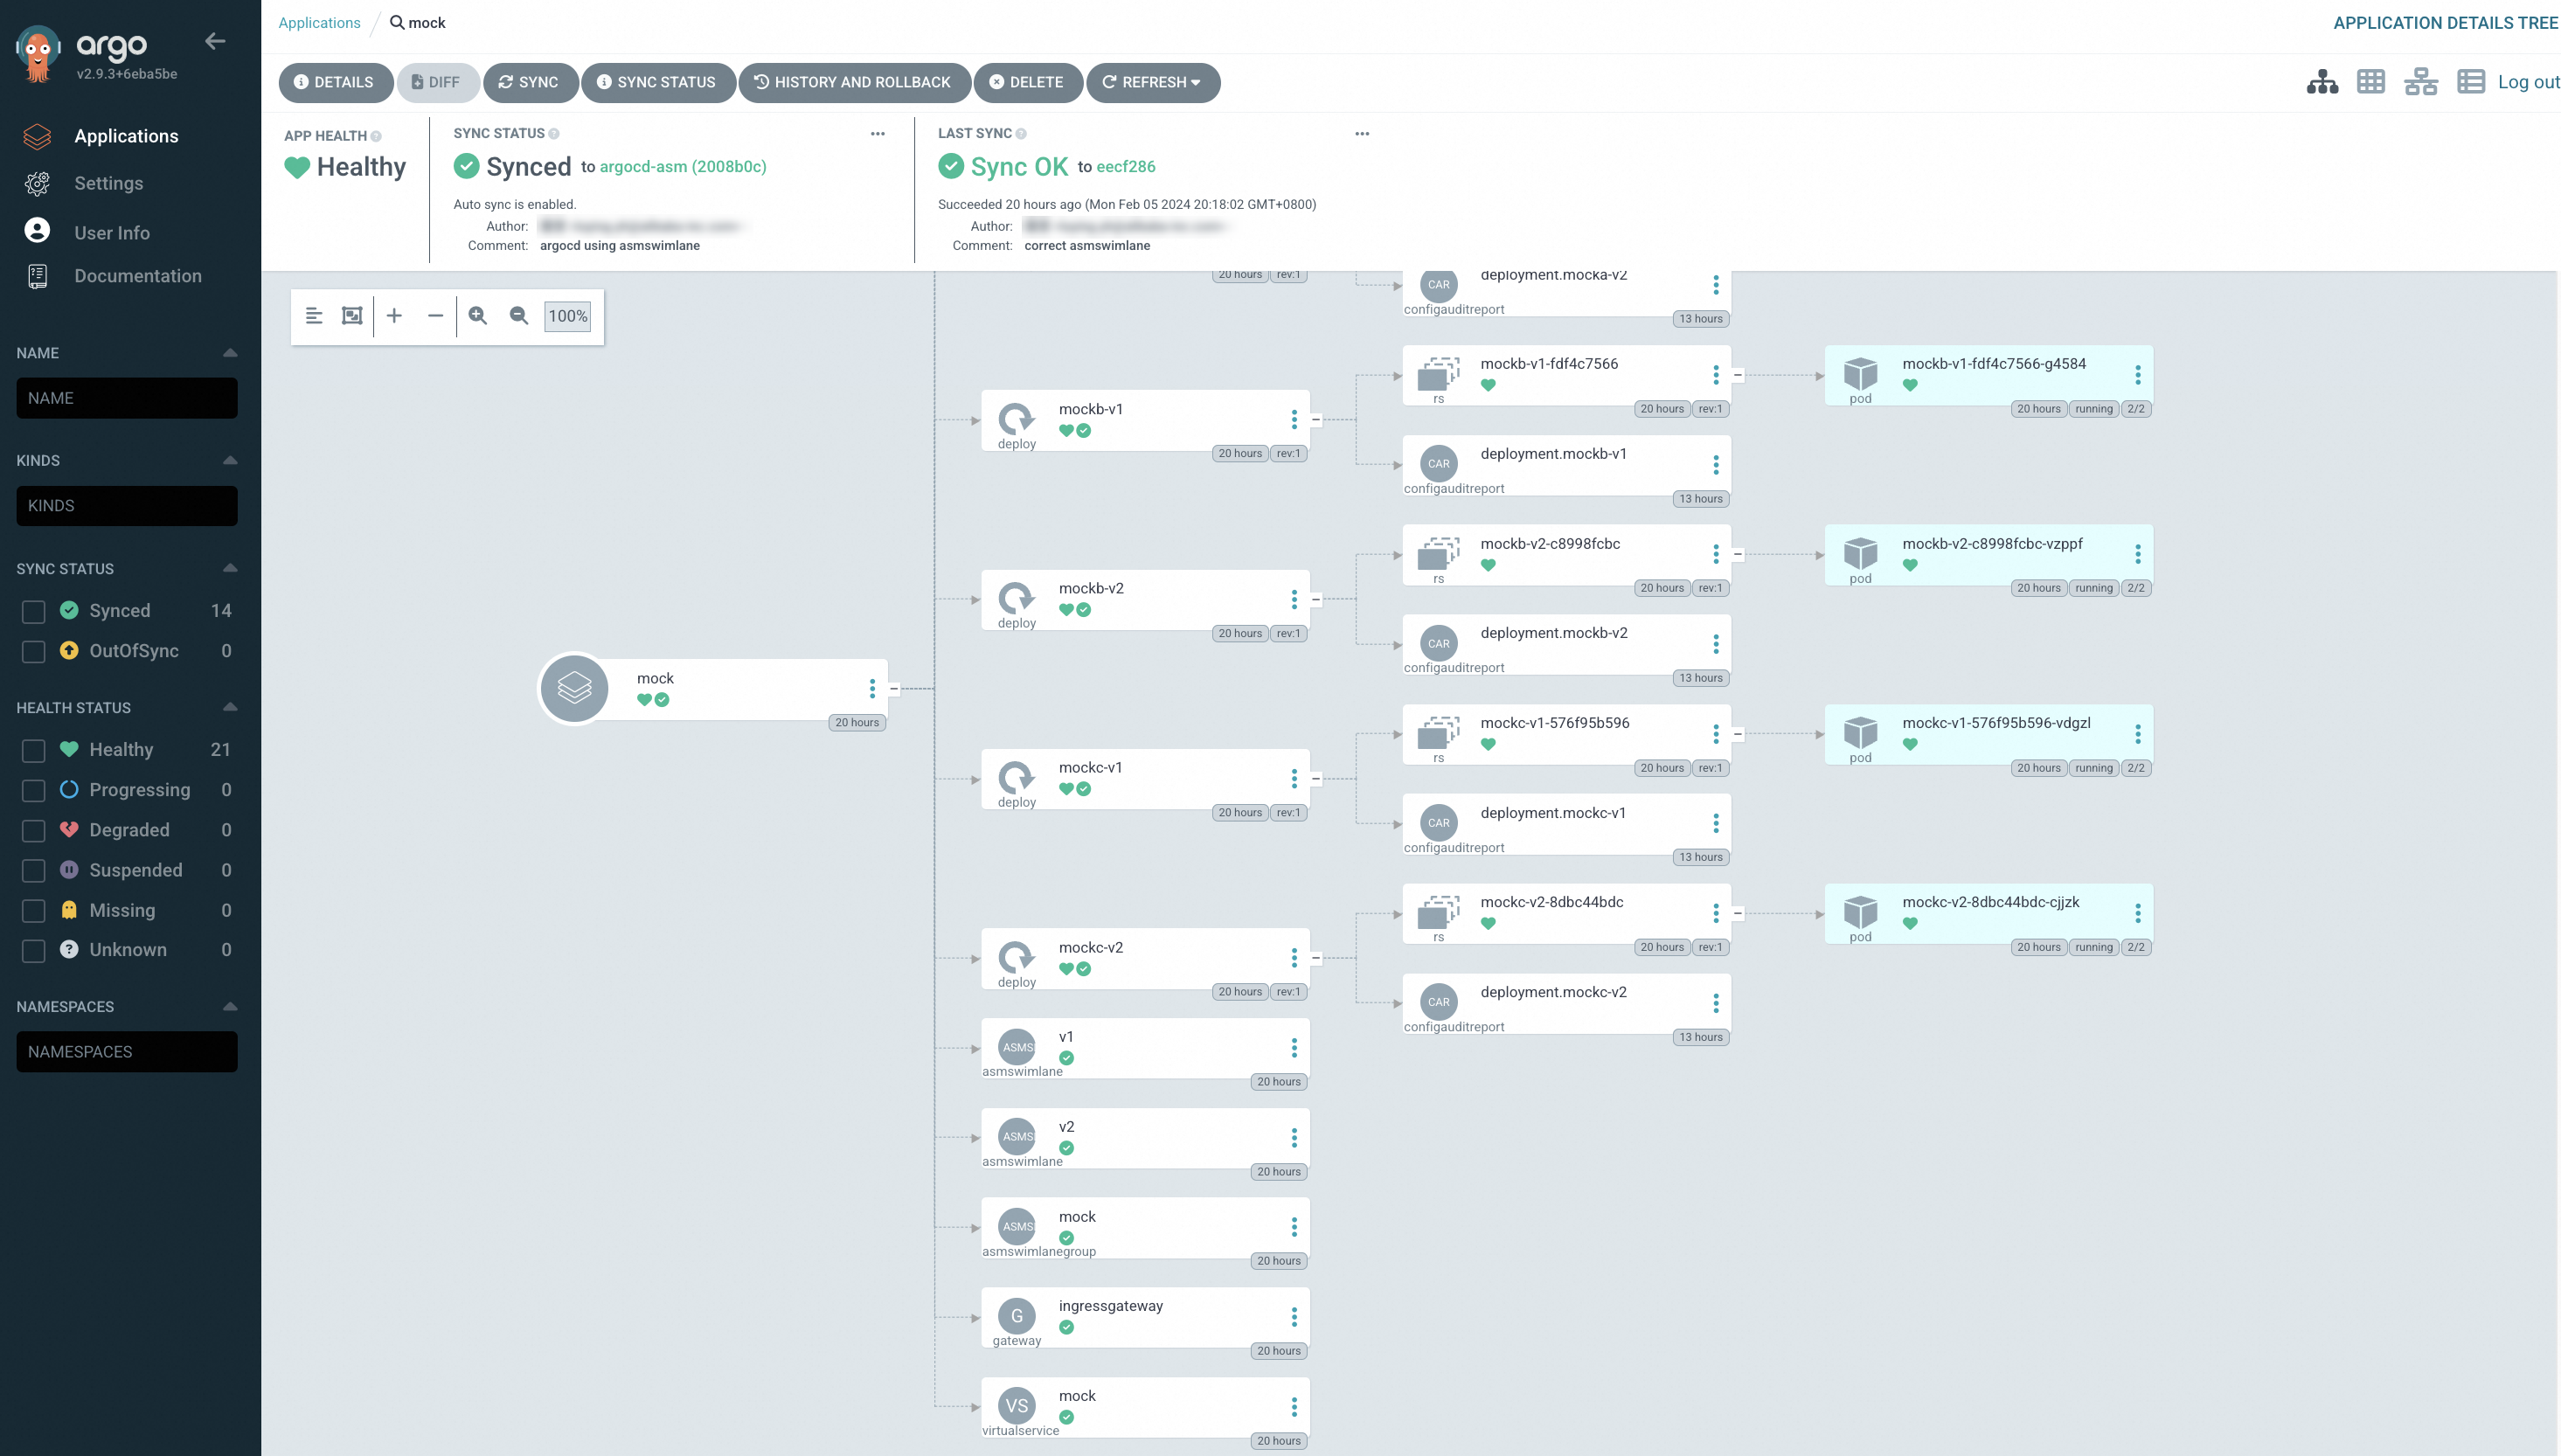
Click the mock application to view the synchronization status of all resources. The resource view shows Deployments, Services, VirtualServices, Gateways, ASMSwimLaneGroup, and ASMSwimLane resources, all synchronized from the Git repository.
Step 2: Verify the end-to-end canary release
The sample application uses ASMSwimLaneGroup and ASMSwimLane CRDs to isolate v1 and v2 of three chained services. A VirtualService on the ingress gateway splits traffic between the two versions at approximately 1:1. Verify this by sending repeated requests.
Get the public IP address of the ingress gateway from the ASM console. For details, see the "Step 2: Obtain the IP address of the ASM ingress gateway" section in Integrate KServe with ASM to implement inference services based on cloud-native AI models.
Set the ingress gateway IP as an environment variable. Replace
<gateway-ip>with the IP address from the previous step.export ASM_GATEWAY_IP=<gateway-ip>Send 100 requests to the ingress gateway: Expected output: Two things confirm the end-to-end canary release is working:
Traffic splitting: Requests alternate between v1 and v2 at roughly a 1:1 ratio.
End-to-end isolation: Each request stays within a single version across the entire call chain (mocka -> mockb -> mockc). A v1 request never crosses into v2 services, and vice versa.
for i in {1..100}; do curl http://${ASM_GATEWAY_IP}/mock; echo ''; sleep 1; done;-> mocka(version: v2, ip: 10.0.239.73)-> mockb(version: v2, ip: 10.0.239.136)-> mockc(version: v2, ip: 10.0.239.139) -> mocka(version: v1, ip: 10.0.239.75)-> mockb(version: v1, ip: 10.0.239.138)-> mockc(version: v1, ip: 10.0.239.137) -> mocka(version: v2, ip: 10.0.239.73)-> mockb(version: v2, ip: 10.0.239.136)-> mockc(version: v2, ip: 10.0.239.139) -> mocka(version: v1, ip: 10.0.239.75)-> mockb(version: v1, ip: 10.0.239.138)-> mockc(version: v1, ip: 10.0.239.137) ...
Publish a new version
To roll out a new version, update the YAML resources in your Git repository. Argo CD detects the changes and synchronizes them to the cluster.
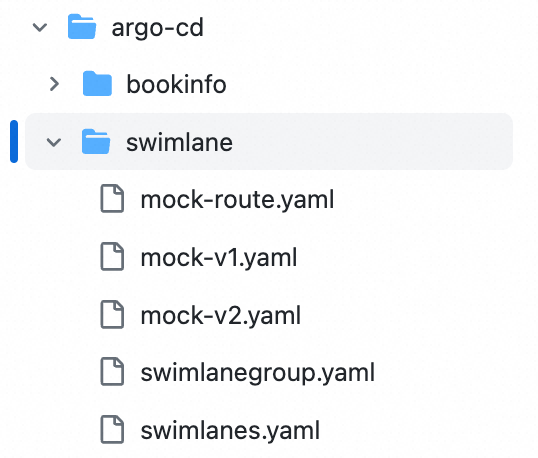
The sample repository at argo-cd/swimlane contains the following files:
| File | Purpose |
|---|---|
| mock-v1.yaml, mock-v2.yaml | Deployments for v1 and v2 of the mocka, mockb, and mockc services |
| swimlanegroup.yaml | Lane group definition. Specifies the services that need traffic lanes (services field) and the Istio gateways through which those services are accessed (ingress field). |
| swimlanes.yaml | Lane definitions. Each ASMSwimLane CRD uses a labelSelector to associate pods of a specific version with a lane. |
| mock-route.yaml | Istio Gateway and VirtualService that control how the ingress gateway routes traffic to each lane |
To modify these files, fork theargocd-asmbranch ofhttps://github.com/AliyunContainerService/asm-labs.gitand use your forked repository URL in Step 1.
Add v3 with a 60:30:10 traffic split
This example adds v3 of the mocka, mockb, and mockc services. It adjusts traffic weights to route 60% to v1, 30% to v2, and 10% to v3. Starting with a small percentage lets you validate v3 under limited production load before increasing its share.
Make the following three changes in your forked Git repository:
1. Create argo-cd/swimlane/mock-v3.yaml
This file defines the v3 Deployments for all three services. Each Deployment uses the labels version: v3 and ASM_TRAFFIC_TAG: v3 to associate its pods with the v3 traffic lane.
2. Update argo-cd/swimlane/swimlanes.yaml
Add an ASMSwimLane CRD named v3, associated with the mock lane group. The labelSelector maps pods with version: v3 to this lane.
3. Update argo-cd/swimlane/mock-route.yaml
Add the v3 subset as a route destination and set the traffic weights. The subset value matches the ASMSwimLane name. In this example, v1 gets 60%, v2 gets 30%, and v3 gets 10%.
After you commit and push these changes, Argo CD synchronizes them to the cluster. Repeat the verification in Step 2 to confirm that traffic splits across v1, v2, and v3 at approximately the configured ratio.
Progressively shift traffic to the new version
To promote v3 gradually, update the weight values in mock-route.yaml and push each change. The weights must add up to 100.
| Stage | v1 weight | v2 weight | v3 weight | When to proceed |
|---|---|---|---|---|
| Initial canary | 60 | 30 | 10 | After deploying v3 |
| Increase v3 share | 40 | 30 | 30 | After verifying v3 is healthy under 10% load |
| Shift majority to v3 | 10 | 10 | 80 | After verifying v3 under 30% load |
| Full promotion | 0 | 0 | 100 | After confirming v3 is production-ready |
Monitor error rates, latency, and resource usage at each stage before increasing the v3 weight. If v3 shows degraded performance, reduce its weight or set it to 0 to roll back.
Roll back a canary version
If the canary version is unhealthy, roll back by reverting the traffic weights in mock-route.yaml.
Update
mock-route.yamlto set the canary version weight to0and redistribute traffic to stable versions. For example, to roll back v3:route: - destination: host: mocka.default.svc.cluster.local subset: v1 weight: 50 # Restore traffic to stable versions - destination: host: mocka.default.svc.cluster.local subset: v2 weight: 50 - destination: host: mocka.default.svc.cluster.local subset: v3 weight: 0 # Remove traffic from the unhealthy versionCommit and push the change. Argo CD synchronizes the updated weights to the cluster, and traffic stops flowing to v3 immediately.
(Optional) After confirming the rollback, remove the v3 Deployment file (
mock-v3.yaml) and the v3 ASMSwimLane entry fromswimlanes.yaml, then push the cleanup changes.