Designer和EAS在使用链路上进行了无缝对接,您可以在离线训练、离线预测和评估流程完成后,将单个模型部署至EAS,以创建一个在线模型服务。本文为您介绍如何将在Designer平台训练获得的模型一键或手动部署为EAS在线服务。
前提条件
已完成模型训练,并验证了模型的准确性,详情请参见模型训练。
单模型一键部署
支持的模型组件
以下模型组件支持您直接一键部署至EAS。其余部分模型仅支持手动部署,详情请参见单模型手动部署。
组件名称 | 产出可部署模型格式 | 匹配的EAS Processor | 备注 |
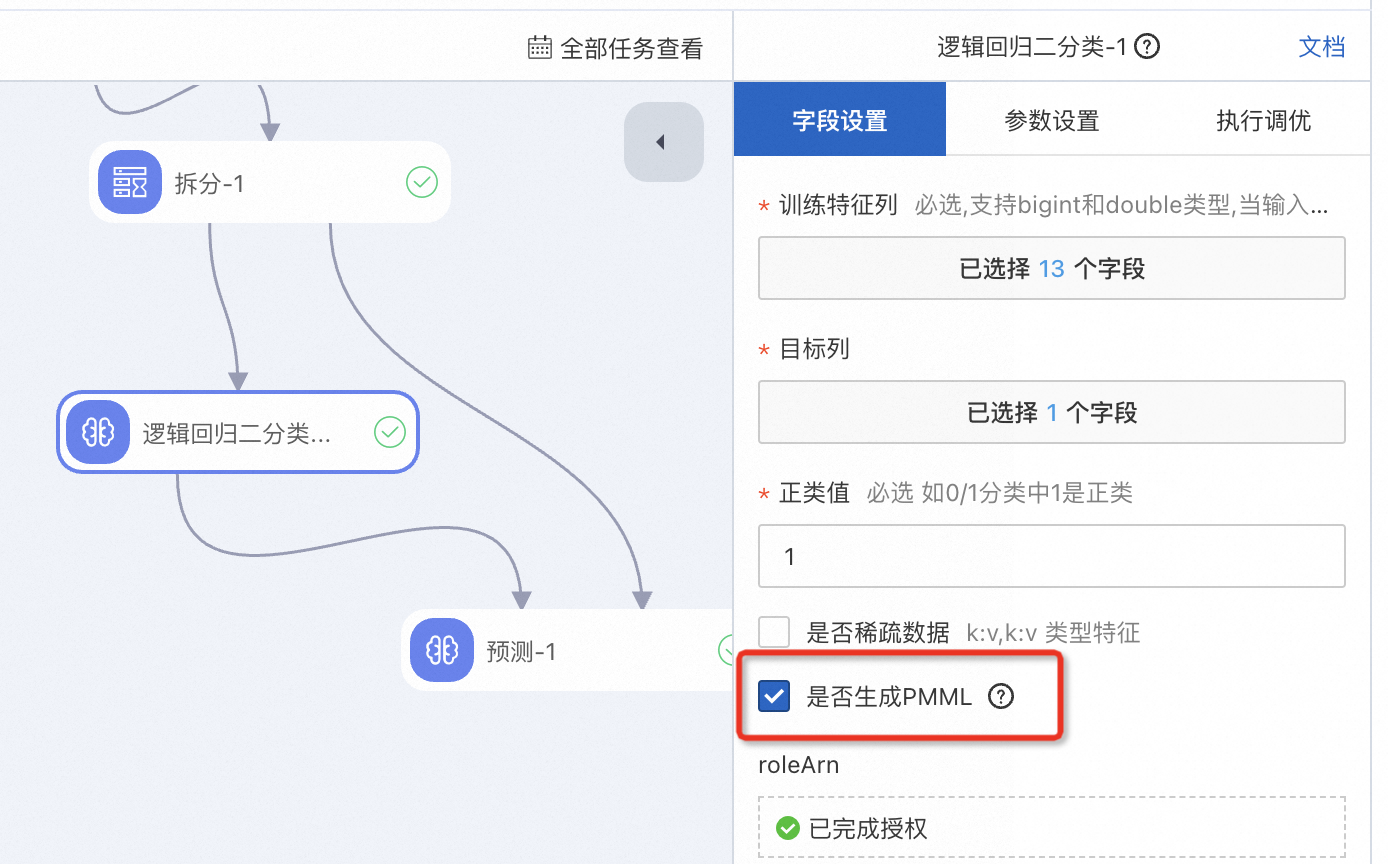
逻辑回归二分类 | PMML | PMML | 训练前需单击模型组件,在字段设置页签选中是否生成PMML,示例如下。
|
GBDT二分类 | PMML | PMML | |
线性支持向量机 | PMML | PMML | |
逻辑回归多分类 | PMML | PMML | |
随机森林 | PMML | PMML | |
朴素贝叶斯 | PMML | PMML | |
K均值聚类 | PMML | PMML | |
GBDT回归 | PMML | PMML | |
线性回归 | PMML | PMML | |
评分卡训练 | PMML | PMML | |
文本摘要训练 | tgz包 | EasyNLP | 会自动配置好PAI提供在公开OSS中的EasyNLP,无需自定义配置。 |
图像分类训练(torch) | tgz包 | EasyCV | 会自动配置好PAI提供在公开OSS中的EasyCV,无需自定义配置。 |
PyAlink脚本 | AlinkModel | Alink | 详情请参见PyAlink脚本。 |
XGBoost训练 | XGBoost | XGBoost | 详情请参见XGBoost训练。 |
操作步骤
单模型手动部署
以下模型组件不支持上述的一键部署,需要在模型训练完成后,使用通用模型导出组件将模型拼装并导出至OSS目录后,再手动部署。
组件名称 | 产出可部署模型格式 | 匹配的EAS Processor | 手动部署流程 |
PS-SMART二分类 | PS格式 | PS算法 | 需要在组件下游连接通用模型导出组件。 |
PS-SMART多分类 | |||
PS-SMART回归 |
导出模型到OSS Bucket后,您可以参见服务部署:控制台手动部署模型至EAS。
常见问题
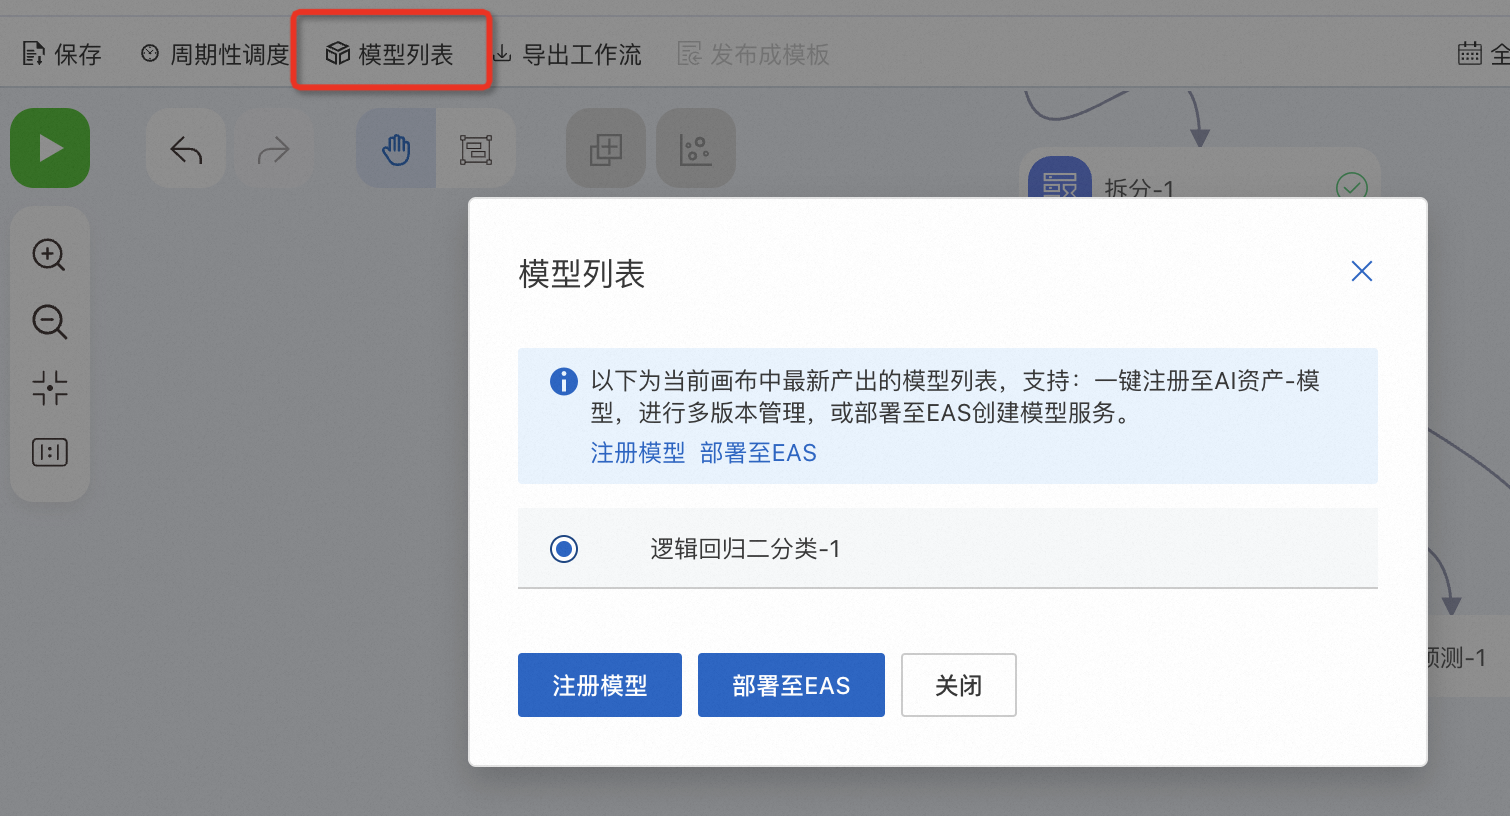
通过一键部署方式部署模型时,有节点支持部署,但是置灰不支持选择,如何解决?
您需要单击该组件节点,在右侧字段设置页签中,选中是否生成PMML,并重新执行对应节点。
相关文档
您可以前往PAI-EAS模型在线服务页面,查看已部署服务的状态,或对服务进行管理操作。详情请参见管理EAS模型在线服务。
您可以通过在线调试功能,来测试服务运行是否正常,详情请参见服务在线调试。
部署模型服务后,支持通过Designer的更新EAS服务(beta)组件,来定时更新已部署的服务,详情请参见在线模型服务定时更新。