本文介绍如何使用数据传输服务DTS(Data Transmission Service),将自建SQL Server增量迁移至RDS SQL Server。DTS支持结构迁移、全量数据迁移以及增量数据迁移,同时使用这三种迁移类型可以实现在自建应用不停服的情况下,平滑地完成自建SQL Server数据库迁移上云。
-
本文为旧版DTS控制台的操作文档,新版DTS控制台的操作文档请参见自建SQL Server迁移至RDS SQL Server。
-
如果仅需要全量数据迁移(旧版DTS控制台),请参见从自建SQL Server全量迁移至RDS SQL Server。
前提条件
-
自建SQL Server数据库版本为2008、2008 R2、2012、2014、2016、2017或2019版本。
说明-
由于SQL Server Cluster或SQL Server AlwaysOn High Availability Group一旦发生主备切换,会导致源库的主库和备库的日志序列号不一致,DTS认为源库日志不连续,导致任务失败。因此暂不支持将这两个版本作为迁移的源库。
-
如需跨版本迁移,请提前确认兼容性。
-
-
自建SQL Server数据库中待迁移的表需具备主键或者唯一性非空索引。
-
RDS SQL Server实例的存储空间须大于自建SQL Server数据库占用的存储空间。
注意事项
-
DTS在执行全量数据迁移时将占用源库和目标库一定的读写资源,可能会导致数据库的负载上升,在数据库性能较差、规格较低或业务量较大的情况下(例如源库有大量慢SQL、存在无主键表或目标库存在死锁等),可能会加重数据库压力,甚至导致数据库服务不可用。因此您需要在执行数据迁移前评估源库和目标库的性能,同时建议您在业务低峰期执行数据迁移(例如源库和目标库的CPU负载在30%以下)。
-
为保障增量数据迁移的正常运行,请勿对源库频繁执行备份,同时建议日志保留3天以上,避免日志截断后无法获取日志。
-
为保证增量数据迁移延迟显示的准确性,DTS会在自建SQL Server数据库中新增一张心跳表,表名格式为
待迁移表名_dts_mysql_heartbeat。 -
DTS会自动地在阿里云RDS SQL Server中创建数据库,如果待迁移的数据库名称不符合阿里云RDS的定义规范,您需要在配置迁移任务之前在阿里云RDS SQL Server中创建数据库。
说明关于阿里云RDS的定义规范和创建数据库的操作方法,请参见创建数据库。
-
若目标库中有已启用的触发器或外键,则会导致迁移任务失败。
-
对于迁移失败的任务,DTS会触发自动恢复。当您需要将业务切换至目标实例,请务必先终止或释放该任务,避免该任务被自动恢复后,导致源端数据覆盖目标实例的数据。
数据迁移限制
-
不支持assemblies、service broker、全文索引、全文目录、分布式schema、分布式函数、CLR存储过程、CLR标量函数、CLR表值函数、内部表、系统、聚合函数的结构迁移。
-
不支持迁移数据类型为sql_variant的数据。
-
不支持迁移含有计算列的表。
-
一个数据迁移任务只能对一个数据库进行增量数据迁移,如果有多个数据库需要增量数据迁移,则需要为每个数据库创建数据迁移任务。
迁移类型说明
-
结构迁移
DTS将迁移对象的结构定义迁移到目标库,目前DTS支持结构迁移的对象为表、视图、表触发器、同义词、SQL 存储过程、SQL 函数、plan guide、自定义类型、rule、default、sequence。
-
全量数据迁移
DTS会将自建SQL Server数据库迁移对象的存量数据,全部迁移到目标库。
-
增量数据迁移
DTS在全量数据迁移的基础上,将自建SQL Server数据库的增量更新数据同步到目标库。
增量数据迁移支持同步的SQL操作
-
INSERT、UPDATE、DELETE
说明不支持同步只更新大字段的UPDATE语句。
-
CREATE TABLE
说明不支持分区、表定义内部包含函数。
-
ALTER TABLE,仅包含ADD COLUMN、DROP COLUMN、RENAME COLUMN
-
DROP TABLE
-
RENAME TABLE、TRUNCATE TABLE、CREATE INDEX
费用说明
|
迁移类型 |
链路配置费用 |
公网流量费用 |
|
结构迁移和全量数据迁移 |
不收费。 |
当目标库的接入方式为公网IP时收取公网流量费用。更多信息,请参见计费概述。 |
|
增量数据迁移 |
收费,详情请参见计费概述。 |
数据库账号的权限要求
|
数据库 |
结构迁移 |
全量迁移 |
增量迁移 |
|
自建SQL Server数据库 |
SELECT权限 |
SELECT权限 |
sysadmin |
|
RDS SQL Server实例 |
读写权限 |
读写权限 |
读写权限 |
数据库账号创建及授权方法:
-
自建SQL Server数据库请参见CREATE USER。
-
RDS SQL Server实例请参见创建账号。
增量数据迁移流程
为解决对象间的依赖,提高迁移成功率,DTS对SQL Server结构和数据的迁移流程如下:
-
执行表、视图、同义词、自定义类型、rule、default和plan guide的结构迁移。
-
执行全量数据迁移。
-
执行SQL存储过程、SQL函数、触发器和外键的结构迁移。
-
执行增量数据迁移。
说明在进行增量数据迁移前,请勿对源库的待迁移对象执行DDL操作,否则可能导致迁移失败。
准备工作
在正式配置数据迁移任务之前,需要在自建SQL Server数据库上进行日志配置并创建聚集索引。
-
在自建SQL Server数据库中执行如下命令,将待迁移的数据库恢复模式修改为完整模式。
use master;
GO
ALTER DATABASE <database_name> SET RECOVERY FULL WITH ROLLBACK IMMEDIATE;
GO
参数说明:
<database_name>:待迁移的数据库名。
示例:
use master; GO ALTER DATABASE mytestdata SET RECOVERY FULL WITH ROLLBACK IMMEDIATE; GO -
执行如下命令,将待迁移的数据库进行逻辑备份。如您已进行过逻辑备份,可跳过本步骤。
BACKUP DATABASE <database_name> TO DISK='<physical_backup_device_name>';
GO
参数说明:
-
<database_name>:待迁移的数据库名。
-
<physical_backup_device_name>:指定备份文件存储的路径和文件名。
示例:
BACKUP DATABASE mytestdata TO DISK='D:\backup\dbdata.bak'; GO -
-
执行如下命令,将待迁移的数据库日志进行备份。
BACKUP LOG <database_name> to DISK='<physical_backup_device_name>' WITH init;
GO
参数说明:
-
<database_name>:待迁移的数据库名。
-
<physical_backup_device_name>:指定备份文件存储的路径和文件名。
示例:
BACKUP LOG mytestdata TO DISK='D:\backup\dblog.bak' WITH init; GO -
-
为待迁移的表创建聚集索引,详情请参见创建聚集索引。
操作步骤
-
登录数据传输控制台。
说明若数据传输控制台自动跳转至数据管理DMS控制台,您可以在右下角的
 中单击
中单击 ,返回至旧版数据传输控制台。
 -
在左侧导航栏,单击数据迁移。
-
在迁移任务列表页面顶部,选择迁移的目标实例所属地域。
-
单击页面右上角的创建迁移任务。
-
配置迁移任务的源库及目标库信息。

类别
配置
说明
无
任务名称
DTS会自动生成一个任务名称,建议配置具有业务意义的名称(无唯一性要求),便于后续识别。
源库信息
实例类型
根据源库的部署位置进行选择,本文以有公网IP的自建数据库为例介绍配置流程。
说明当自建数据库为其他实例类型时,您还需要执行相应的准备工作,详情请参见准备工作。
实例地区
当实例类型选择为有公网IP的自建数据库时,实例地区无需设置。
说明如果您的自建SQL Server数据库进行了白名单安全设置,您需要在实例地区配置项后,单击获取DTS IP段来获取到DTS服务器的IP地址,并将获取到的IP地址加入自建SQL Server数据库的白名单安全设置中。
数据库类型
选择SQLServer。
主机名或IP地址
填入自建SQL Server数据库的访问地址,本案例中填入公网IP地址。
端口
填入自建SQL Server数据库的服务端口,默认为1433。
说明本案例中,该服务端口须开放至公网。
数据库账号
填入自建SQL Server的数据库账号,权限要求请参见数据库账号的权限要求。
数据库密码
填入该数据库账号的密码。
说明源库信息填写完毕后,您可以单击数据库密码后的测试连接来验证填入的源库信息是否正确。源库信息填写正确则提示测试通过;如果提示测试失败,单击测试失败后的诊断,根据提示调整填写的源库信息。
目标库信息
实例类型
选择RDS实例。
实例地区
选择目标RDS实例所属地域。
RDS实例ID
选择目标RDS实例ID。
数据库账号
填入目标RDS实例的数据库账号,权限要求请参见数据库账号的权限要求。
数据库密码
填入该数据库账号的密码。
说明目标库信息填写完毕后,您可以单击数据库密码后的测试连接来验证填入的目标库信息是否正确。目标库信息填写正确则提示测试通过;如果提示测试失败,单击测试失败后的诊断,根据提示调整填写的目标库信息。
-
配置完成后,单击页面右下角的授权白名单并进入下一步。
如果源或目标数据库是阿里云数据库实例(例如RDS MySQL、云数据库MongoDB版等),DTS会自动将对应地区DTS服务的IP地址添加到阿里云数据库实例的白名单;如果源或目标数据库是ECS上的自建数据库,DTS会自动将对应地区DTS服务的IP地址添加到ECS的安全规则中,您还需确保自建数据库没有限制ECS的访问(若数据库是集群部署在多个ECS实例,您需要手动将DTS服务对应地区的IP地址添加到其余每个ECS的安全规则中);如果源或目标数据库是IDC自建数据库或其他云数据库,则需要您手动添加对应地区DTS服务的IP地址,以允许来自DTS服务器的访问。DTS服务的IP地址,请参见DTS服务器的IP地址段。
警告DTS自动添加或您手动添加DTS服务的公网IP地址段可能会存在安全风险,一旦使用本产品代表您已理解和确认其中可能存在的安全风险,并且需要您做好基本的安全防护,包括但不限于加强账号密码强度防范、限制各网段开放的端口号、内部各API使用鉴权方式通信、定期检查并限制不需要的网段,或者使用通过内网(专线/VPN网关/智能网关)的方式接入。
-
选择迁移对象及迁移类型。
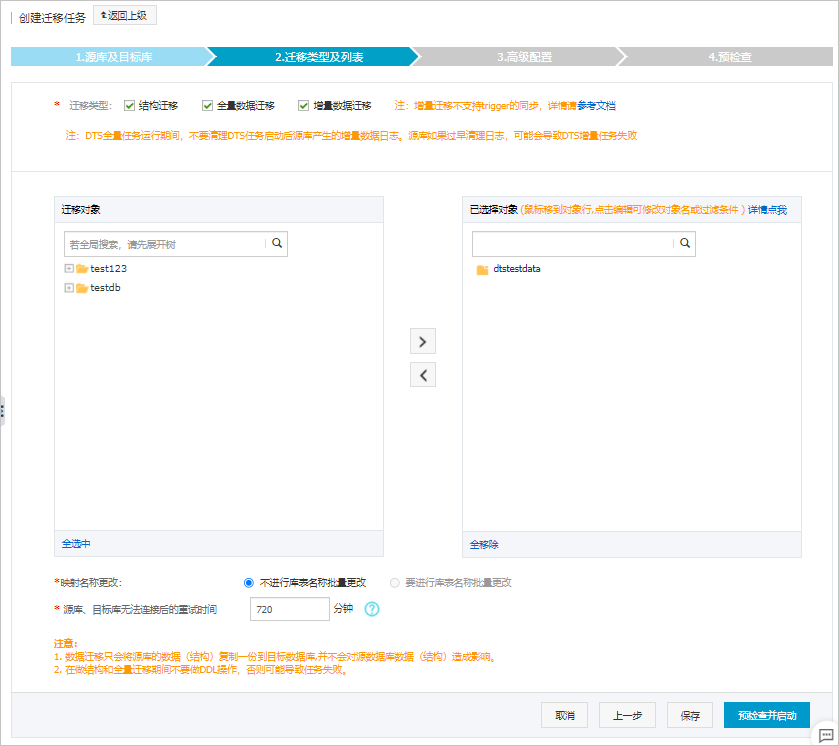
配置
说明
迁移类型
-
如果只需要进行全量数据迁移,则同时勾选结构迁移和全量数据迁移。
-
如果需要进行不停机迁移,则同时勾选结构迁移、全量数据迁移和增量数据迁移。本案例同时勾选这三种迁移类型。
说明如果未勾选增量数据迁移,为保障数据一致性,数据迁移期间请勿在自建SQL Server数据库中写入新的数据。
迁移对象
在迁移对象框中单击待迁移的对象,然后单击
 图标将其移动至已选择对象框。说明
-
一个数据迁移任务只能对一个数据库进行增量数据迁移,如果有多个数据库需要增量数据迁移,则需要为每个数据库创建数据迁移任务。
-
迁移对象选择的粒度为库、表、列。
-
默认情况下,迁移对象在目标库中的名称与源库保持一致。如果您需要改变迁移对象在目标库中的名称,需要使用对象名映射功能,详情请参见库表列映射。
-
如果使用了对象名映射功能,可能会导致依赖这个对象的其他对象迁移失败。
映射名称更改
如需更改迁移对象在目标实例中的名称,请使用对象名映射功能,详情请参见库表列映射。
源、目标库无法连接重试时间
默认重试12小时,您也可以自定义重试时间。如果DTS在设置的时间内重新连接上源、目标库,迁移任务将自动恢复。否则,迁移任务将失败。
说明由于连接重试期间,DTS将收取任务运行费用,建议您根据业务需要自定义重试时间,或者在源和目标库实例释放后尽快释放DTS实例。
-
-
上述配置完成后,单击页面右下角的预检查并启动。
说明-
在迁移任务正式启动之前,会先进行预检查。只有预检查通过后,才能成功启动迁移任务。
-
如果预检查失败,单击具体检查项后的
 ,查看失败详情。
-
您可以根据提示修复后重新进行预检查。
-
如无需修复告警检测项,您也可以选择确认屏蔽、忽略告警项并重新进行预检查,跳过告警检测项重新进行预检查。
-
-
-
预检查通过后,单击下一步。
-
在购买配置确认页面,选择链路规格并选中数据传输(按量付费)服务条款。
-
单击购买并启动,迁移任务正式开始。
-
全量数据迁移
请勿手动结束迁移任务,否则可能导致数据不完整。您只需等待迁移任务完成即可,迁移任务会自动结束。
-
增量数据迁移
迁移任务不会自动结束,您需要手动结束迁移任务。
说明请选择合适的时间手动结束迁移任务,例如业务低峰期或准备将业务切换至目标实例时。
-
观察迁移任务的进度变更为增量迁移,并显示为无延迟时,将源库停写几分钟,此时增量迁移可能会显示延迟的时间。
-
等待迁移任务的增量迁移再次进入无延迟后,手动结束迁移任务。

-
-
-
将业务切换至RDS实例。
后续操作
用于数据迁移的数据库账号拥有读写权限,为保障数据库安全性,请在数据迁移完成后,删除自建SQL Server数据库和RDS SQL Server实例中的数据库账号。