This topic describes how to use Funcraft to manage functions. In this topic, a demo function whose output is Hello World is created.
This topic is no longer maintained. If you use Funcraft to manage your Function Compute resources, we recommend that you migrate your resources to Serverless Devs and use Serverless Devs to manage your resources.
For more information about how to migrate Function Compute-related resources from Funcraft to Serverless Devs, see Migrate resources from Funcraft to Serverless Devs.
For more information about how to use Serverless Devs to manage functions, see Manage function resources by using Serverless Devs.
We apologize for any inconvenience caused.
Background information
Funcraft is an application deployment tool provided by Function Compute. You can use Funcraft to manage resources of services such as Function Compute, API Gateway, and Log Service with ease and deploy applications with high efficiency. For more information about Funcraft, see Features.
Prerequisites
The following operations are complete:
Procedure
Create a template for initialization.
Run the following command to initialize the project template:
fun init -n demoSelect a project template as prompted.
? Select a template to init (Use arrow keys or type to search)
> event-nodejs12
  event-nodejs10
  event-nodejs8
  event-nodejs6
  event-python3
  event-python2.7
  event-java8
  event-php7.2
  event-dotnetcore2.1
  http-trigger-nodejs12
  http-trigger-nodejs10
  http-trigger-nodejs8
  http-trigger-nodejs6
  http-trigger-python3
  http-trigger-python2.7
  http-trigger-java8
(Move up and down to reveal more choices)
The following types of project templates are available:
Templates prefixed with
event-are regular event functions.Templates prefixed with
http-triggerautomatically create HTTP triggers. An HTTP trigger uses Request and Response as input parameters to help you create a web application.
In this example,
event-nodejs10is used.Funcraft creates a demo folder in the directory where you run the command. The demo folder contains the index.js and template.yml files.
The index.js file contains the sample code of the function.
The template.yml file contains the information about the function.
In this example, the
demoservice and thedemofunction are created.For more information about the configuration items that are supported by the template.yml file, see Serverless Application Model.
Optional:Debug the function on your on-premises device.
To debug the function on your on-premises device, you must first install Docker on your on-premises device. For more information, see Install Docker. If you cannot install Docker on your on-premises device, skip this step and debug the function in the Function Compute console.
Run the following command to access the demo function:
cd demoRun the following command on your on-premises device to debug the function:
fun local invoke demo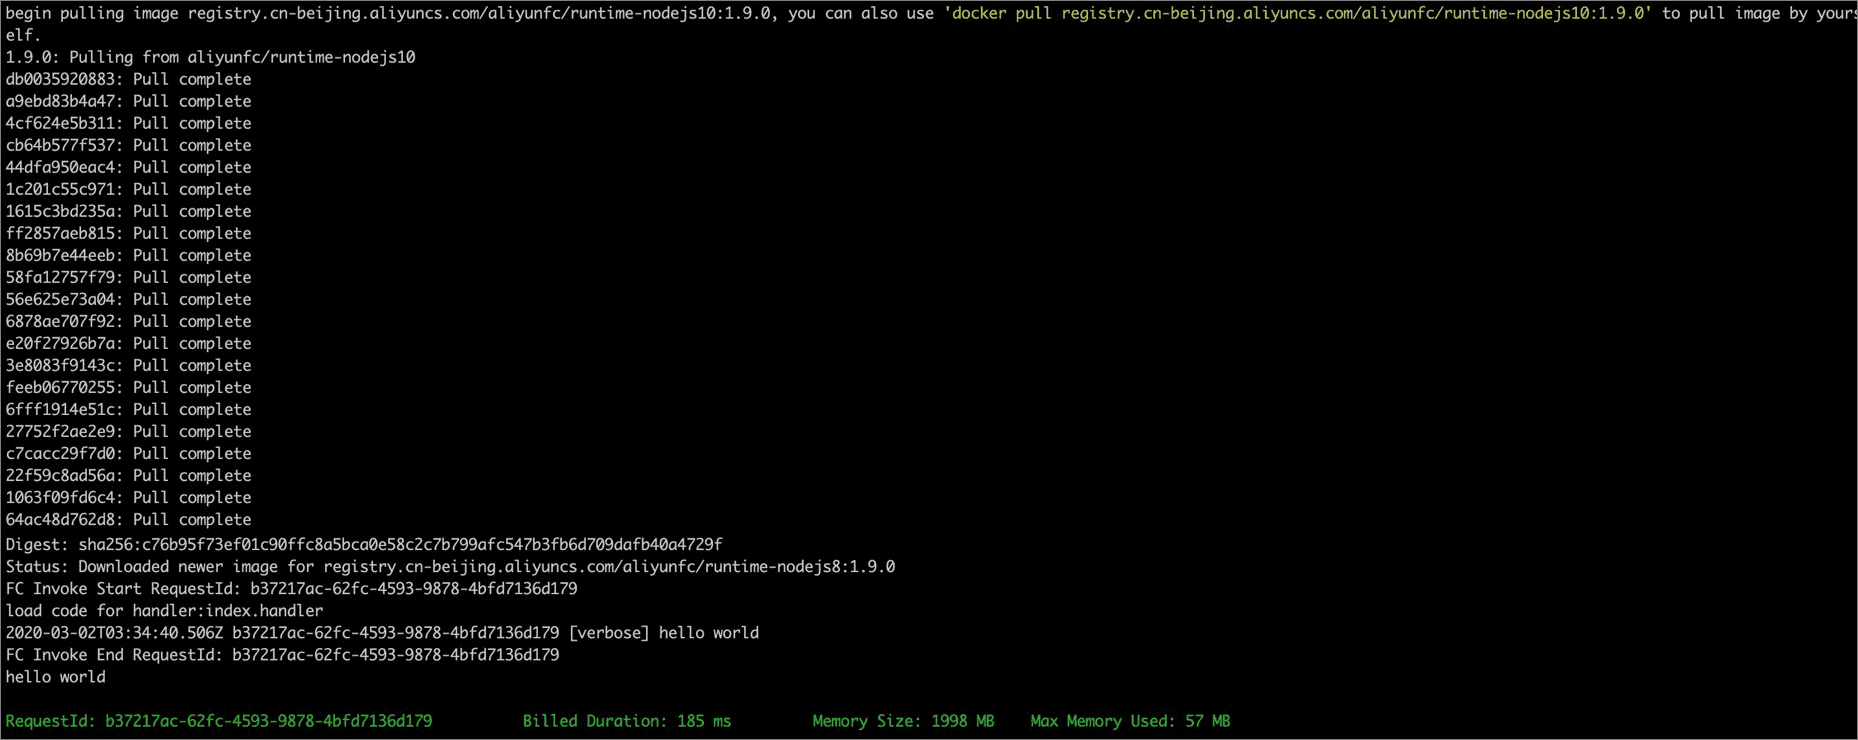 Note
NoteThe first time you debug the function, the image of the invocation environment is pulled to your on-premises device. This takes a long time to complete.
Deploy the function to Function Compute.
Run the following command to deploy the function to Function Compute:
fun deployDuring the deployment, enter
Yto confirm the resources that you want to create.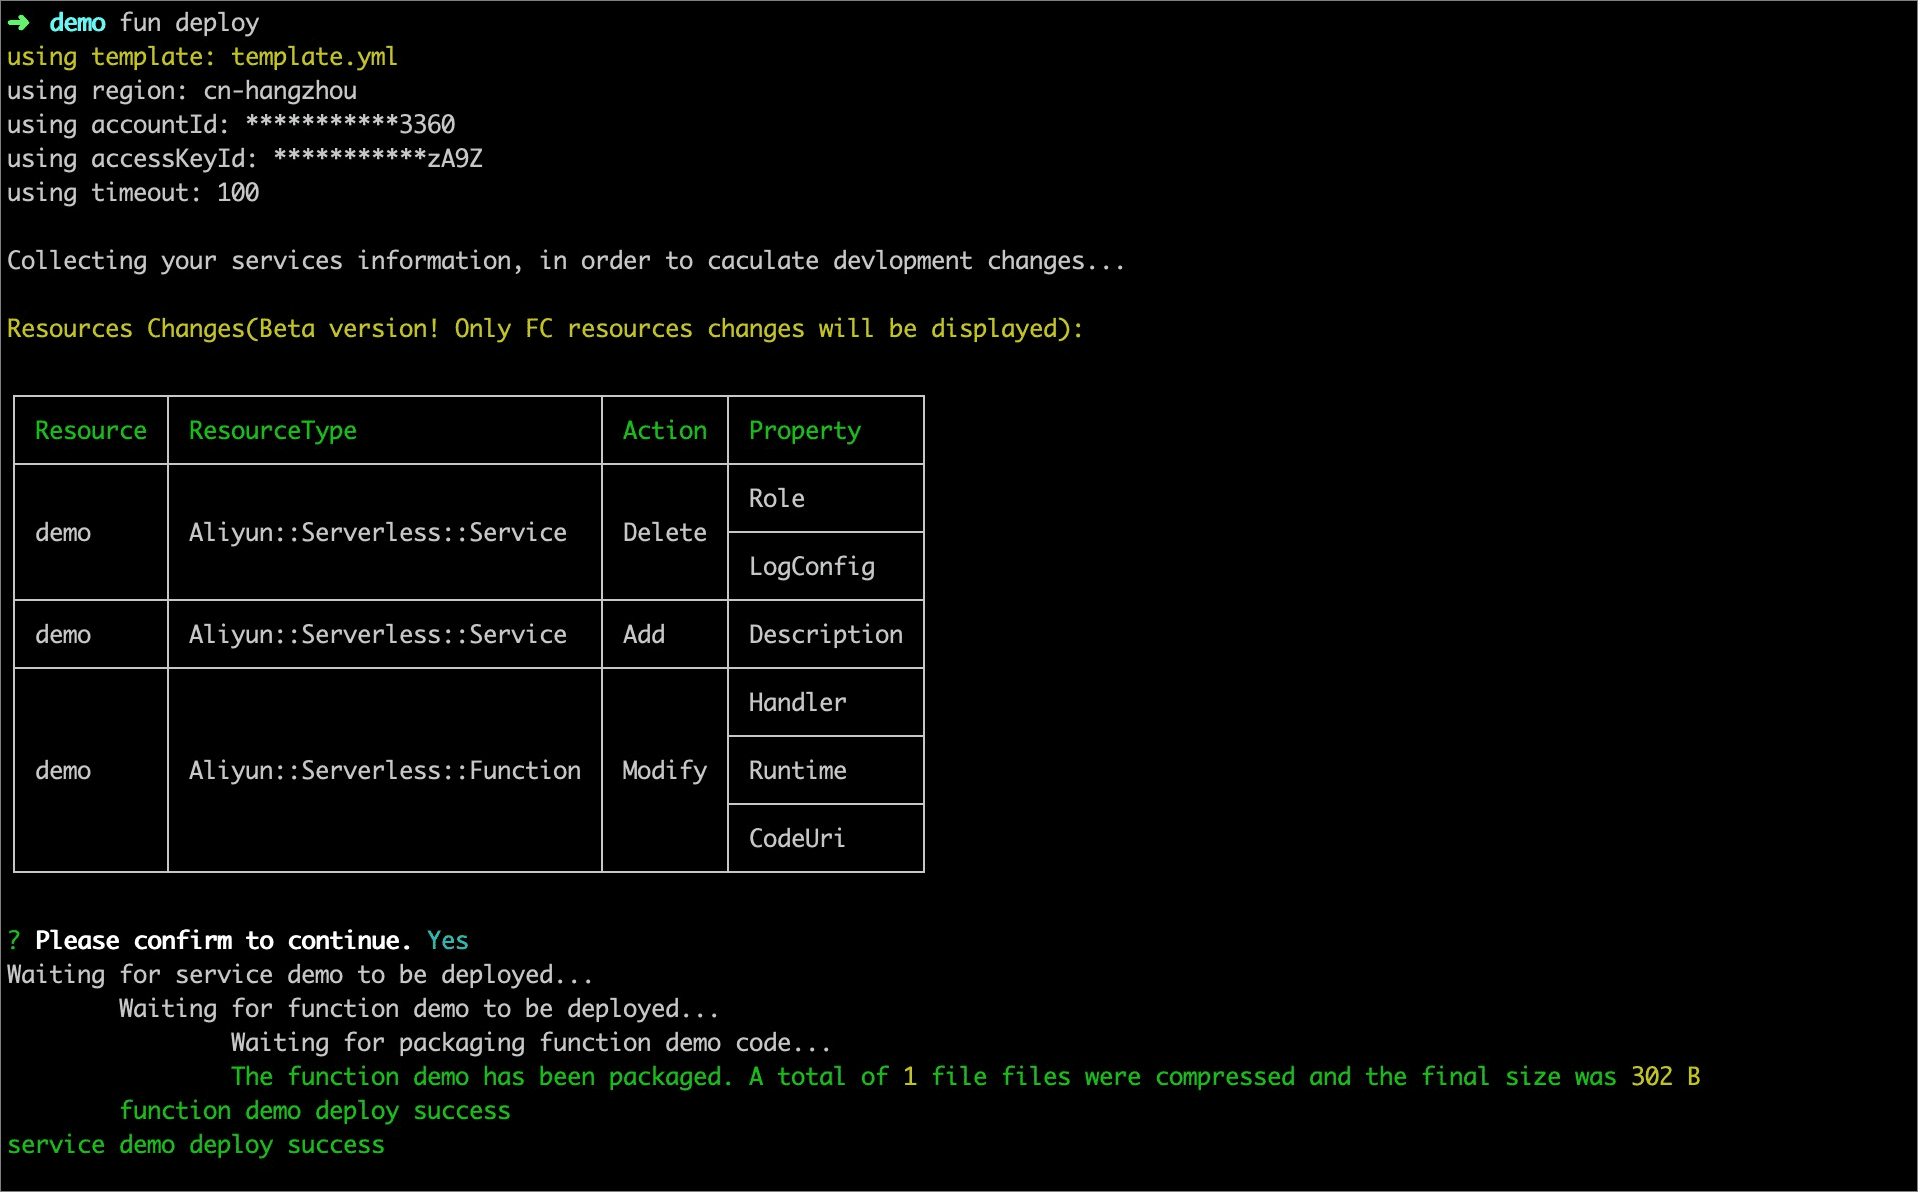
After the resources are created, the
service demo deploy successmessage appears. The message indicates that your resources are deployed.
Test the result in Function Compute.
You can log on to the Function Compute console to check whether the preceding deployment is successful.
Log on to the Function Compute console.
In the left-side navigation pane, click Services and Functions.
In the top navigation bar, select a region.
On the Services page, click the target service.
On the Functions page, click the name of the function that you want to manage.
On the Code tab of the details page of the function, click Test Function to execute the function in the Function Compute console.
View logs.
After the function is executed, you can view the execution log on the Code tab. To view historical execution logs, you must first configure a Logstore for the function. Then, you can view historical execution logs on the Logs tab. For more information, see Configure logging.
What to do next
After you complete the preceding steps, you can read the following topics based on your business scenarios to perform more advanced operations: