By Erick Otenyo, Alibaba Cloud Tech Share Author. Tech Share is Alibaba Cloud's incentive program to encourage the sharing of technical knowledge and best practices within the cloud community.
In this tutorial, we will be setting up and configuring geospatial libraries alongside with Django so as to run a geographic application on Alibaba Cloud Elastic Compute Service (ECS).
This tutorial is divided into two parts.
Geospatial applications are applications that implement location aspects in their functionalities. Examples of these applications include those for finding nearest coffee shops, showing directions from point A to point B like the Google Maps, applications for monitoring utilities in different locations e.t.c. Basically any application that incorporates location data. Bare in mind the application does not necessarily have to show a map, but can have geographical functionalities running on the background.
Coordinate systems enable geographic datasets to use common locations for integration. A coordinate system is a reference system used to represent the locations of geographic features, imagery, and observations, such as Global Positioning System (GPS) locations, within a common geographic framework.
With the Geographic coordinate system, a point is referenced by its longitude and latitude values. Longitude and latitude are angles measured from the earth's center to a point on the earth's surface. Latitude and longitude values are measured either in decimal degrees or in degrees, minutes, and seconds (DMS). Latitude values are measured relative to the equator and range from –90° at the south pole to +90° at the north pole. Longitude values are measured relative to the prime meridian. They range from –180° when traveling west to 180° when traveling east.
From the documentation, GeoDjango is an included module for Django that turns it into a geographic Web framework. GeoDjango makes it possible to create geographic Web applications. Its features include:
This means we can comfortable create location-based services using Geodjango. We can spatially query services in our application to find for example the nearest points of interest,find out if a point is within a given neigbourhood and so forth. This tutorial will guide you in creation of a geographical web application for viewing and querying coffee shops around Nairobi Kenya.
Geodjango has additional requirements beyond what Django requires. This guide will cover the installation and setup of all of the additional requirements.
We will be using a Python 3 virtual environment to build and run our application. A virtual environment is an isolated working copy of Python which allows you to work on a specific project without worry of affecting other projects. This enables multiple side-by-side installations of Python, one for each project.
A virtual environment doesn't actually install separate copies of Python, but it does provide a clever way to keep different project environments isolated.
The following command will install Python set up tools and Pip which we will need.
sudo apt-get install python-setuptools python-pipPython set up tools is a collection of enhancements to the Python distutils that allow easy building and distribution of Python packages, especially ones that have dependencies on other packages. Pip is a package management system used to install and manage software packages in Python.
We have already talked about Python virtual environment, so lets go ahead and install virtualenv, which is a package for creating virtual environments.
pip install virtualenvWe will also use virtualenvwrapper, which provides a set of commands which makes working with virtual environments much more pleasant. It also places all your virtual environments in one place.
sudo easy_install virtualenvwrapperWe will need to create a folder, where all our different virtual environments will be placed.
mkdir ~/venvsMake the path available in a WORKON_HOME environment variable by exporting it. This will be used by virtualenvwrapper to indicate where your environments directory will be created.
export WORKON_HOME=~/venvsAdd virtualenvrapper.sh to bash file so as to load virtualenvwrapper commands.
echo "source /usr/local/bin/virtualenvwrapper.sh" >> ~/.bashrcNow we can execute our bash to have the commands available
source ~/.bashrcWe are now ready to create a virtual environment. We will do this in a later step.
PostgreSQL or Postgres, is an object-relational database management system with an emphasis on extensibility and standards compliance. It can handle workloads ranging from small single-machine applications to large Internet-facing applications with many concurrent users.
PostGIS is an open source, freely available, and fairly OGC compliant spatial database extender for the PostgreSQL Database Management System. In a nutshell it adds spatial functions such as distance, area, union, intersection, and specialty geometry data types to the database. Our Geodjango application will use a postGIS enabled database to store data and spatial geometries.
Install Postgres using the following command
sudo apt-get updatesudo apt-get install -y postgresql postgresql-contribInstall PostGIS extension
sudo apt-get install -y postgis postgresql-9.5-postgis-2.2We are going to use the postgres user created during Postgres installation to do database administrative tasks.
Log into the Postgres interactive session using the following command
sudo -u postgres psqlYou will have a PostgreSQL prompt where we can set up our database and user
First we create a database for our project
postgres=#CREATE DATABASE coffeshops;We have called our database coffeshops but you can use any name, but be sure to remember it for the subsequent steps.
Next we create a database user for our project. Make sure to use a secure password:
postgres=# CREATE USER geo WITH PASSWORD 'password';Note the user name as we will also need this in setting up our Geodjango app.
Give our new user access to administer our new database
postgres=# GRANT ALL PRIVILEGES ON DATABASE coffeeshops TO geo;Our Geodjango application will need to create a postgis extension, and to create an extension for a database, our user needs superuser role. Lets add this role to our user.
postgres=# ALTER ROLE geo SUPERUSER;Exit out of the PostgreSQL prompt
postgres=# \qOur database coffeeshops is now ready for use.
Geodjango uses a number of Geospatial Libraries to provide geospatial functionalities. These libraries include:
To install the above geospatial libraries and their dependencies, run the following command:
sudo apt-get install binutils libproj-dev gdal-binCreate a virtulaenv named geodjango with python3 by typing:
mkvirtualenv --python=/usr/bin/python3 geodjangoYour prompt should change to show that you are working in the newly created virtual environment. It will look something like this:
(geodjango)user@host:~$Once our virtual environment is created and activated, install the python packages we need by typing:
(geodjango) $ pip install django psycopg2This installs the django package and the psycopg2 package. The psycopg2 package is a necessary adapter to allow our application connect our postgres database.
Now we are ready to create our coffee shops app. To start a django project, run the following:
(geodjango) $ django-admin startproject coffeeshopsThis will create a new Django project inside a folder with the same name as our project. The directory will have the following content:
~/coffeeshops/manage.py: A Django project management script~/coffeeshops/coffeeshops: Our project package that contains settings for the project in settings.py, urls.py for defining application routes,wsgi.py which describes how our application will communicate with the webserver, and __init.py__ that tells python to treat this directory as a package.Next we need to edit our project's settings so as to match our app's requirements, and also make our app a geospatial application by enabling the Django geospatial module.
We are going to use nano as our text editor to open the settings.py file and make edits.
(geodjango) $ nano ~/coffeeshops/coffeeshops/settings.pyFirst we will edit ALLOWED_HOSTS variable by adding our server's IP address so as to secure our app to only requests from this IP address.
ALLOWED_HOSTS = ['your_server_IP']To make our application a Geodjango app and not a normal Django app, we need to add the django.contrib.gis module to the INSTALLED_APPS directive. This is the module that gives Django Geospatial powers.
INSTALLED_APPS = [
    ...
    'django.contrib.staticfiles',
    'django.contrib.gis'
]
The next step is to configure our postgres database access. We need to adjust django to connect to our early created postgres database. Here we will use a spatially aware adapter that will create a postgis extension so as to support geographical data. This adapter will be from the django.contrib.gis module.
Find the section starting with DATABASES and change it to match our database. We assign the database name, user, password, host which will be 'localhost' because our database is local in the server, and the port, which we can pass an empty string to use the postgres default.
. . .
DATABASES = {
    'default': {
        'ENGINE': 'django.contrib.gis.db.backends.postgis',
        'NAME': 'coffeeshops',
        'USER': 'geo',
        'PASSWORD': 'your_user_password',
        'HOST': 'localhost',
        'PORT': '',
    }
}
. . .
Next we should indicate to Django where our project's static files should be placed. This will enable our webserver to correctly pick and server these files. Find the following lines and edit them to have Django put them in a directory named static in the project's base directory'
...
STATIC_URL = '/static/'
STATIC_ROOT = os.path.join(BASE_DIR, 'static/')
...
When finished editing, save and close the file.
We can now migrate the database schema to the PostgreSQL database. The django.contrib.gis.db.backends.postgis engine will create a postGIS extension for our database.
(geodjango) $ ~/coffeeshops/manage.py makemigrations
(geodjango) $ ~/coffeeshops/manage.py migrate
Create the superuser for the project by typing the following:
(geodjango) $ ~/coffeeshops/manage.py createsuperuserYou will be prompted for the superuser's username, email and password.
Next we need to collect all our static files into the directory we set by typing and confirming:
(geodjango) $ ~/coffeeshops/manage.py collectstaticNow we can finaly test pur application using the Django development server by typing the following:
(geodjango) $ ~/coffeeshops/manage.py runserver 0.0.0.0:8000If everything works, you can visit your server's IP address on port :8000 in your web browser:
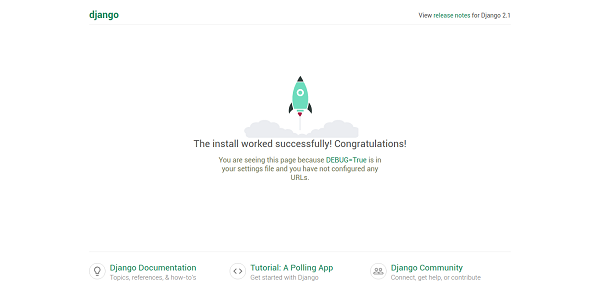
http://your_server_ip:8000You should see Django 2.0 index page:

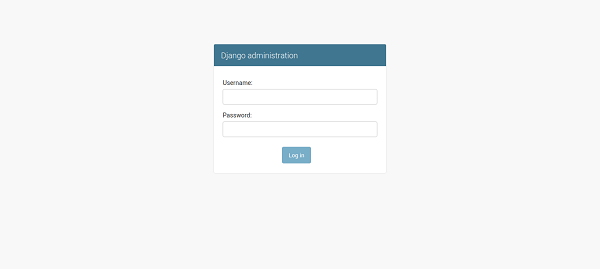
You can also go to the admin interface by appending /admin to your url. To log in, use the username and password created using the createsuperuser commmand.

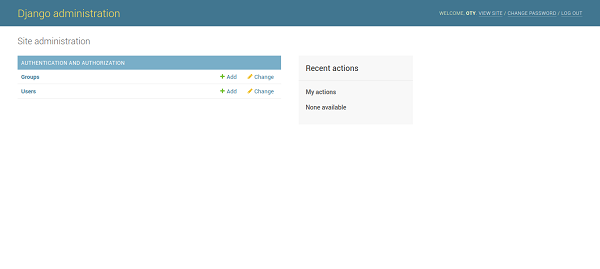
After a successful login, you should see the default Django admin page.

To shutdown the development server, hit CTRL-C in the terminal window.
In this tutorial, we have learnt the fundamental Geospatial concepts and how Geospatial data is represented. We installed and created a Postgres database with the postGIS extension. We also setup and tested a basic Geodjango project by connecting to spatial database and including the django GIS module.
In the next tutorial we will be completing our coffeeshops geographic application by creating Geo Models that will be used to define our coffee shops location data and support geospatial queries.
Setup and Deploy Geodjango App on Alibaba Cloud Part 2: Completing the App

2,593 posts | 791 followers
FollowAlibaba Clouder - March 22, 2019
Alibaba Clouder - March 15, 2019
Alibaba Clouder - March 18, 2019
Alibaba Clouder - March 18, 2019
Alibaba Clouder - May 23, 2018
Alibaba Clouder - March 5, 2019

2,593 posts | 791 followers
Follow ECS(Elastic Compute Service)
Elastic and secure virtual cloud servers to cater all your cloud hosting needs.
Learn More ApsaraDB RDS for PostgreSQL
An on-demand database hosting service for PostgreSQL with automated monitoring, backup and disaster recovery capabilities
Learn More OSS(Object Storage Service)
An encrypted and secure cloud storage service which stores, processes and accesses massive amounts of data from anywhere in the world
Learn MoreMore Posts by Alibaba Clouder