By Cheng Hong, Solutions Architect, and Vikram Godse, Solutions Architect (updates to work with International Portal)
Many of our customers using Windows Active Directory (AD) as corporate directory has the requirement of enabling single sign-on (SSO) between their company domain and Alibaba Cloud. This will allow users sign into the Alibaba Cloud Management Console using their company domain account.
Currently we only support user mapping and due to which we have a 1:1 mapping of AD users to Resource Access Management (RAM) Users who would like to use Single Sign-On. Mapping RAM Roles to AD Groups is still in development and will be available April 2019, according to information available at the time of writing this document.
This document will show you how to enable federation between Alibaba Cloud and Windows ADFS through Security Assertion Markup Language (SAML) integration.
Install AD, ADFS and DNS on windows server, this server will use as company domain server.
In the server manager dashboard, select "Add roles and features"
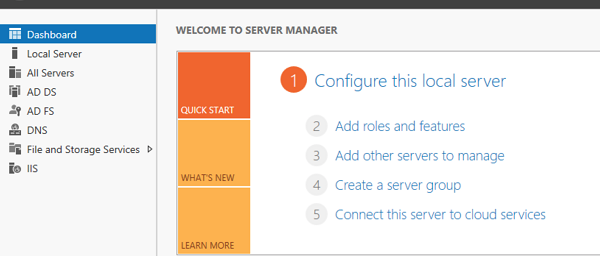
Click "Next".
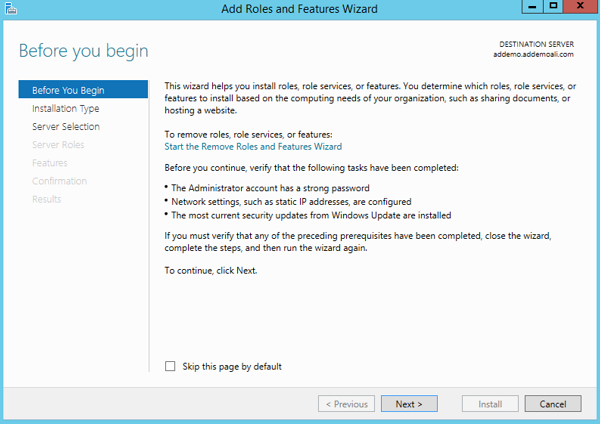
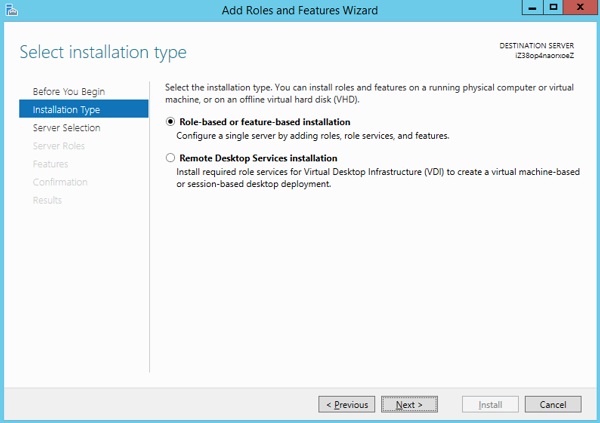
Select "Role-based or feature-based installation"
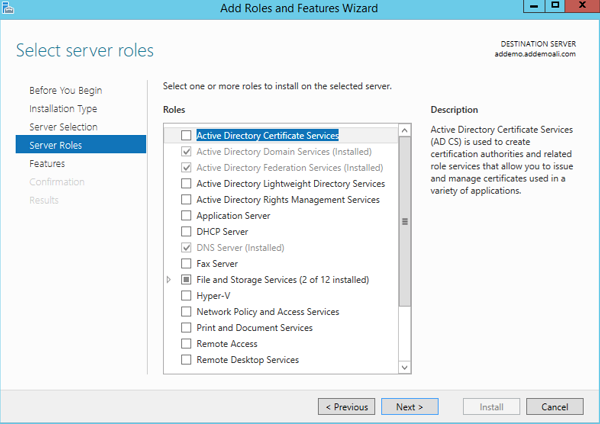
Select the features to install.
Select current server, then click "Next".
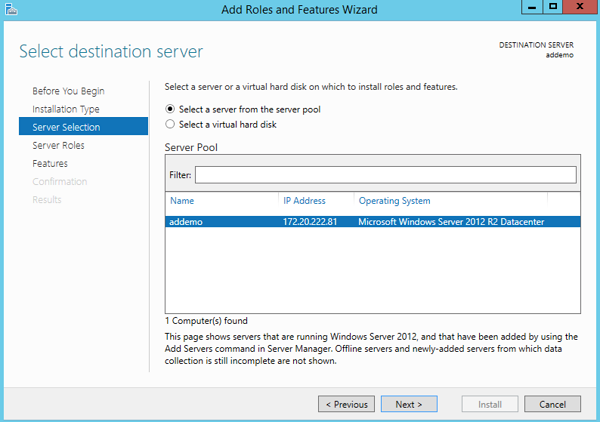
Click "Next".
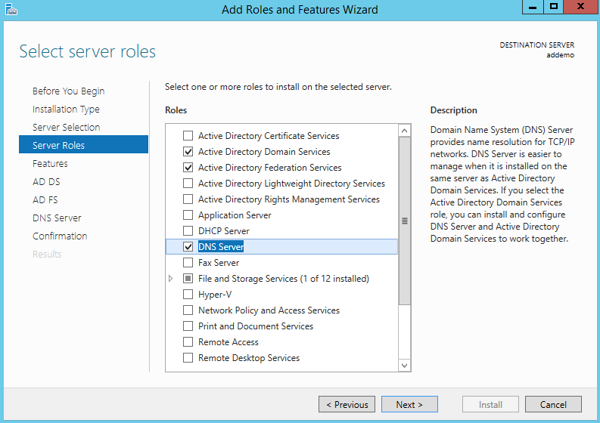
Click "Next".
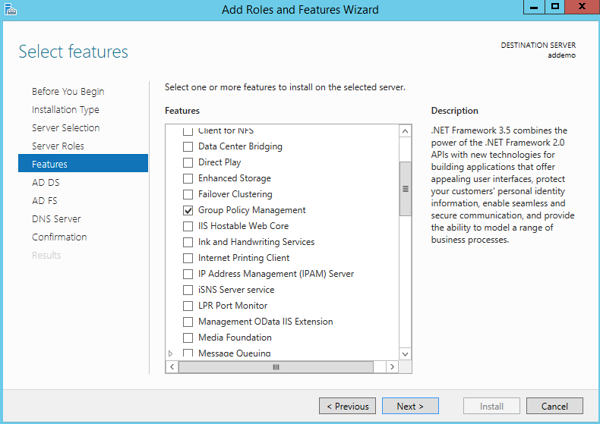
Click "Next".
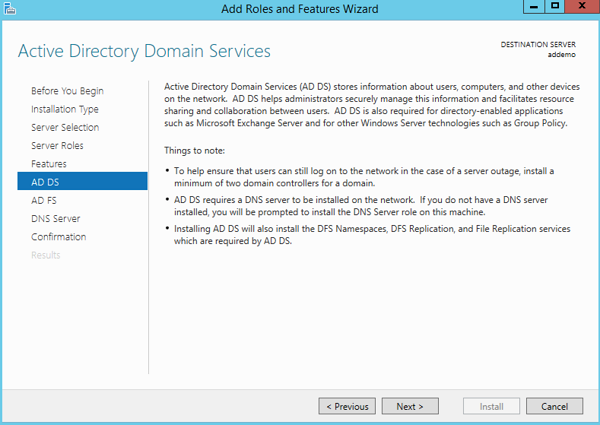
Click "Next".
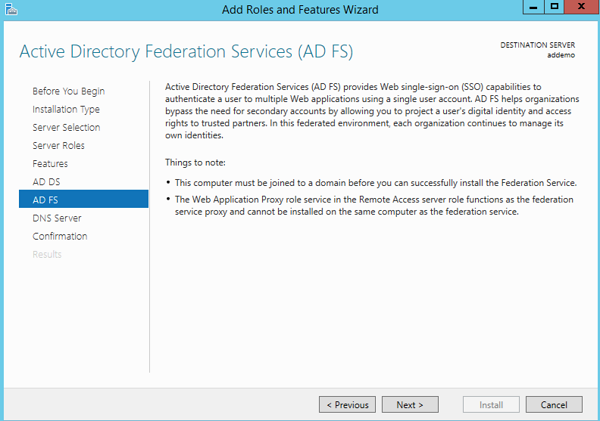
Click "Next".
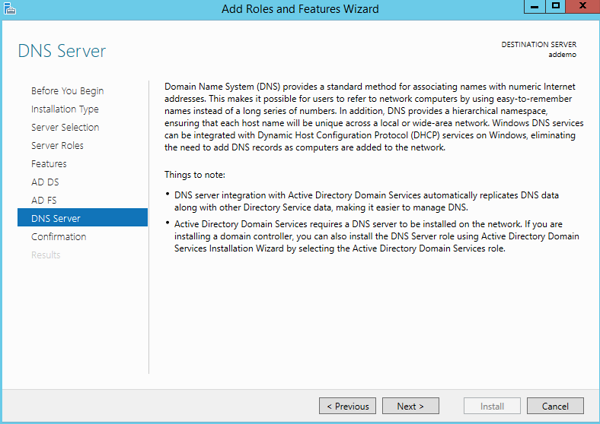
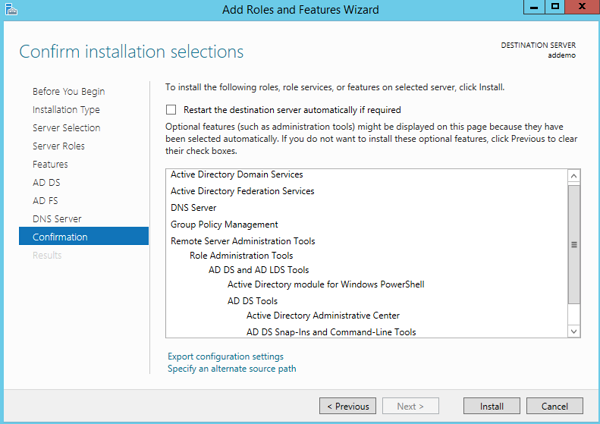
Confirm installation selections and click "Install".
After installation completed, click "Close".
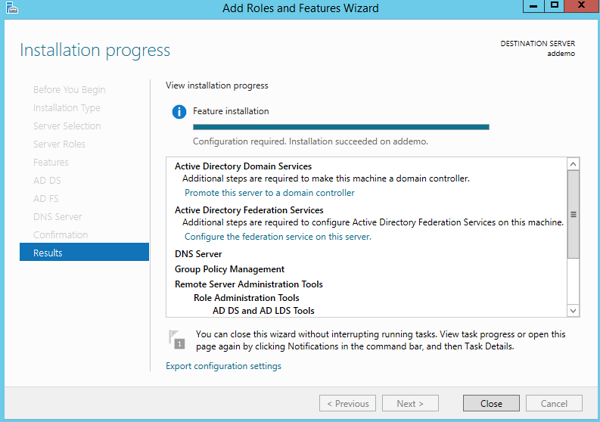
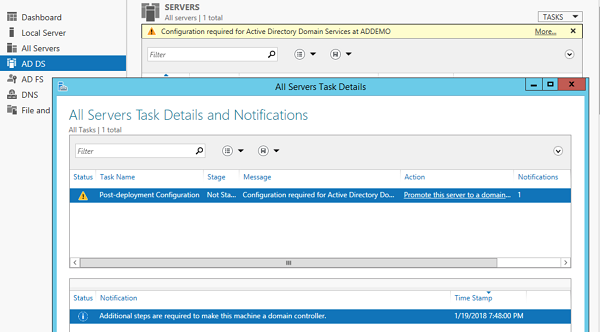
Return to server manager and click "AD DS", click the Action listed to complete the configuration.
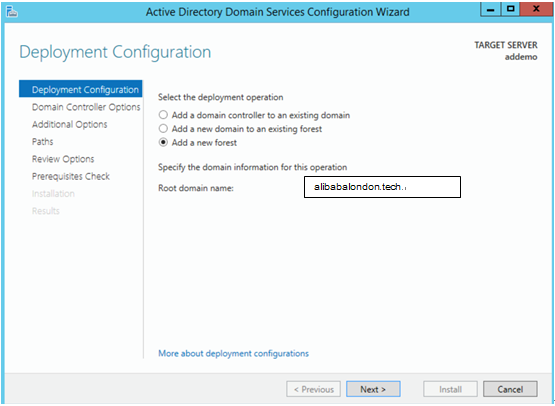
Select "Add a new forest" and set the root domain as "alibabalondon.tech". An important point to note here is that the domain specified here does not have to be a real registered domain, if you are doing this configuration for testing or demo purposes. This domain is used to extract the "metadata xml file" from ADFS. You can create a "hostname" record that points the domain to the public IP address of the AD/ADFS Server on the client computer.
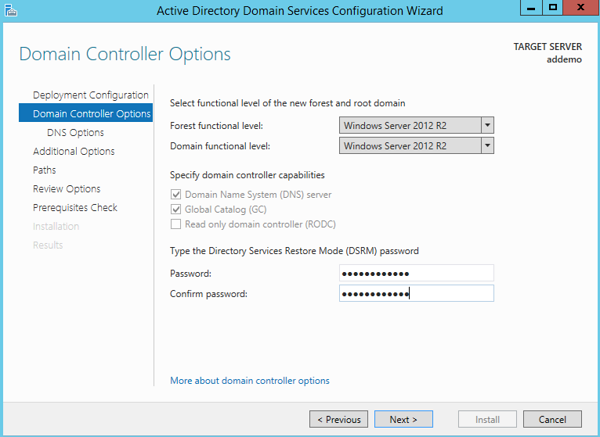
Enter the DSRM password.
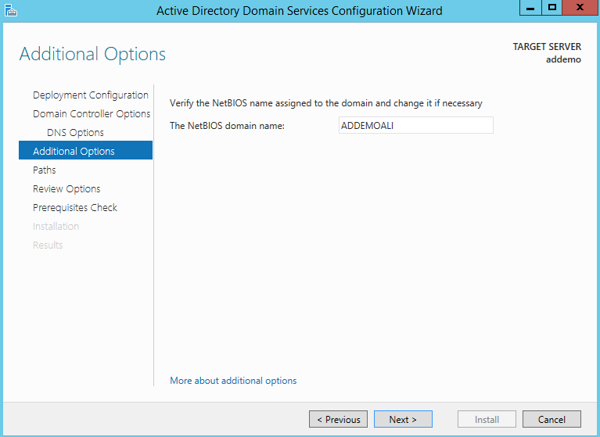
Enter the NetBIOS domain name.
Click "Next".
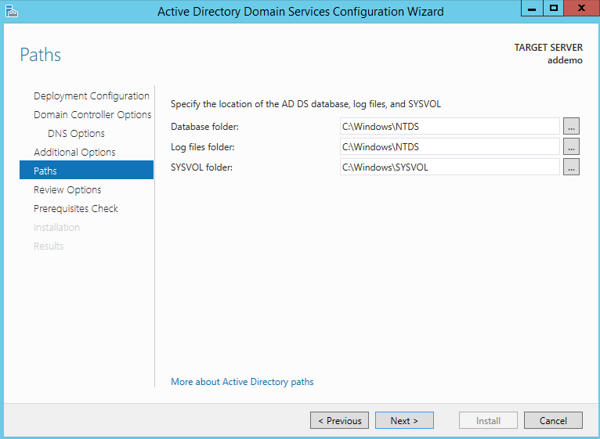
Review all the selections and click "Next".
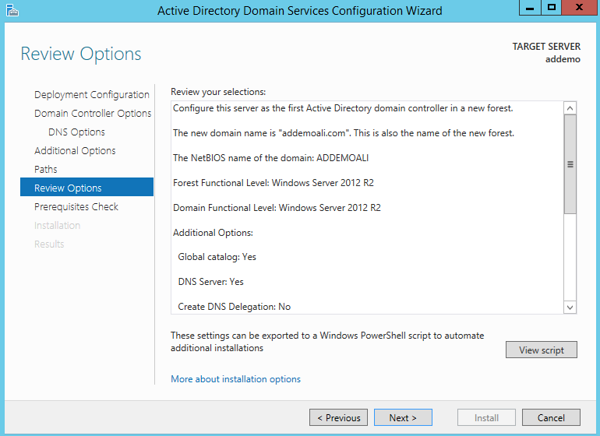
Click "Install" to begin the installation.
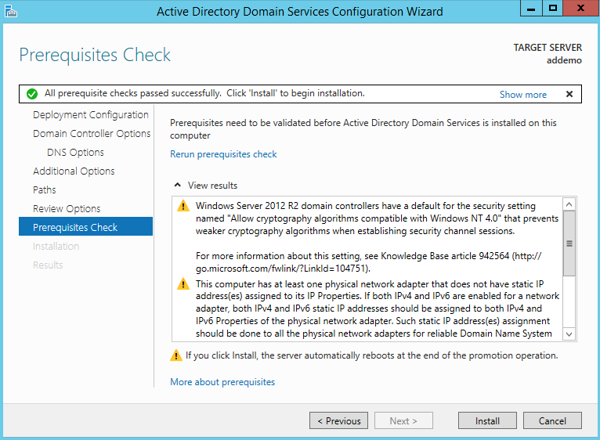
After installed, the server will restart automatically.
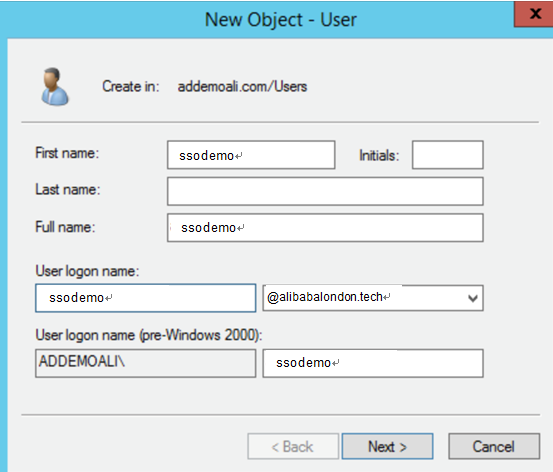
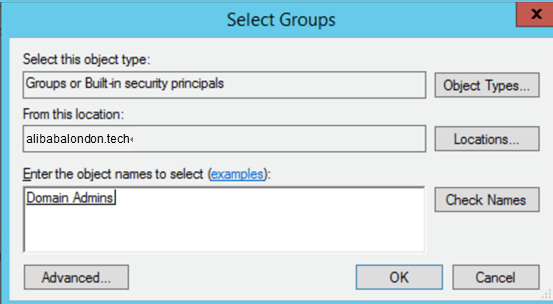
Create user: ssodemo@alibabalondon.tech
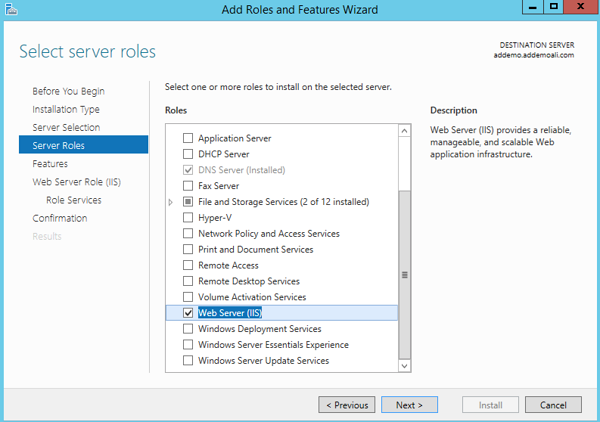
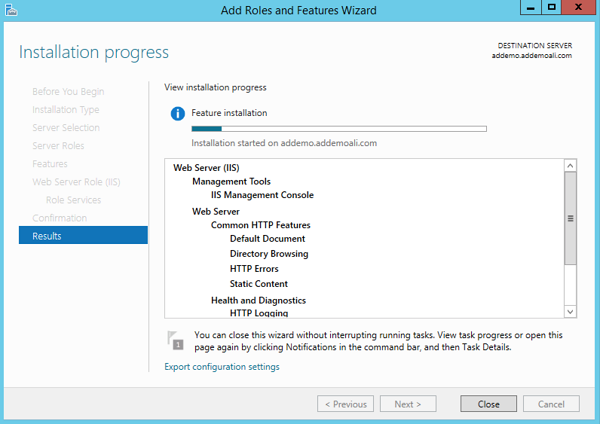
IIS is not required for AD integration. Installing IIS is to generate self-signed certification for ADFS, if you have other ways to generate the certification this step can be skipped.
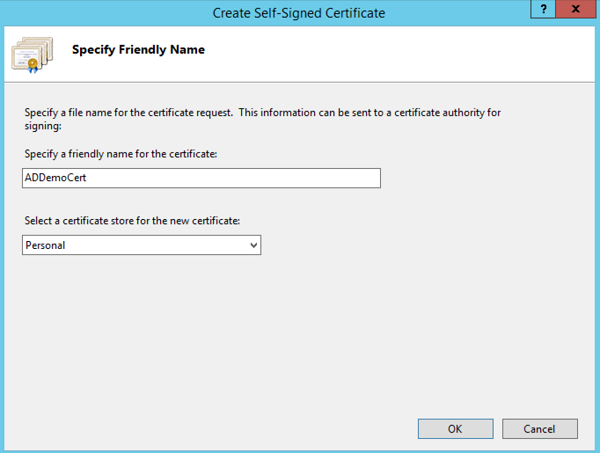
Create the SSL certification for ADFS configuration.
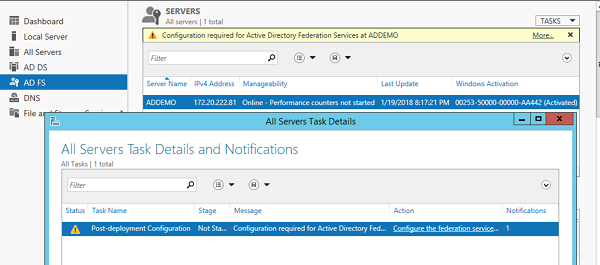
Return to server manager and click "AD DFS", click the Action listed to complete the configuration.
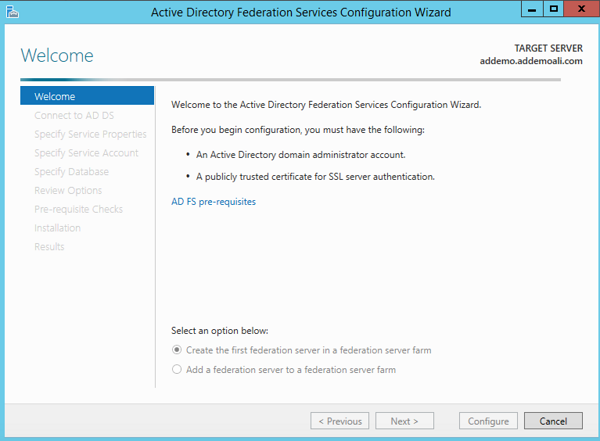
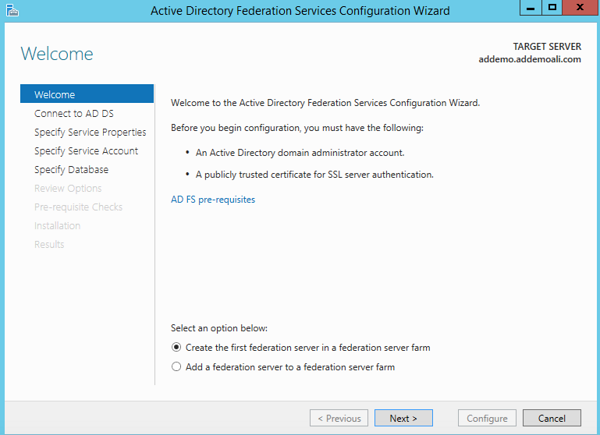
Select "Create the first federation server in a federation server farm", then click "Next".
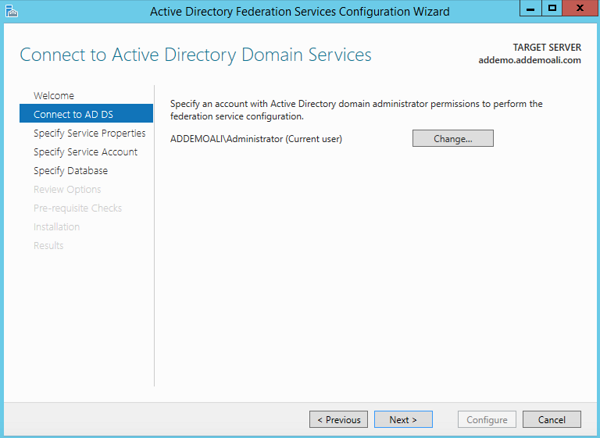
Connect to AD DS.
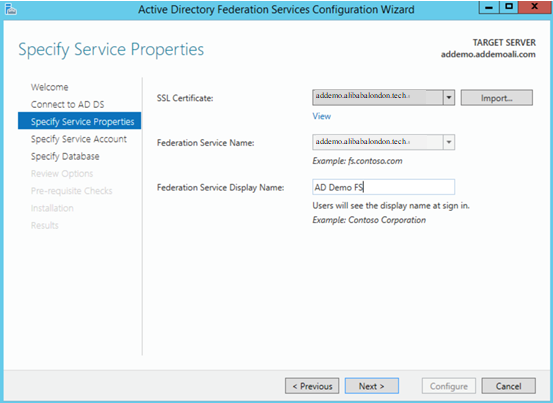
Select the SSL certification generated in previous step. Enter a name for "Federation Service Display Name".
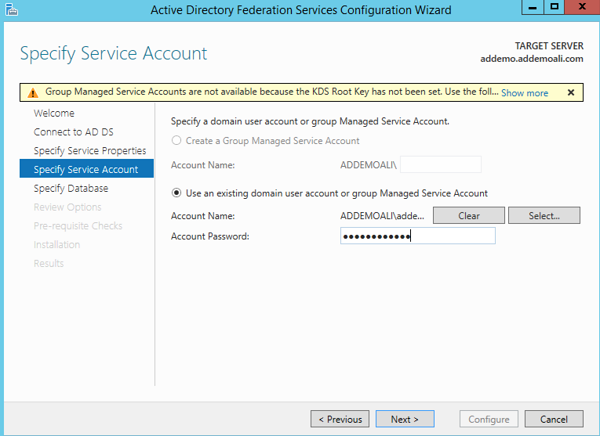
Enter the account and password.
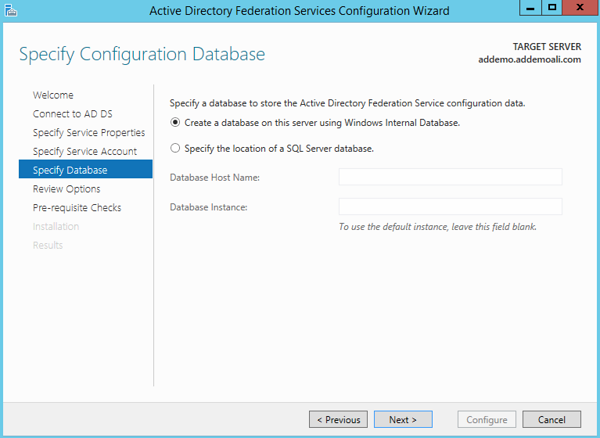
Select "Create a database on this server using Windows Internal Database"
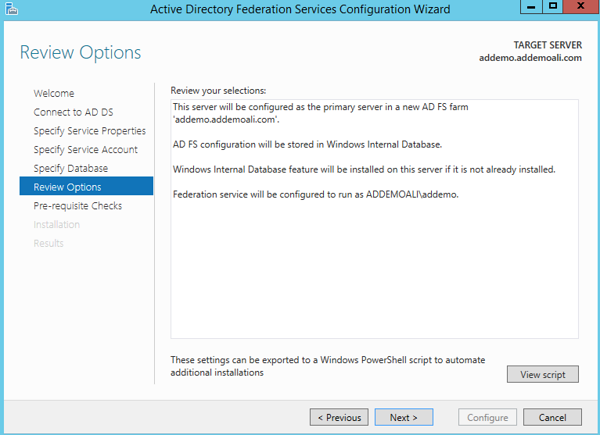
Review all the selections and click "Next".
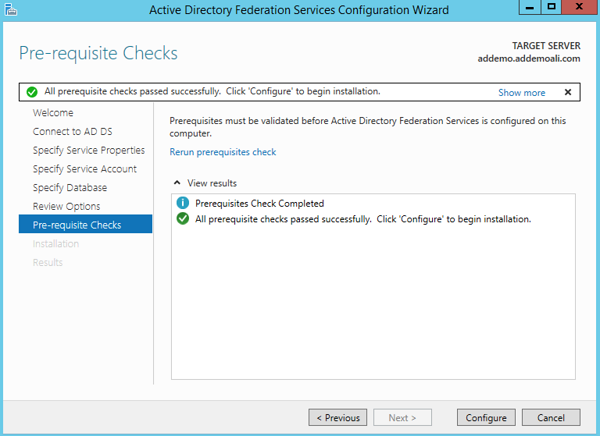
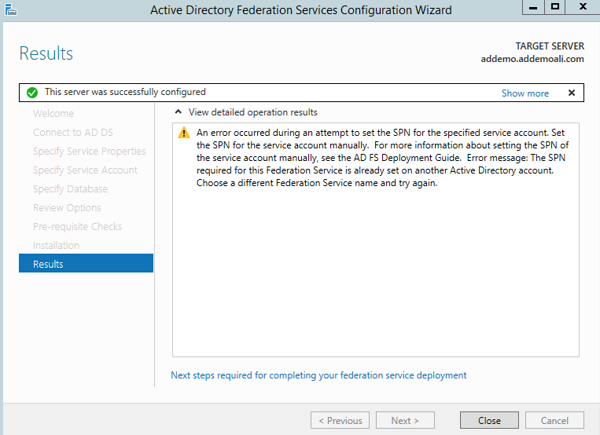
Click "Configure" to begin the configuration.
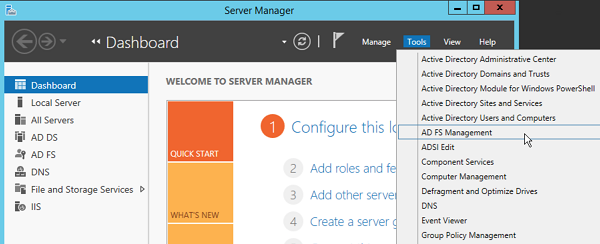
Open the AD FS Management.
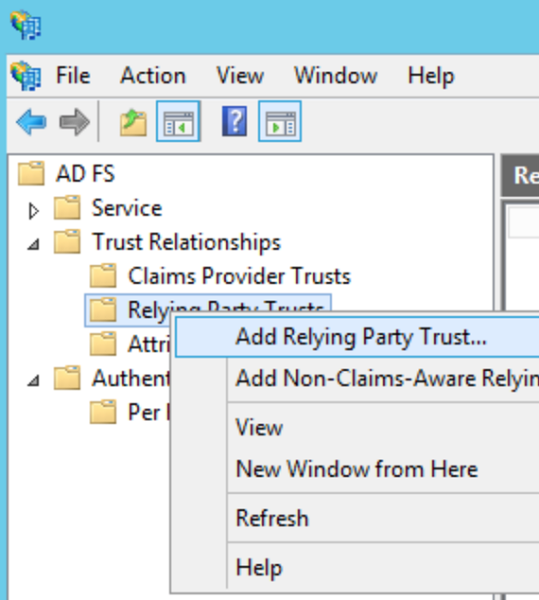
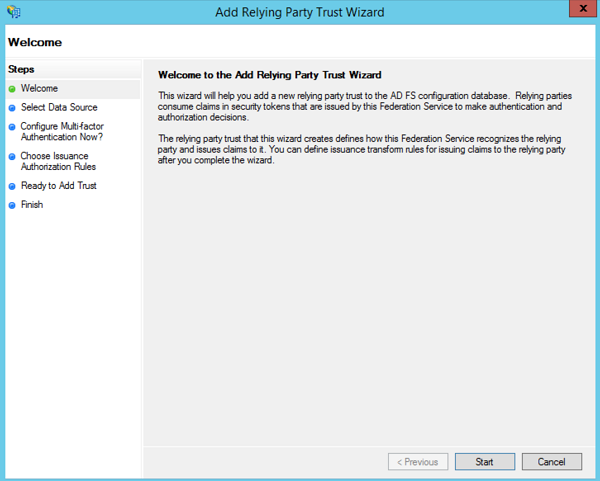
In the Add Relying Party Trust Wizard, click "Start".
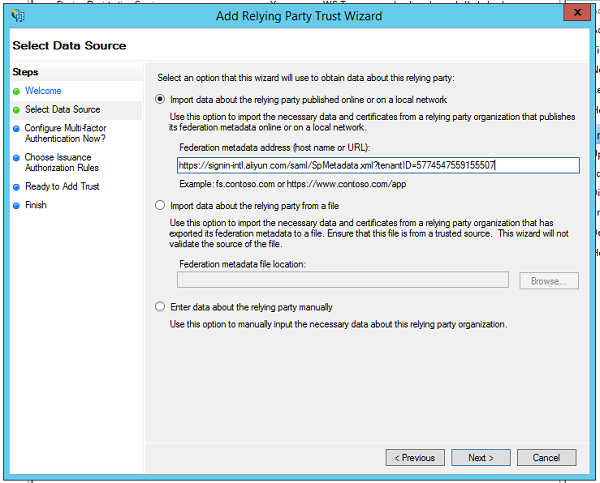
Select "Import data about the relying party published online or on a local network".
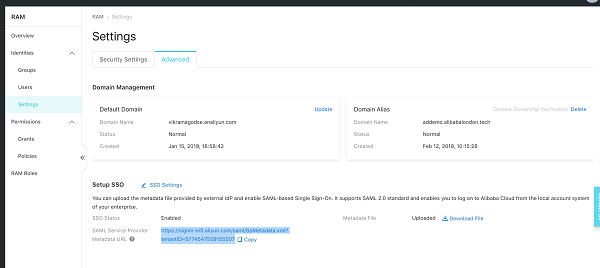
Enter the SAML Service Provider Meta-Data URL that is available in the RAM Console "Settings", "Advanced Settings"
Click "Next".
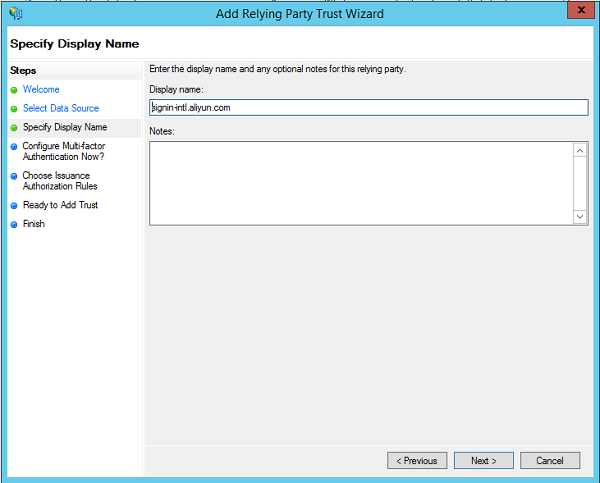
Enter the "Display name", then click "Next".
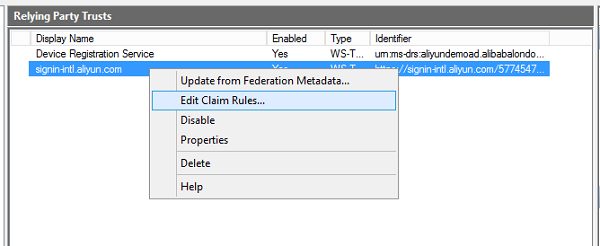
Open "Edit Claim Rules" dialog box, click "Add Rule" and add the rule settings as below.
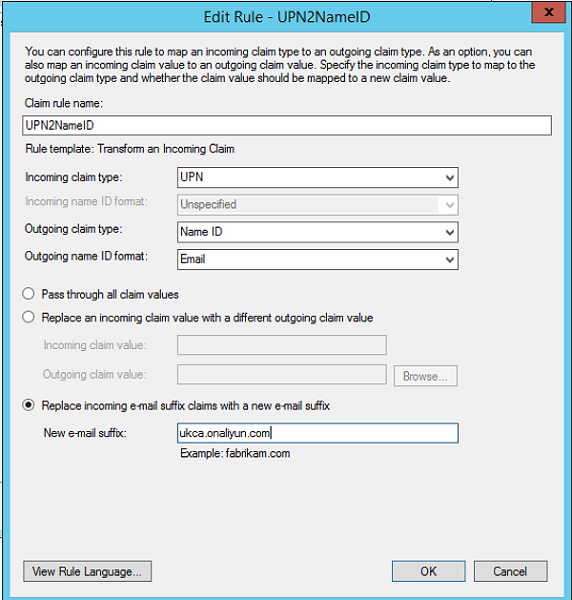
Pls note that the e-mail suffix mentioned here is the "Default Domain" that you can access from the RAM Console "Settings"
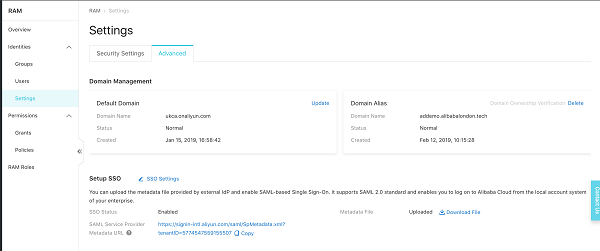
Download the metadata file from the windows AD server:
https://addemo.addemoali.com/FederationMetadata/2007-06/FederationMetadata.xml
As mentioned before if this domain is not a valid registered domain, you can create a host file entry on the client computer to map the Domain (addemo.addemoali.com) to the IP address of AD/ADFS Server. It will not work with the IP address in the URL.
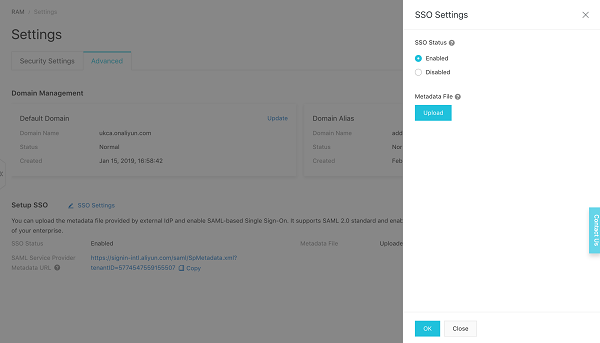
Go to RAM Console "Settings", "Advanced Settings" , "SSO Settings", "Enable SSO" and then "Upload" Metadata file
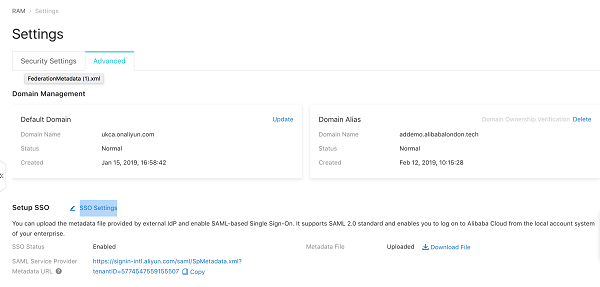
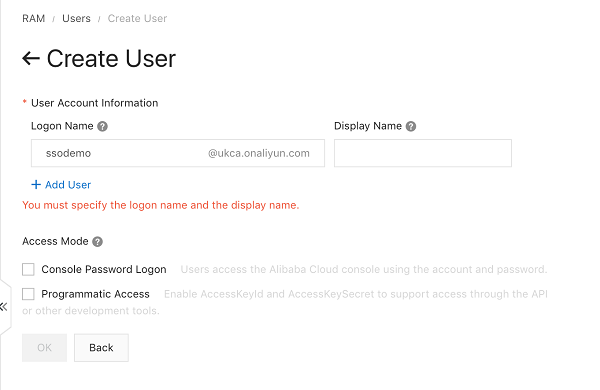
Create user ssodemo@ukca.onaliyun.com in Alibaba Cloud,
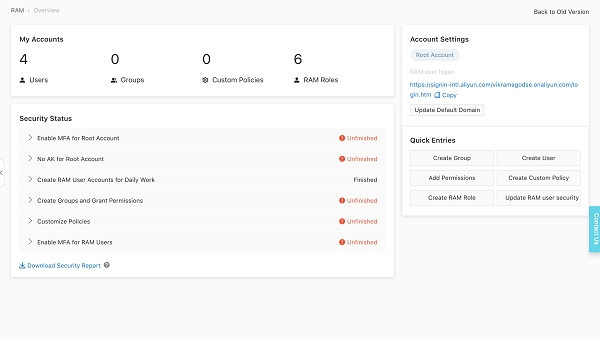
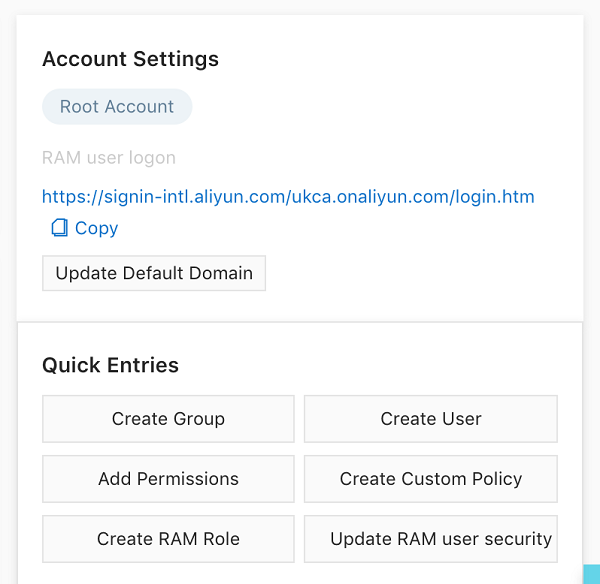
the "ukaca.onaliyun.com" is an alias that you can set to the RAM Login URL from the RAM Console as follows

Login the Cloud console https://signin-intl.aliyun.com/ukca.onaliyun.com/login.htm
This is the RAM Login URL that is available from the RAM Console

When you click on the "Logon with Organization Account", you will be redirected to the AD FS Login Page.
Enter the AD user (ssodemo@alibabalondon.tech) and password.

You have successfully logged in.
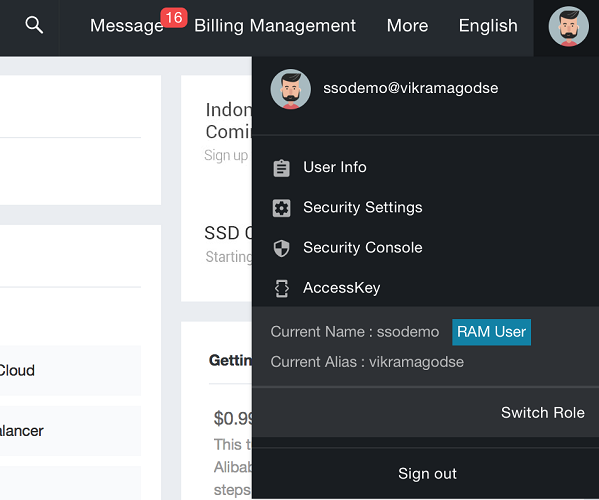
This feature enables federated single sign on (SSO) which allows users can log into Alibaba Cloud Management Console with their corporate credentials. The feature currently allows 1:1 mapping of Alibaba Cloud Resource Access Management (RAM) users to AD users. The mapping or RAM roles to AD groups is currently in development and will be delivered by end April 2019.
Attract, Observe, Recommend, Analyze: Supporting Retail Campaigns with Data Analytics
Reinventing Your Business with New Retail Roadshow and Booth Solutions

2,605 posts | 747 followers
FollowAlibaba Clouder - March 21, 2019
Alibaba Cloud Community - February 17, 2022
Alibaba Cloud Indonesia - November 16, 2020
ApsaraDB - March 4, 2021
ApsaraDB - March 4, 2021
Alibaba Cloud Community - June 16, 2022

2,605 posts | 747 followers
Follow ECS(Elastic Compute Service)
Elastic and secure virtual cloud servers to cater all your cloud hosting needs.
Learn More DNS
DNS
Alibaba Cloud DNS is an authoritative high-availability and secure domain name resolution and management service.
Learn More RAM(Resource Access Management)
Secure your cloud resources with Resource Access Management to define fine-grained access permissions for users and groups
Learn MoreMore Posts by Alibaba Clouder