×
Community Blog Migrating an On-Premises Active Directory to Alibaba Cloud

Migrating an On-Premises Active Directory to Alibaba Cloud

This article explains how to migrate an on-premises active directory to Alibaba Cloud with steps and images.

By M Muzaffer Azam

Microsoft Active Directory can be extended and migrated to Alibaba Cloud by using the Active Directory Native Replication Service and replicating Directory Service to an Alibaba Cloud ECS Instance as an additional domain controller.
Prerequisites

  • Create an Alibaba Cloud account and associate payment method
  • Create Landing Zone on Alibaba Cloud
  • Create a VPN between Alibaba Cloud and On-Premises DC

High-Level Migration Steps

  • Create an ECS Instance with a similar specification on Alibaba Cloud and an OS that matches the On-Premises Domain Controllers
  • Install Microsoft AD DS & DNS Services on the ECS Instance while joining the On-Premises Domain.
  • Promote Domain Controller
  • Migrate FSMO Roles (This will be covered in the next article.)

Install ADDS on ECS Instance

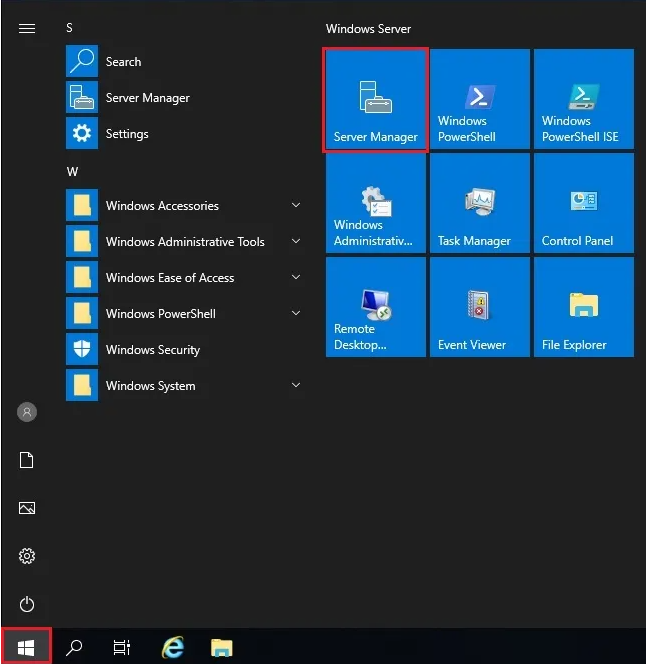
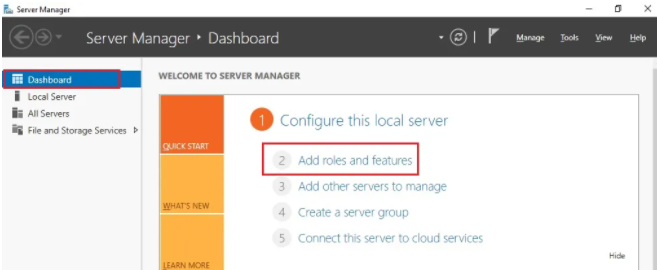
  • Click the Windows start button and choose Server Manager:

1

  • Select Add roles and features:

2

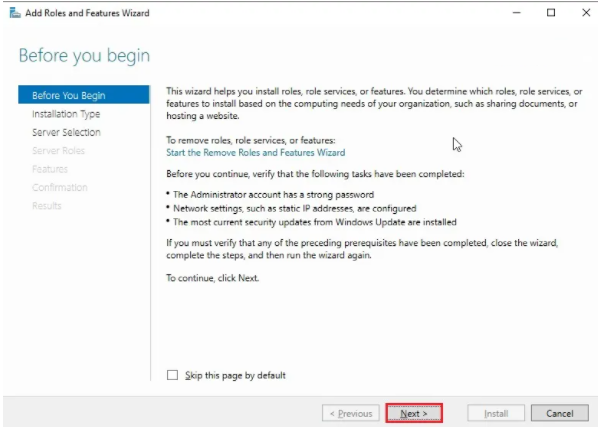
  • Click Next:

3

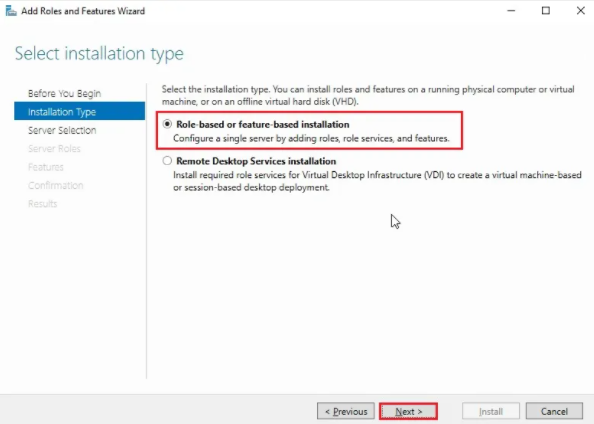
  • Select Role-based or feature-based installation and click Next:

4

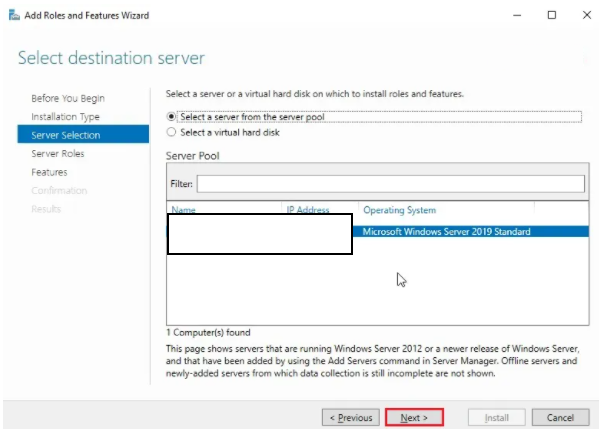
  • Highlight Select a server from the server pole and click Next:

5

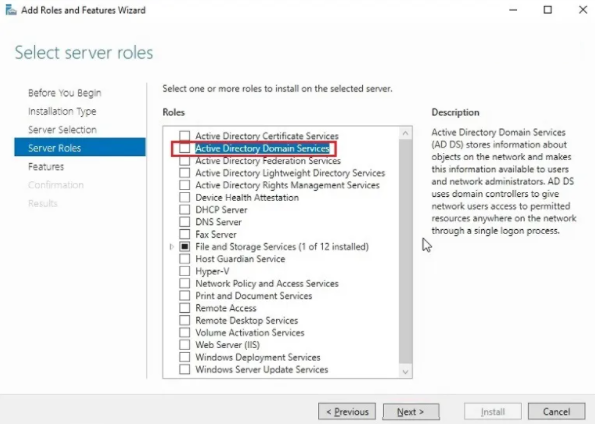
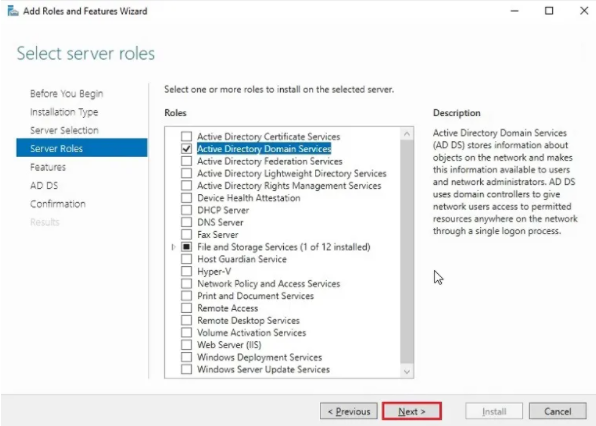
  • Select the Active Directory Domain Services box:

6

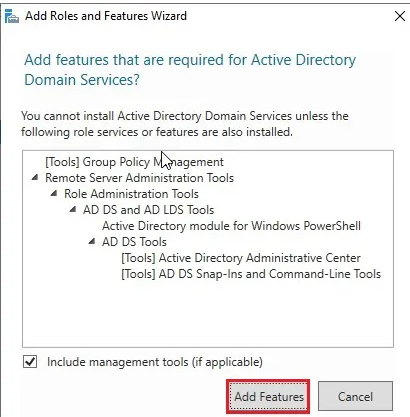
  • Select Add Features on the Add Features that are required for the Active Directory Domain Services page:

7

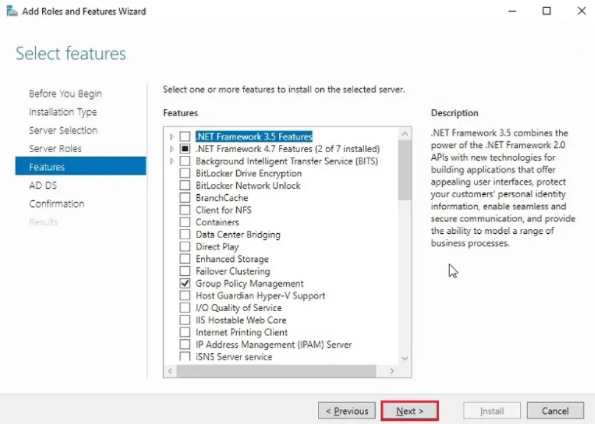
  • Click Next:

8

  • Add Roles and Features Wizard and click Next:

9

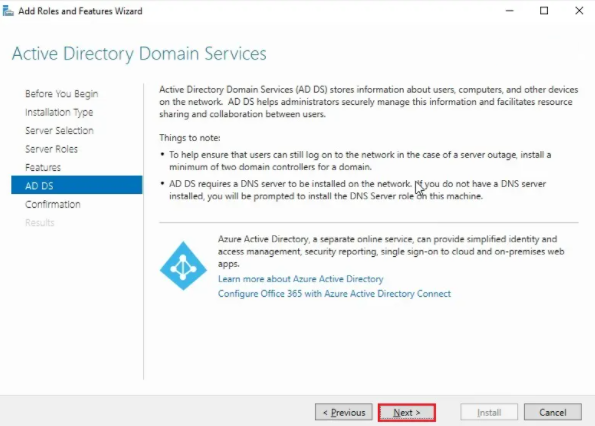
  • Click Next:

10

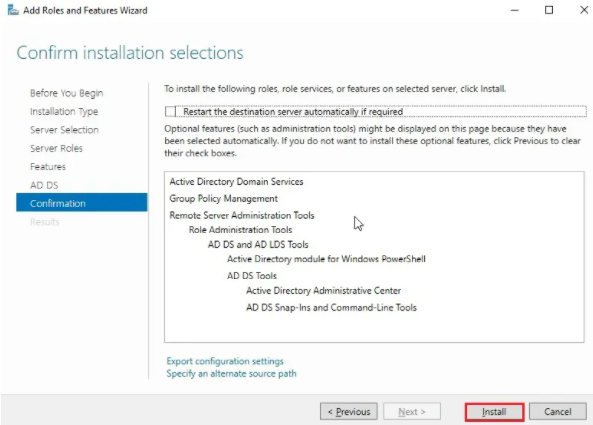
  • Click Install to start the Active Directory installation:

11

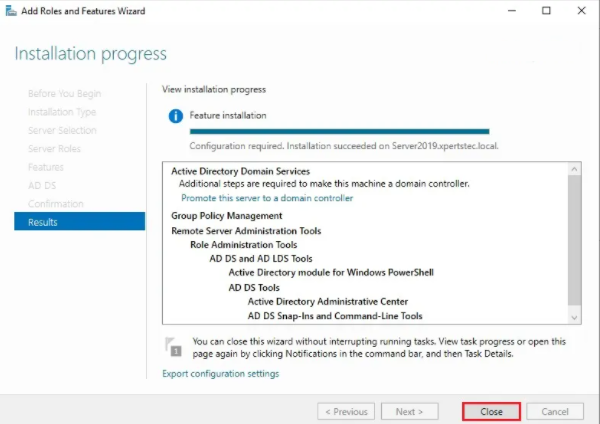
  • After the Active Directory installation finishes, click Close:

12

Promote Domain Controller

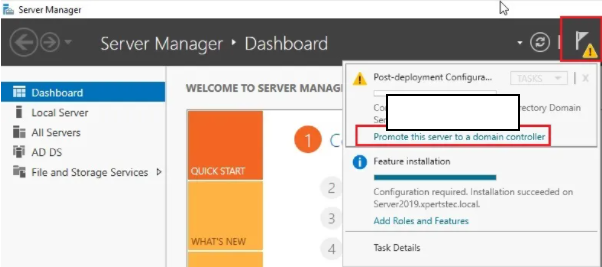
  • Click the warning message on the Server Manager and then click Promote this server to a Domain Controller*:

13

  • Select the deployment operation:
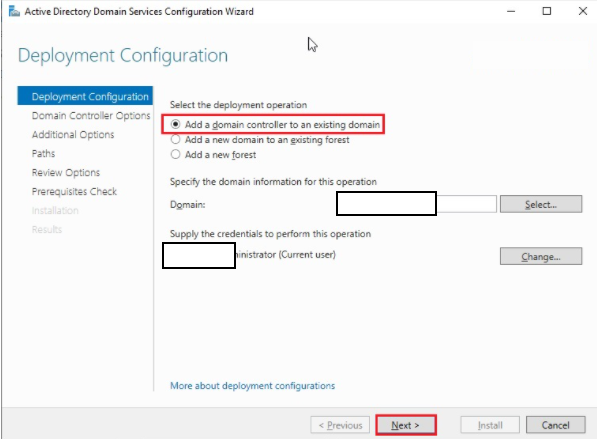
    • Highlight Add a DC to an existing domain
    • Select Domain
    • Verify Administrator Credentials
    • Click Next

14

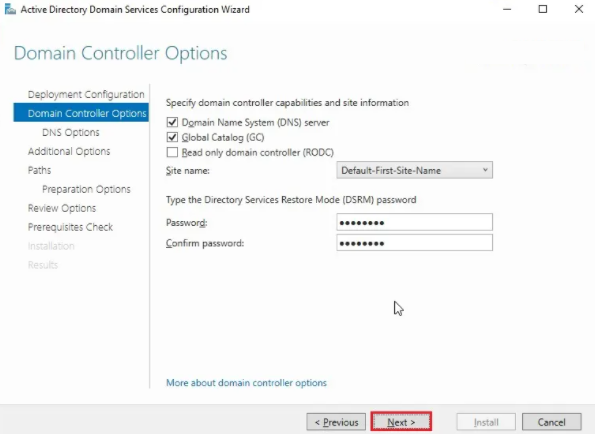
  • Highlight Domain Name System (DNS) Server and Global Catalog (GC)
  • Type the Directory Services restore mode DSRM Password and click Next.

15

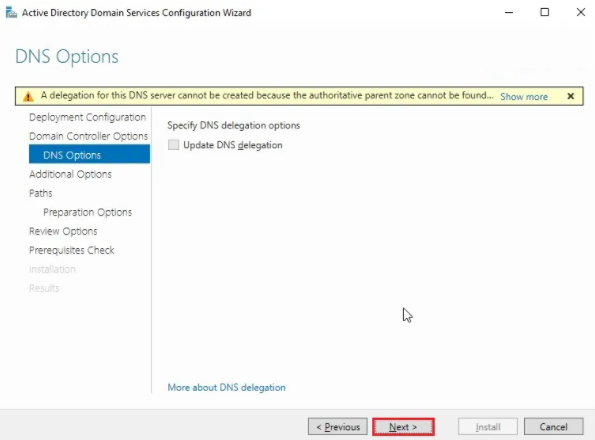
  • Ignore the DNS options warning and click Next.

16

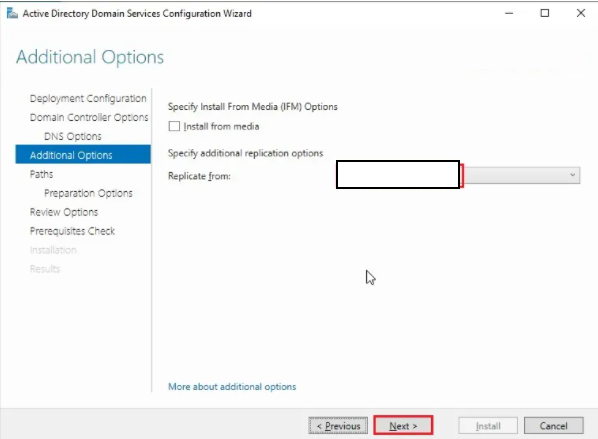
  • Select Replication from Server and click Next:

17

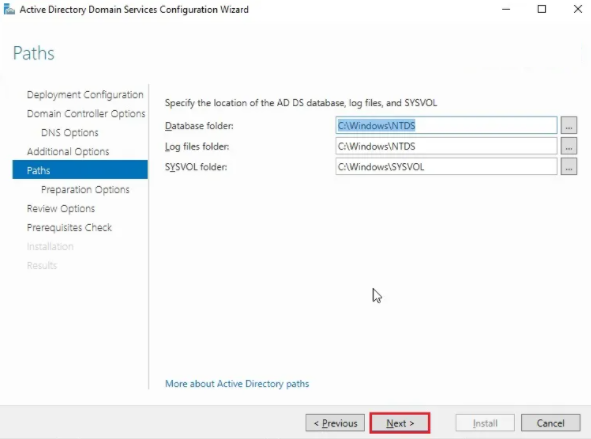
  • Specify the location of the AD DS database, log files, and SYSVOL folders and click Next:

18

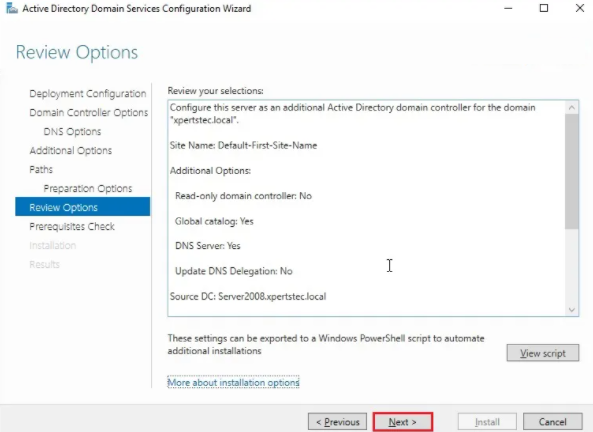
  • Review and click Next:

19

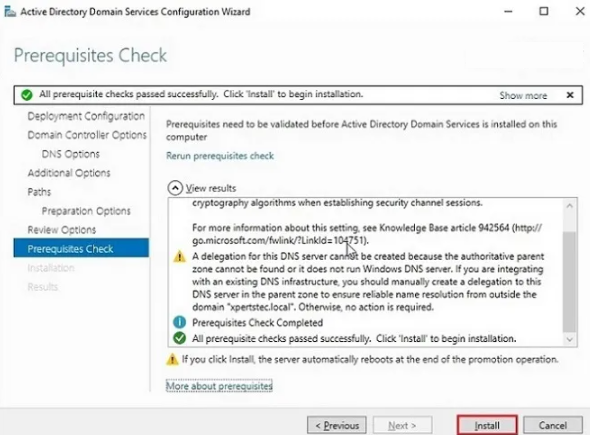
  • Review the prerequisite and click Install:

20

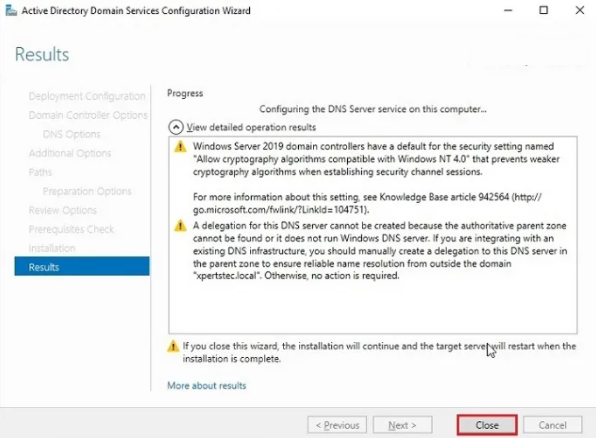
  • After finishing the installation, click Close:

21

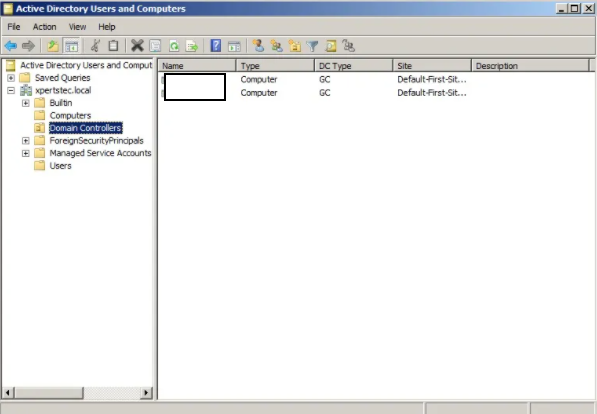
  • Restart the ESC Instance and log on to the Domain Controller
  • Open Active Directory Users and Computers, expand Domain Controllers, and the new DC will be listed under it:

22

0 0 0
Share on

5544031433091282

14 posts | 2 followers

You may also like

Comments