By Hitesh Jethva, Alibaba Cloud Tech Share Author. Tech Share is Alibaba Cloud's incentive program to encourage the sharing of technical knowledge and best practices within the cloud community.
Django is a free, open source and high-level Python Web framework that encourages rapid development and clean, pragmatic design. Django the MVC (Model-View-Controller) architecture and is maintained by the Django Software Foundation. Django is a strong web framework that can assist you to get your application online as quickly as possible. The primary goal of Django is to ease the creation of complex, database-driven websites. Django supports four major database backends including, PostgreSQL, MySQL, SQLite, and Oracle.
You can run Django in conjunction with Apache, Nginx using WSGI, Gunicorn, or Cherokee using a Python module.
In this tutorial, we will learn how to install and configure Django with PostgreSQL database on and Elastic Compute Service (ECS) Ubuntu 16.04 server. We will also learn to configure the Gunicorn application server to interface with our applications and set up Nginx to reverse proxy to Gunicorn.
First, log in to your Alibaba Cloud ECS Console. Create a new ECS instance, choosing Ubuntu 16.04 as the operating system with at least 2GB RAM. Connect to your ECS instance and log in as the root user.
Once you are logged into your Ubuntu 16.04 instance, run the following command to update your base system with the latest available packages.
apt-get update -yBefore starting, you will need to install Nginx, PostgreSQL and some Python package to your system. You can install all of them with the following command:
apt-get install python3-pip python3-dev libpq-dev postgresql postgresql-contrib nginx -yOnce all the packages are installed. You can proceed to configure PostgreSQL database.
Next, you will need to create a PostgreSQL database and user for Django application.
First, log into PostgreSQL interactive session by running the following command:
sudo -u postgres psqlNext, create a PostgreSQL database and user for your Django project using the following command:
postgres=# CREATE DATABASE testproject;
postgres=# CREATE USER testuser WITH PASSWORD 'password';
Next, setting the default encoding to UTF-8, setting the default transaction isolation scheme to "read committed" and setting the timezone to UTC with the following command:
postgres=# ALTER ROLE testuser SET client_encoding TO 'utf8';
postgres=# ALTER ROLE testuser SET default_transaction_isolation TO 'read committed';
postgres=# ALTER ROLE testuser SET timezone TO 'UTC';
Next, grant all the privileges to your database and exit from the PostgreSQL session with the following command:
postgres=# GRANT ALL PRIVILEGES ON DATABASE testproject TO testuser;
postgres=# \qNext, you will need to create a Python virtual environment for your project. You can do that by installing package required by Python within a virtual environment.
First, upgrade pip and install virtual environment with the following command:
sudo -H pip3 install --upgrade pip
sudo -H pip3 install virtualenv
Next, create a directory for your project:
mkdir ~/testproject
cd ~/testproject
Next, create a Python virtual environment by running the following command:
virtualenv testprojectenvThe above command will create a testprojectenv directory under testproject directory and install a local version of Python and a local version of pip.
Next, you will need to install all the required packages for your project.
First, activate the virtual environment with the following command:
source testprojectenv/bin/activateAfter activation your virtual environment, install Django, Gunicorn, and the psycopg2 PostgreSQL adaptor with the following command:
(testprojectenv) root@mail:~/testproject# pip install django gunicorn psycopg2Output:
Installing collected packages: pytz, django, gunicorn, psycopg2
Successfully installed django-2.1.1 gunicorn-19.9.0 psycopg2-2.7.5 pytz-2018.5Next, you will need to tell Django to install the records inside your project directory. You can do this with the following command:
(testprojectenv) root@mail:~/testproject# django-admin.py startproject testproject ~/testprojectNext, you will need define your server's IP address, database username and password in settings.py file:
(testprojectenv) root@mail:~/testproject# nano /root/testproject/testproject/settings.pyMake the following changes:
ALLOWED_HOSTS = ['192.168.43.192']

DATABASES = {
    'default': {
        'ENGINE': 'django.db.backends.postgresql_psycopg2',
        'NAME':  'testproject',
        'USER' : 'testuser',
        'PASSWORD' : 'password',
        'HOST' : 'localhost',
        'PORT' : '',
    }
}

STATIC_ROOT = os.path.join(BASE_DIR, 'static/')
Save and close the file when you are completed.
Next, you will need to migrate the initial database schema to our PostgreSQL database. You can do this by running the following script:
(testprojectenv) root@mail:~/testproject# ~/testproject/manage.py makemigrations
(testprojectenv) root@mail:~/testproject# ~/testproject/manage.py migrate
Next, create an administrative user for the project by running the following command:
(testprojectenv) root@mail:~/testproject# ~/testproject/manage.py createsuperuserOutput:
Username (leave blank to use 'root'):
Email address: admin@example.com
Password:
Password (again):
Superuser created successfully.
Next, collect all of the static content into the directory location you have configured by running the following command:
(testprojectenv) root@mail:~/testproject# ~/testproject/manage.py collectstaticNow, you can start your project by starting up the Django development server with the following command:
(testprojectenv) root@mail:~/testproject# ~/testproject/manage.py runserver 0.0.0.0:8000Once the server started successfully. You should see the following output:
Performing system checks...
System check identified no issues (0 silenced).
September 10, 2018 - 15:06:07
Django version 2.1.1, using settings 'testproject.settings'
Starting development server at http://0.0.0.0:8000/
Quit the server with CONTROL-C.
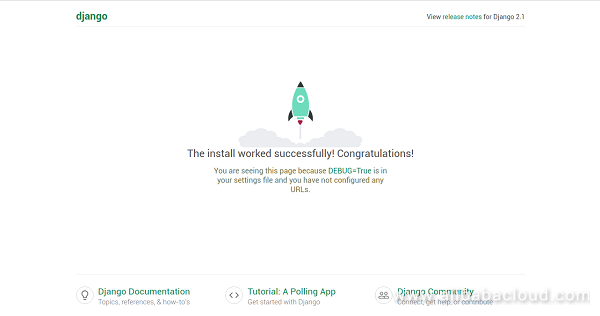
Now, open your web browser and type the URL http://your-server-ip:8000. You will be redirected to the Django index page as shown below:

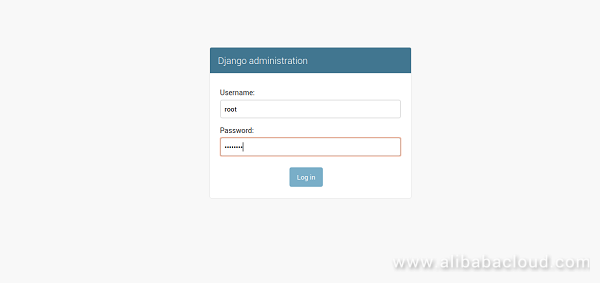
You can also access Django's admin interface by typing the URL http://your-server-ip:8000/admin in your web browser. You will be prompted for the admin username and password which you have created earlier as shown below:

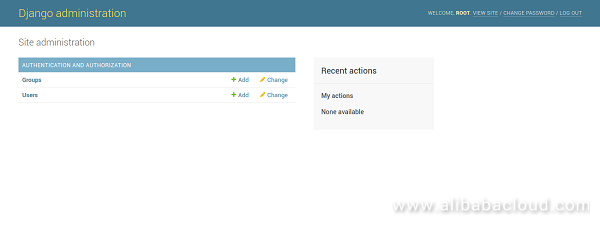
After entering username and password, click on Login button. You will be redirected to the Django admin interface as shown below:

Now, press CTRL+C in the terminal window to shut down the development server.
If you want to test Gunicorn to test whether Gunicorn can serve the application. To do so, load your project's WSGI module with the following command:
(testprojectenv) root@mail:~/testproject# gunicorn --bind 0.0.0.0:8000 testproject.wsgiThe above command will start Gunicorn on the same interface that the Django development server was running on. You can test it by visiting the URL http://your-server-ip:8000.
Once you have completed your testing, press CTRL+C in the terminal to stop the Gunicorn.
Now, deactivate your virtual environment by running the following command:
(testprojectenv) root@mail:~/testproject# deactivateNext, you will need to create a systemd service file for Gunicorn. So, you can easily start and stop the application server. You can do this by creating the following file:
nano /etc/systemd/system/gunicorn.serviceAdd the following lines:
[Unit]
Description=gunicorn daemon
After=network.target

[Service]
User=root
Group=www-data
WorkingDirectory=/root/testproject
ExecStart=/root/testproject/testprojectenv/bin/gunicorn --access-logfile - --workers 3 --bind unix:/root/testproject/testproject.sock testproject.wsgi:application

[Install]
WantedBy=multi-user.target
Save and close the file. Then, start Gunicorn service and enable it to start on boot time with the following command:
systemctl start gunicorn
systemctl enable gunicorn
You can check the status of Gunicorn with the following command:
systemctl status gunicornOutput:
  gunicorn.service - gunicorn daemon
   Loaded: loaded (/etc/systemd/system/gunicorn.service; enabled; vendor preset: enabled)
   Active: active (running) since Mon 2018-09-10 20:58:14 IST; 10s ago
 Main PID: 2377 (gunicorn)
   CGroup: /system.slice/gunicorn.service
           ├─2377 /root/testproject/testprojectenv/bin/python3 /root/testproject/testprojectenv/bin/gunicorn --access-logfile - --workers 3 --b
           ├─2384 /root/testproject/testprojectenv/bin/python3 /root/testproject/testprojectenv/bin/gunicorn --access-logfile - --workers 3 --b
           ├─2385 /root/testproject/testprojectenv/bin/python3 /root/testproject/testprojectenv/bin/gunicorn --access-logfile - --workers 3 --b
           └─2386 /root/testproject/testprojectenv/bin/python3 /root/testproject/testprojectenv/bin/gunicorn --access-logfile - --workers 3 --b

Sep 10 20:58:14 mail.example.com systemd[1]: Started gunicorn daemon.
Sep 10 20:58:14 mail.example.com gunicorn[2377]: [2018-09-10 20:58:14 +0530] [2377] [INFO] Starting gunicorn 19.9.0
Sep 10 20:58:14 mail.example.com gunicorn[2377]: [2018-09-10 20:58:14 +0530] [2377] [INFO] Listening at: unix:/root/testproject/testproject.soc
Sep 10 20:58:14 mail.example.com gunicorn[2377]: [2018-09-10 20:58:14 +0530] [2377] [INFO] Using worker: sync
Sep 10 20:58:14 mail.example.com gunicorn[2377]: [2018-09-10 20:58:14 +0530] [2384] [INFO] Booting worker with pid: 2384
Sep 10 20:58:15 mail.example.com gunicorn[2377]: [2018-09-10 20:58:15 +0530] [2385] [INFO] Booting worker with pid: 2385
Sep 10 20:58:15 mail.example.com gunicorn[2377]: [2018-09-10 20:58:15 +0530] [2386] [INFO] Booting worker with pid: 2386Gunicorn is now configured and working. it's time to configure Nginx to pass traffic to the process. You can do this by creating a new Nginx configuration file inside /etc/nginx/sites-available/ directory.
nano /etc/nginx/sites-available/gunicornAdd the following lines:
server {
    listen 80;
    server_name 192.168.43.192;

    location = /favicon.ico { access_log off; log_not_found off; }
    location /static/ {
        root /root/testproject;
    }

    location / {
        include proxy_params;
        proxy_pass http://unix:/root/testproject/testproject.sock;
    }
}
Save and close the file. Then, enable the Nginx virtual host by creating symlink:
ln -s /etc/nginx/sites-available/gunicorn /etc/nginx/sites-enabled/Next, test the Nginx for any configuration error with the following command:
nginx -tOutput:
nginx: the configuration file /etc/nginx/nginx.conf syntax is ok
nginx: configuration file /etc/nginx/nginx.conf test is successful
Finally, restart Nginx by running the following command:
systemctl restart nginxNow, Nginx is configured to pass the traffic to the process. To test it, open your web browser and type the URL http://your-server-ip. You will be redirected to your application as shown in the following page:


2,593 posts | 791 followers
FollowAlibaba Clouder - March 18, 2019
Alibaba Clouder - August 2, 2018
Alibaba Clouder - December 17, 2018
Alibaba Clouder - April 12, 2018
Alibaba Clouder - March 18, 2019
Alibaba Clouder - December 20, 2019

2,593 posts | 791 followers
Follow ECS(Elastic Compute Service)
Elastic and secure virtual cloud servers to cater all your cloud hosting needs.
Learn More Simple Application Server
Cloud-based and lightweight servers that are easy to set up and manage
Learn MoreLearn More
More Posts by Alibaba Clouder