This article introduces the development and realization of cloud-to-end Internet of Things (IoT) programs through Node.js.
The code in the article also uploads the simulated temperature and humidity data to the Alibaba Cloud IoT Platform. We still extend this code to connect the actual temperature and humidity sensors and upload the data to the cloud, while the cloud sends a control command to control the LED on and off. Building the relevant hardware platforms will not be covered here.
Currently, Node.js is used to directly operate GPIO. According to resources on the Internet, two common methods are available: use the rpio library (the latest version is rpio 2 0.4.1) or use quick2wire-gpio-admin. (If there are better solutions, I hope that netizens recommend them). Because I am most familiar with it, I chose rpio2 this time.
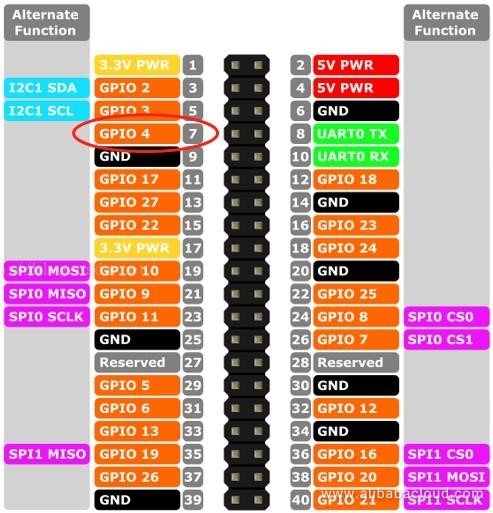
Note that the pin in rpio2 is somewhat different from that used with Python. The pin specified by rpio2 is the pin position of the physical pin header. For example, our LED module control pin is connected to GPIO4. In this case, we define pin = 4 in Python and pin = 7 in rpio2.
The rpio2 library must be installed before it can be used. Enter the following command:
npm install rpio2 –productionThe code for operating GPIO is also relatively simple, as shown in the following sample code:
const Gpio = require('/home/pi/node_modules/rpio2/lib/index.js'). Gpio;
var led = new Gpio(7);  //Create Pin7 pin
led.open(Gpio.OUTPUT, Gpio.LOW); //Set to OUTPUT, which defaults to low level
for(var i = 0; i < 20; i++){
    led.toggle();    //Switch the level status of the LED
    led.sleep(300);  //Wait for 500 ms
}
led.close();
Obtaining the value of DHT11 is relatively complex. You may refer to this article for more information: https://www.instructables.com/id/Raspberry-Pi-Nodejs-Blynk-App-DHT11DHT22AM2302/
No problems were found when installing bcm2835-1.46, but if you install node-dht-sensor directly by entering the sudo npm install -g node-dht-sensor command, the following error occurs:
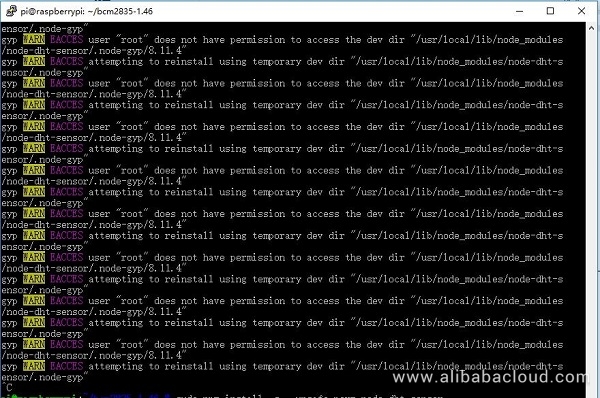
We must execute the command like this:
sudo chmod -R 777 /var/root
sudo npm install -g --unsafe-perm node-dht-sensor. This installs it correctly, as shown in the following figure: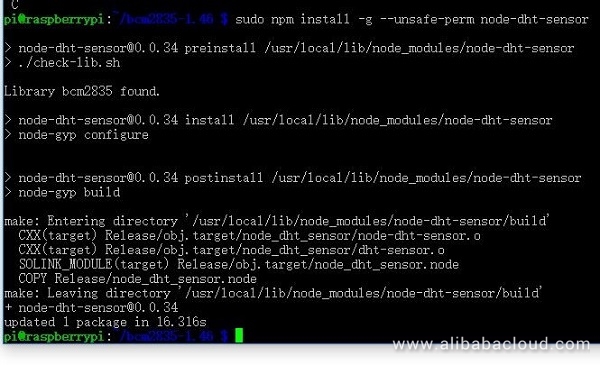
The code for obtaining temperature and humidity is relatively simple, as follows:
var sensorLib = require('node-dht-sensor');
// Setup sensor, exit if failed
var sensorType = 11; // 11 for DHT11, 22 for DHT22 and AM2302
var sensorPin  = 16;  // The GPIO pin number for sensor signal
if (! sensorLib.initialize(sensorType, sensorPin)) {
    console.warn('Failed to initialize sensor');
    process.exit(1);
}
// Automatically update sensor value every 2 seconds
setInterval(function() {
var readout = sensorLib.read();
    console.log('Temperature:', readout.temperature.toFixed(1) + 'C');
    console.log('Humidity:   ', readout.humidity.toFixed(1)    + '%');
}, 2000);
If the sudo NODE_PATH=/usr/local/lib/node_modules node ./nodejs_dht11.js command is executed, the result is as follows:

With the above operation, we merge the code above into the official sample of Alibaba Cloud, thus realizing two-way communication of the Alibaba Cloud.
Add the message function to obtain the data sent from the cloud:
 client.on('message', function(topic, message) {
 var json = JSON.parse(message.toString());
 console.log("LED="+ json.params.LED.toString());
 led.write( json.params.LED);
});
The getPostData function must be modified to include the temperature and humidity function:
function getPostData(){
 var readout = sensorLib.read();
 const payloadJson = {
 id: Date.now(),
 params: {
 temperature: readout.temperature.toFixed(1),
 humidity: readout.humidity.toFixed(1)
 },
 method: "thing.event.property.post"
 }
The device we created on the Alibaba Cloud IoT Platform remains the same, and we connect to it in the cloud.
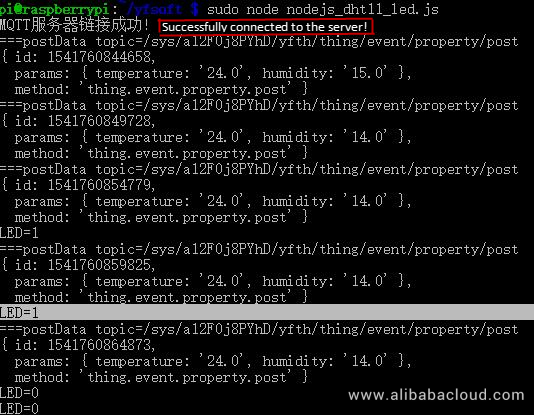
The execution code must be preceded by sudo, otherwise an error occurs. The execution results are as follows:
To learn more about Alibaba Cloud's Internet of Things (IoT) Platform, visit https://www.alibabacloud.com/product/iot
How to Implement Dynamic Registration of IoT Devices Using Alibaba Cloud Function Compute
Connecting .NET Gadgeteer to the Alibaba Cloud IoT Platform Using C#
GXIC - February 25, 2019
Alibaba Clouder - November 28, 2019
Alibaba Clouder - January 11, 2019
GXIC - June 11, 2019
GXIC - June 11, 2019
Alibaba Clouder - September 18, 2019
 IoT Platform
Provides secure and reliable communication between devices and the IoT Platform which allows you to manage a large number of devices on a single IoT Platform.
Learn More IoT Solution
A cloud solution for smart technology providers to quickly build stable, cost-efficient, and reliable ubiquitous platforms
Learn More API Gateway
API Gateway provides you with high-performance and high-availability API hosting services to deploy and release your APIs on Alibaba Cloud products.
Learn More Global Internet Access Solution
Migrate your Internet Data Center’s (IDC) Internet gateway to the cloud securely through Alibaba Cloud’s high-quality Internet bandwidth and premium Mainland China route.
Learn MoreMore Posts by GXIC