This is the second section of the DataWorks workshop. In this section of the workshop you will work on a massive log data analysis task. By doing so, you will learn how to synchronize data from different data sources to MaxCompute, how to quickly trigger task runs, and how to view task logs.
Before you begin the steps outlined in this section of the workshop, you need to make sure you have an valid Alibaba Cloud account.
If you have already activated MaxCompute, you can skip this step and go on to create the project space directly.
1. Log in to the Alibaba Cloud website, click Log in in the upper-right corner to fill in your Alibaba Cloud account and password.
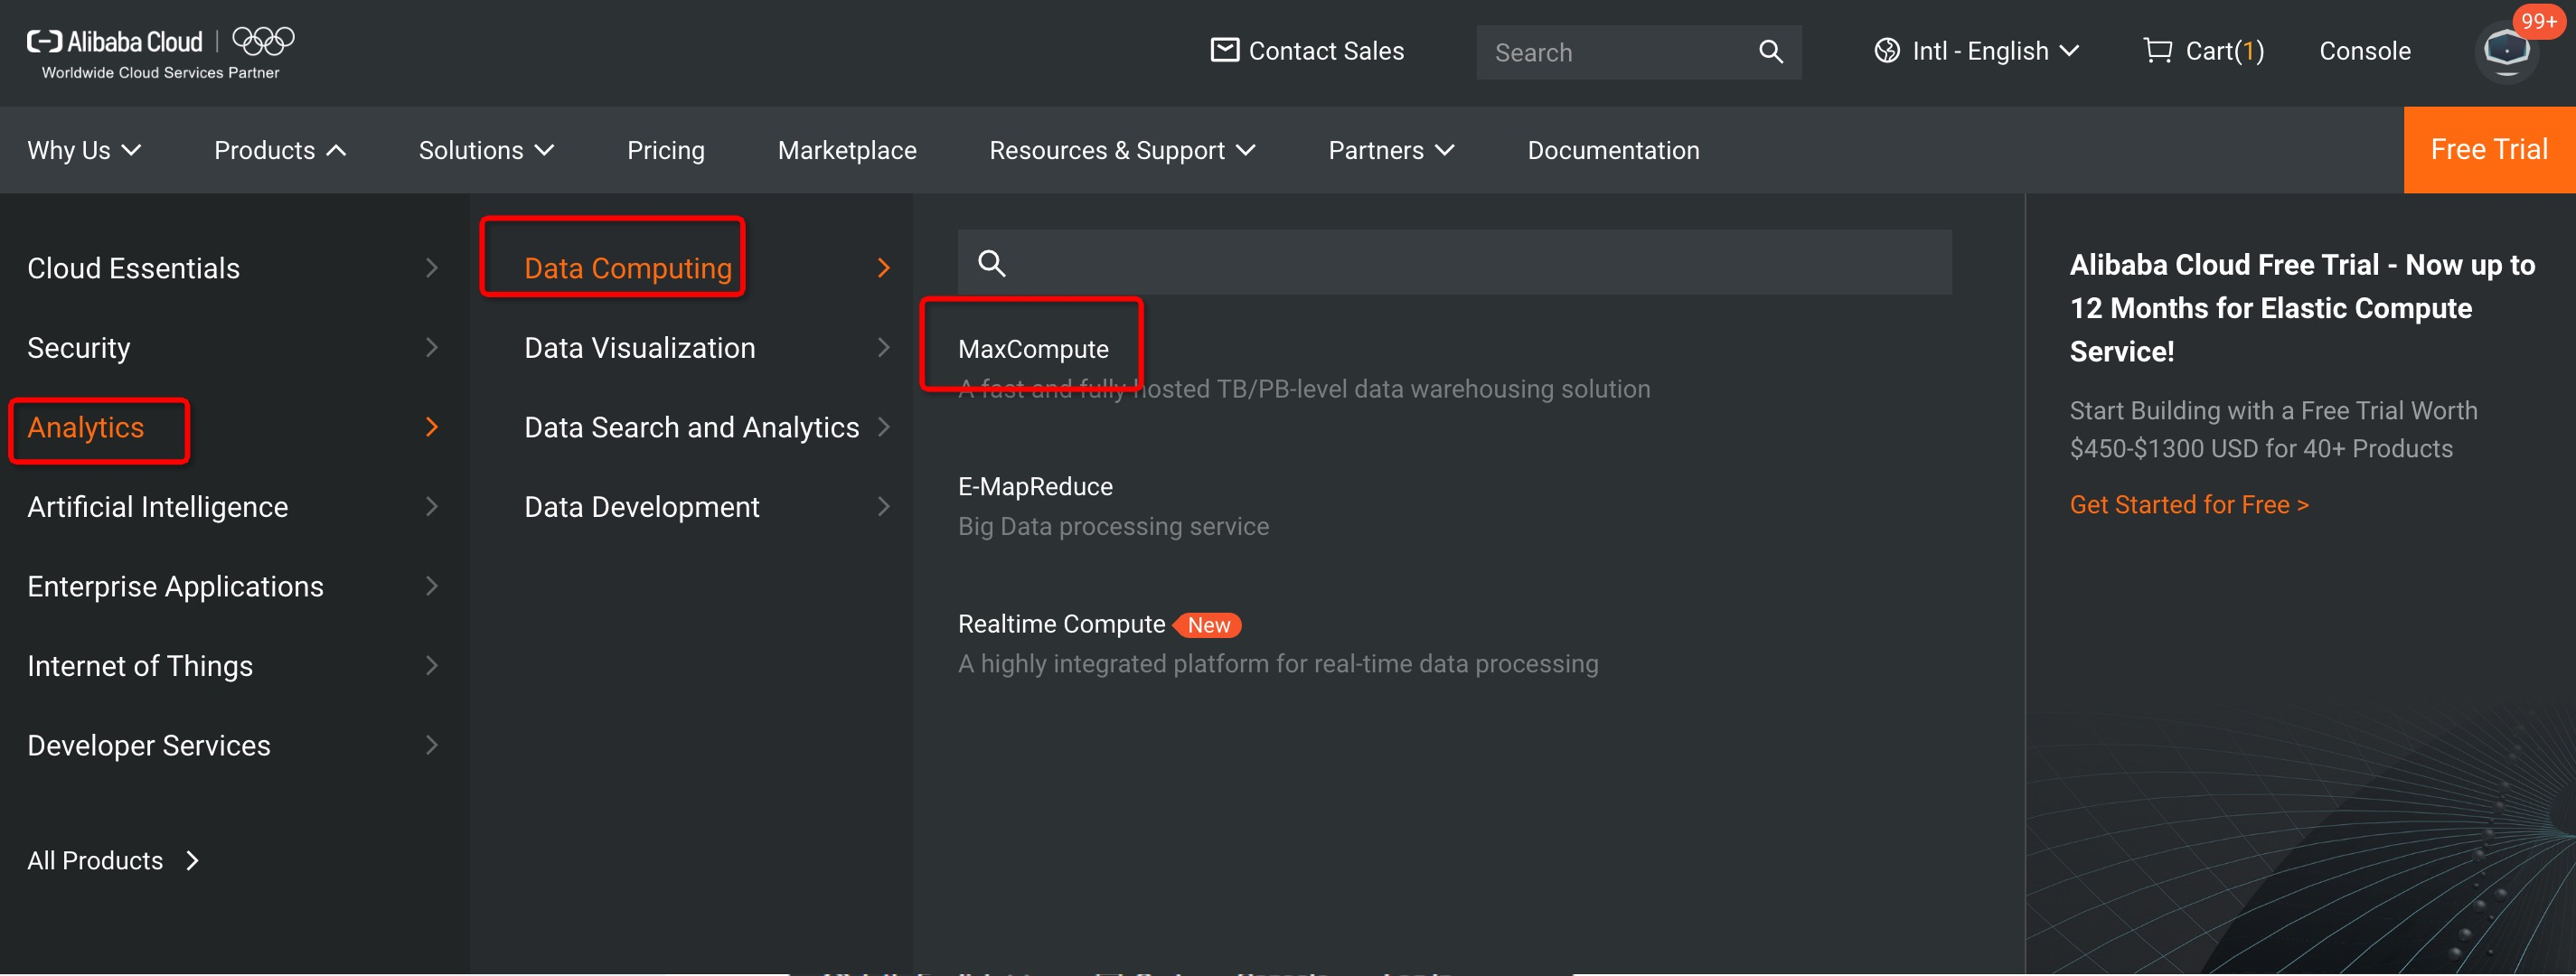
2. Select Products and then Analytics & Big Data and last MaxComputute, and then go to the MaxCompute product details page.
3. 
4. Click Start now.
5. Select Pay-As-You-Go, click Buy Now.
1. Log on to the DataWorks console by using a primary account.
2. You can create a workspace in one of two ways.
(1). On the console Overview page, go to Commonly Used Features > Create Workspace.
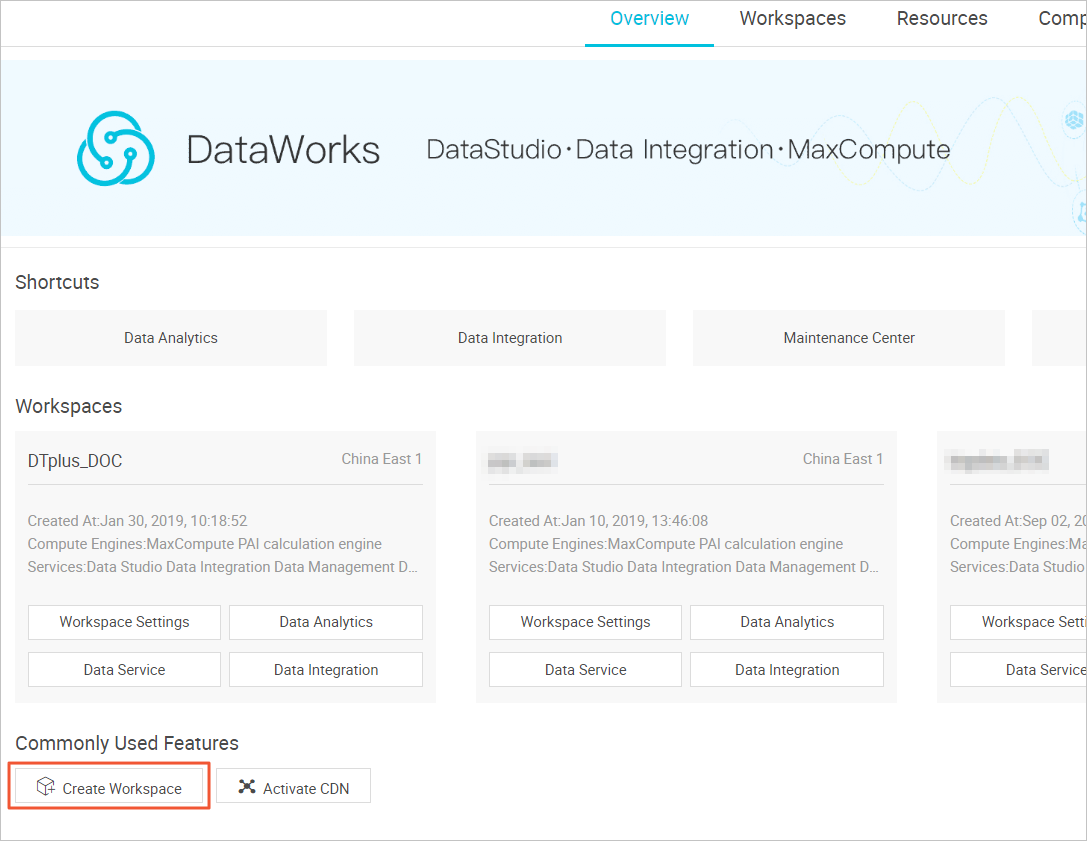
(2). On the console Workspace page, select region, and then click Create Workspace in the upper right corner.

3. Fill in the configuration items in the Create Workspace dialog box. Select a region and a calculation engine service.
Note: If you have not purchase the relevant services in the region, it is directly display that there is no service available in the Region. The data analytics, O&M, and administration are selected by default.
4. Configure the basic information and advanced settings for the new project, and click Create Workspace.
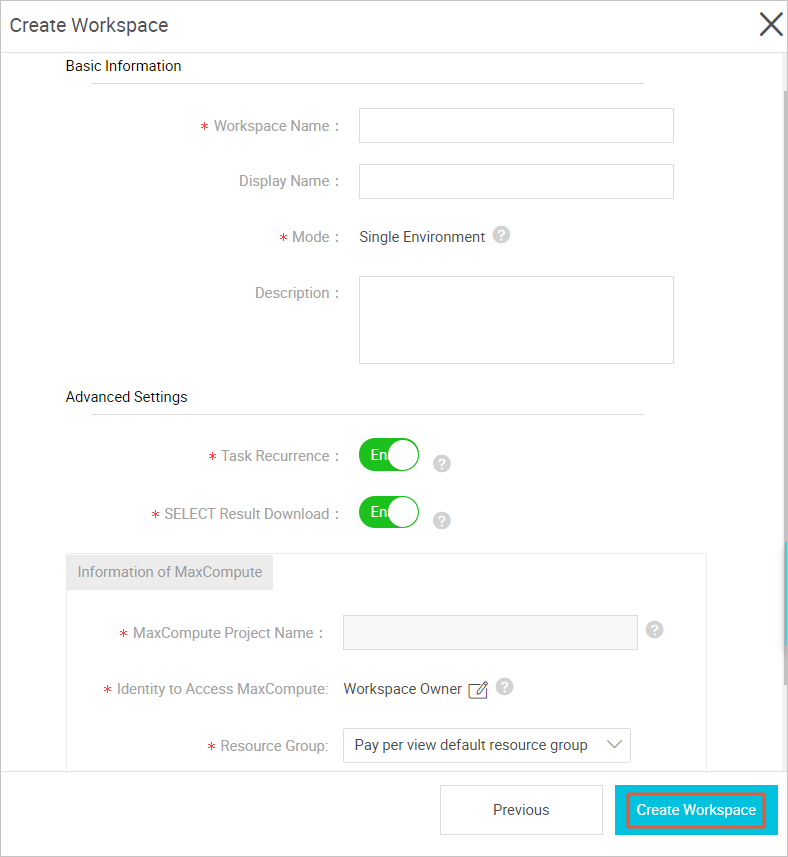
Note the following:
(1). The workspace name needs to begin with a letter or underline, and can only contain letters, underscores, and numbers.
(2). The workspace name is globally unique, it is recommended that you use your own easy-to-distinguish name as the project space name for this lab.
5. Once the workspace has been created successfully, you can select the Workspace page to Data Analytics after viewing the workspace space.

Before you begin, note that, based on the scenario simulated by this lab, you need to distribute to create both the OSS and ApsaraDB for RDS data sources.

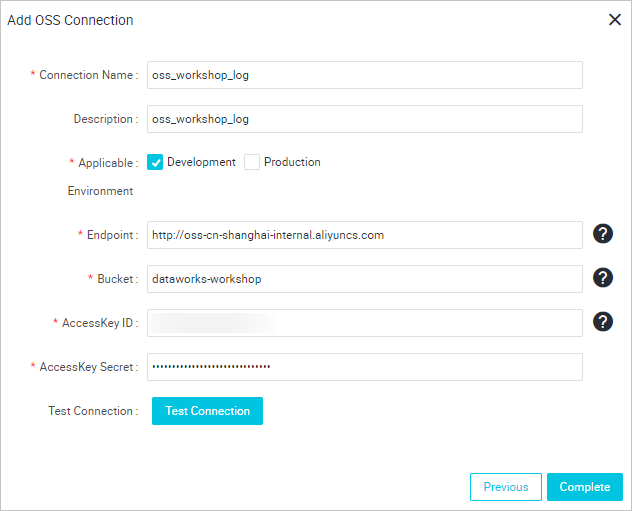
Here are the above parameters you need to enter:
http://oss-cn-shanghai-internal.aliyuncs.com
Note: If the test connectivity fails, check your AK and the region in which the item is located. It is recommended to create the project in China (Shanghai), and other regions do not guarantee network access.
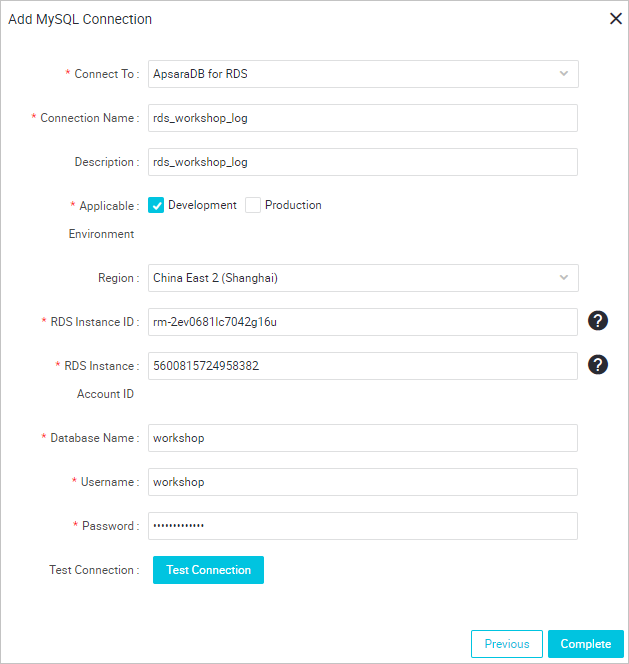
Here are the above parameters you need to enter:
1. Right-click Business Flow under Data Analytics, select Create Business Flow.
2. Fill in the Business Flow name and description.
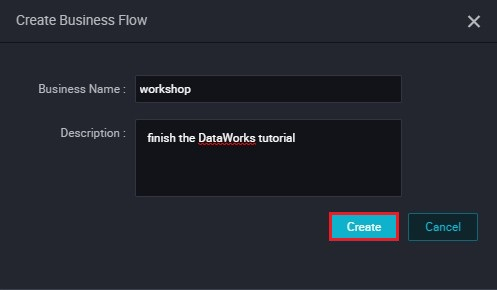
3. Click Create to complete the creation of the Business Flow.
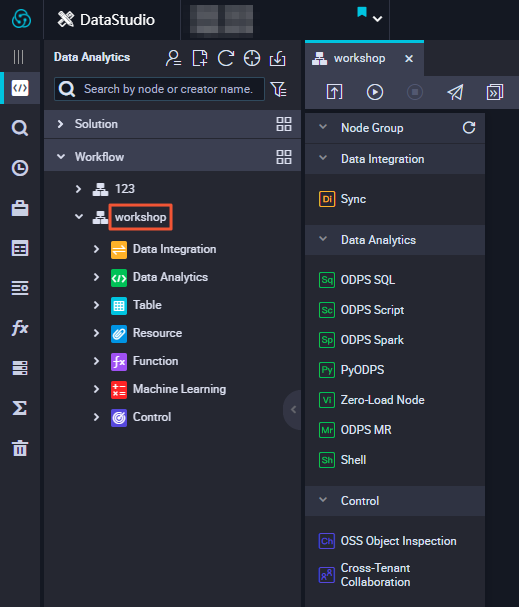
4. Enter the Business Flow Development Panel and drag a virtual node and two data sync nodes (oss_datasync and rds_datasync) into the Panel.
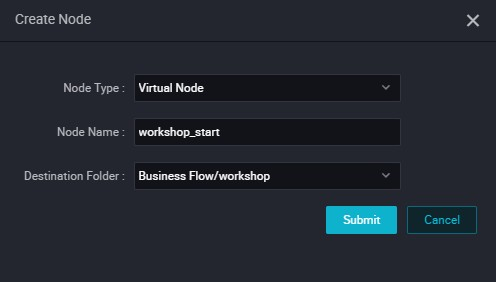
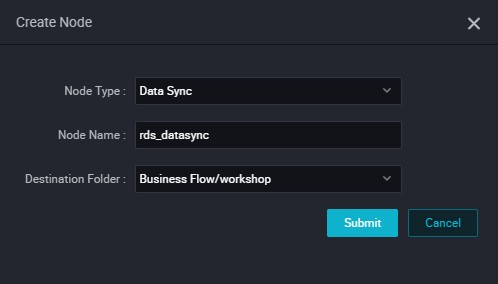
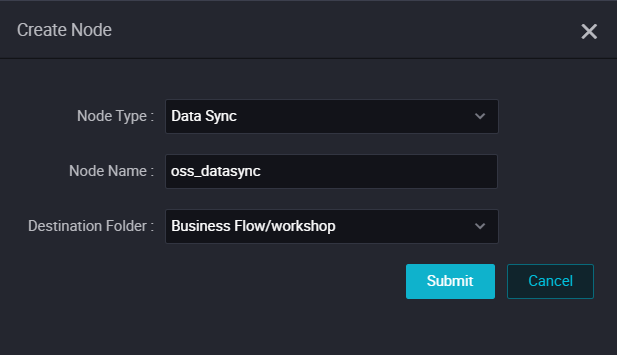
5. Drag the connection to set the workshop_start node to the upstream of both data synchronization nodes.
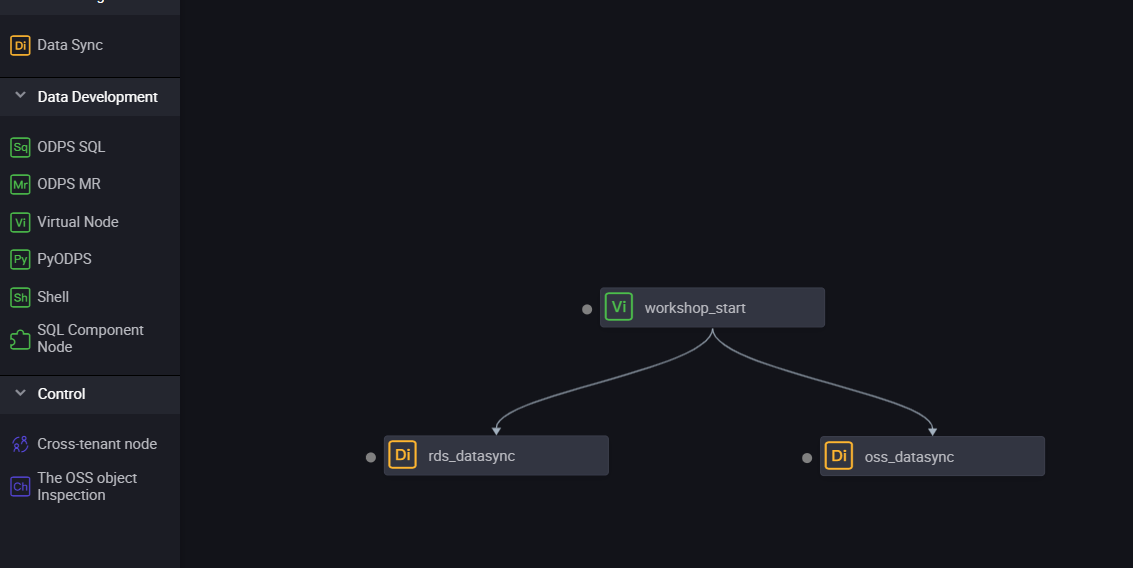
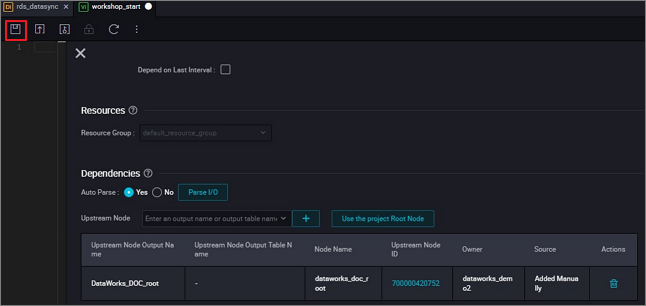
workshop_start TaskSince the new version sets the input and output nodes for each node, you need to set an input for the workshop_start node, the virtual node in the Business Flow can be set to the upstream node as the project root node, the project root node is generally named project name _ root.
You can configure it by clicking Schedule. When the task configuration is complete, click Save.
1. Right-click Table and choose Create Table.
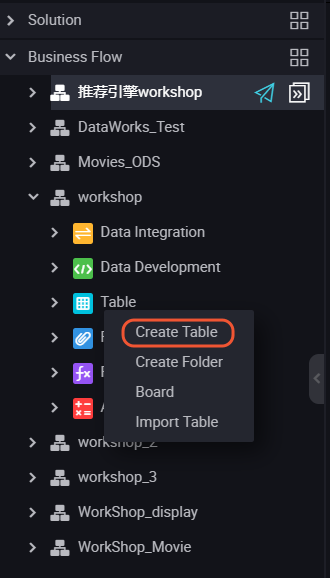
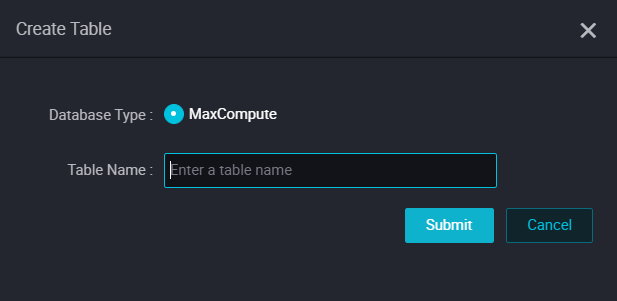
2. Type in Table Name (ods_raw_log_d and ods_user_info_d) for the OSS logs and RDS respectively.
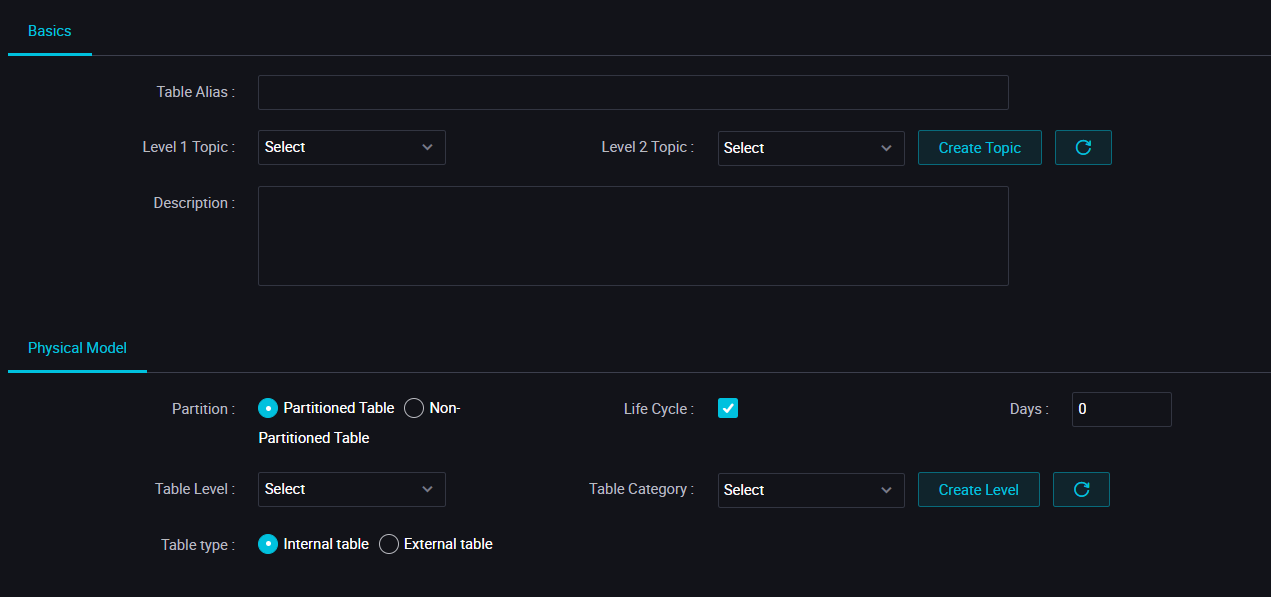
3. Type in your Table Alias and choose Partitioned Table.
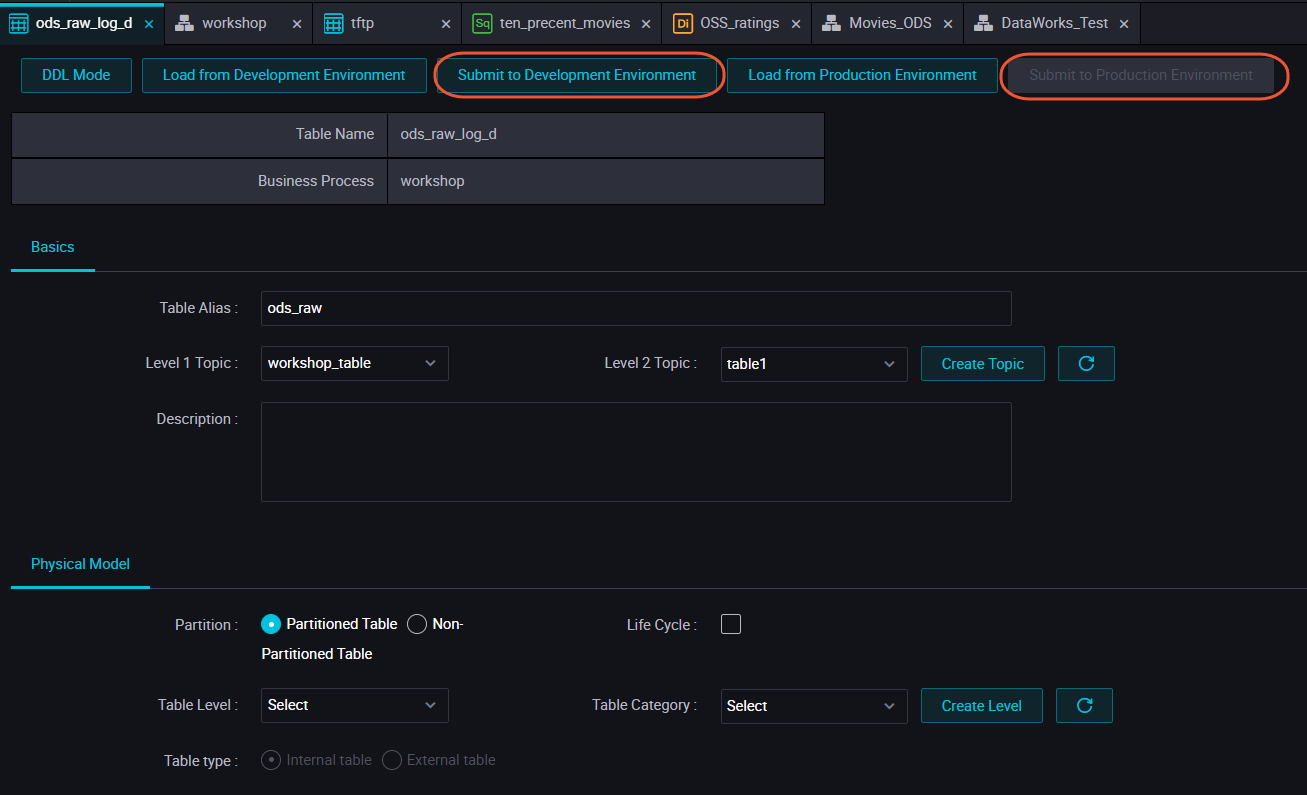
4. Type in the field and partition information, click Submit to Development Environment and Submit to Production Environment.

You can also click DDL Mode, use the following SQL statements to create tables.
//Create a target table for oss logs
CREATE TABLE IF NOT EXISTS  ods_raw_log_d (
  col STRING
)
PARTITIONED BY (
  dt STRING
);

//Creates a target table for RDS
CREATE TABLE IF NOT  EXISTS ods_user_info_d (
  uid STRING COMMENT 'User ID',
  gender STRING COMMENT 'Gender',
  age_range STRING COMMENT 'Age range',
  zodiac STRING COMMENT 'Zodiac'
)
PARTITIONED BY (
  dt STRING
);
5. Click Submit to Development Environment and Submit to Production Environment. You can configure both of the tables in this way.
oss_datasync nodeoss_datasync node to go to the node configuration page.Select the data source you made in the OSS data source.
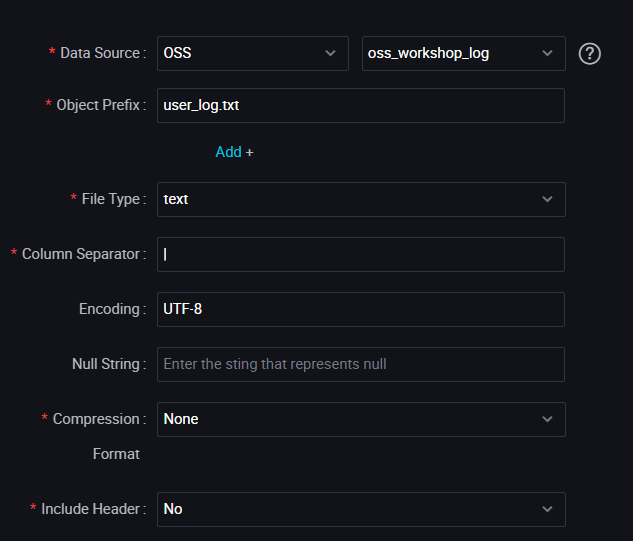
Here are the above parameters you need to enter:
oss_workshop_log
/user_log.txt
|
Select the data destination is ods_raw_log_d in the odps_first data source. Both partition information and cleanup rules take the system default, the default configuration of the partition is ${bizdate}.
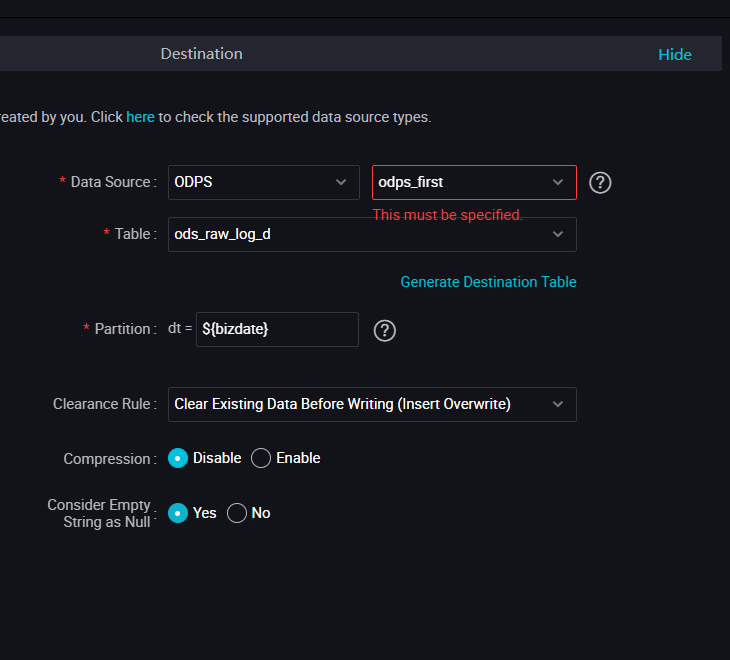
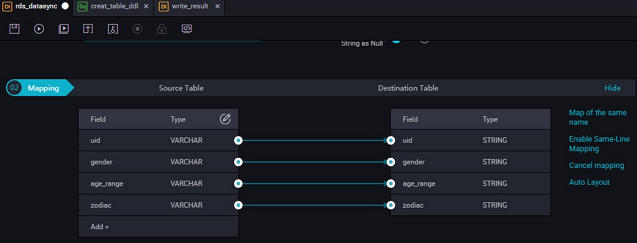
Configure the field mapping, connect the fields that you want to synchronize.


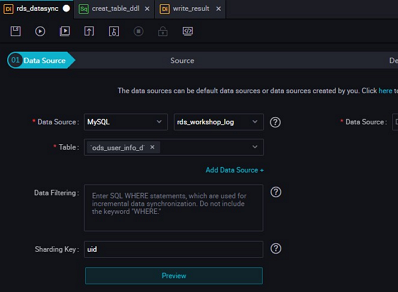
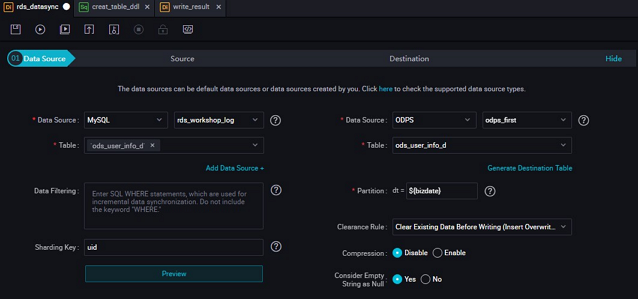
rds_datasync node Noderds_datasync node to go to the node configuration page.Select the data source that is located in the MySQL data source rds_workshop_log, and the table is named as ods_user_info_d, the split key uses the default to generate columns.
Select the data destination ods_user_info_d in the data source named odps_first. Both partition information and cleanup rules take the system default, the default configuration of the partition is ${bizdate}.


1. Click Submit to submit the current Business Flow.
2. Select the nodes in the submit dialog box, and check the Ignore Warning on I/O Inconsistency, click Submit.
1. Click Run.
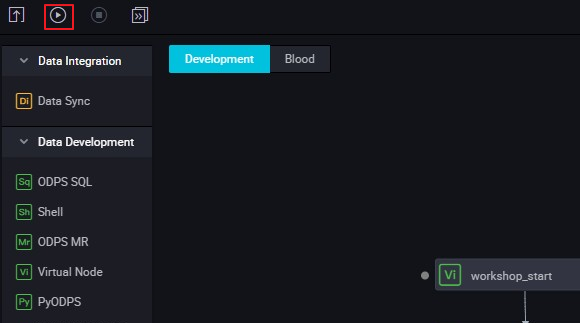
During a task run, you can view the run status.
2. Right-click the rds_datasync task and select View Log.
When the following words appear in the log, it indicates that the synchronization task runs successfully and synchronizes a batch of data.
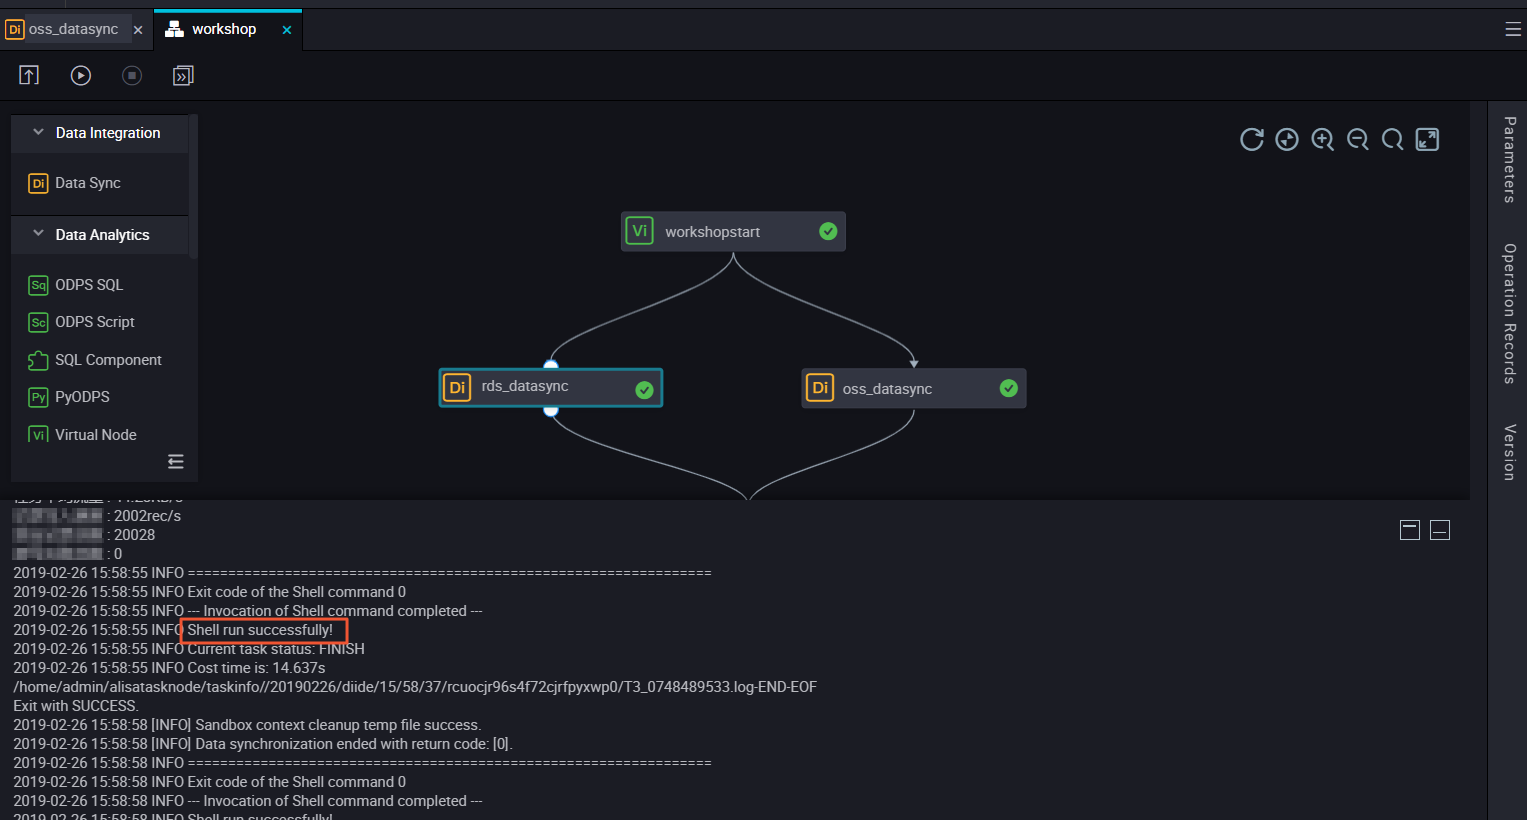
3. Right-click the oss_datasync task and select View Log. The confirmation method is consistent with the rds_datasync task.
1. Click temporary query in the left-hand navigation bar.
2. Select New > ODPS SQL.
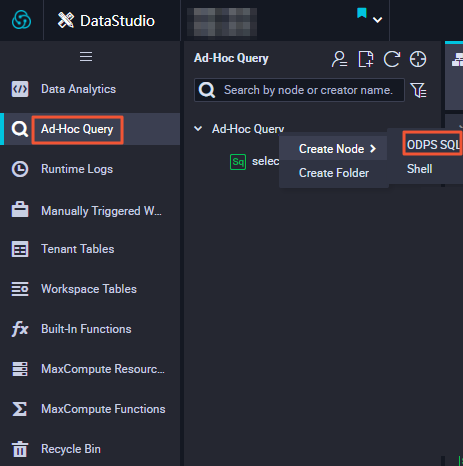
3. Write and execute SQL statement to check the entries imported into ods_raw_log_d.
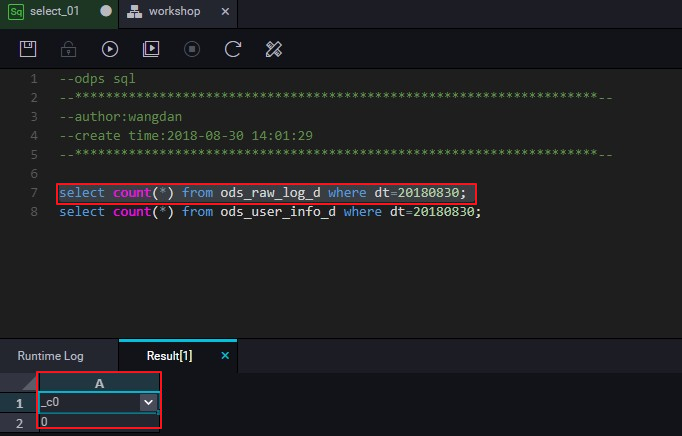
4. Also write and execute SQL statements to view the number of imported ods_user_info_d records.
Note: The SQL statement is as follows, where the partition columns need to be updated to the business date, if the task runs on a date of 20180717, the business date is 20180716.
Check that data was written to MaxCompute
select count(*) from ods_raw_log_d where dt=business date;
select count(*) from ods_user_info_d where dt=business date;
Now that you've learned how to synchronize the log data, complete the data acquisition, you can continue with the next tutorial in this workshop, which is Data Processing with DataWorks .

2,593 posts | 793 followers
FollowAlibaba Clouder - February 20, 2020
Alibaba Clouder - May 12, 2021
Alibaba Cloud MaxCompute - November 15, 2021
Alibaba Clouder - February 20, 2020
Alibaba Clouder - February 20, 2020
Alibaba Cloud MaxCompute - February 19, 2019

2,593 posts | 793 followers
Follow MaxCompute
Conduct large-scale data warehousing with MaxCompute
Learn More DataWorks
A secure environment for offline data development, with powerful Open APIs, to create an ecosystem for redevelopment.
Learn More DataV
DataV
A powerful and accessible data visualization tool
Learn MoreMore Posts by Alibaba Clouder