By Justin Cook and Pablo Puig
Have you ever wondered if it is possible to use the elasticity of the Alibaba Cloud Object Storage Service (OSS) bucket service to place images, videos, and countless other types of static content and attach them to your WordPress site? Fortunately, you can create buckets to place these objects in and utilize them on your WordPress site.
This article will explain how to connect the OSS bucket to your WordPress site and the key features you can utilize within the architecture.
The following step-by-step guide explains how to connect your WordPress site to an OSS bucket.
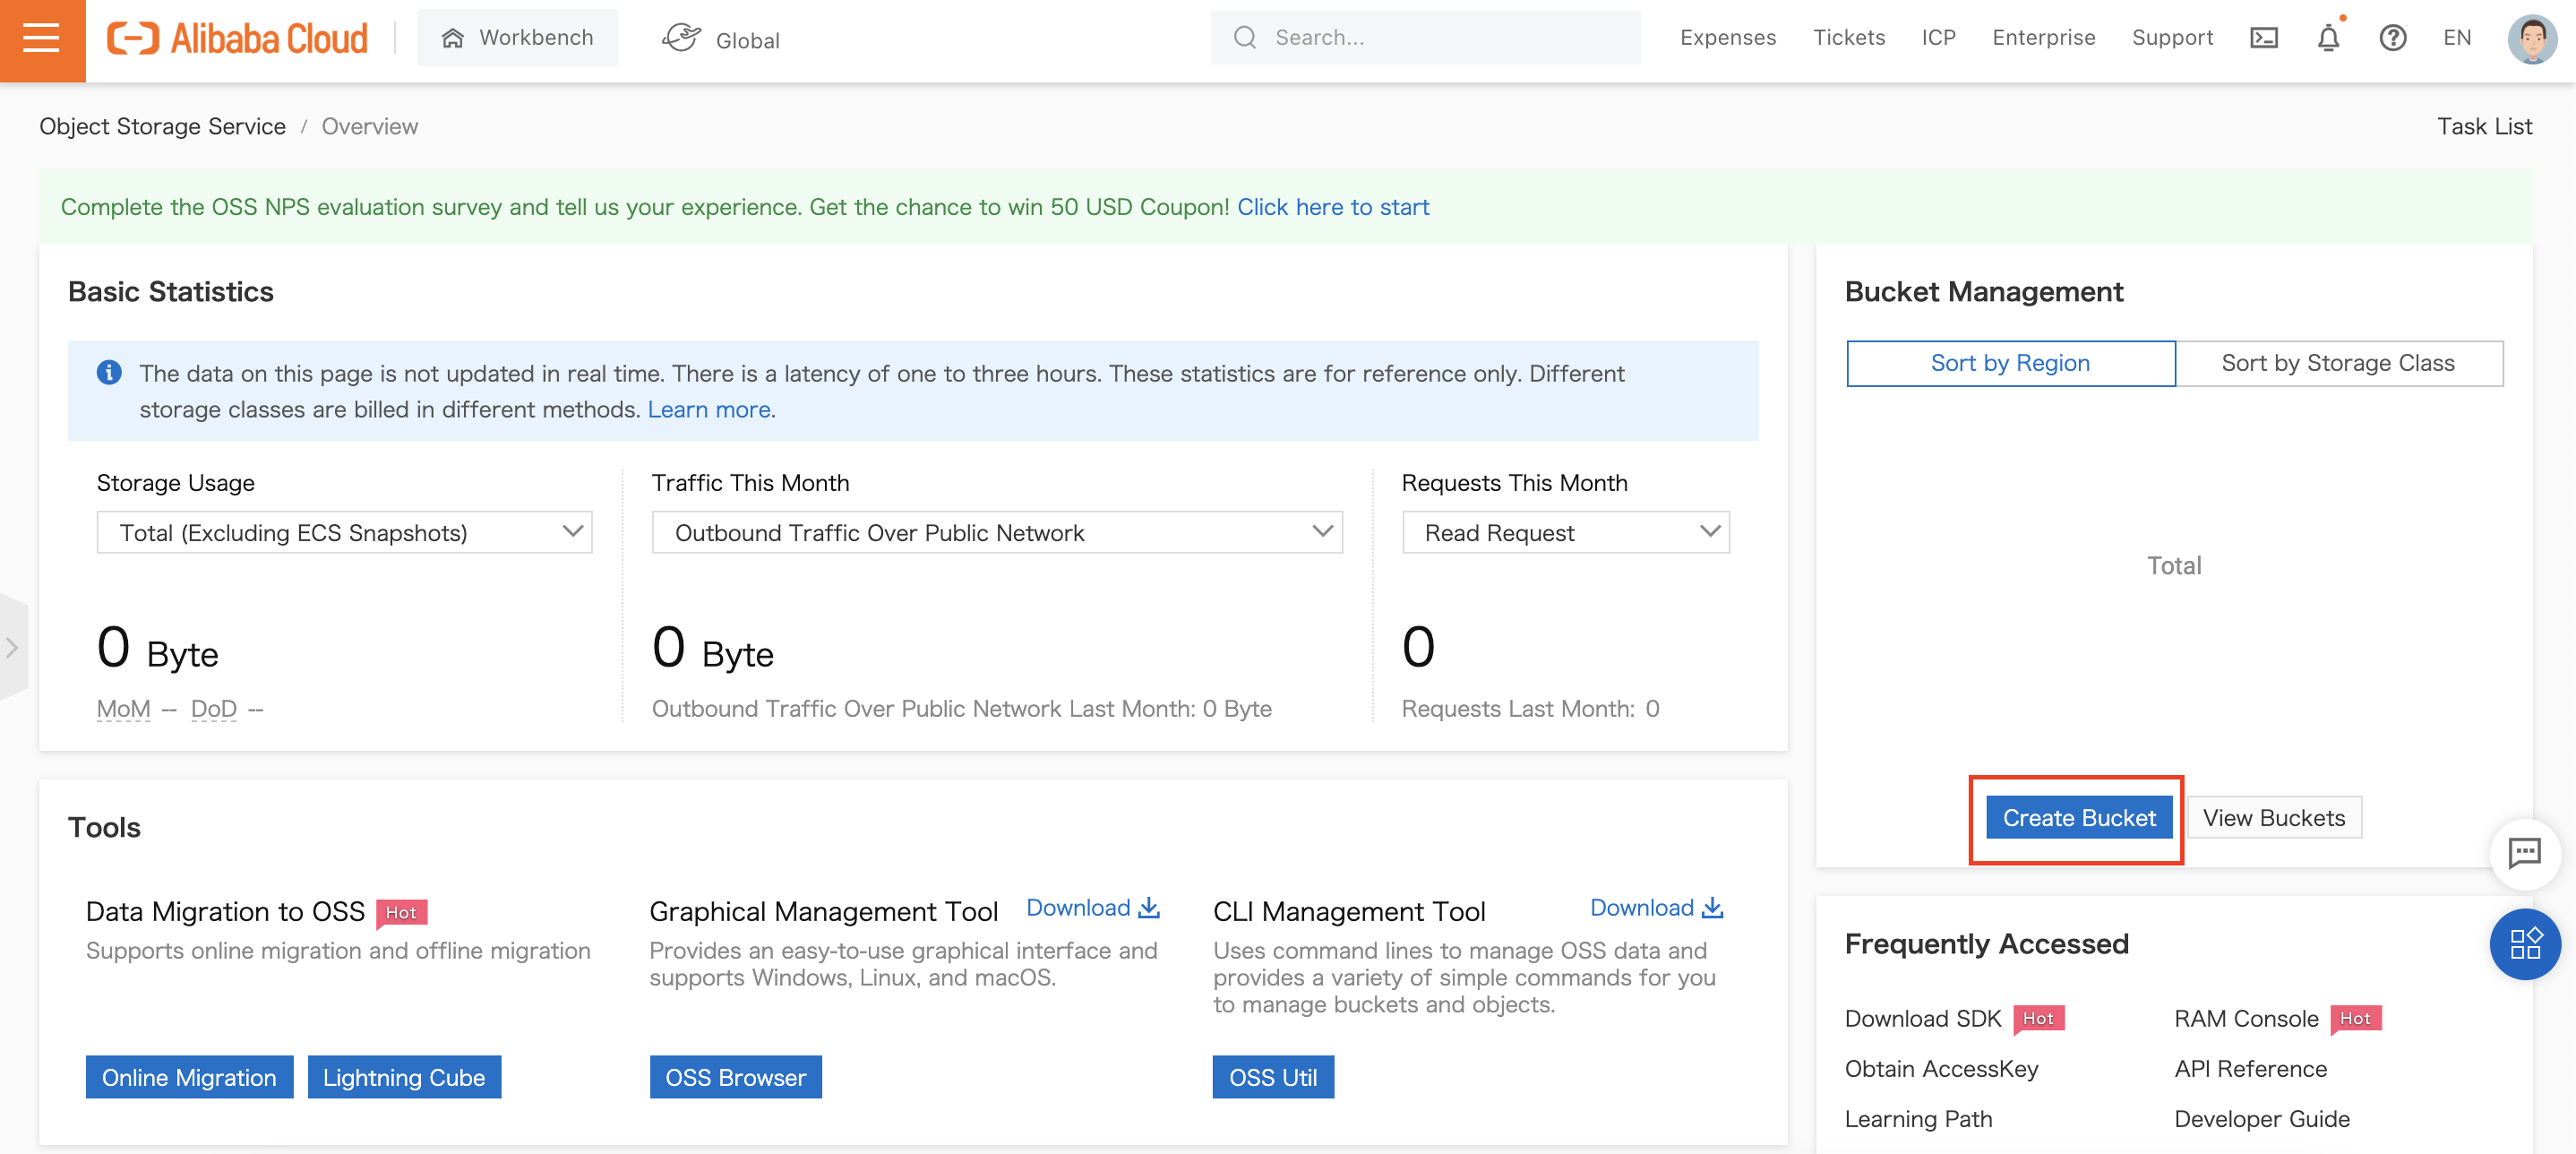
Note: Storage Class and Region cannot be changed after the bucket is created.
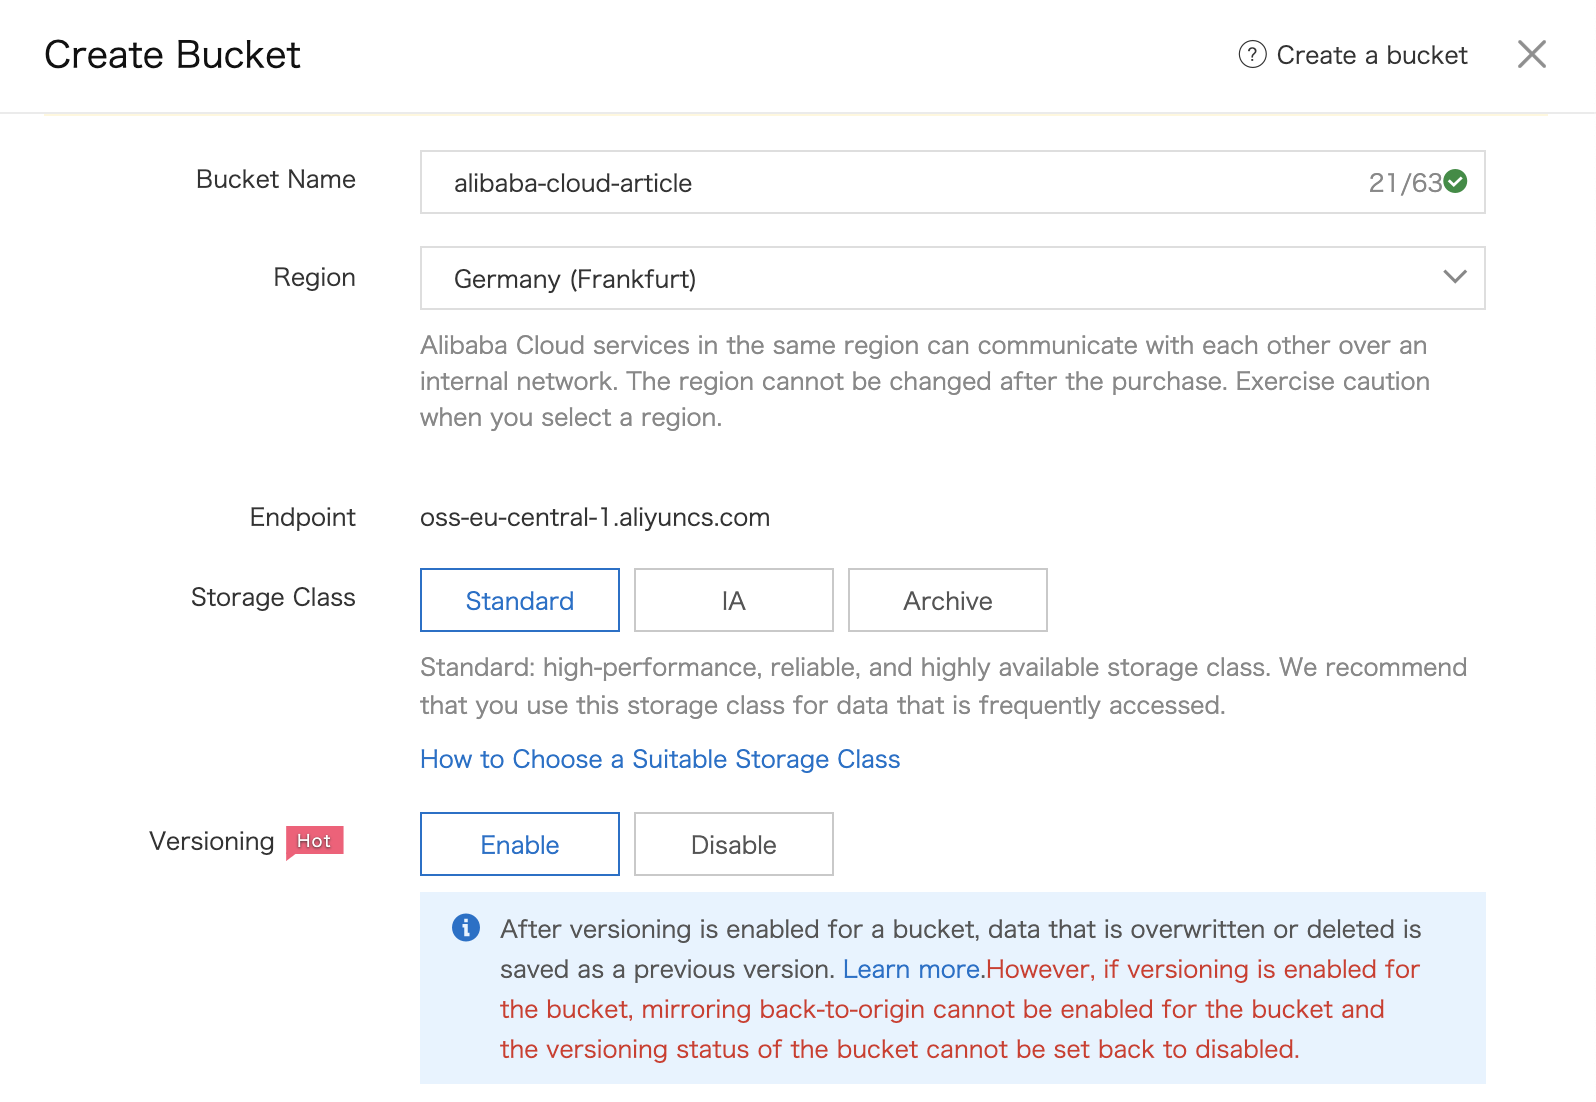
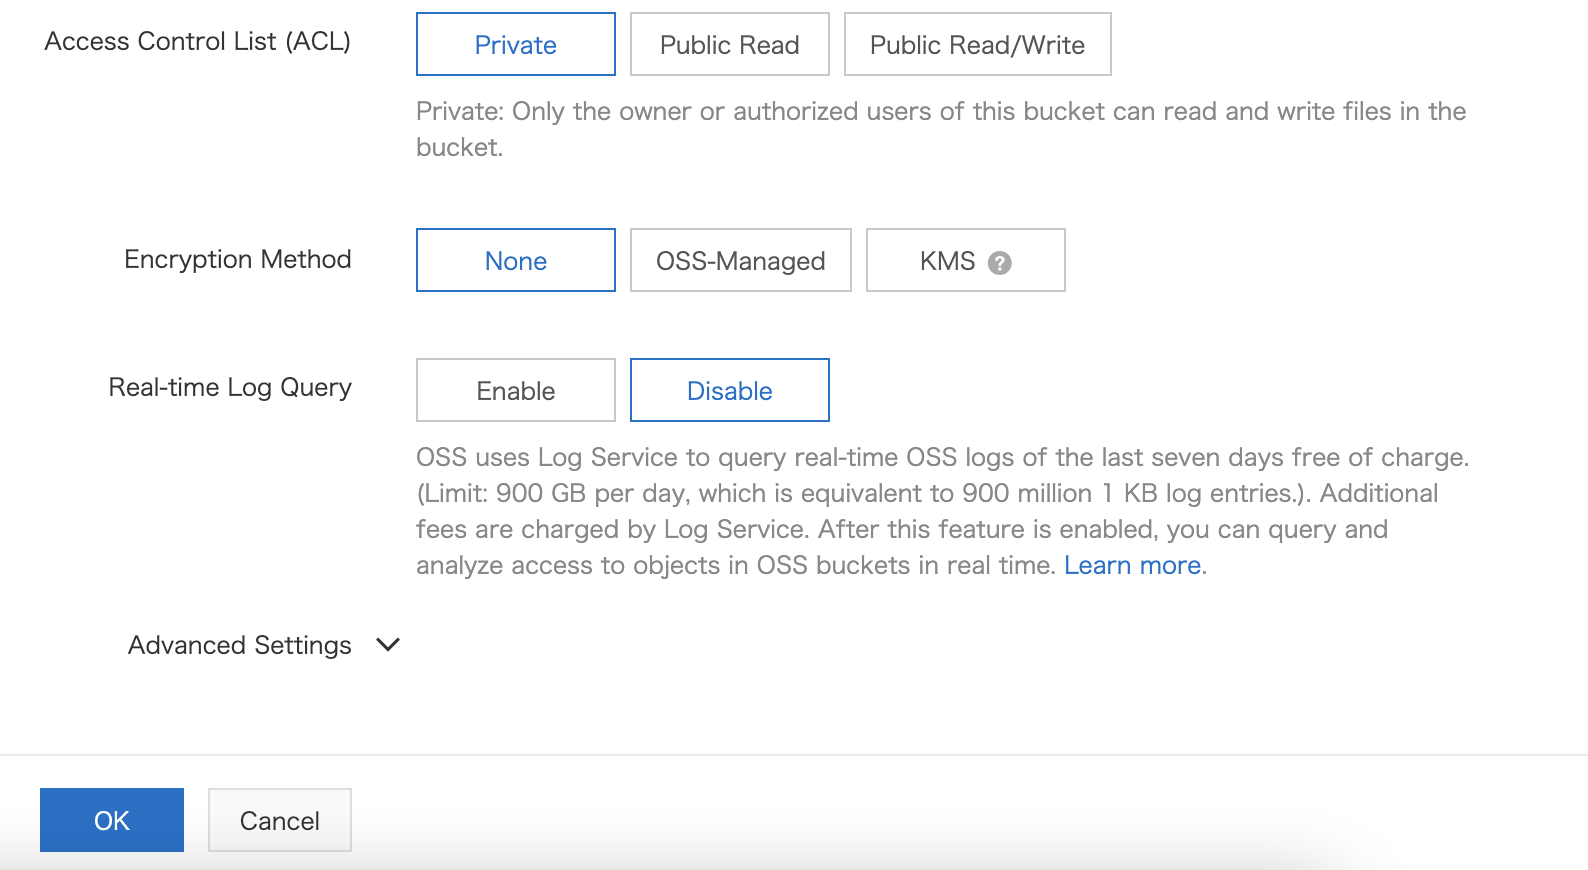
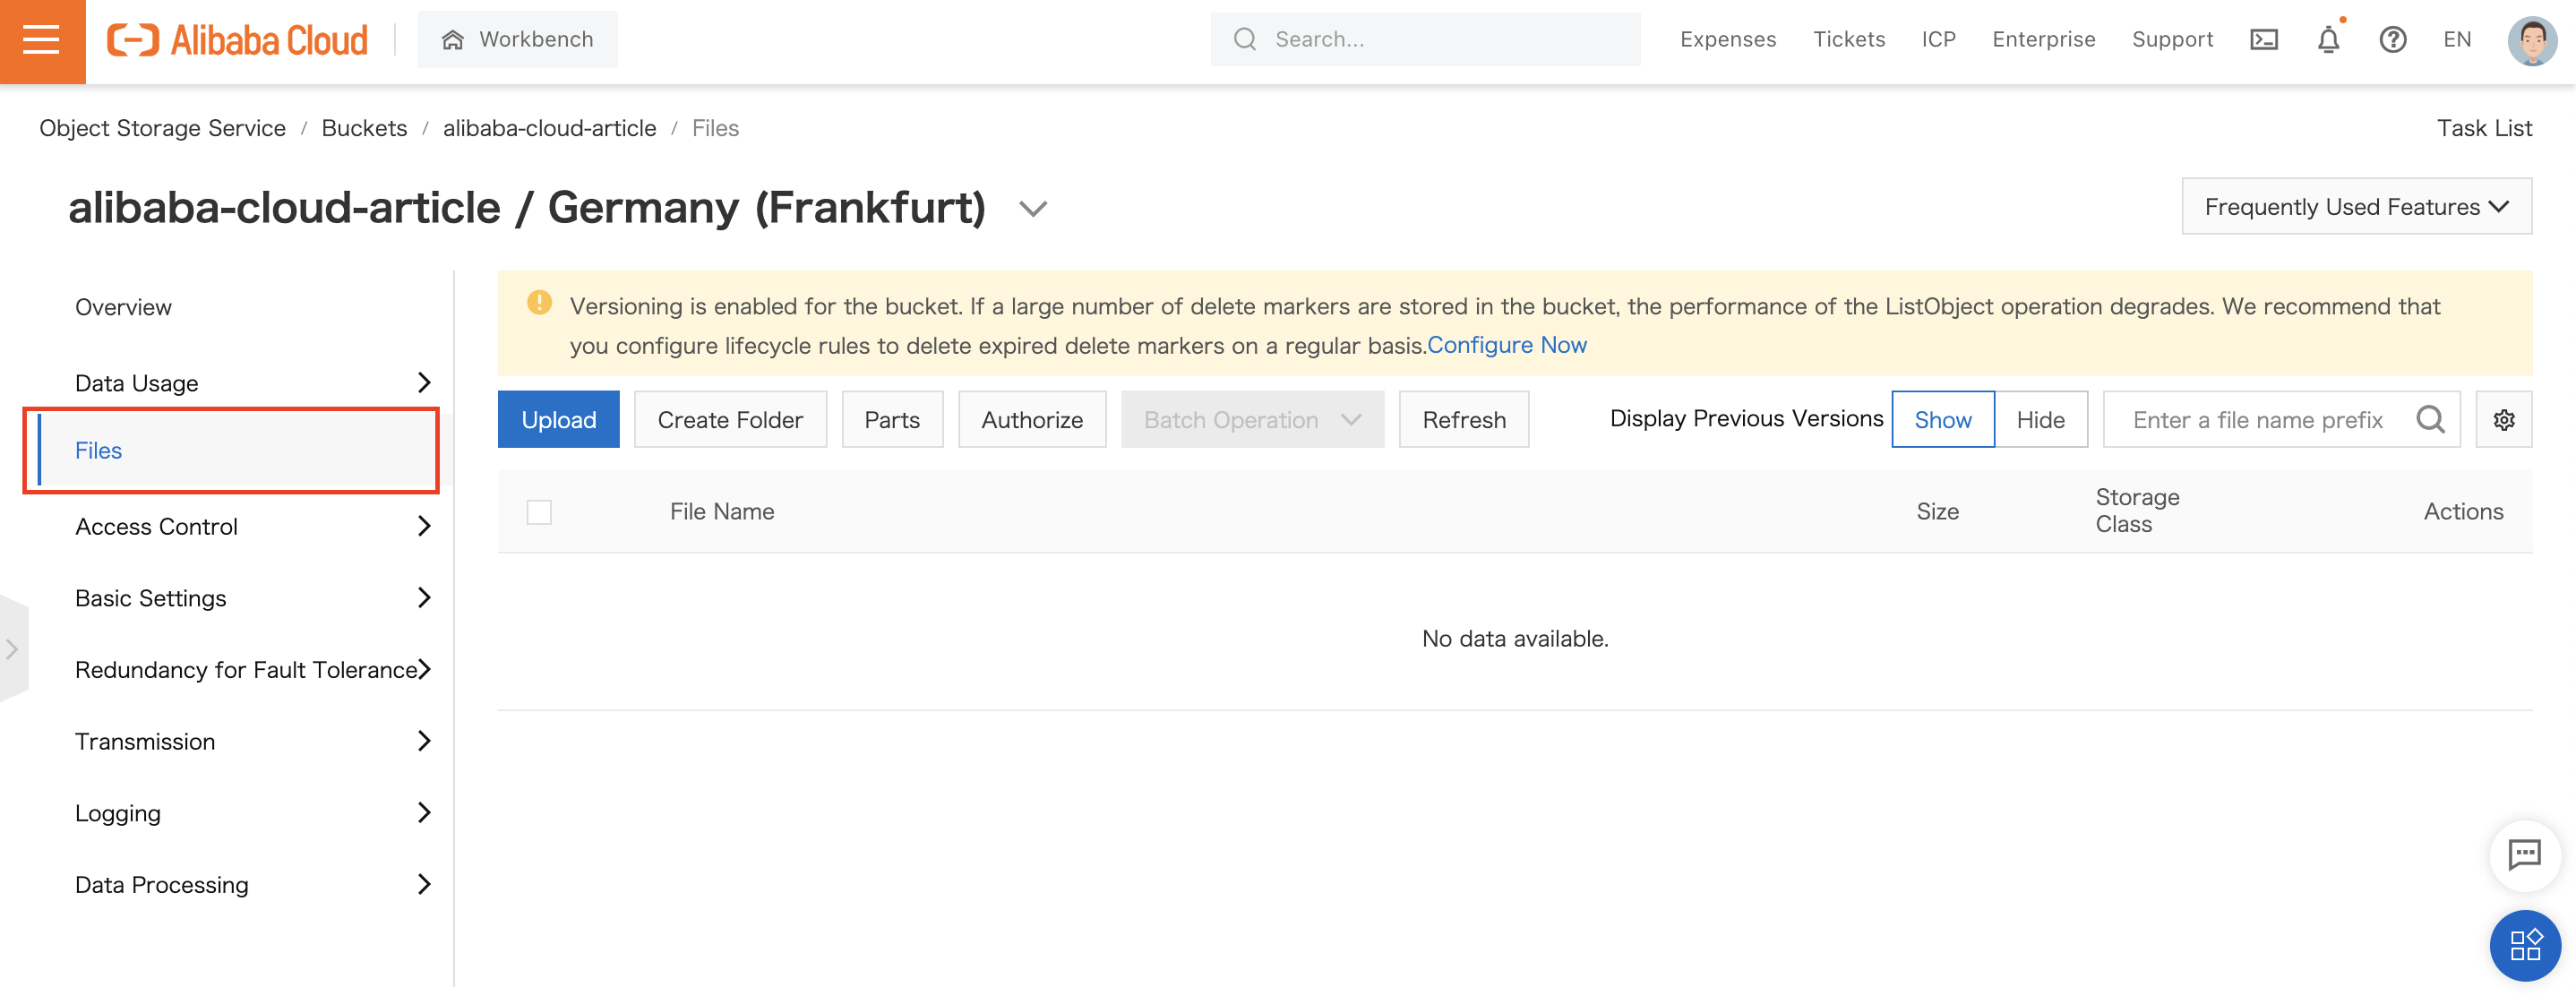
Note: Uploading files to OSS is free of charge. You only pay for storing the files:
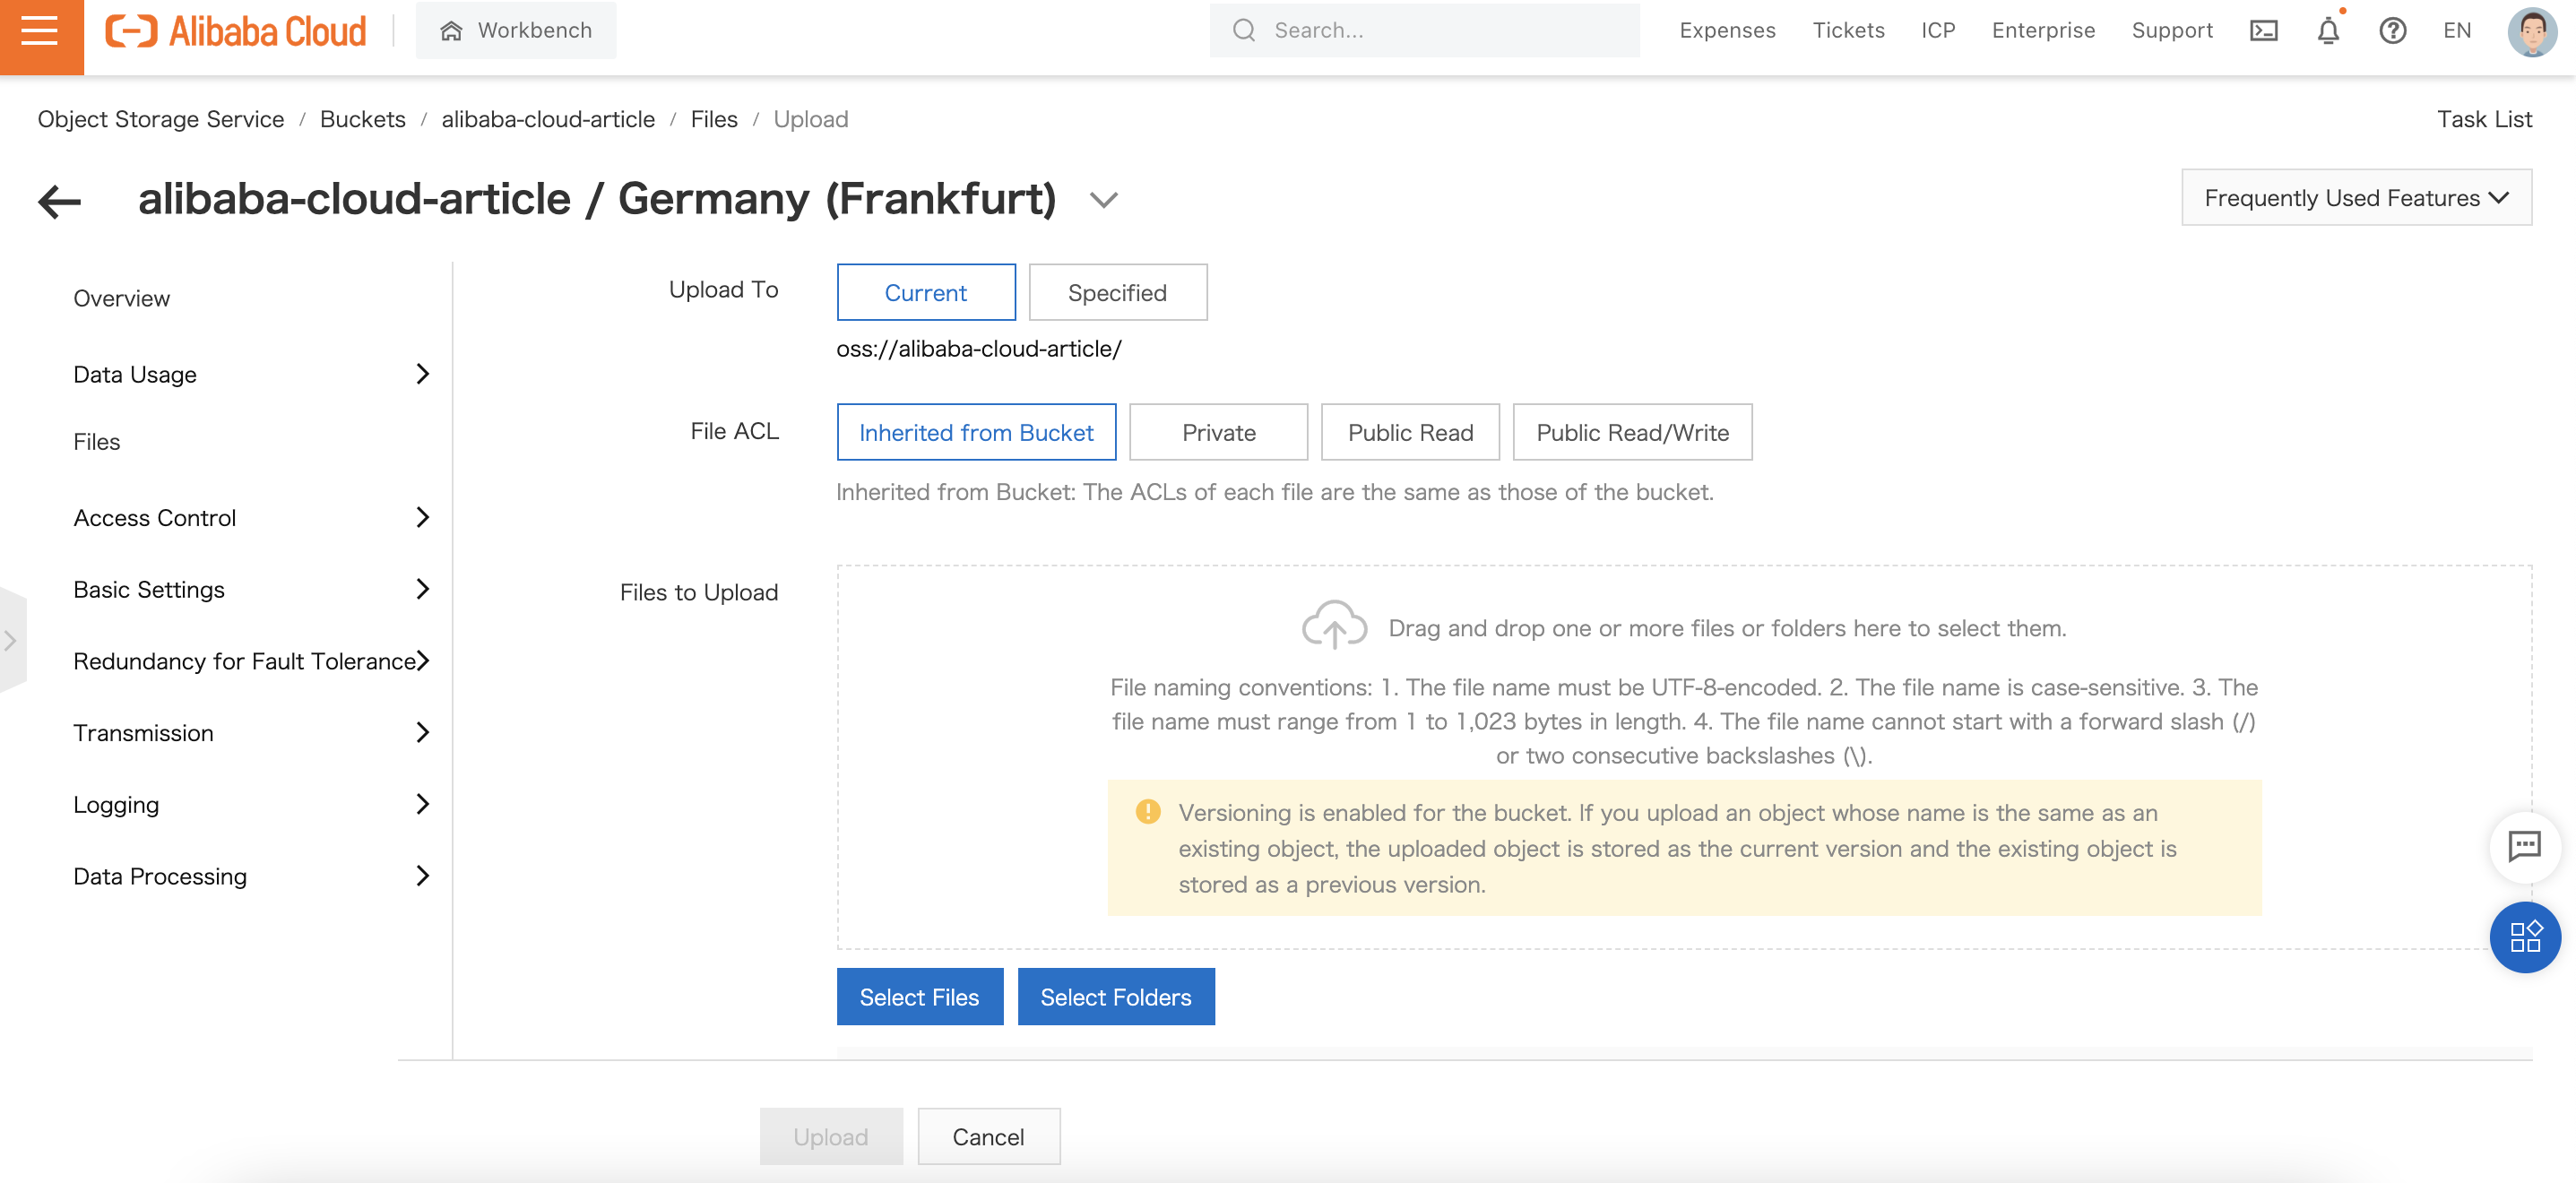
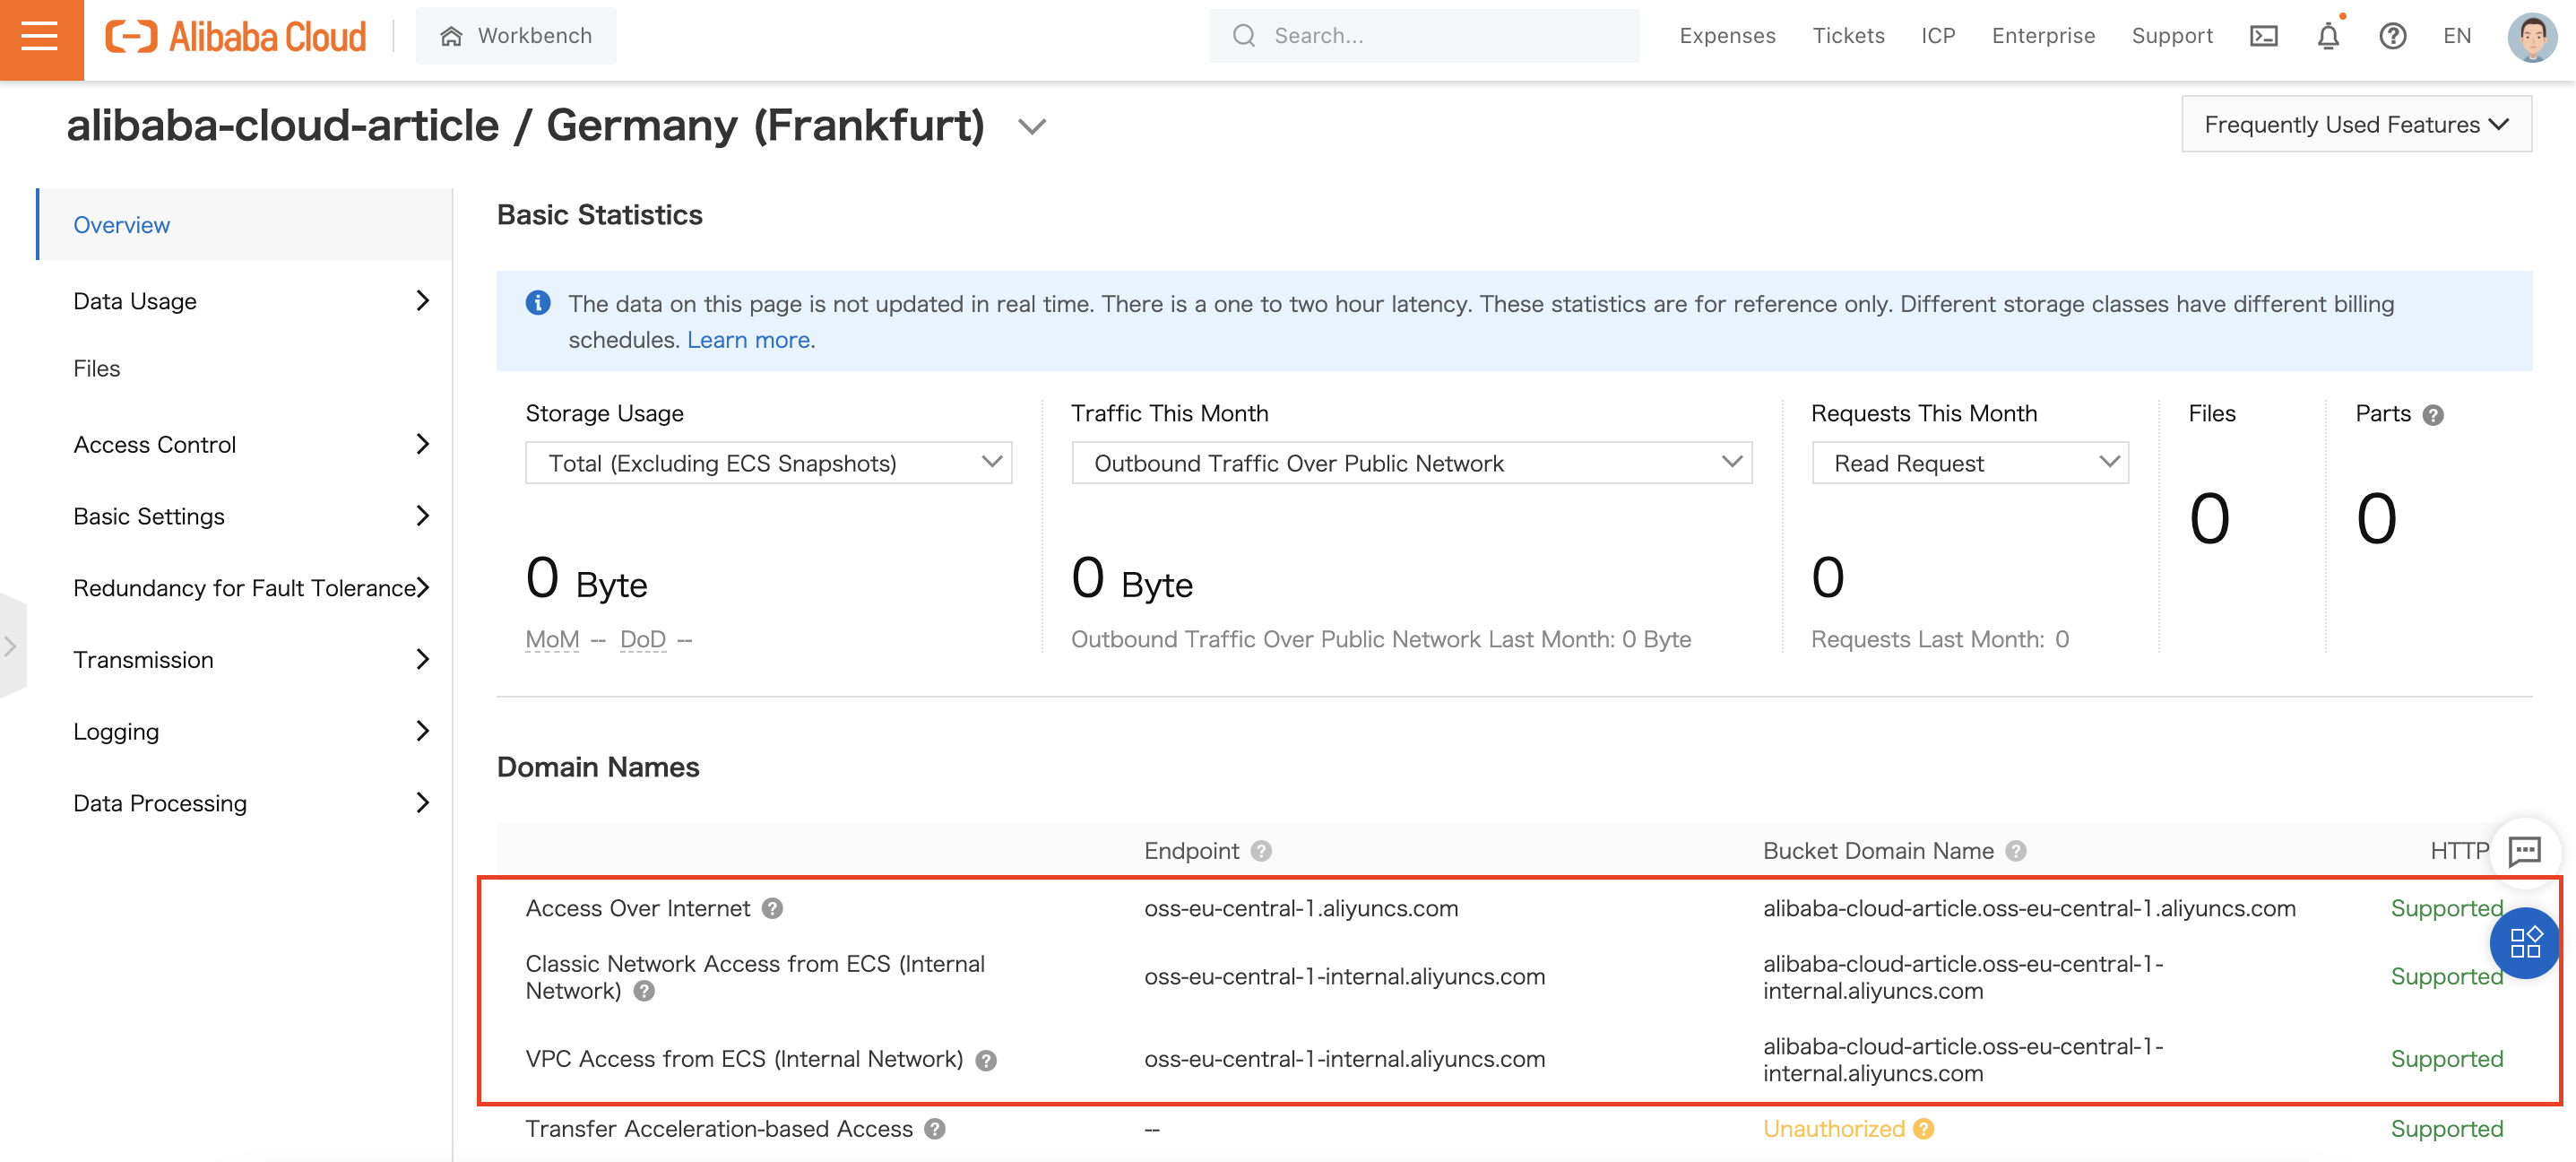
Once you have finished uploading the resources, you need to copy the OSS bucket domain name for future steps.
Go to your OSS bucket. Under Overview, you will find your OSS bucket domain name under Domain Names:


Note: The AccessKey pairs are displayed only once. You must immediately save the AccessKey ID and the AccessKey Secret:


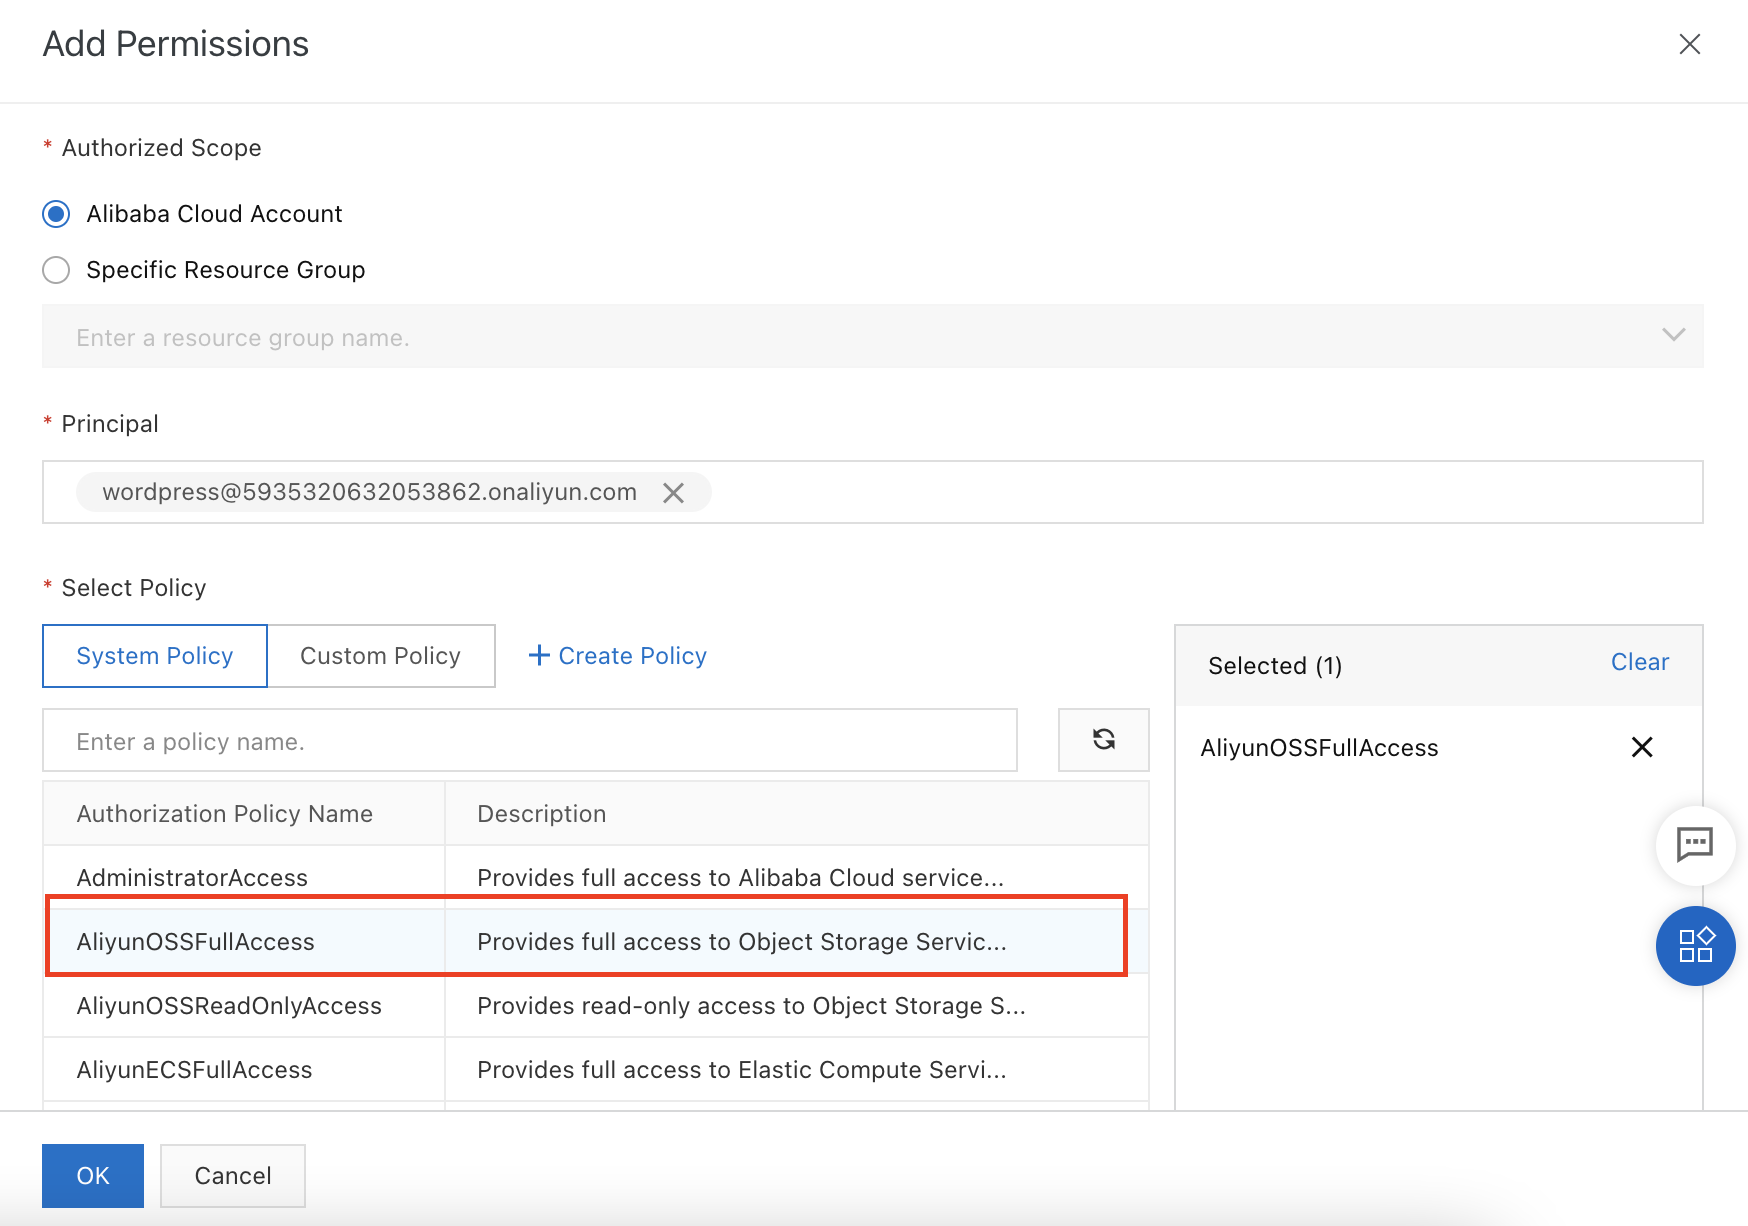
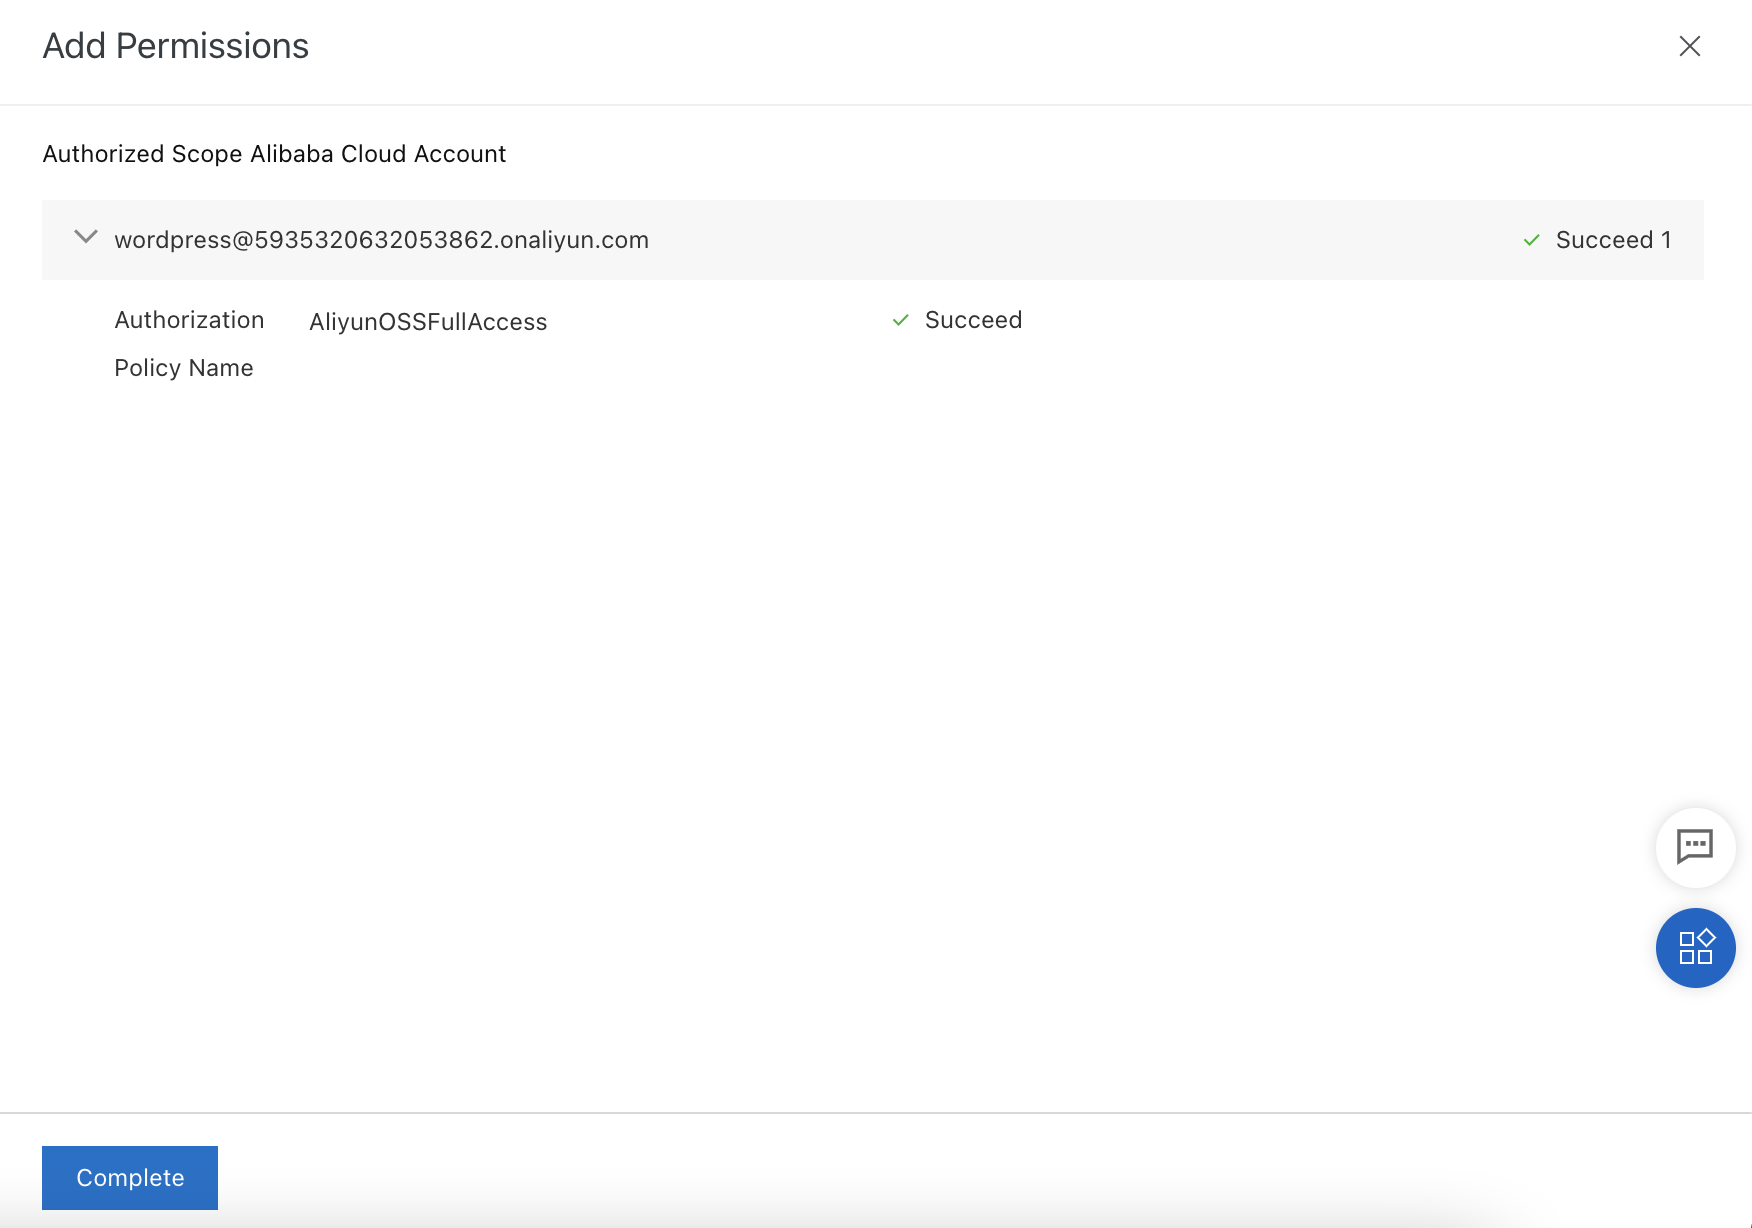
You have already created the OSS bucket and the RAM Access Keys. Now, it is time to connect to your WordPress instance and configure your WordPress site to use OSS as the default storage.
Note: For this guide, we assume that you are using an Elastic Compute Service (ECS) instance to host your WordPress site.

/data/wwwroot/default/ onto OSS with the following commands:$ cd /data/wwwroot/default/
$ mv wp-content local-wp-content$ sudo apt-get update
$ sudo apt-get install gdebi-core
$ sudo wget https://github.com/aliyun/ossfs/releases/download/v1.80.4/ossfs_1.80.4_ubuntu14.04_amd64.deb
$ sudo gdebi ossfs_1.80.4_ubuntu14.04_amd64.deb$ sudo –u www echo BUCKET_NAME:ACCESSKEY_ID:ACCESSKEY_SECRET > /etc/passwd-ossfs
$ chown www:www /etc/passwd-ossfs
$ chmod 640 /etc/passwd-ossfs
$ sudo -u www mkdir /data/wwwroot/default/wp-content
$ sudo -u www ossfs BUCKET_NAME /data/wwwroot/default/wp-content -ourl= OSS_INTERNAL_ADDRESS
$ sudo -u www cp -r local-wp-content/* wp-content/etc/init/ by running the following commands:$ cat > /etc/init/wordpress-oss.conf
description "Mount WordPress OSS" start on startup
script
sudo -u www ossfs BUCKET_NAME /data/wwwroot/default/wp-content -ourl=OSS_INTERNAL_DOMAIN_NAME
end script$ sudo service wordpress-oss start
wordpress-oss start/running, process 2000Purchasing an Affordable Virtual Private Server for Your Web Apps: An Intro to Light Space

1,308 posts | 461 followers
FollowAlibaba Clouder - August 26, 2020
Alibaba Clouder - February 21, 2020
Alibaba Clouder - November 29, 2017
Alibaba Clouder - March 21, 2019
Alibaba Clouder - June 2, 2020
Alibaba Clouder - December 28, 2017

1,308 posts | 461 followers
Follow ECS(Elastic Compute Service)
Elastic and secure virtual cloud servers to cater all your cloud hosting needs.
Learn More Web Hosting Solution
Explore Web Hosting solutions that can power your personal website or empower your online business.
Learn More YiDA Low-code Development Platform
A low-code development platform to make work easier
Learn More mPaaS
mPaaS
Help enterprises build high-quality, stable mobile apps
Learn MoreMore Posts by Alibaba Cloud Community
JustinCook September 21, 2021 at 3:15 pm
Thanks again for everyone for making this possible!