By: Jeremy Pedersen
For years, one of my biggest pet peeves was Alibaba Cloud's lack of a real CI/CD solution.
Google Cloud had Cloud Build. AWS had CodePipeline and CodeBuild. Heck, even Microsoft Azure had a CI/CD suite, Azure Pipelines!
Where did that leave Alibaba Cloud? Well...if you were a Chinese user on aliyun.com, you could run your builds with "Yun Xiao" (云效). It was a nice tool, but it wasn't available on alibabacloud.com and didn't have an English interface.
But things are different now.
Alibaba Cloud now has a fully functional CI/CD tool, Alibaba Cloud DevOps Pipeline (Flow).
In this week's blog, we'll dive into "Flow" and try building our own pipeline.
To keep things simple, we'll be using a VM-based workflow: this way we won't have to go out of our way to set up other tools like Container Registry or Alibaba Cloud Container Service. I want to stay focused on the build process, not other tooling!
Our first order of business is to log into the Flow console and create a new pipeline. Note that the first time you do this, you may have to fill in a form with your "team name" and "organization size". Once in the console, we can move on to creating a pipeline:
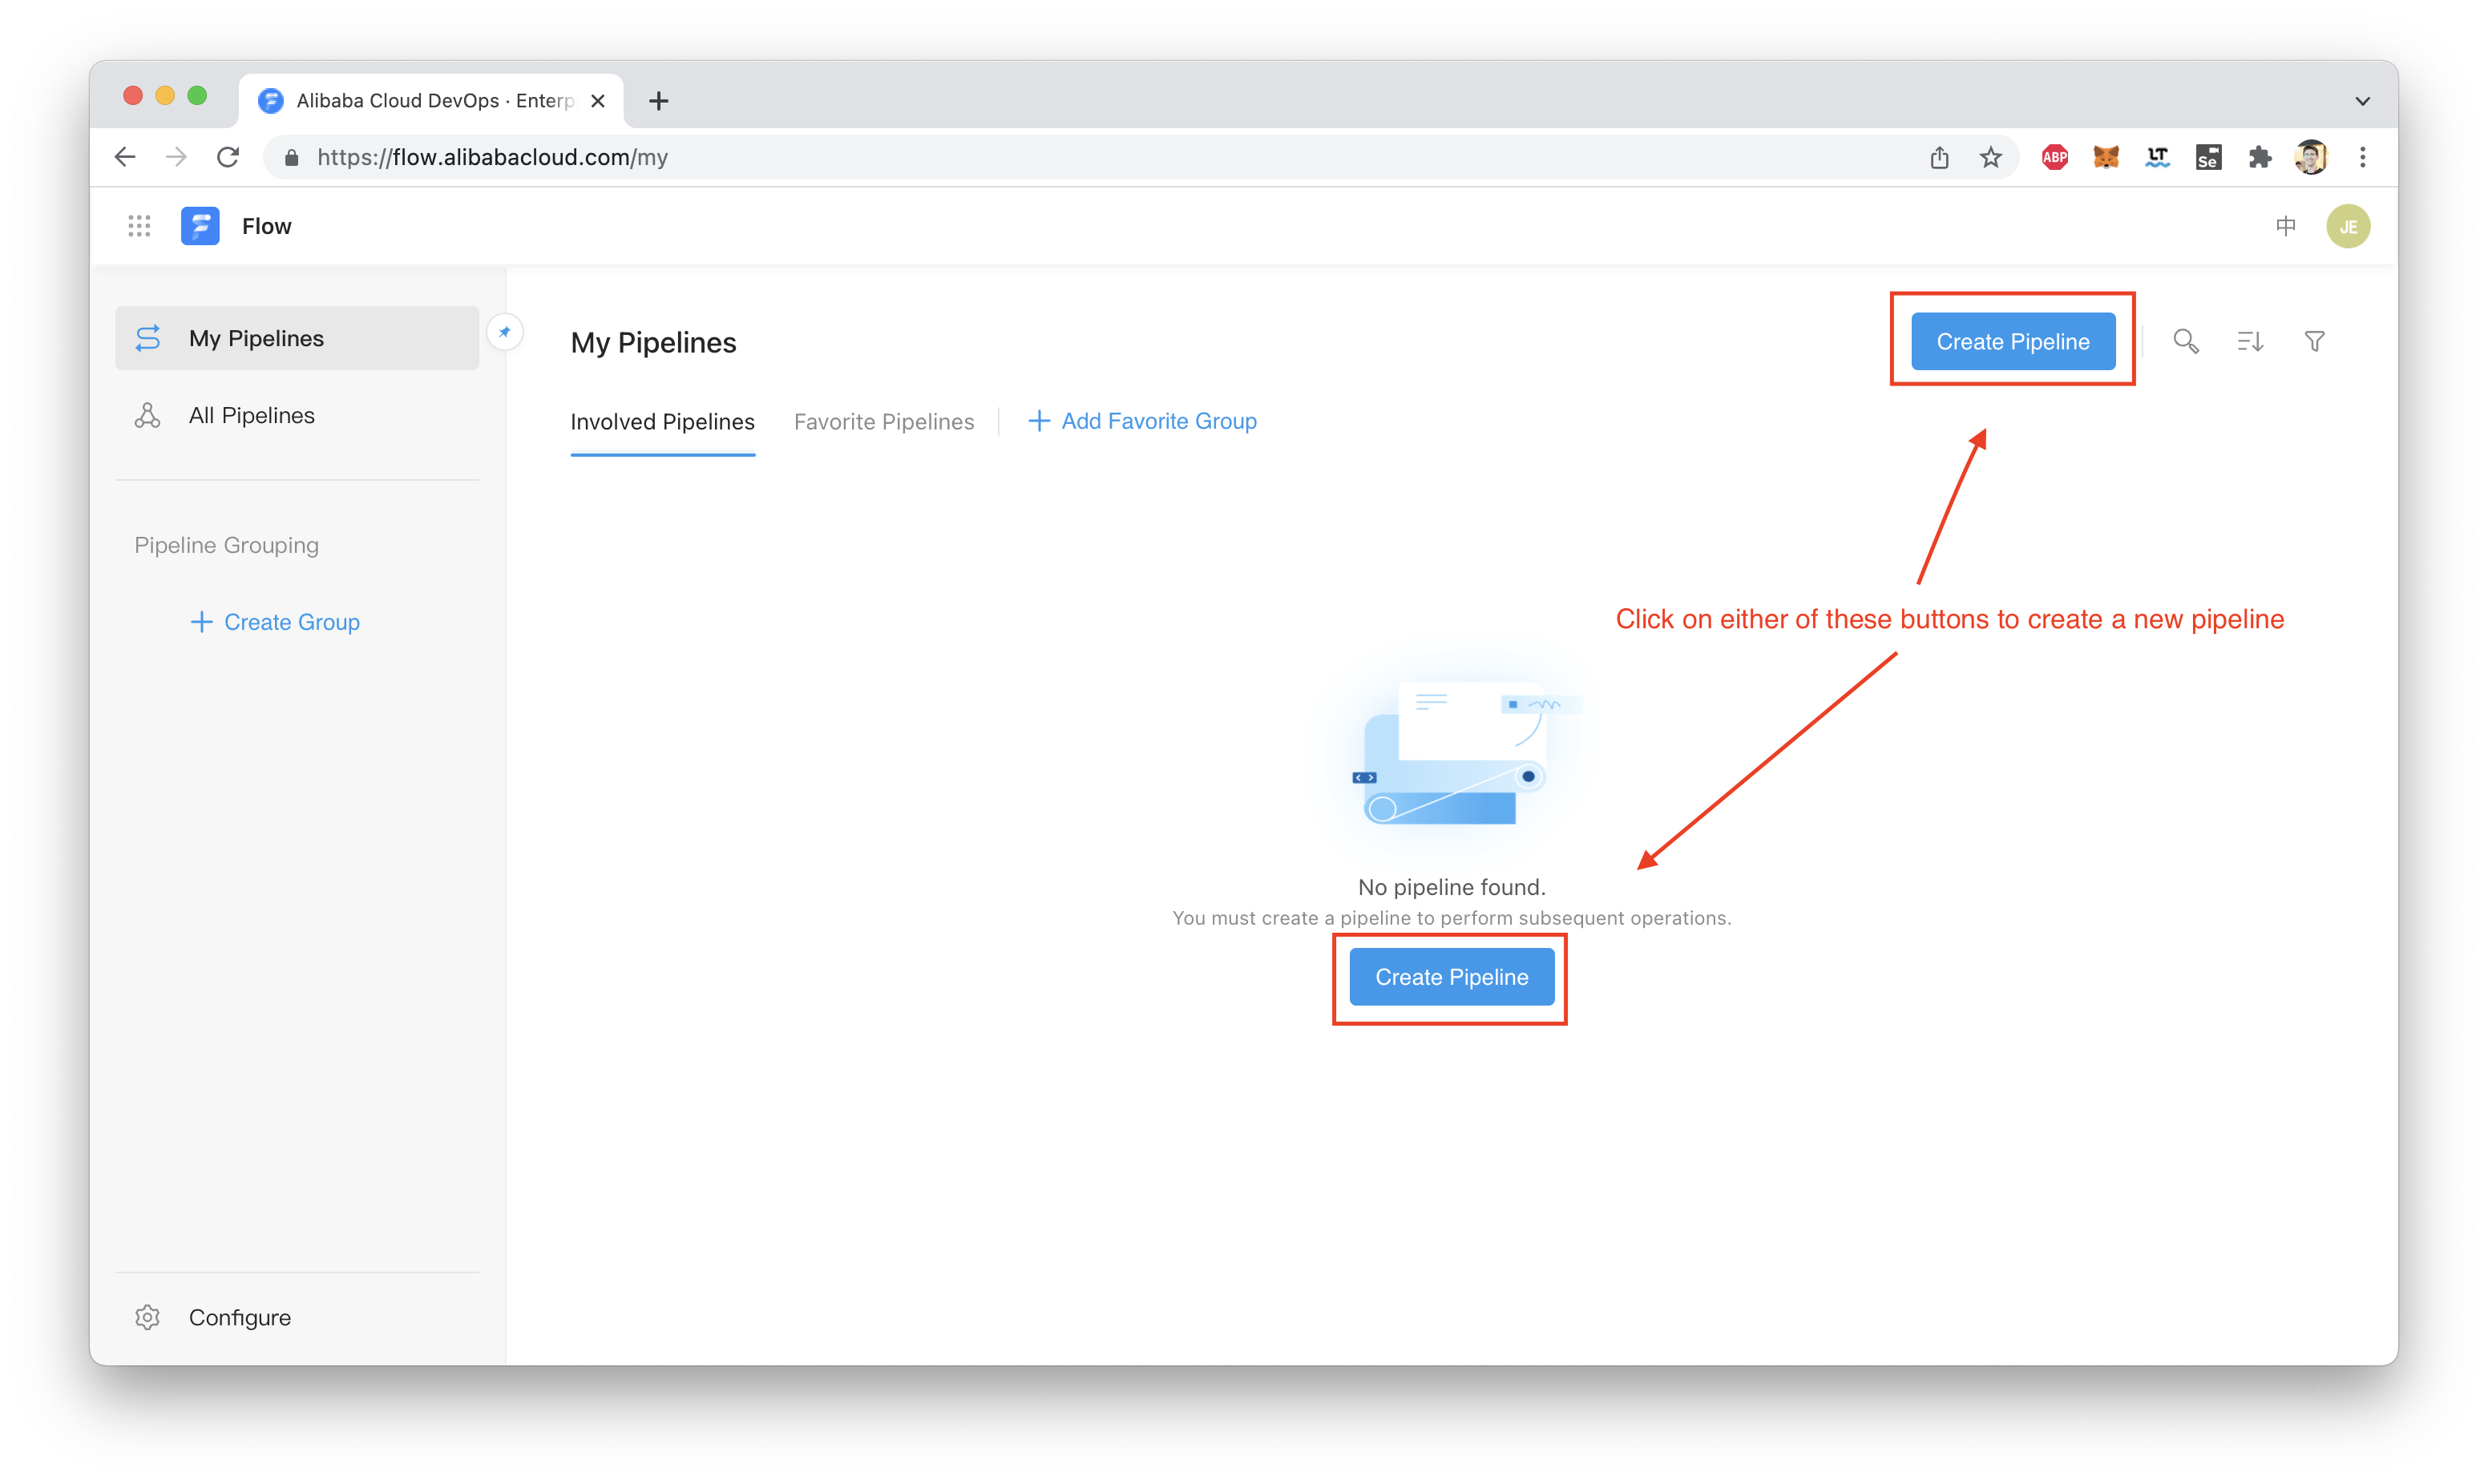
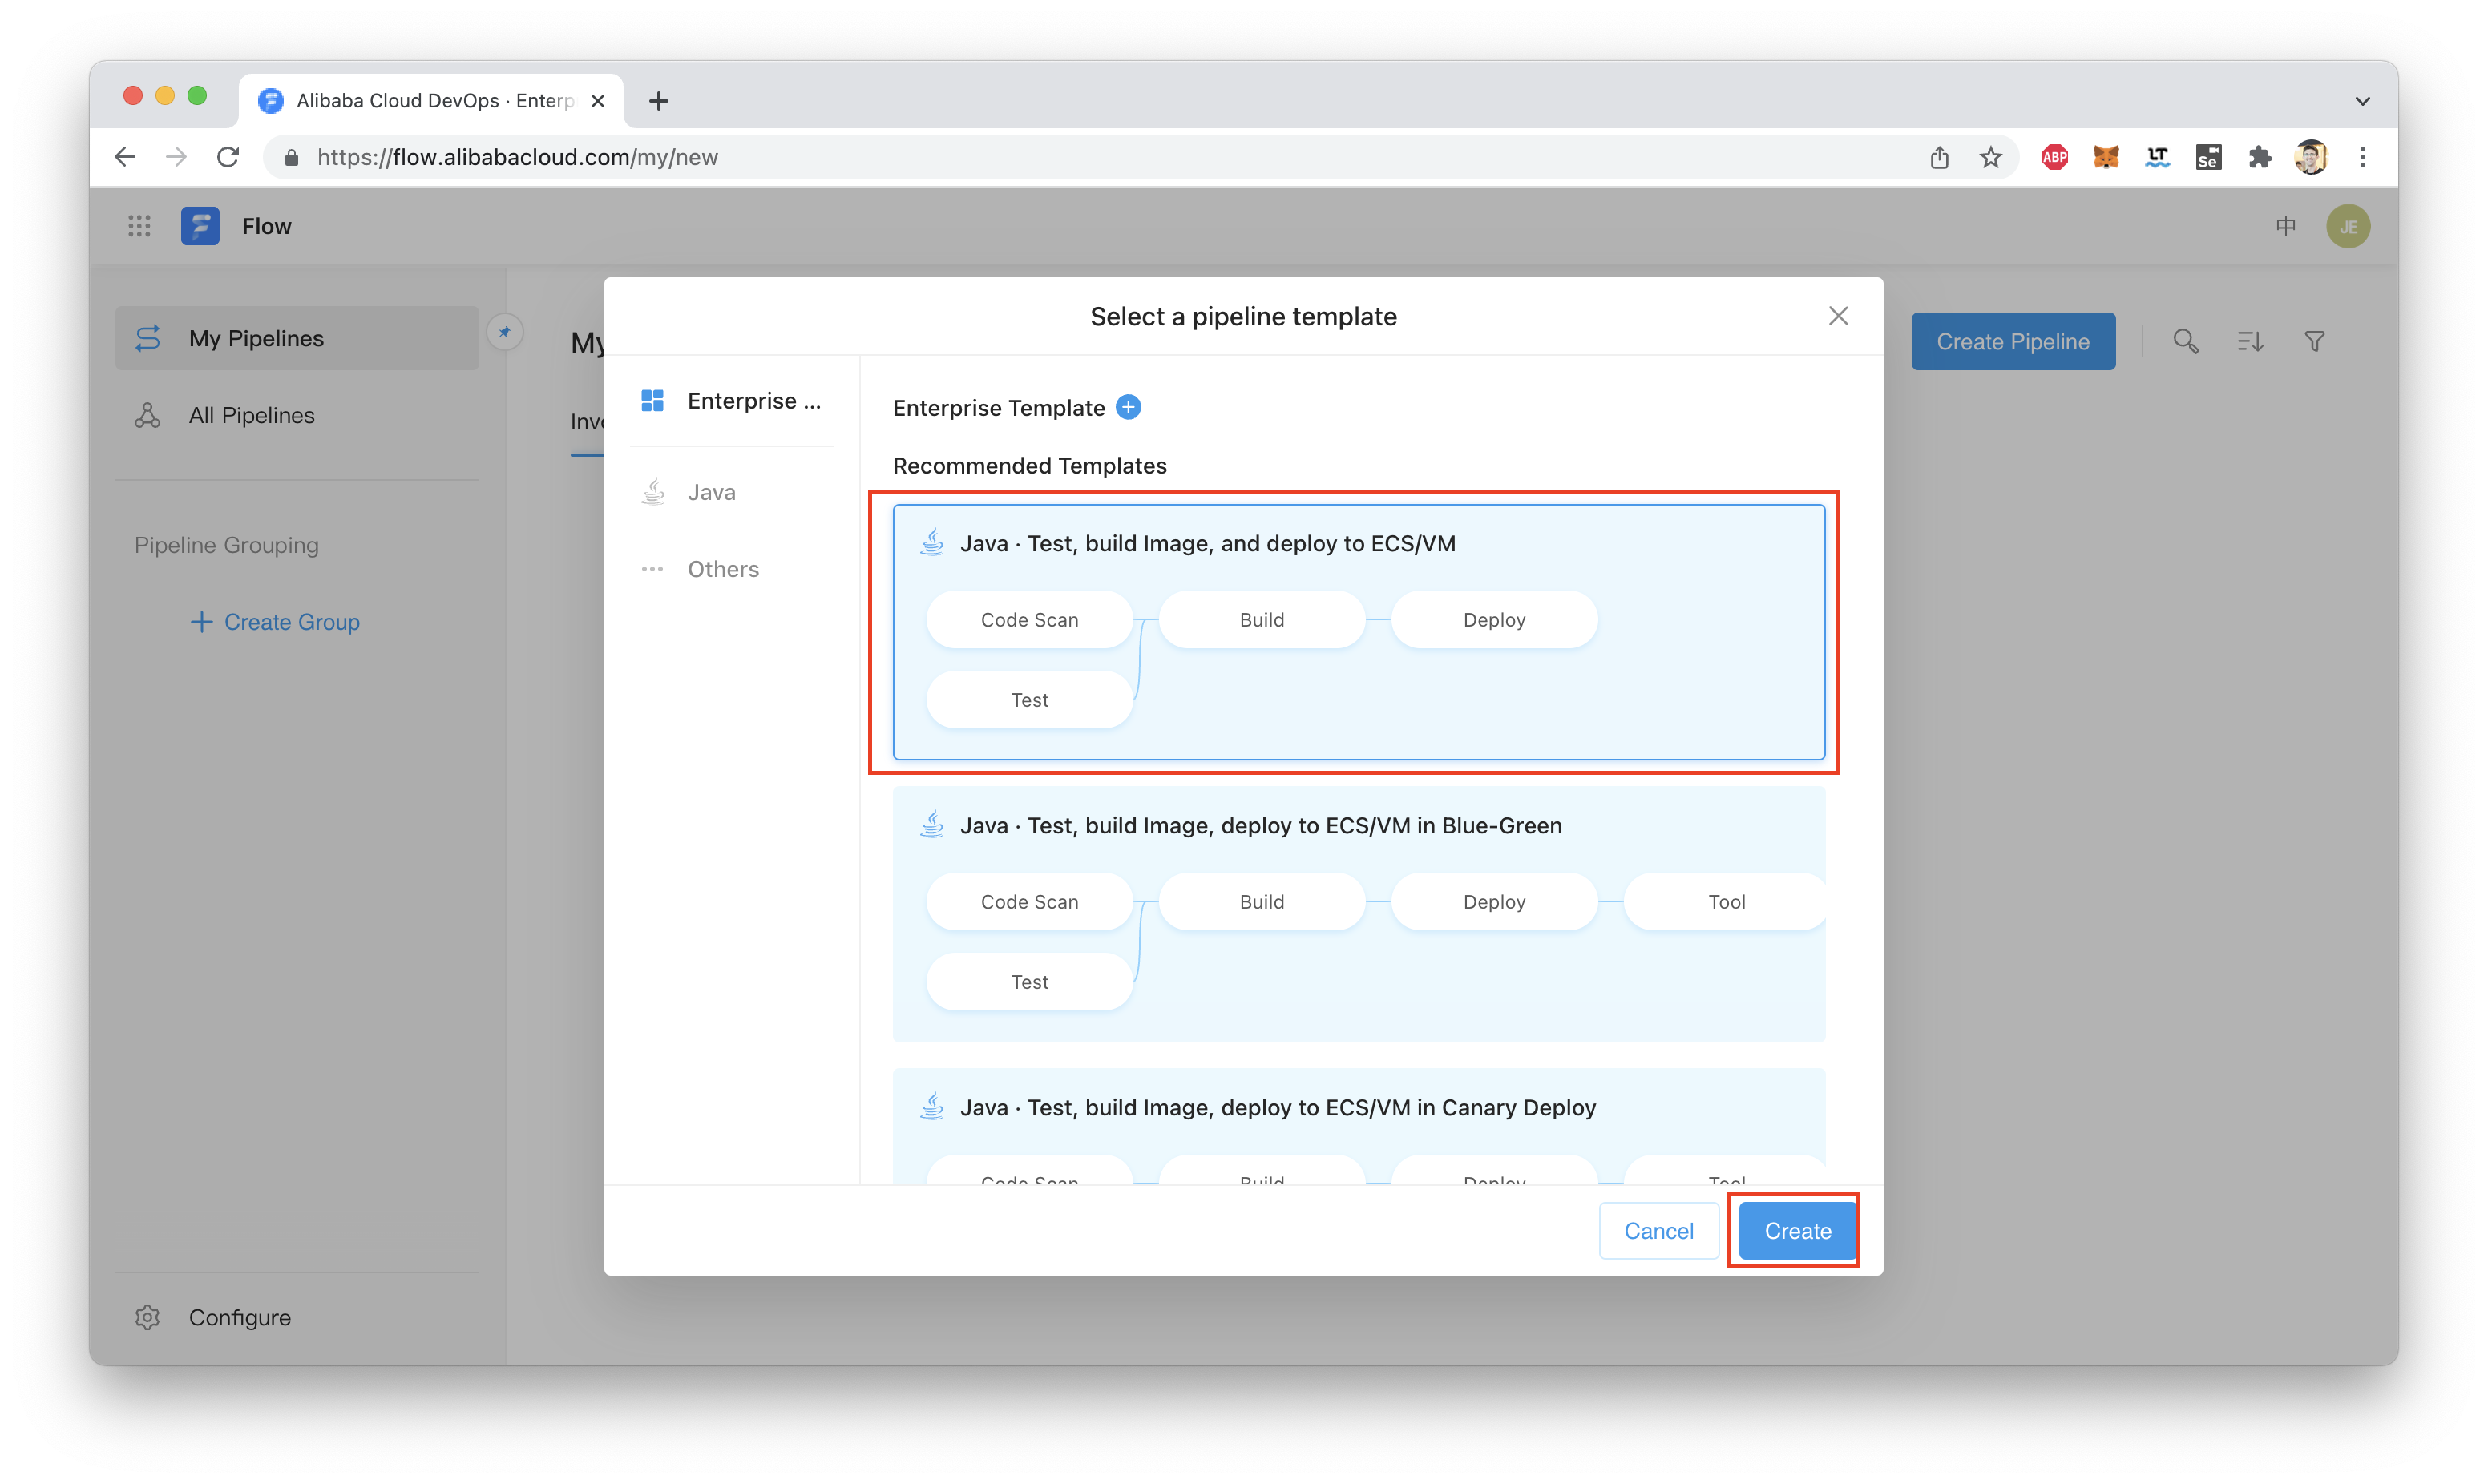
We'll use one of the existing templates, designed to build and deploy a Java application on an ECS VM:
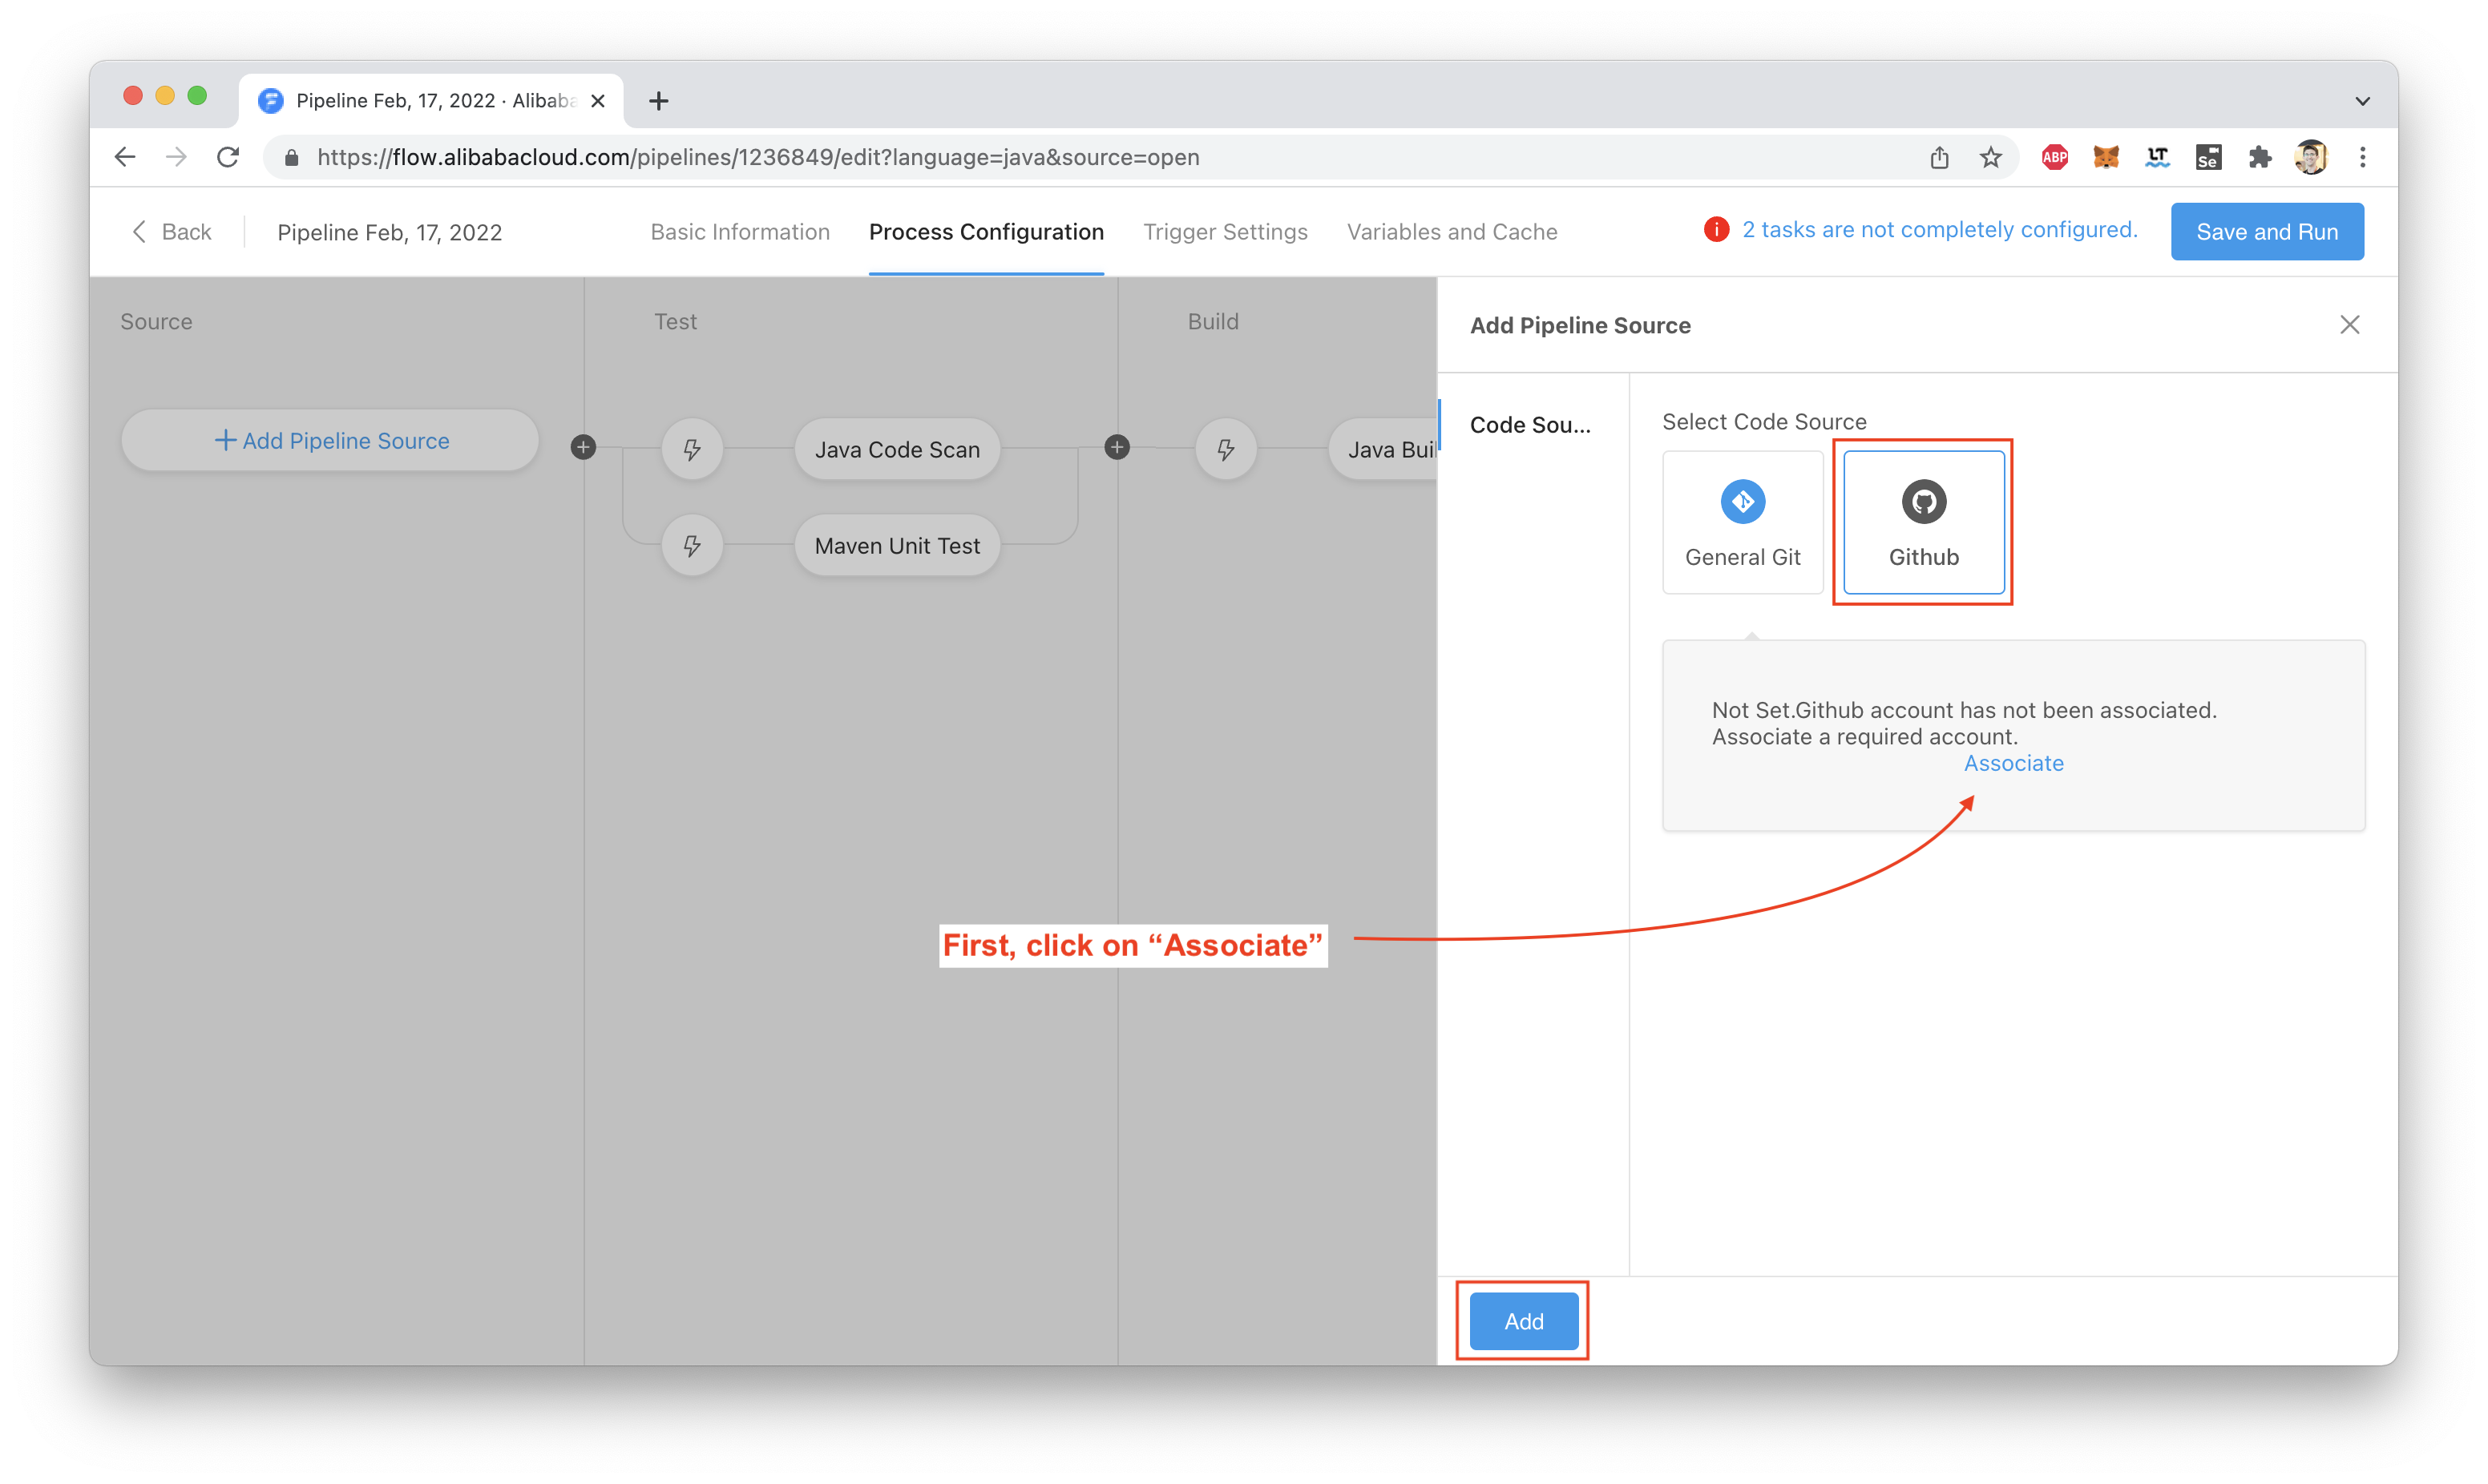
The very first thing we need to do is link our pipeline to a "code source". This is a Git repository which will be used to trigger builds:
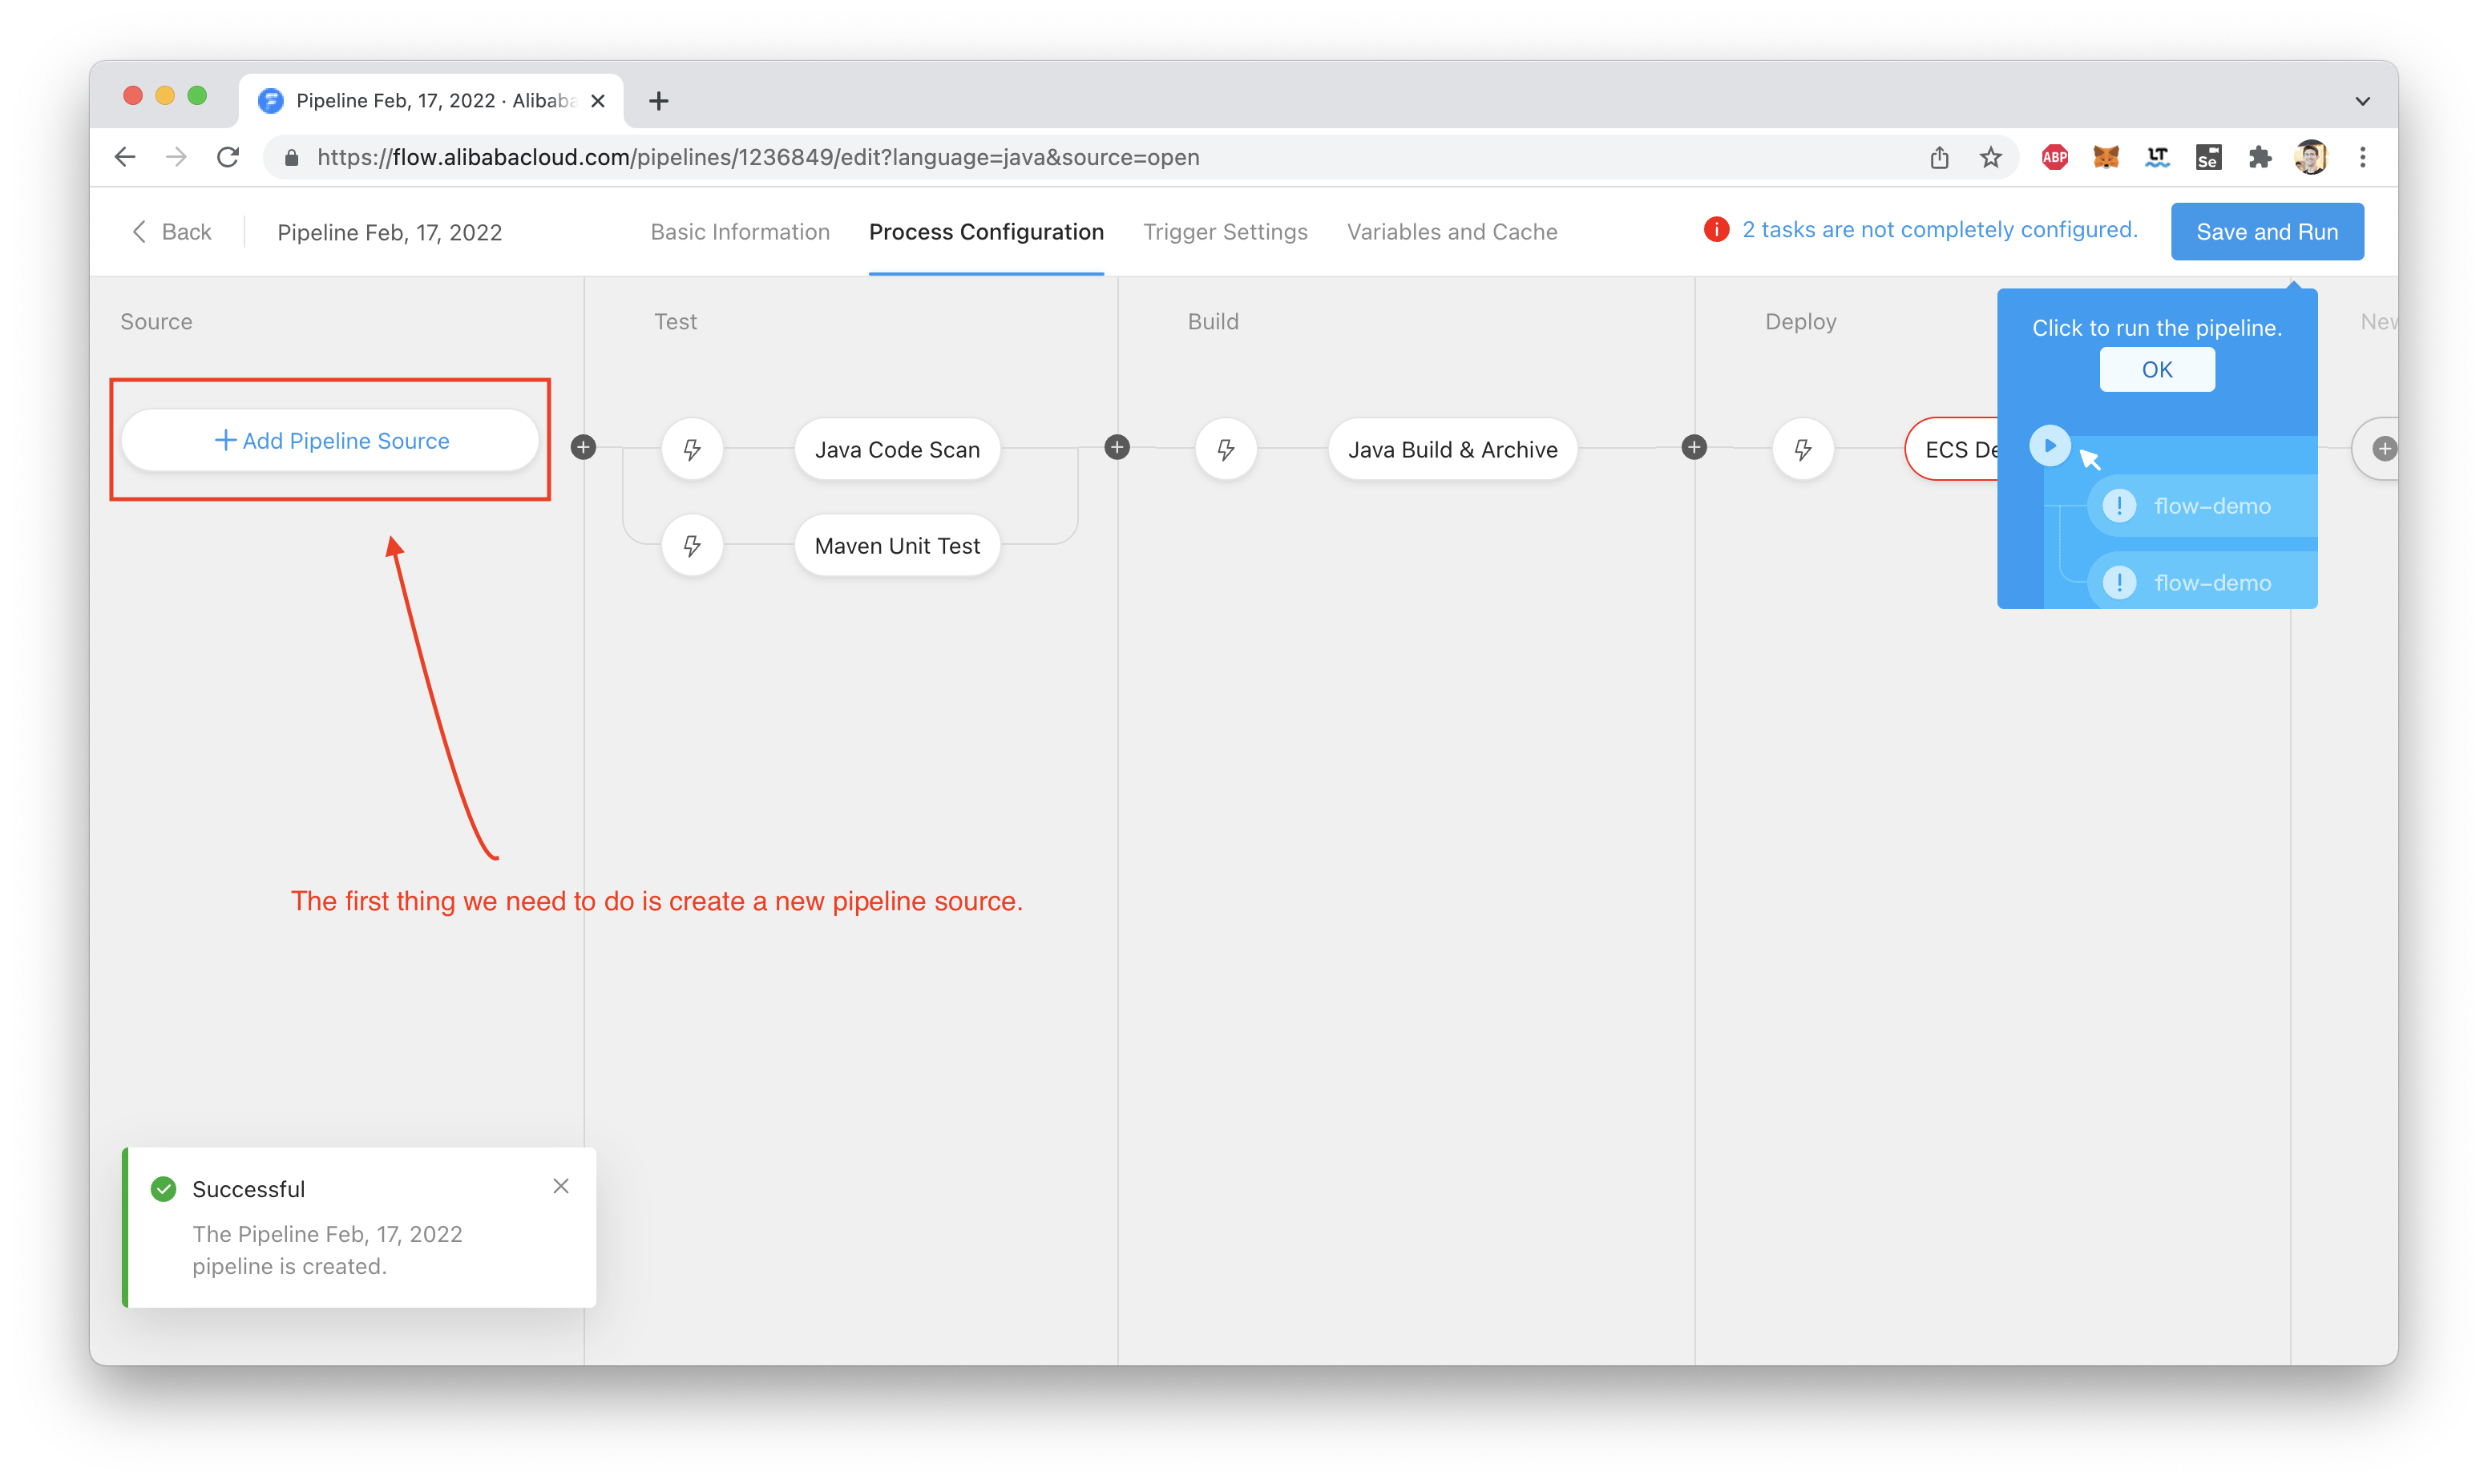
We can link to a GitHub repository, or to a private Git repository somewhere else (like a GitLab instance). In my case, I will be linking to GitHub.
Of course, this immediately creates a new problem: we need some Java code for our pipeline to build!
To keep things simple, I'll be using the Spring Boot project from this tutorial, which builds a simple web application.
Feel free to go through that tutorial in detail, if you are interested in learning about Spring Boot. If not, just clone into the repository provided in the tutorial with:
git clone https://github.com/spring-guides/gs-spring-boot.gitThen copy all the content from gs-spring-boot/complete into your own GitHub repo under your own account.
Once you've copied that code over, build and test the project with:
./gradlew bootRunOr, if you are more of a Maven person:
./mvnw spring-boot:runNote: You'll need a working Gradle or Maven install, and of course Java. Otherwise, you can't test anything locally!
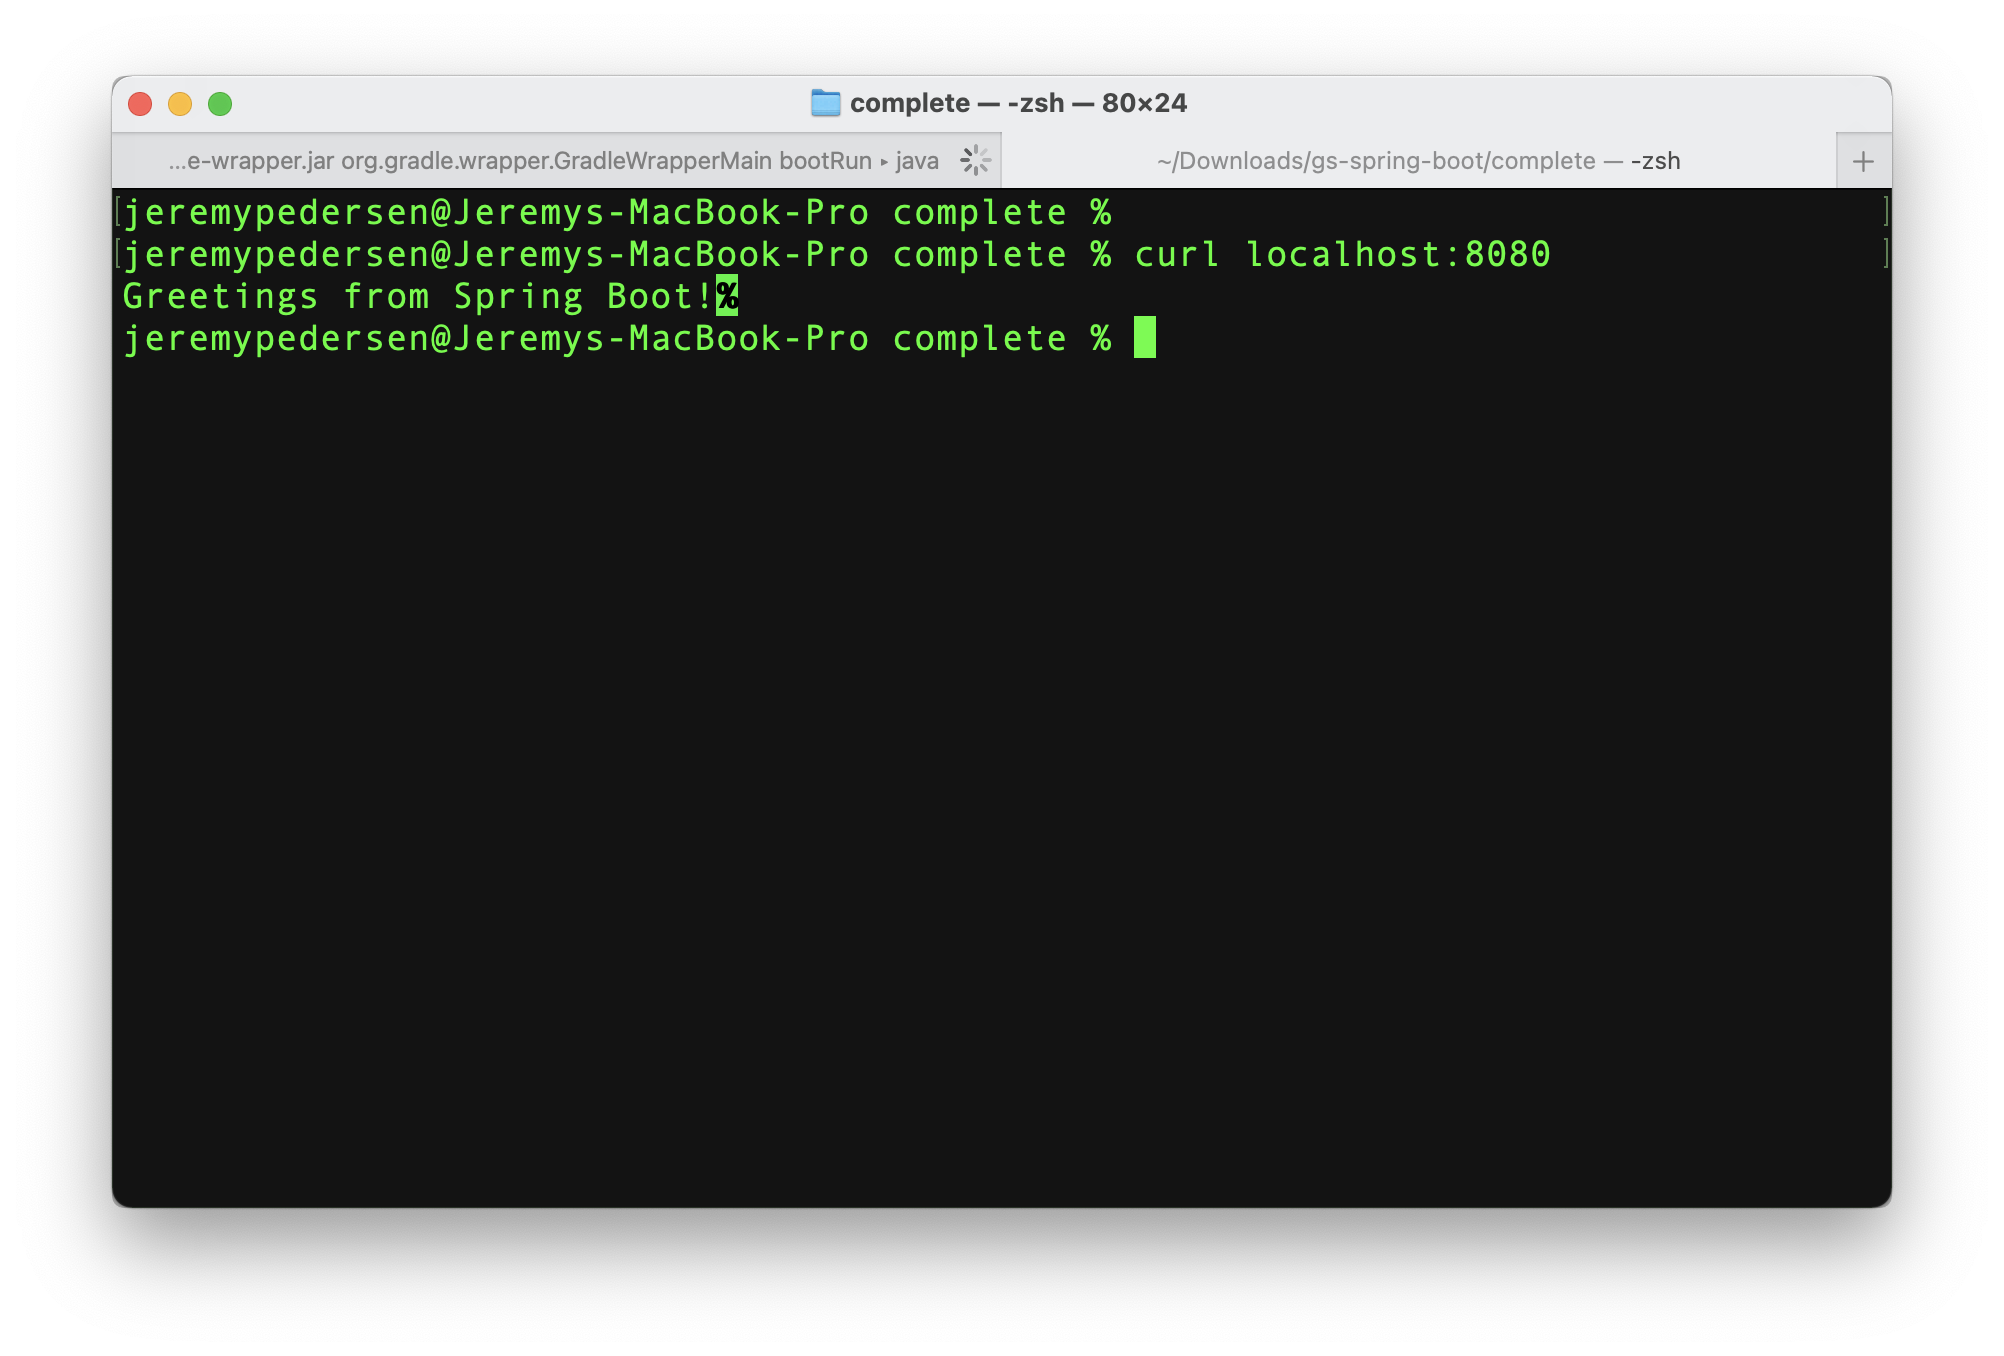
If your project builds and runs successfully, you should see something like this (if you are using Gradle, like me):
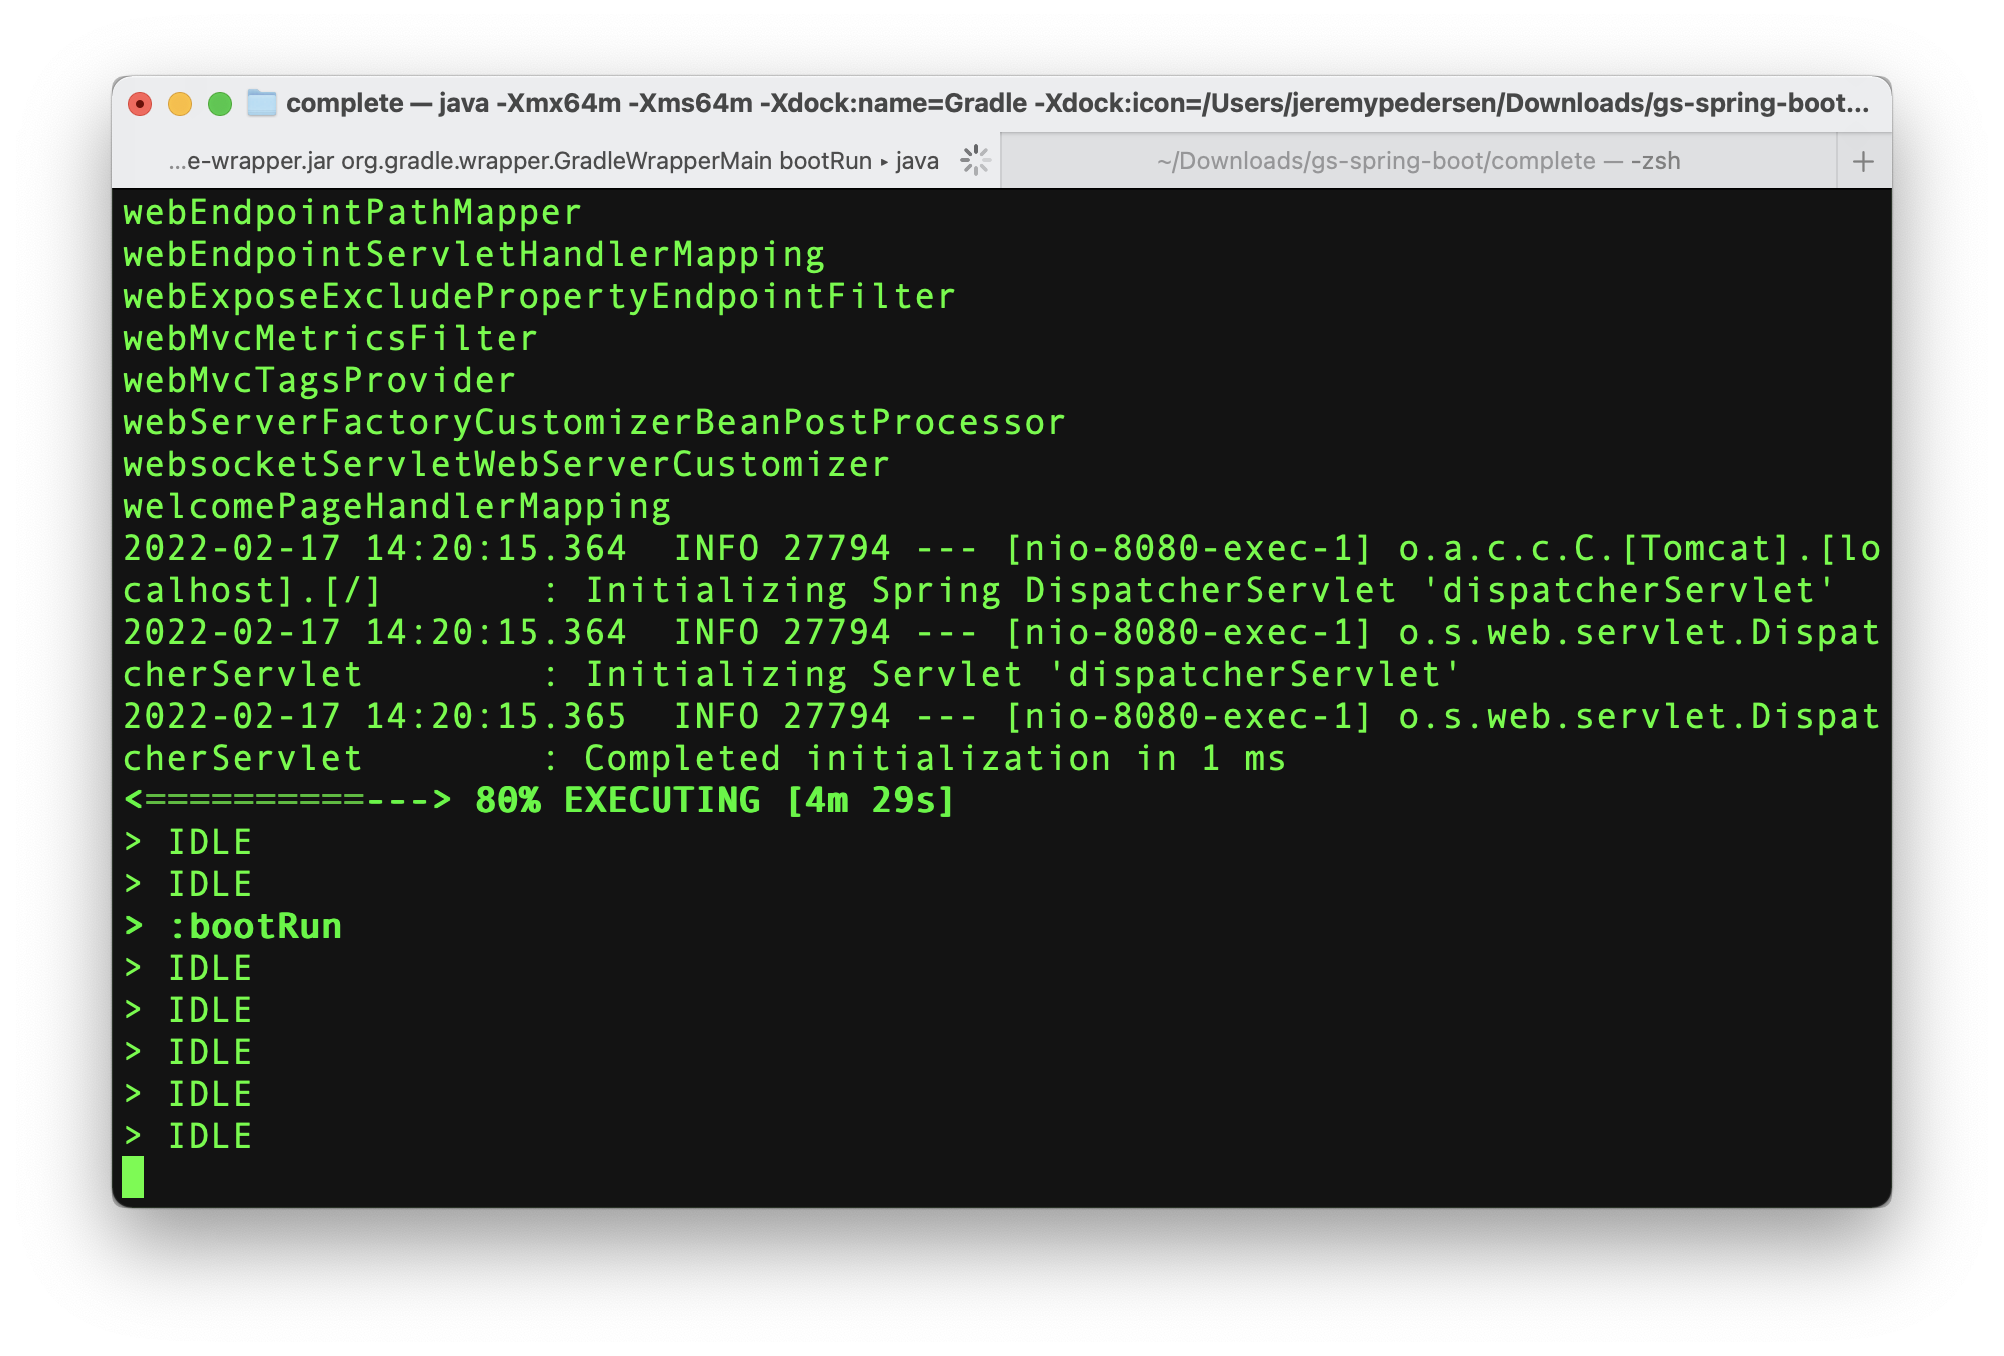
Try running curl localhost:8080 in a separate terminal window to make sure your Java app is up and running:
Don't forget to push all this up to GitHub! In my case, I created a temporary repository (don't go looking for it, it's already gone!) to hold the project.
Setting up the code source is straightforward. First, we need to "Associate" our GitHub account with Flow:
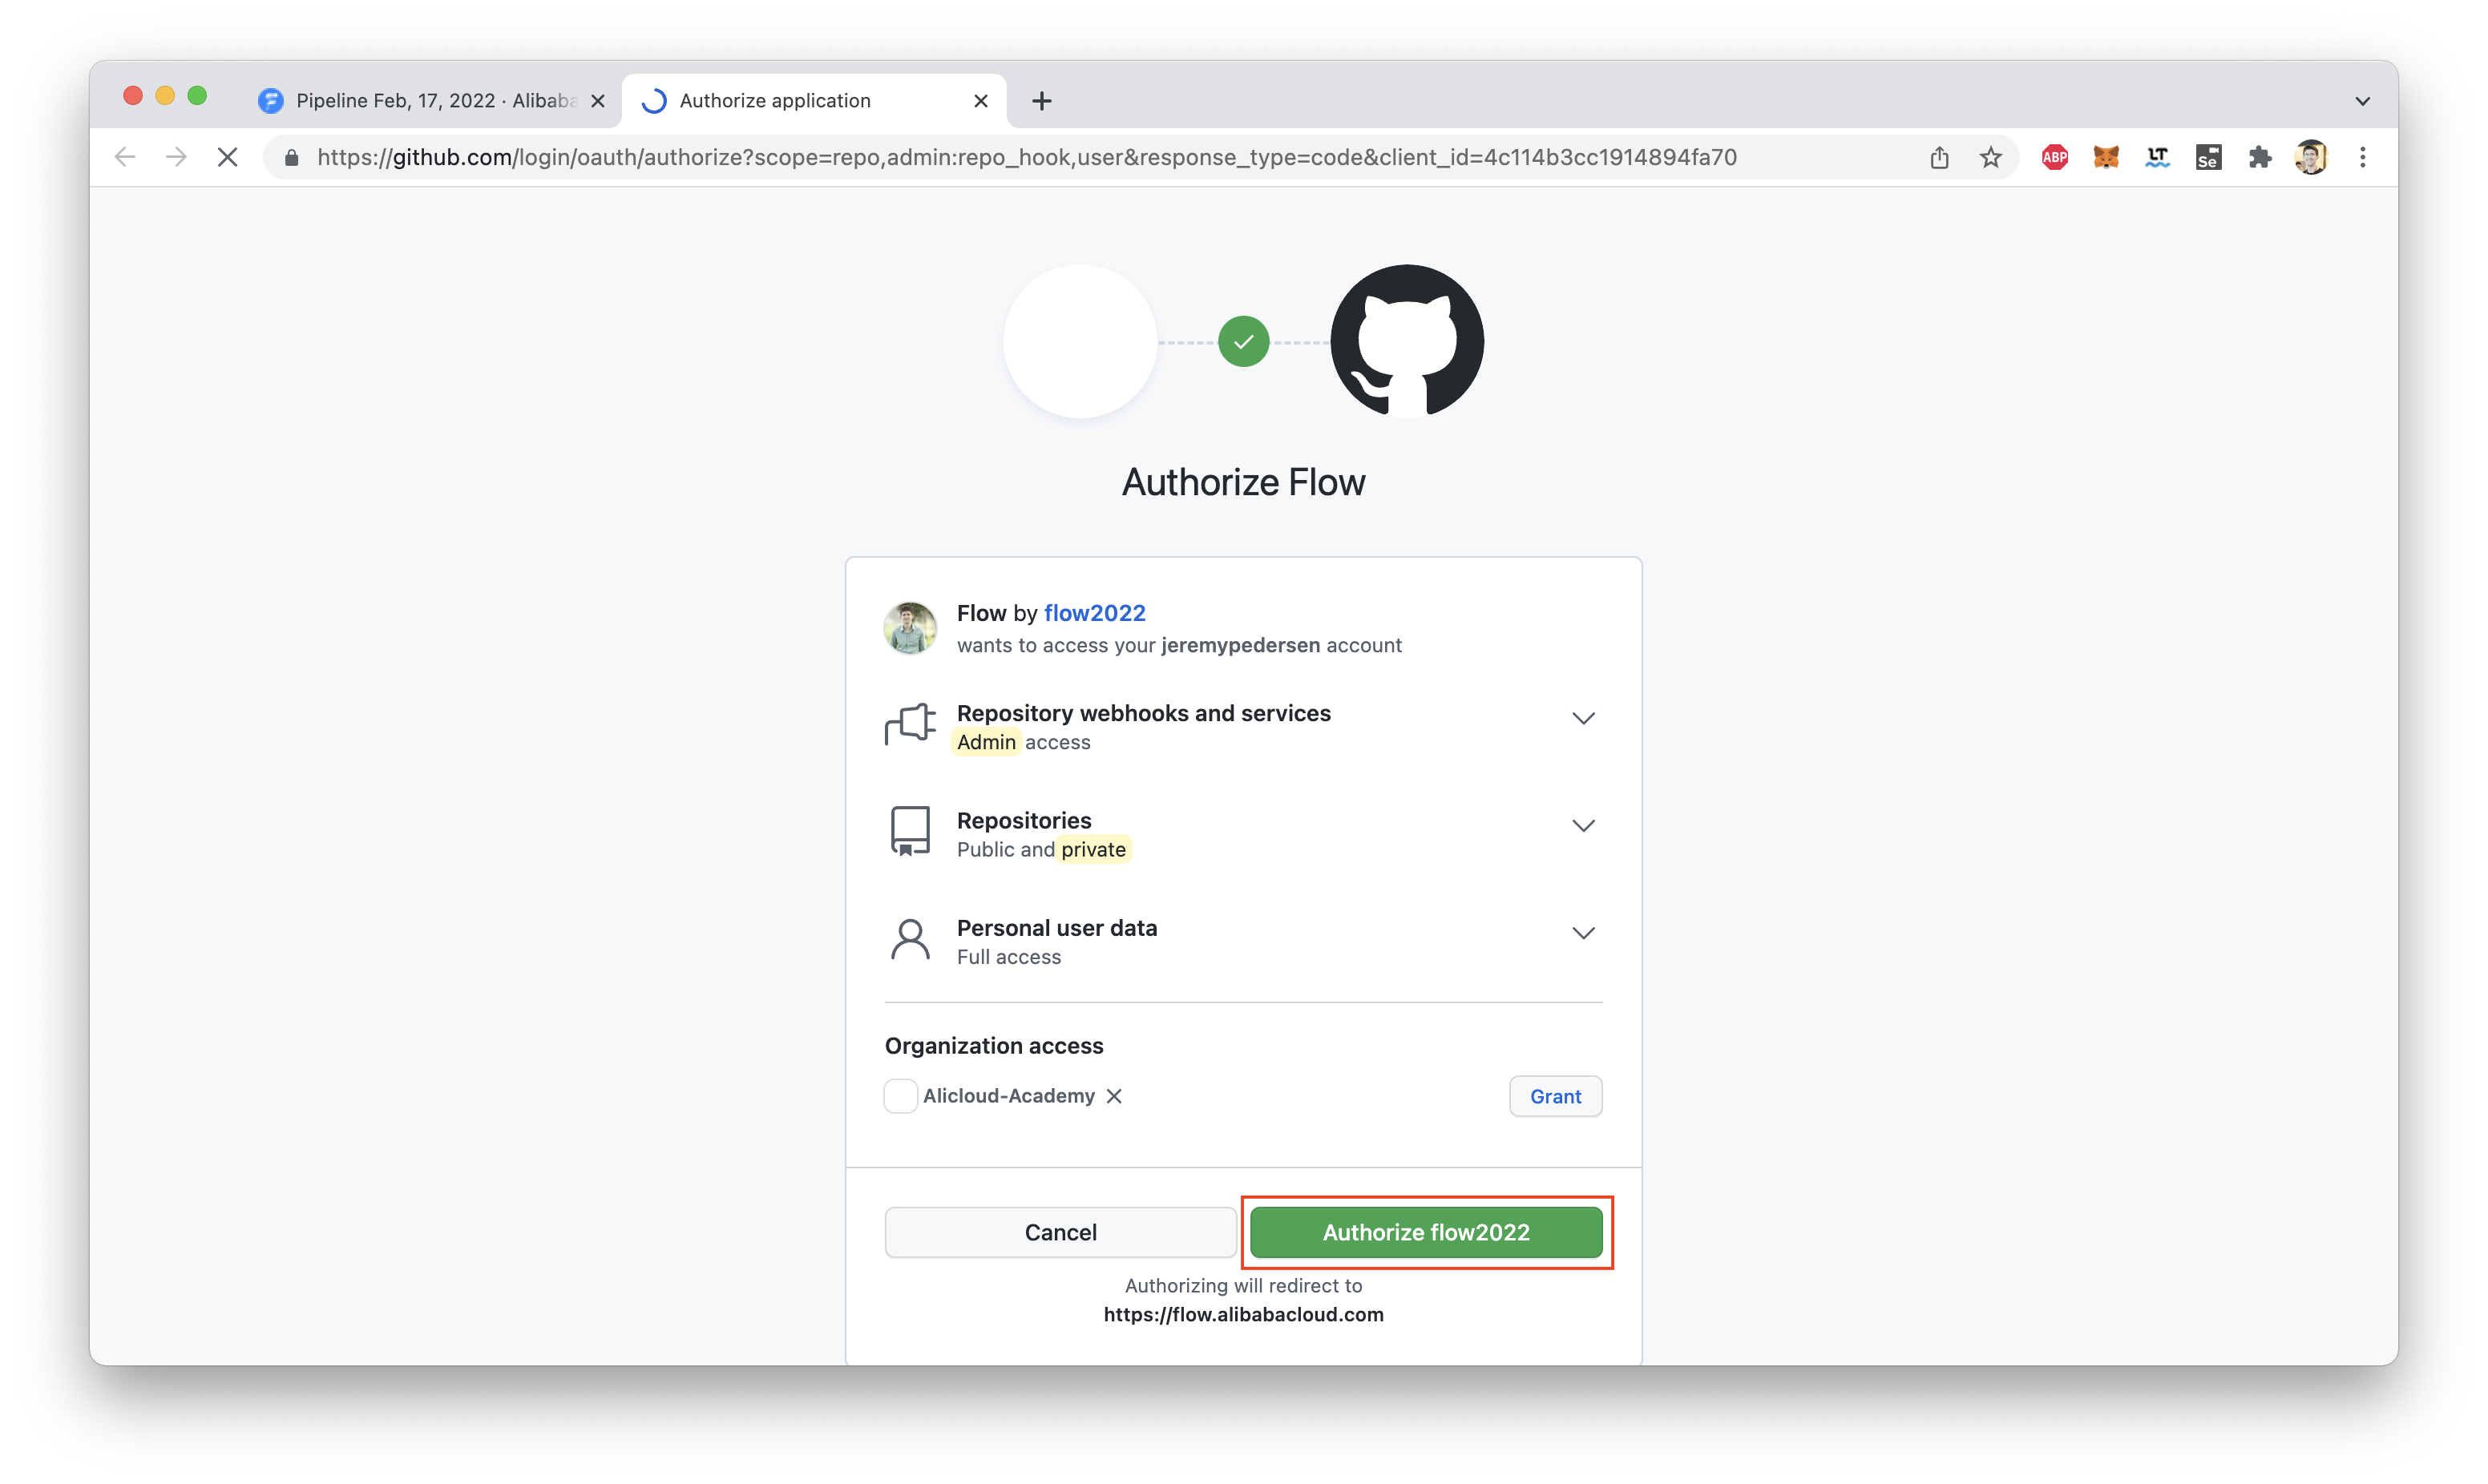
This will open another tab (you'll need to be logged into GitHub for this to work). GitHab will ask you to confirm the authorization:
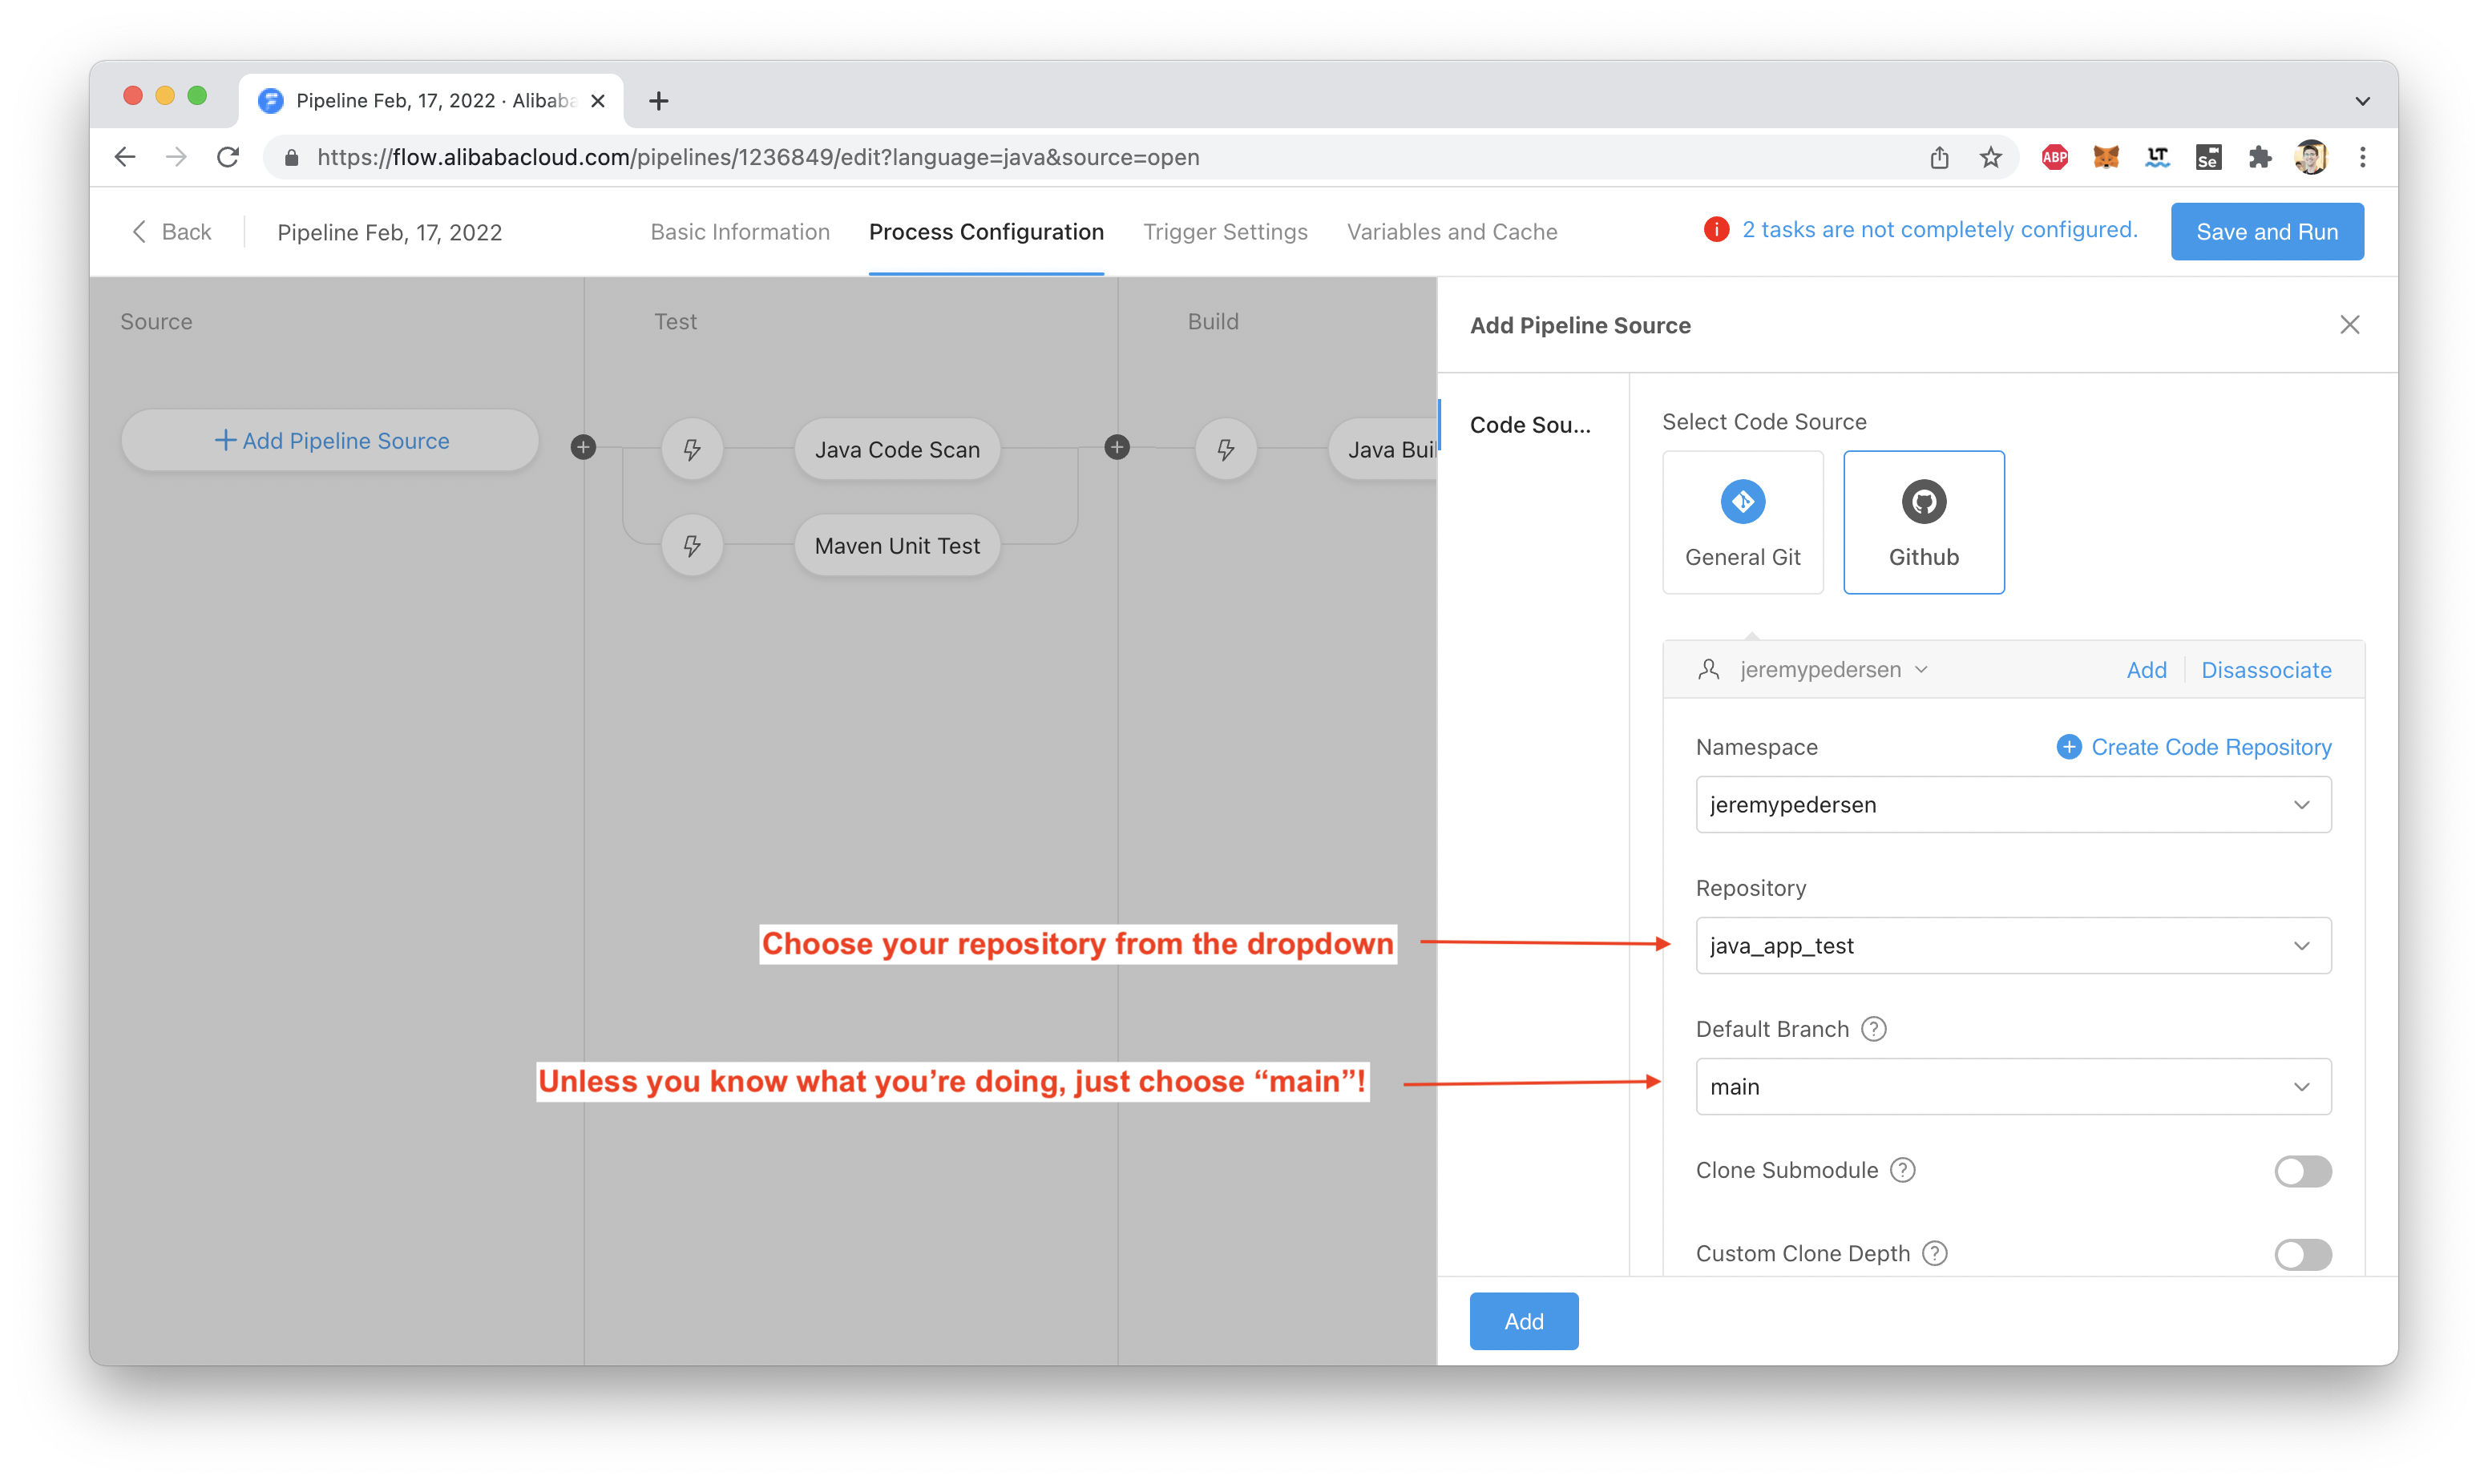
You can now go back to the Flow console. You should be able to see your repositories. Choose the one that holds the Java app you'll be deploying:
For the code scan, unit test, and build steps, we can leave everything at the defaults for now:
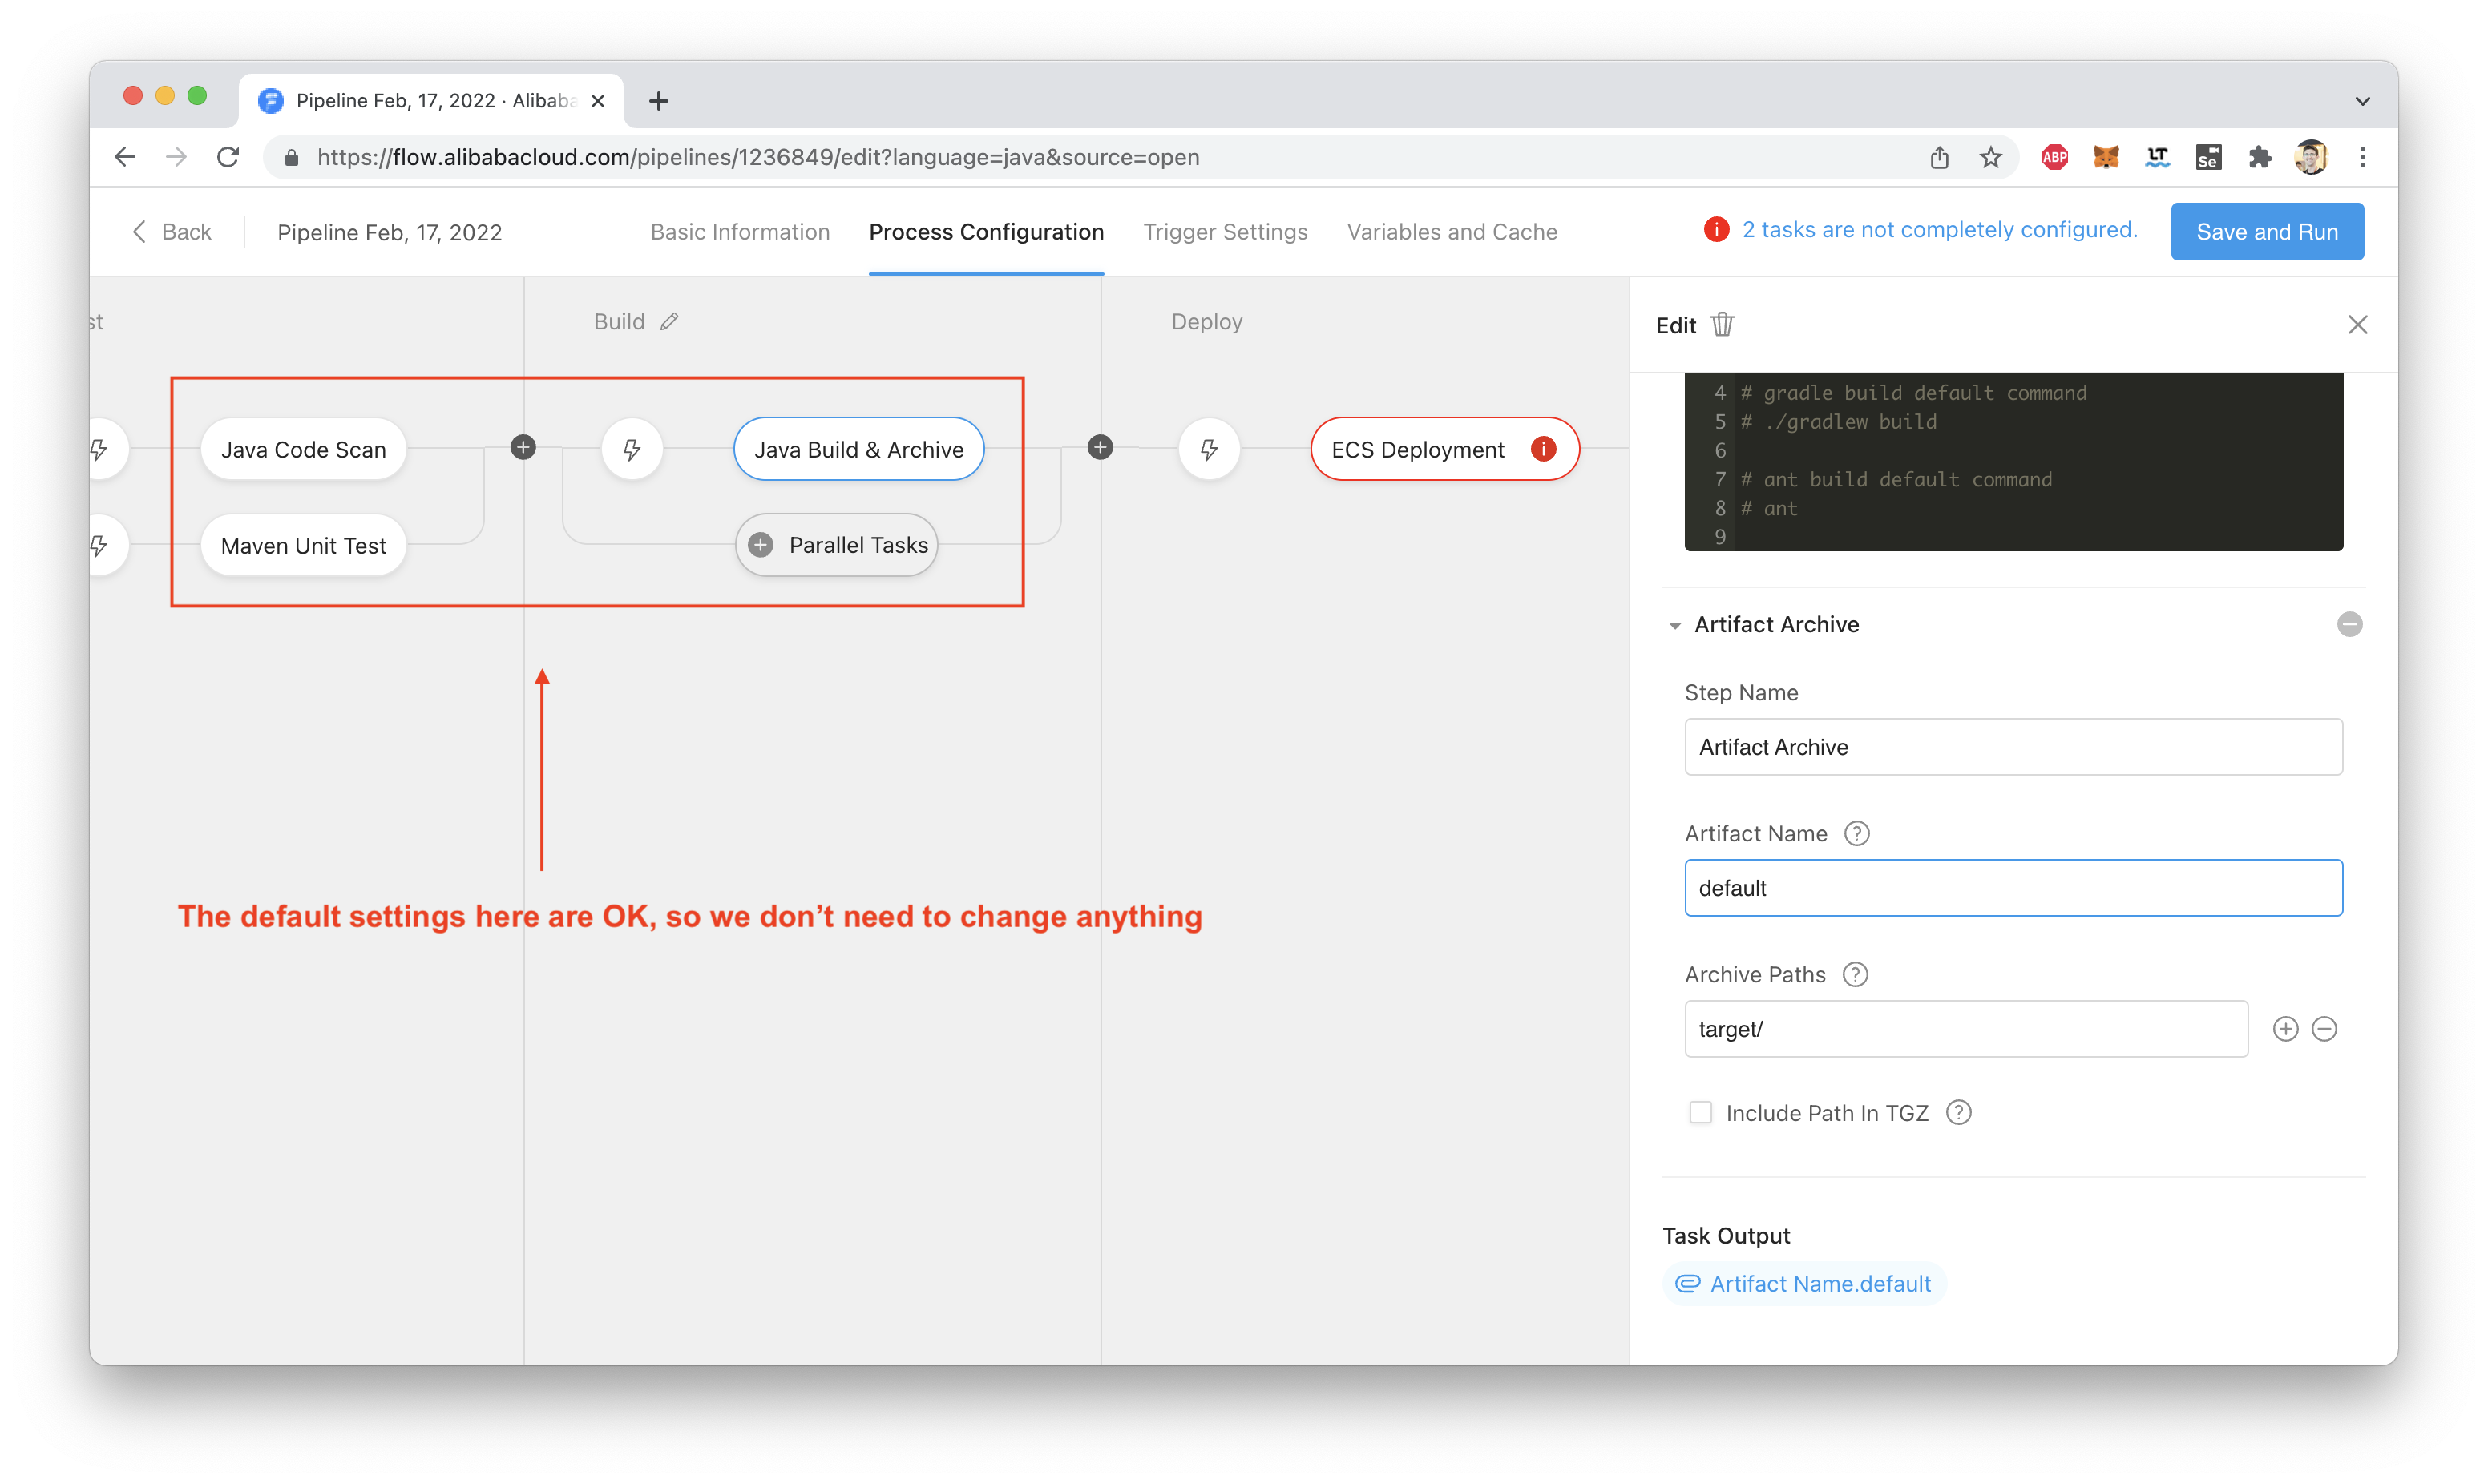
In a real world project, you'd likely be adding lots of additional elements here to run unit tests, test your builds, and so on. For today's blog, we will keep it simple and leave things as-is.
We need somewhere to deploy our code once it's built. Let's create an ECS instance for this purpose.
There will be a few requirements to make sure everything works correctly:
I set up an instance in Singapore that meets these requirements:
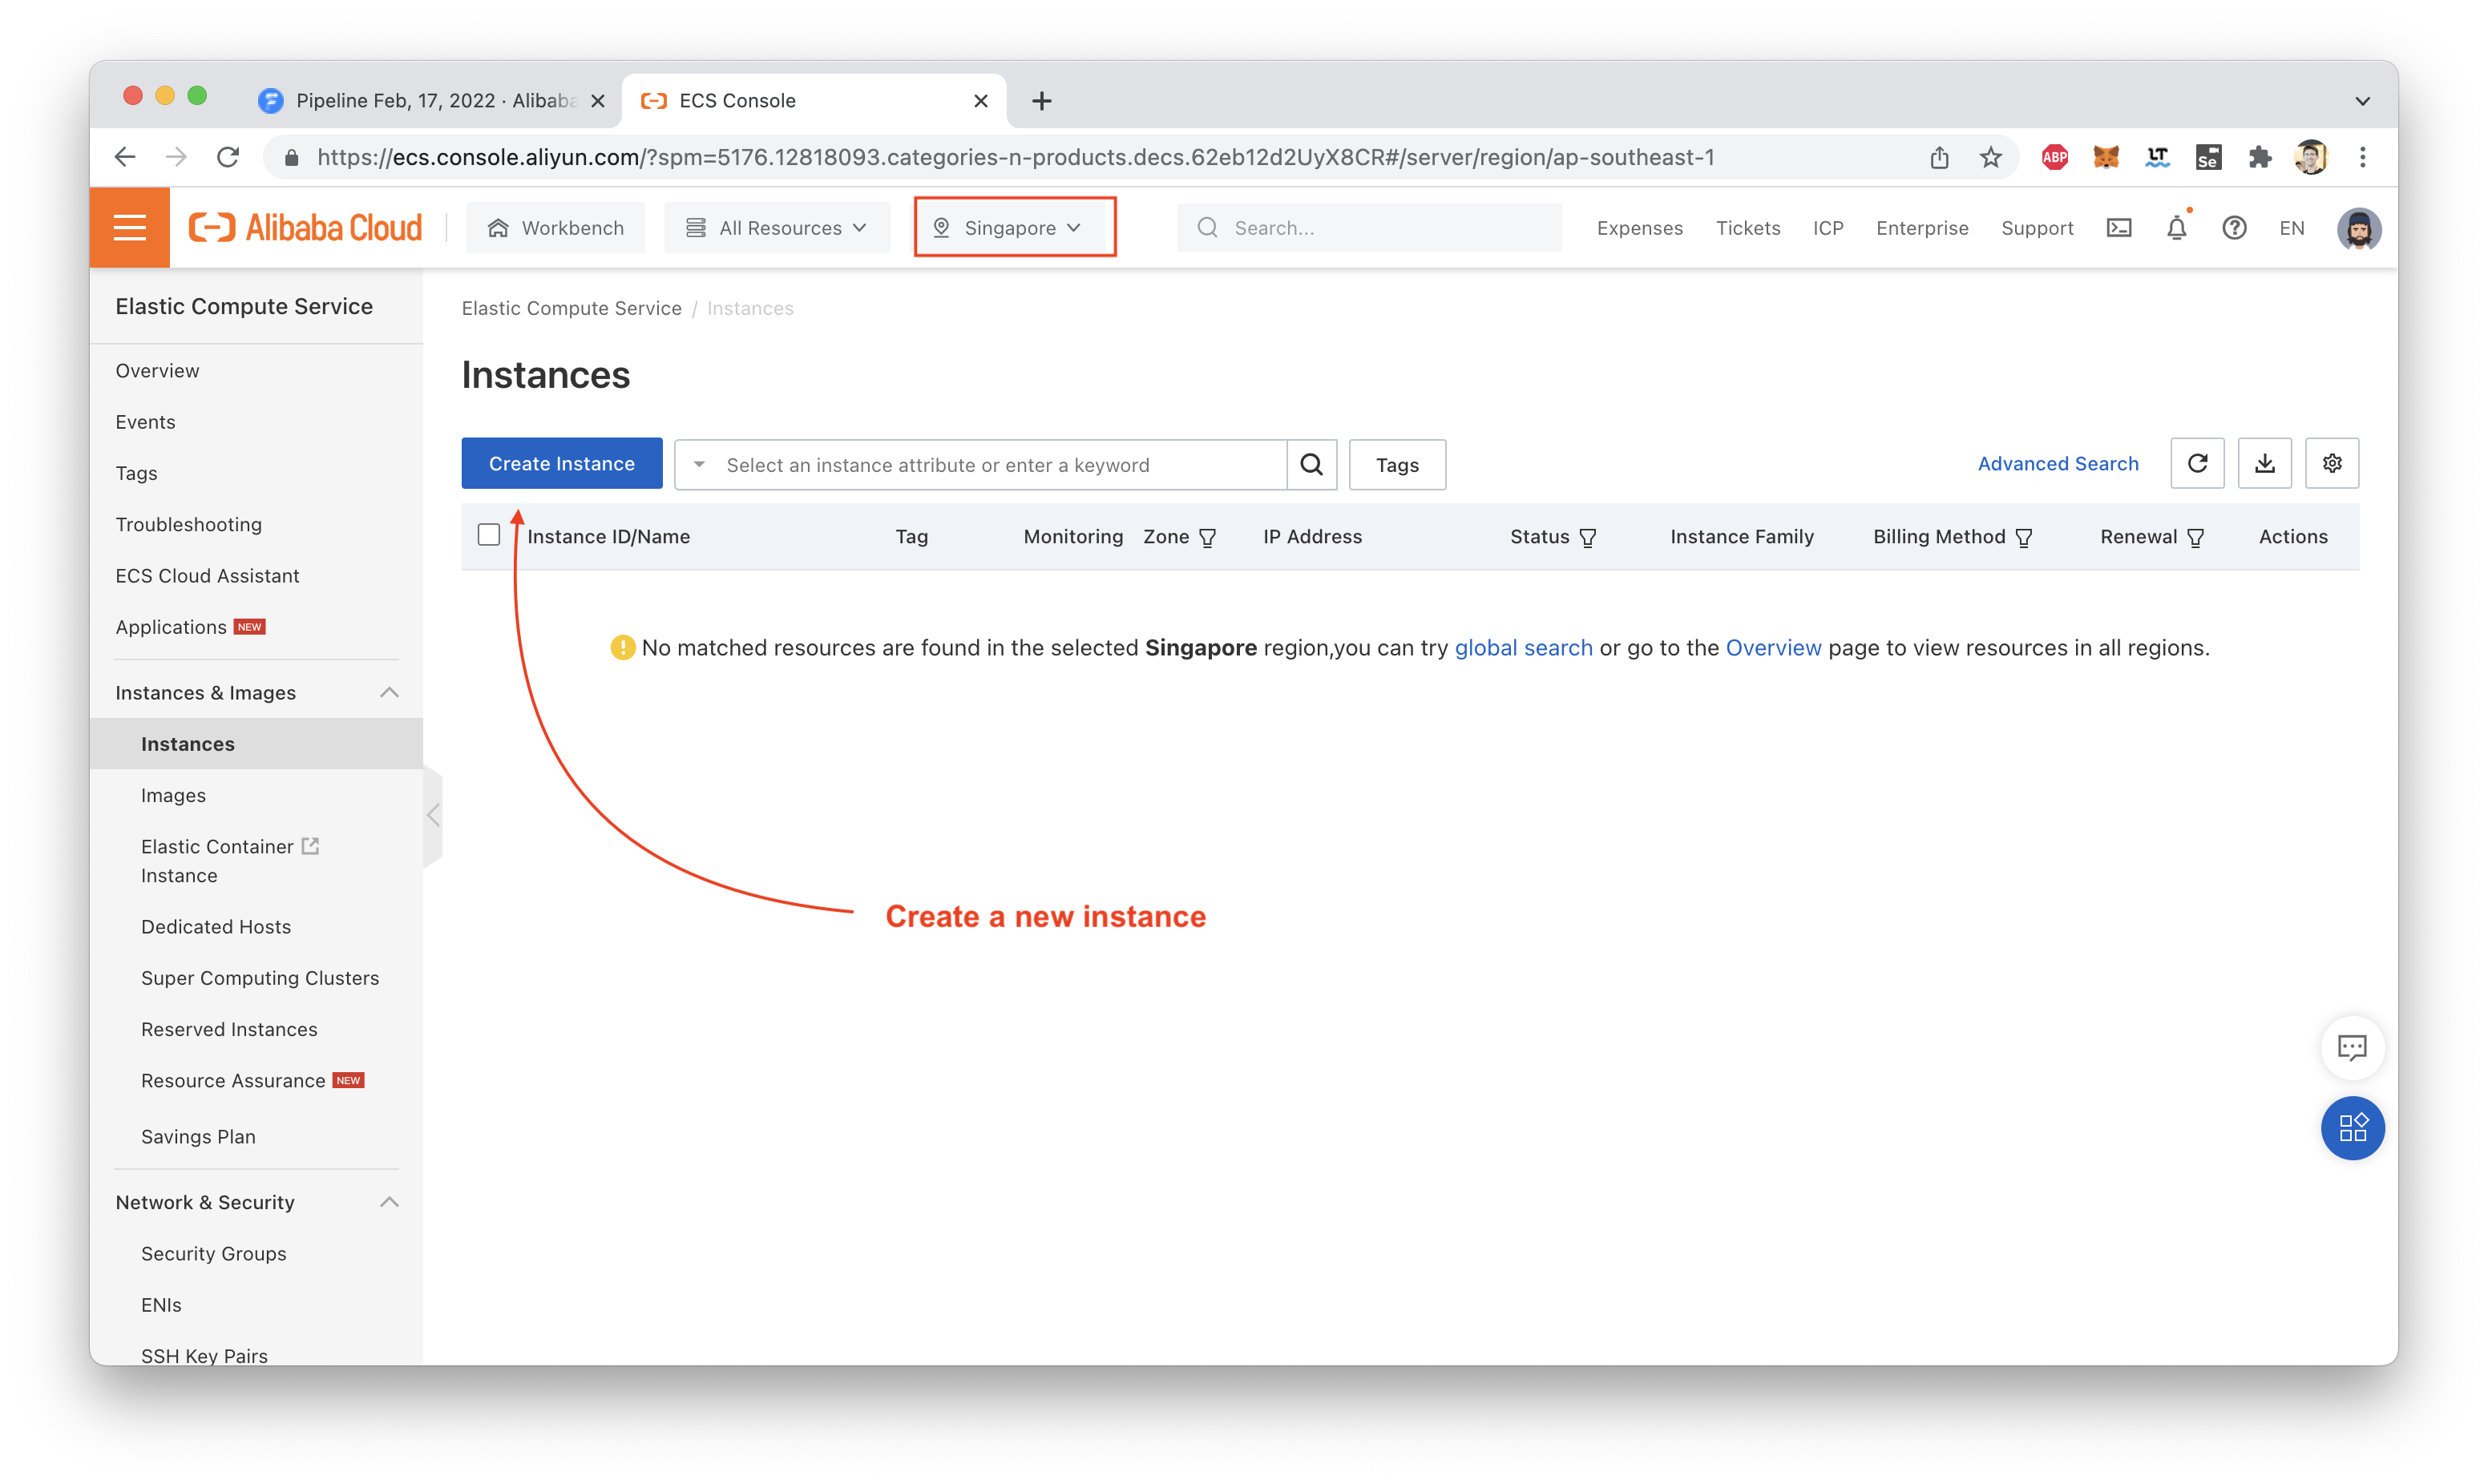
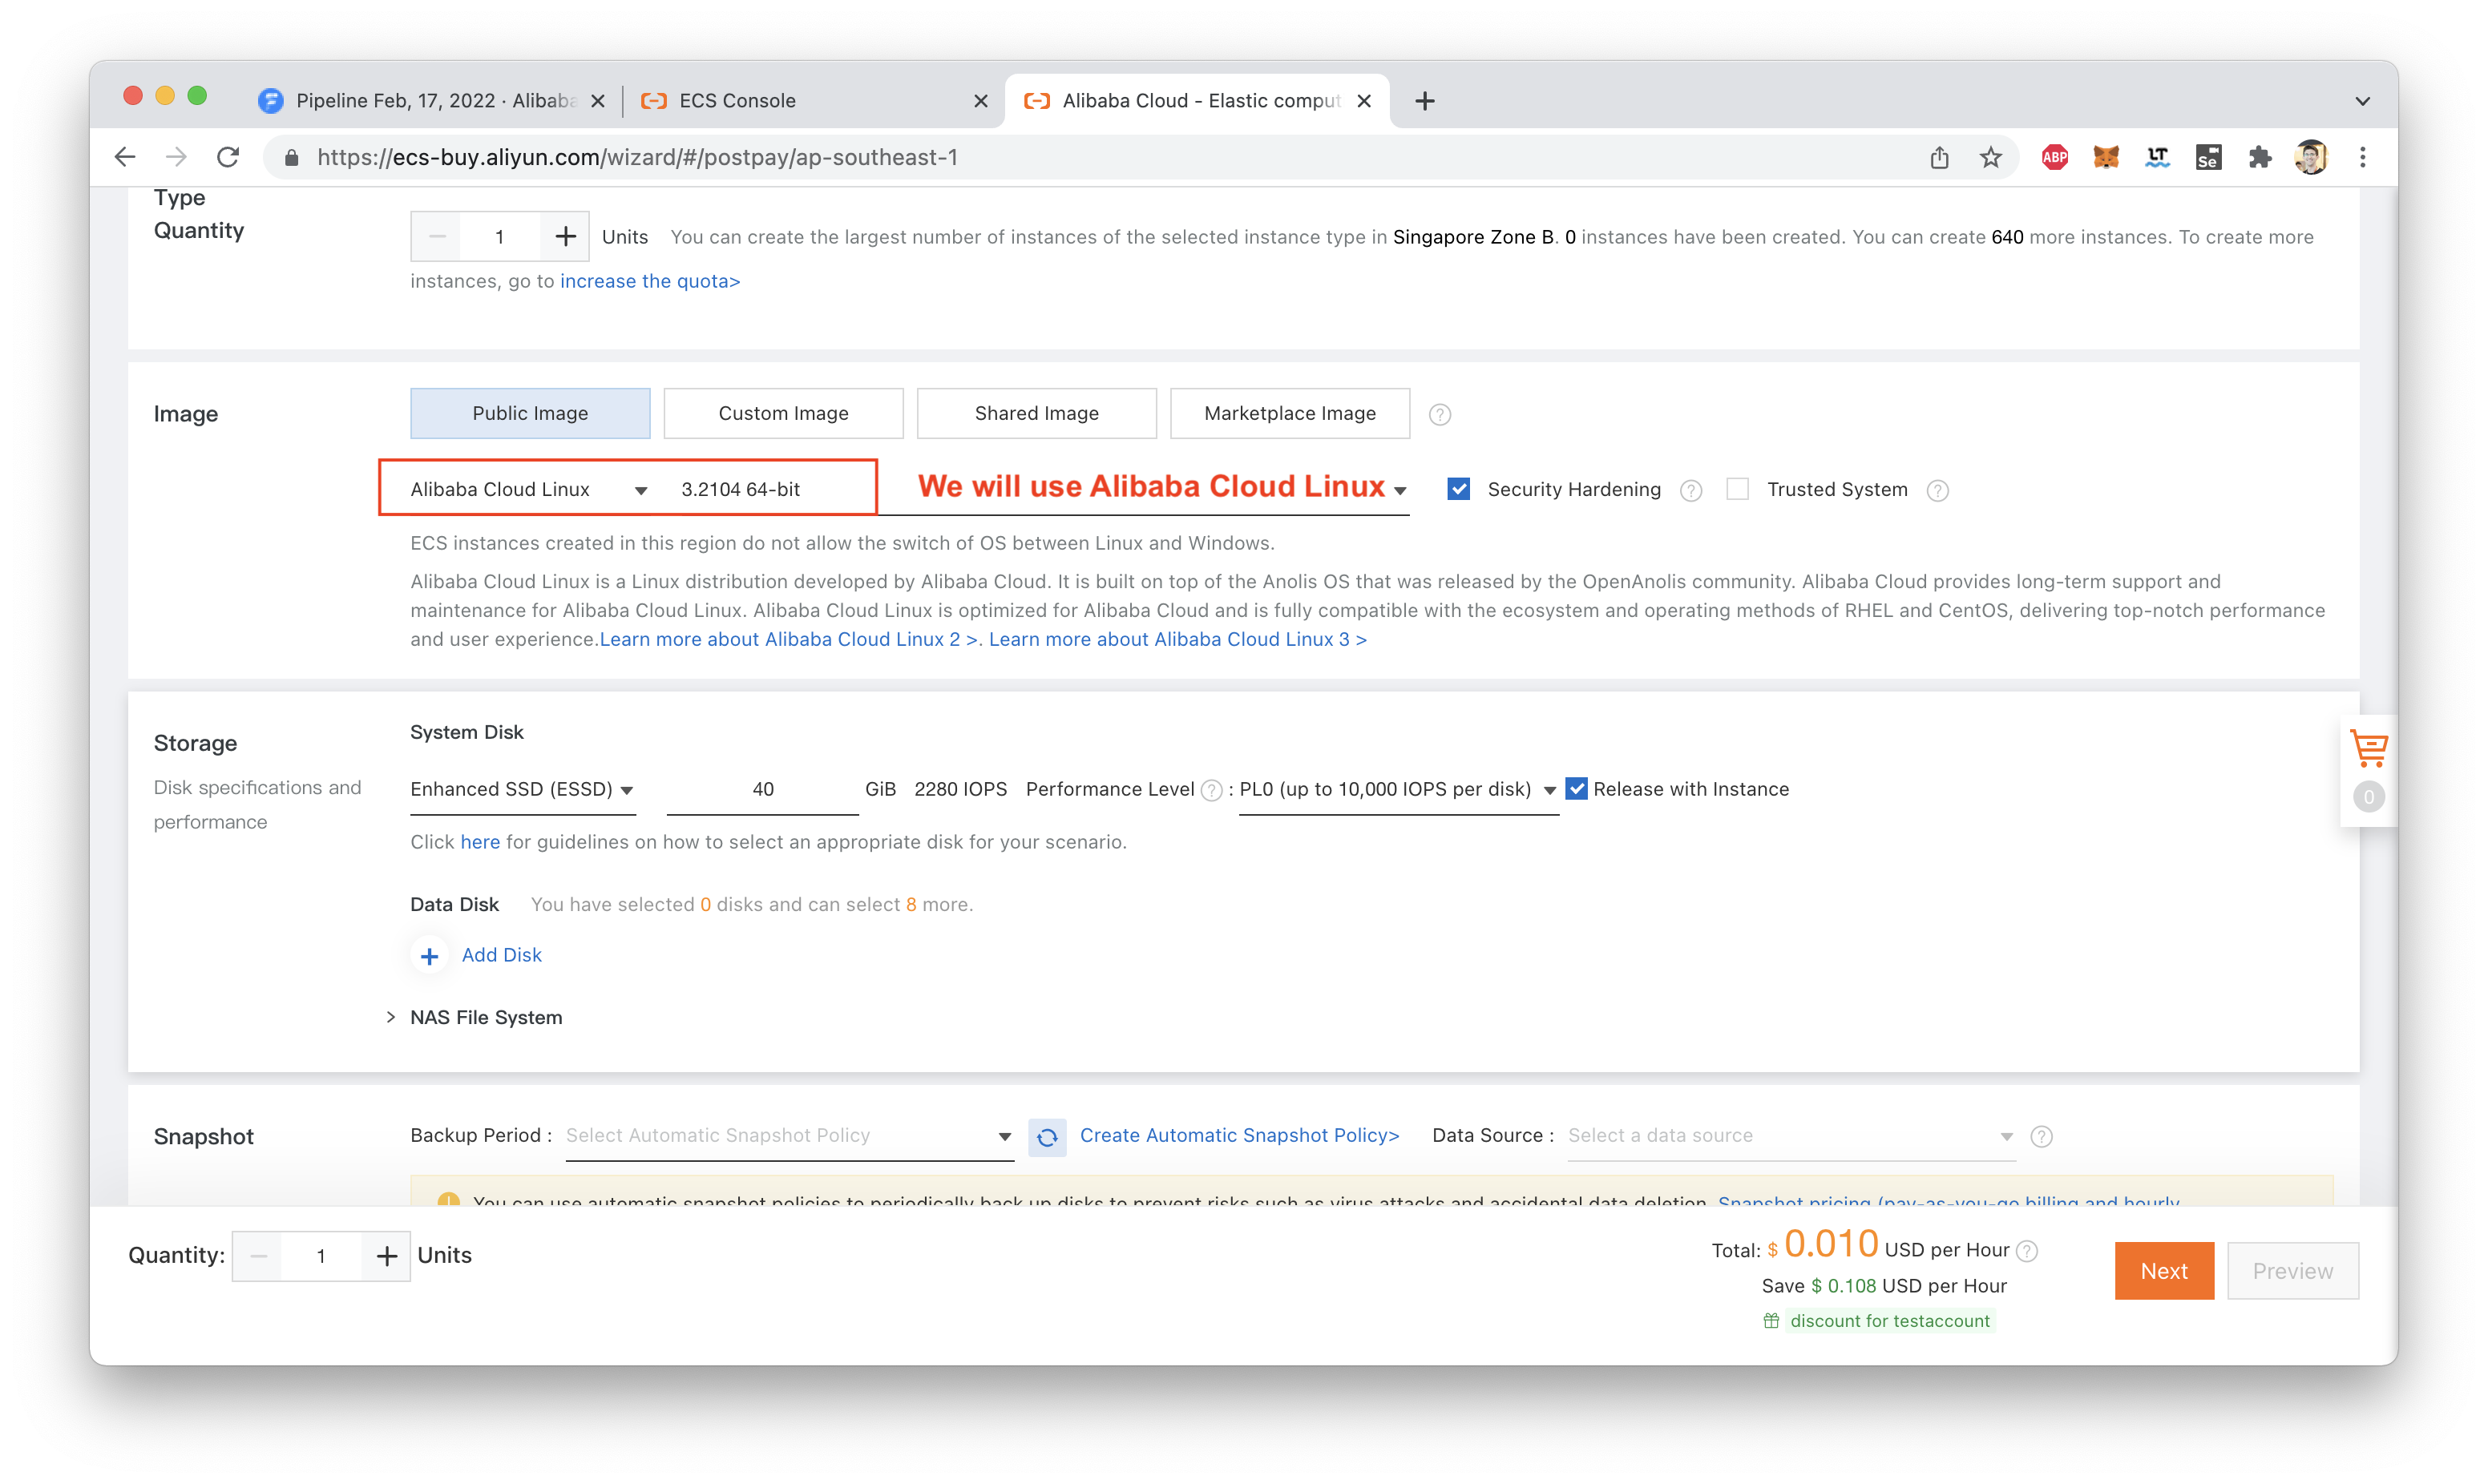
I'll use Alibaba Cloud Linux (Aliyun Linux):
We need to make sure the instance has a public IP assigned:

We also need to open port 8080 (the default port that our Spring Boot app will be listening on):
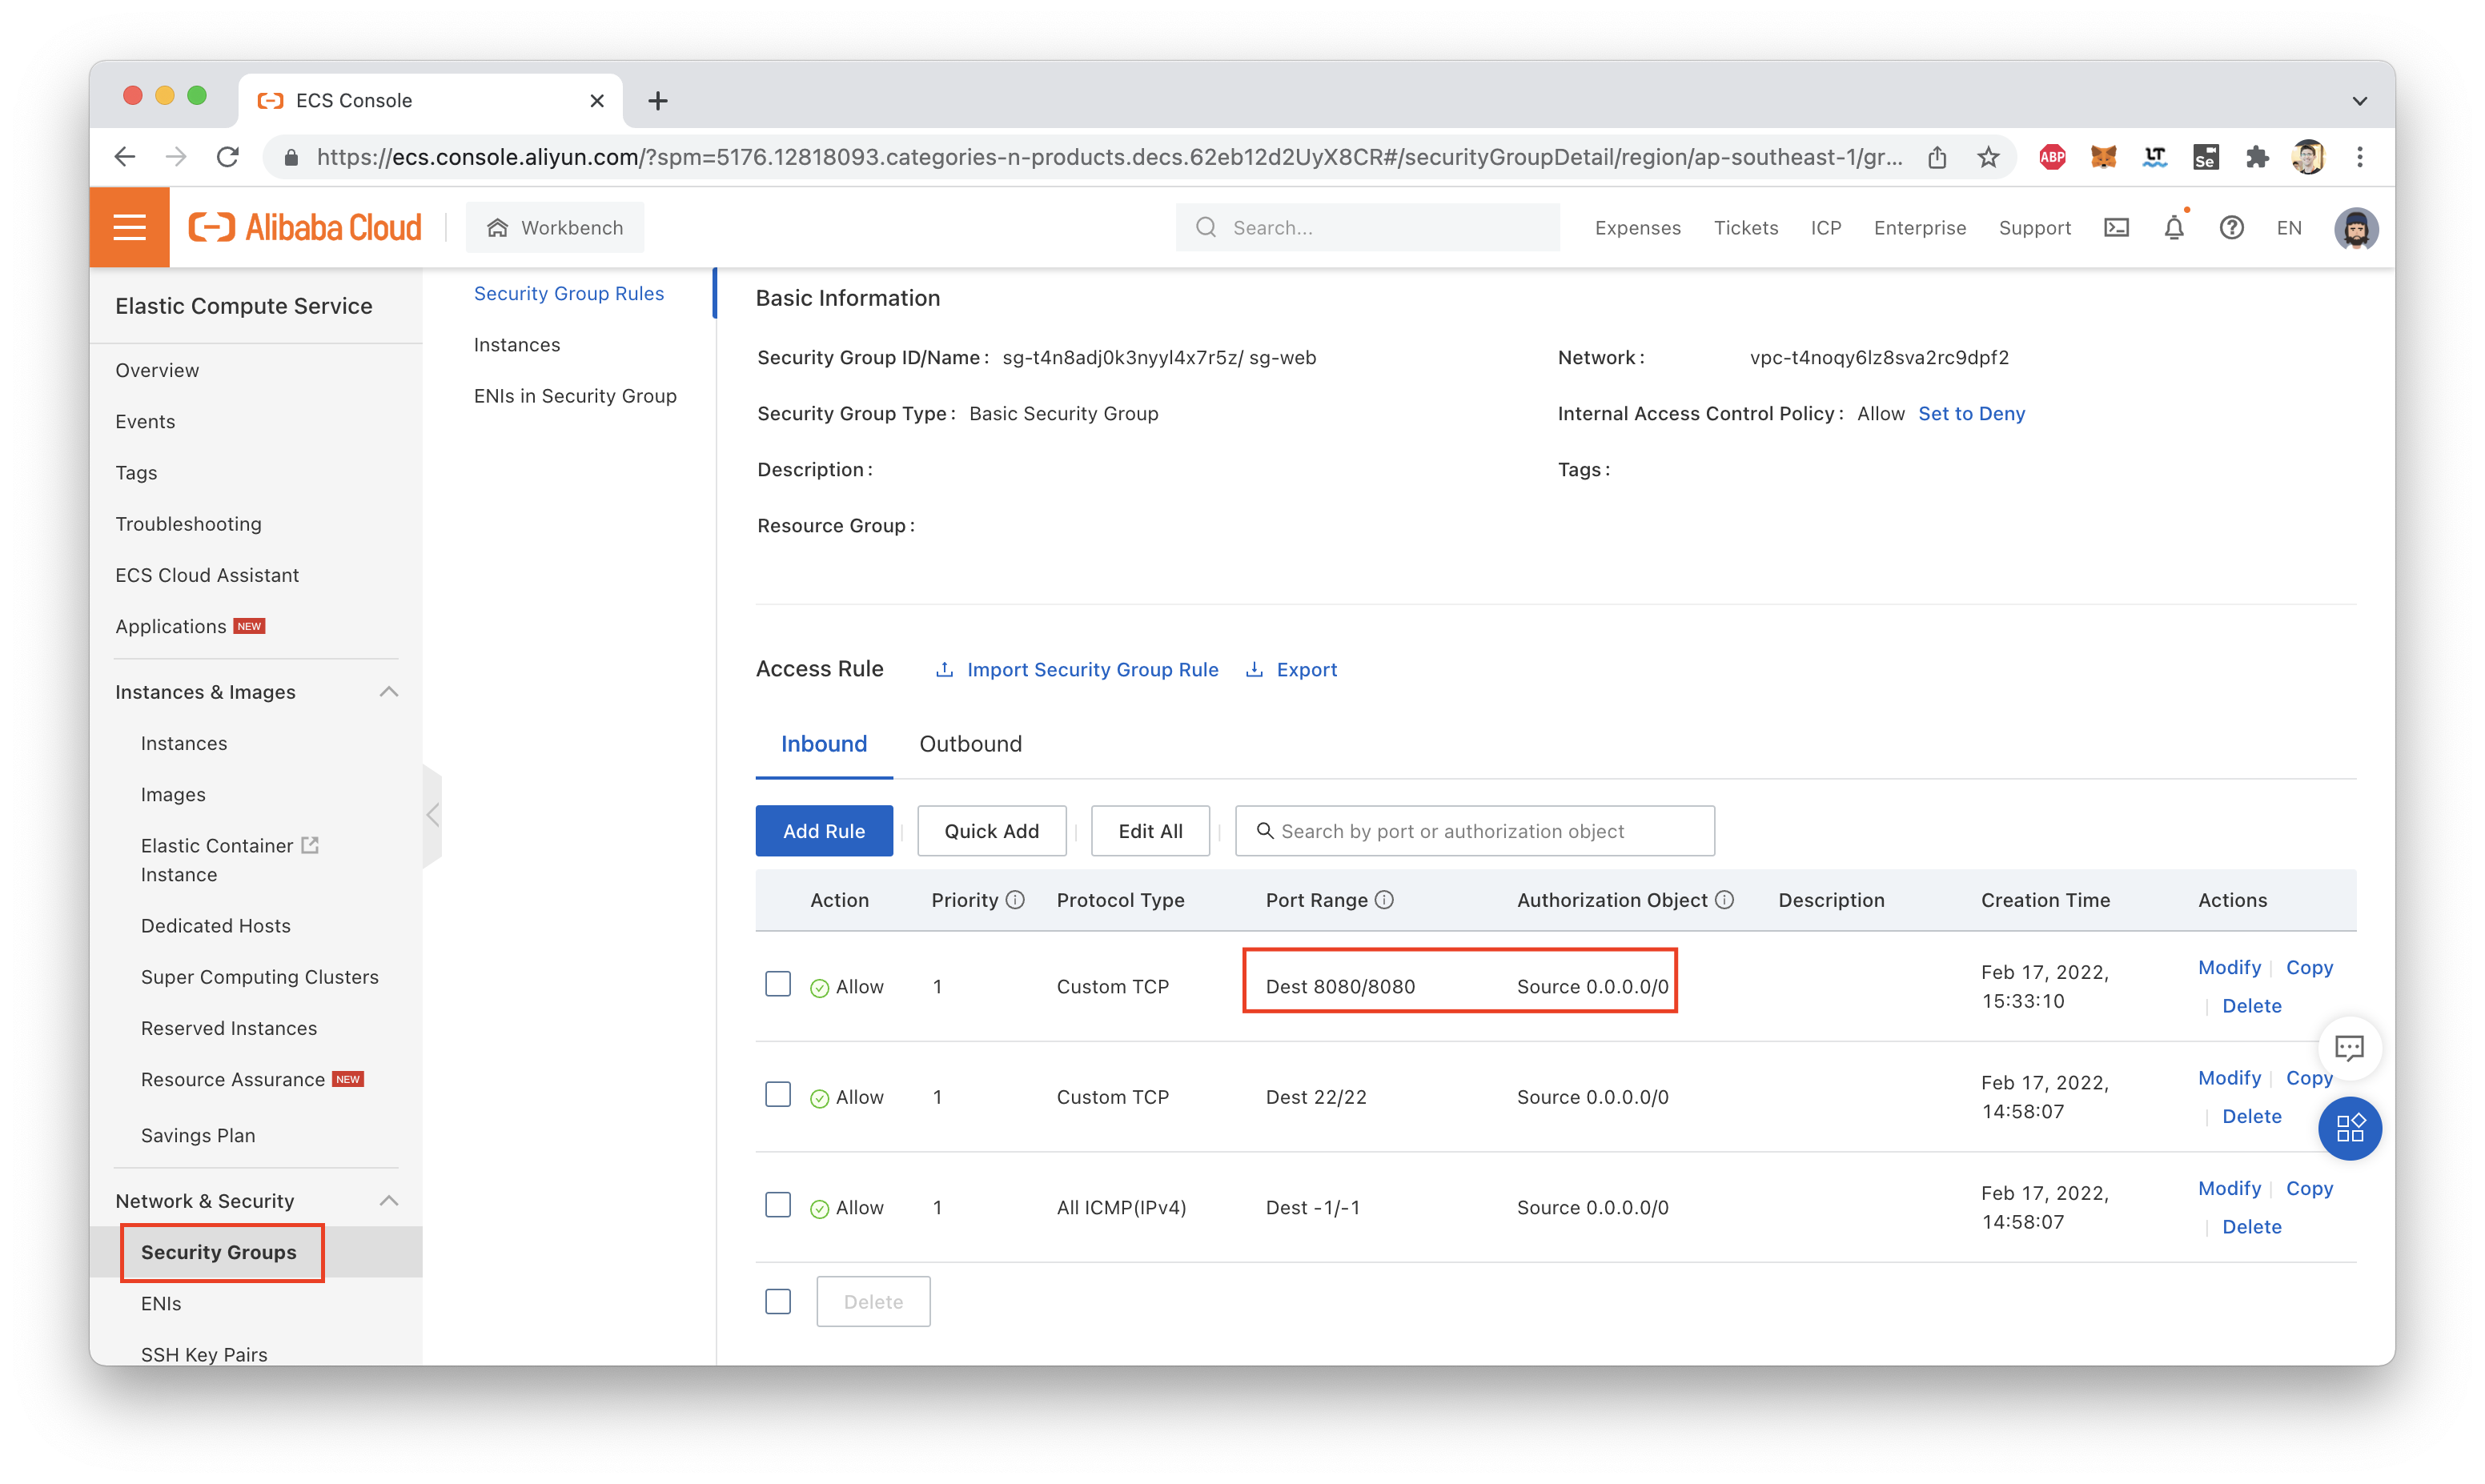
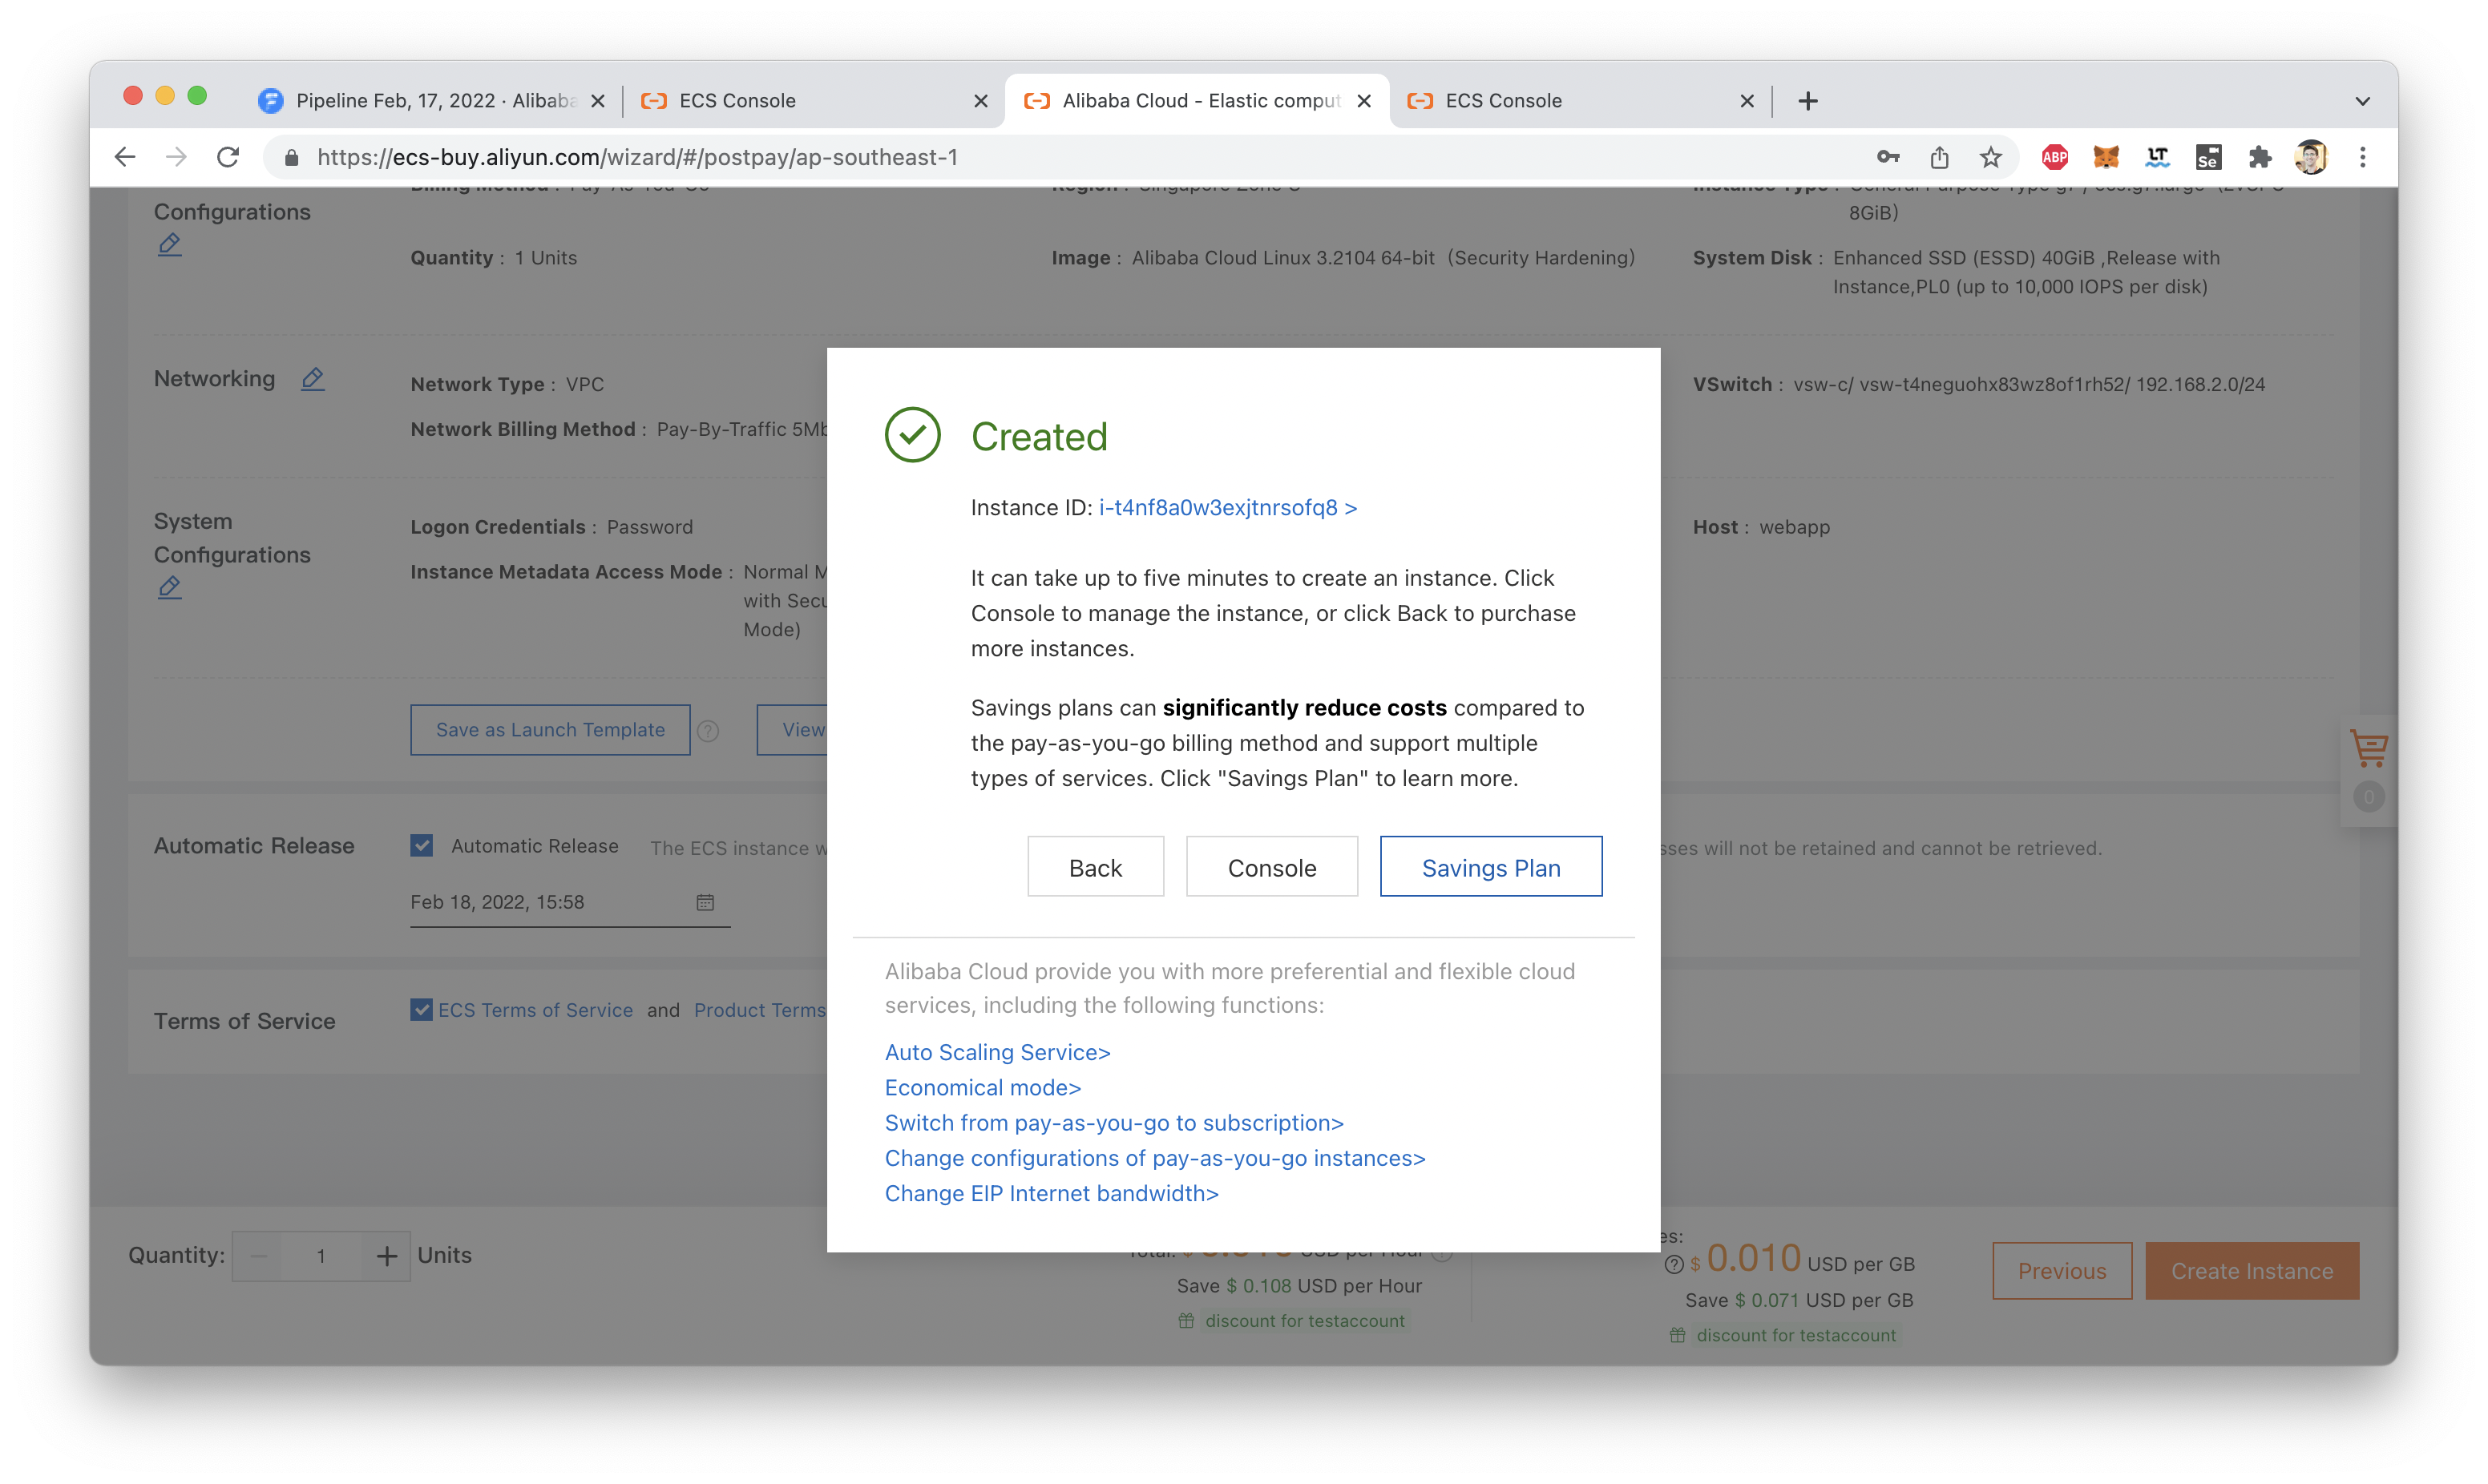
Great! Now that our instance is up and running, we need to install Java.
Let's find the instance's public IP, SSH in (you'll need your instance's SSH Key or Password for this part), and run the installation:
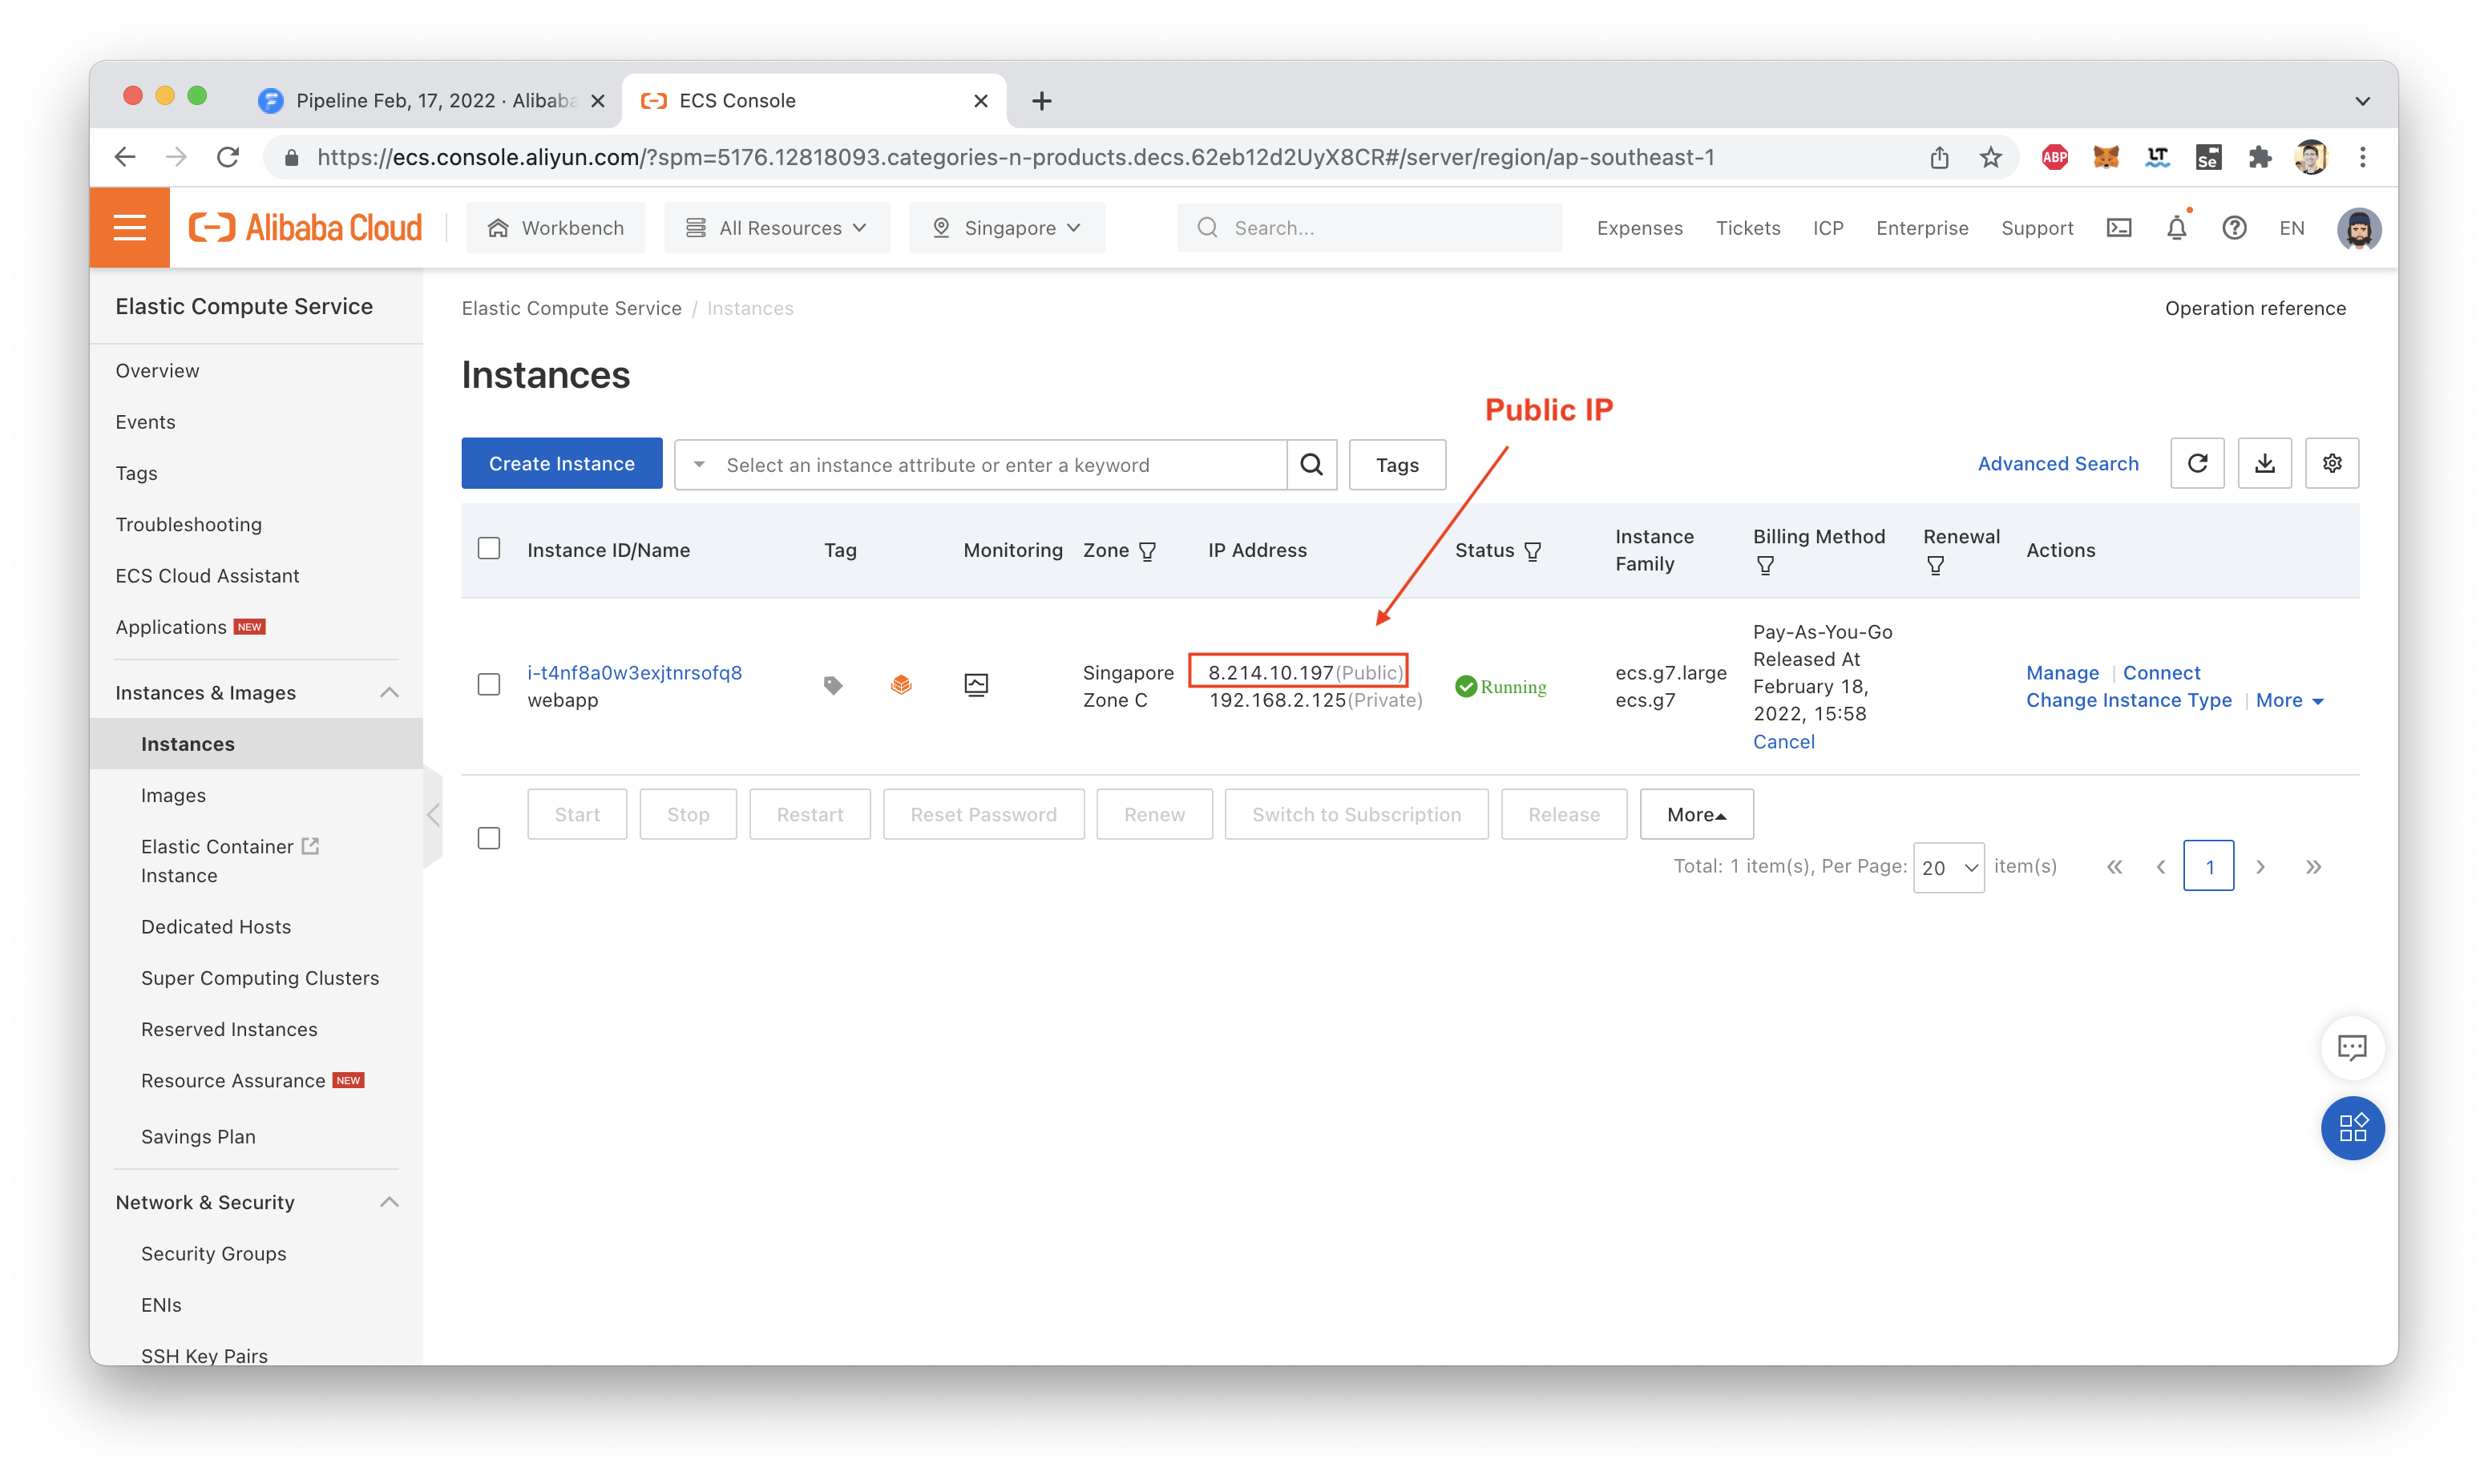
Once logged in, run:
yum install javaGreat, now we can move on to setting up the "Deploy" stage in our pipeline.
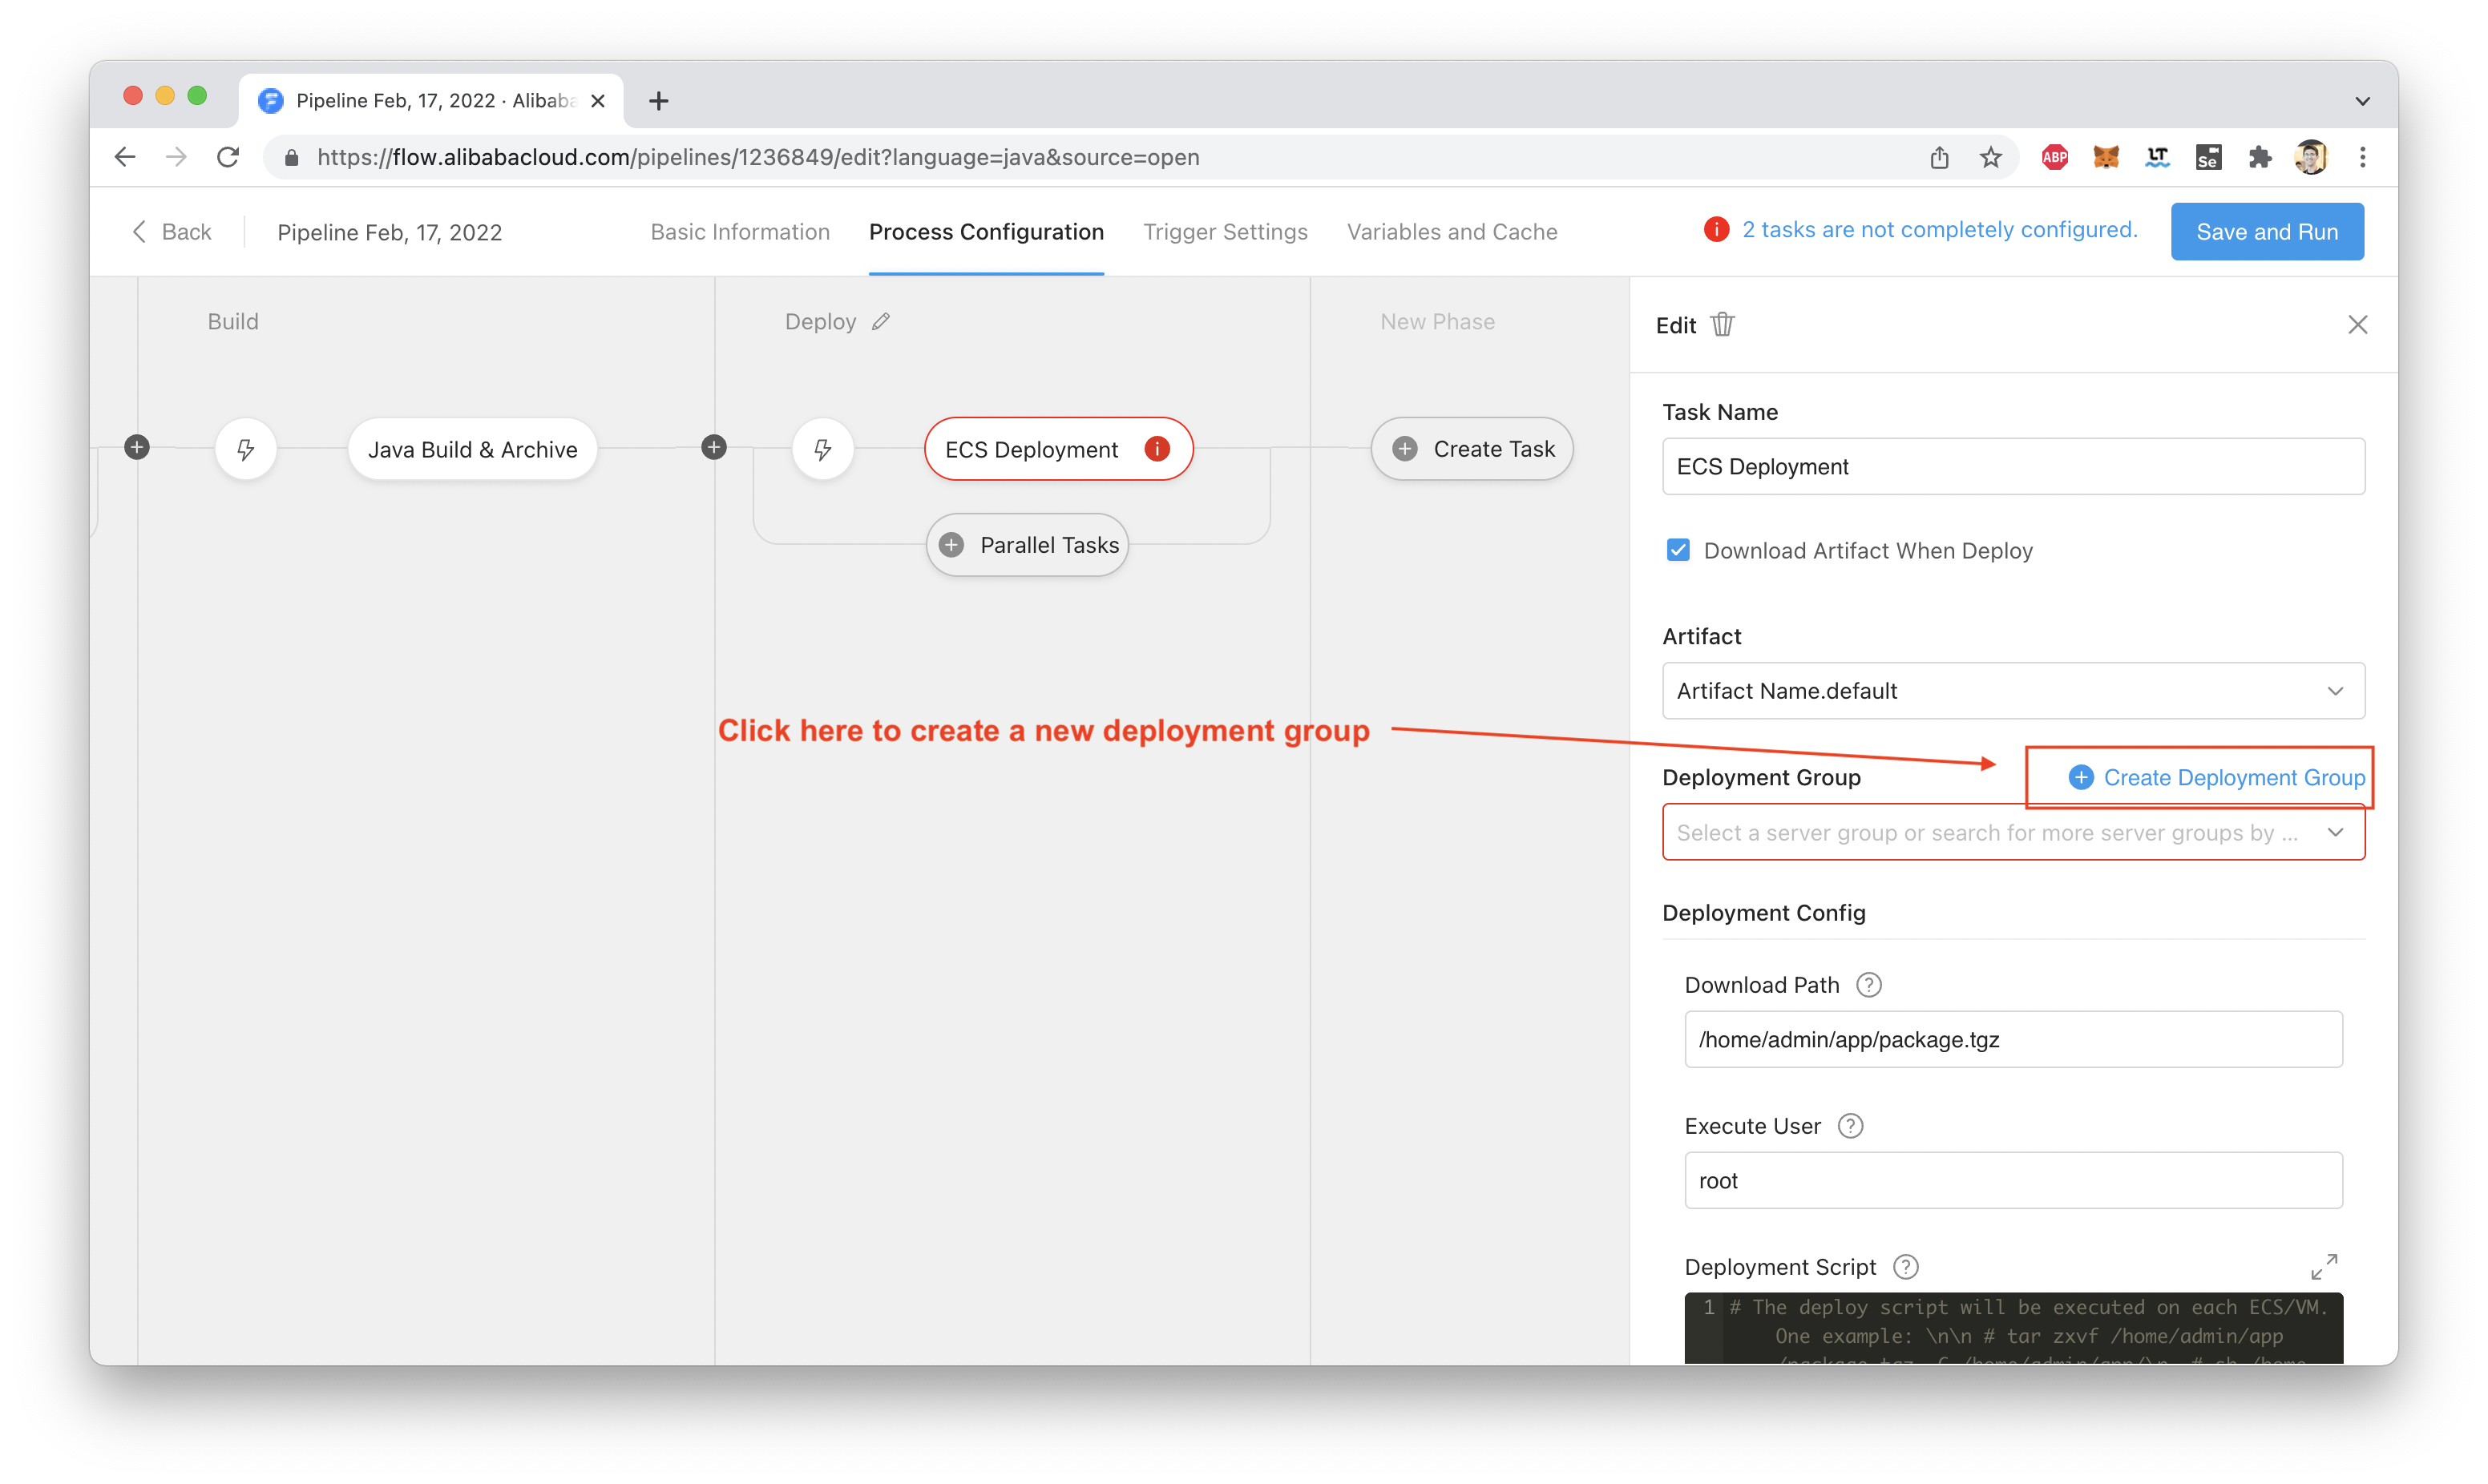
The first thing we need to do is create a "deployment group". This is a group of one or more ECS instances where our application will be deployed each time we run the pipeline:
Choose the region where your ECS instance is located, then select it from the list:
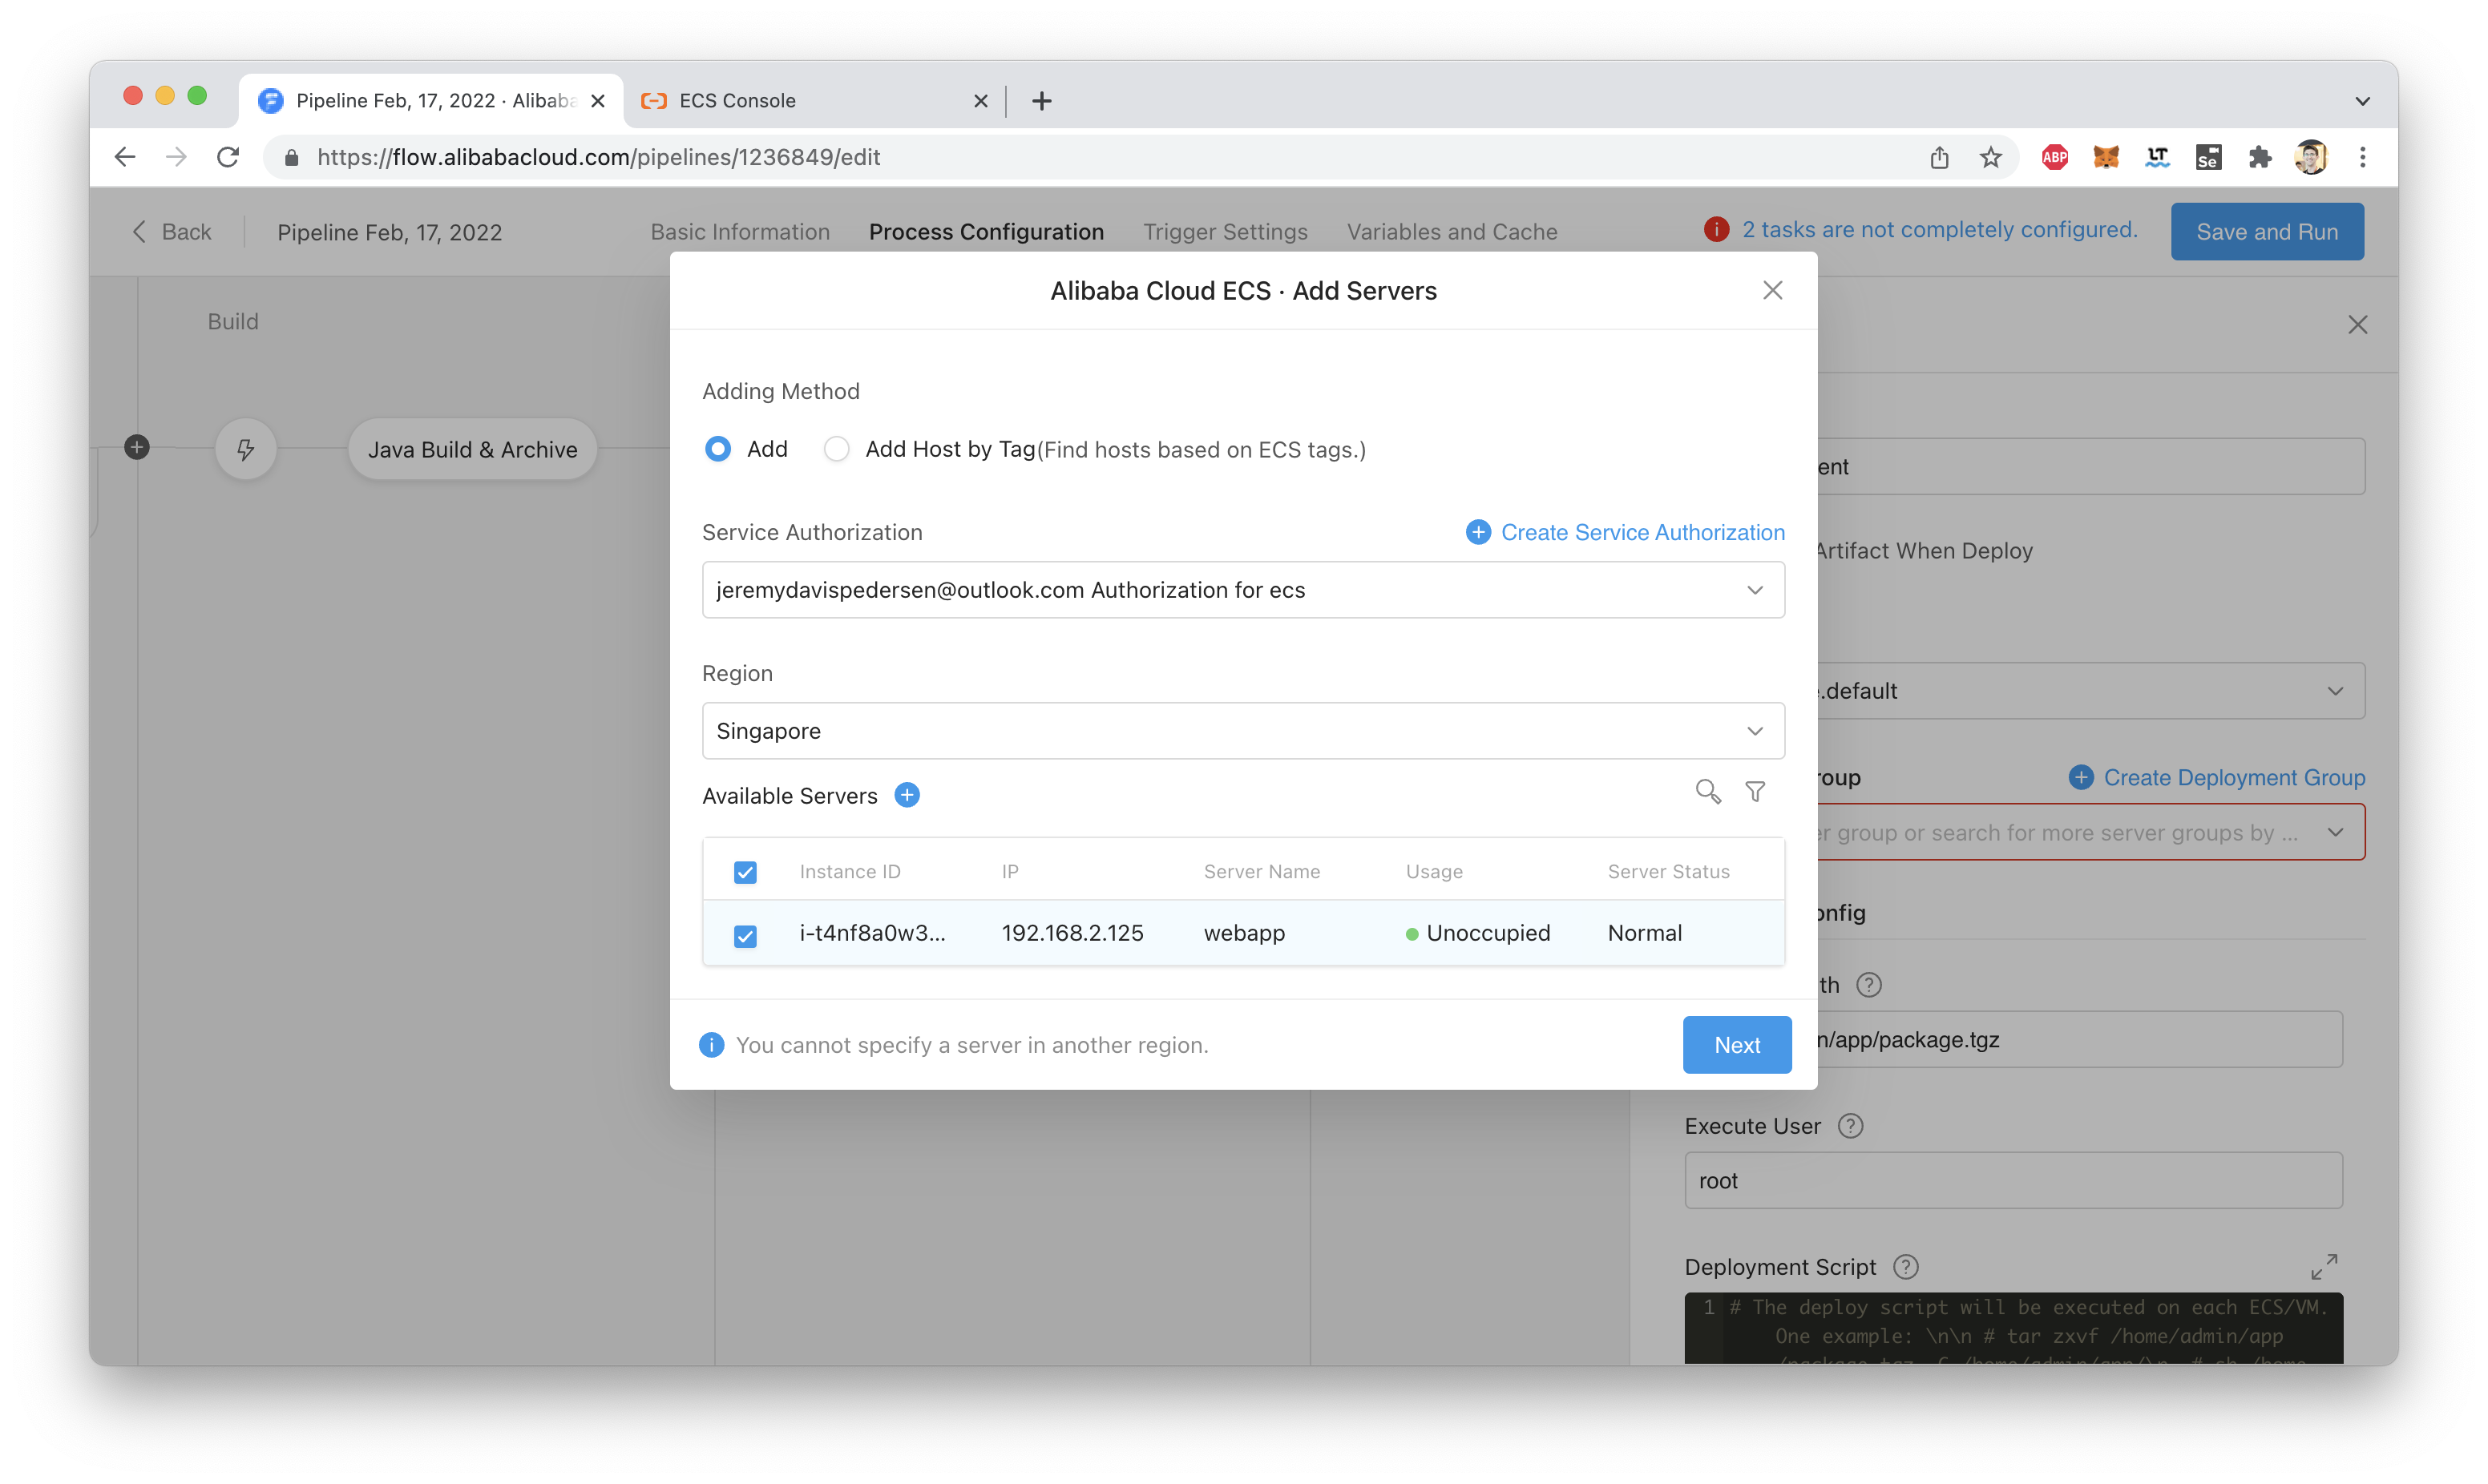
See that blue button in the screenshot above? The one that says "Create Service Authorization"? If you haven't used Flow before, you'll need to click on that to create a new RAM role, which will allow Flow to talk to the ECS service. Otherwise, no ECS instances will show up in the "Available Servers" list.
After clicking "Next", you'll need to give your new Server Group a name:
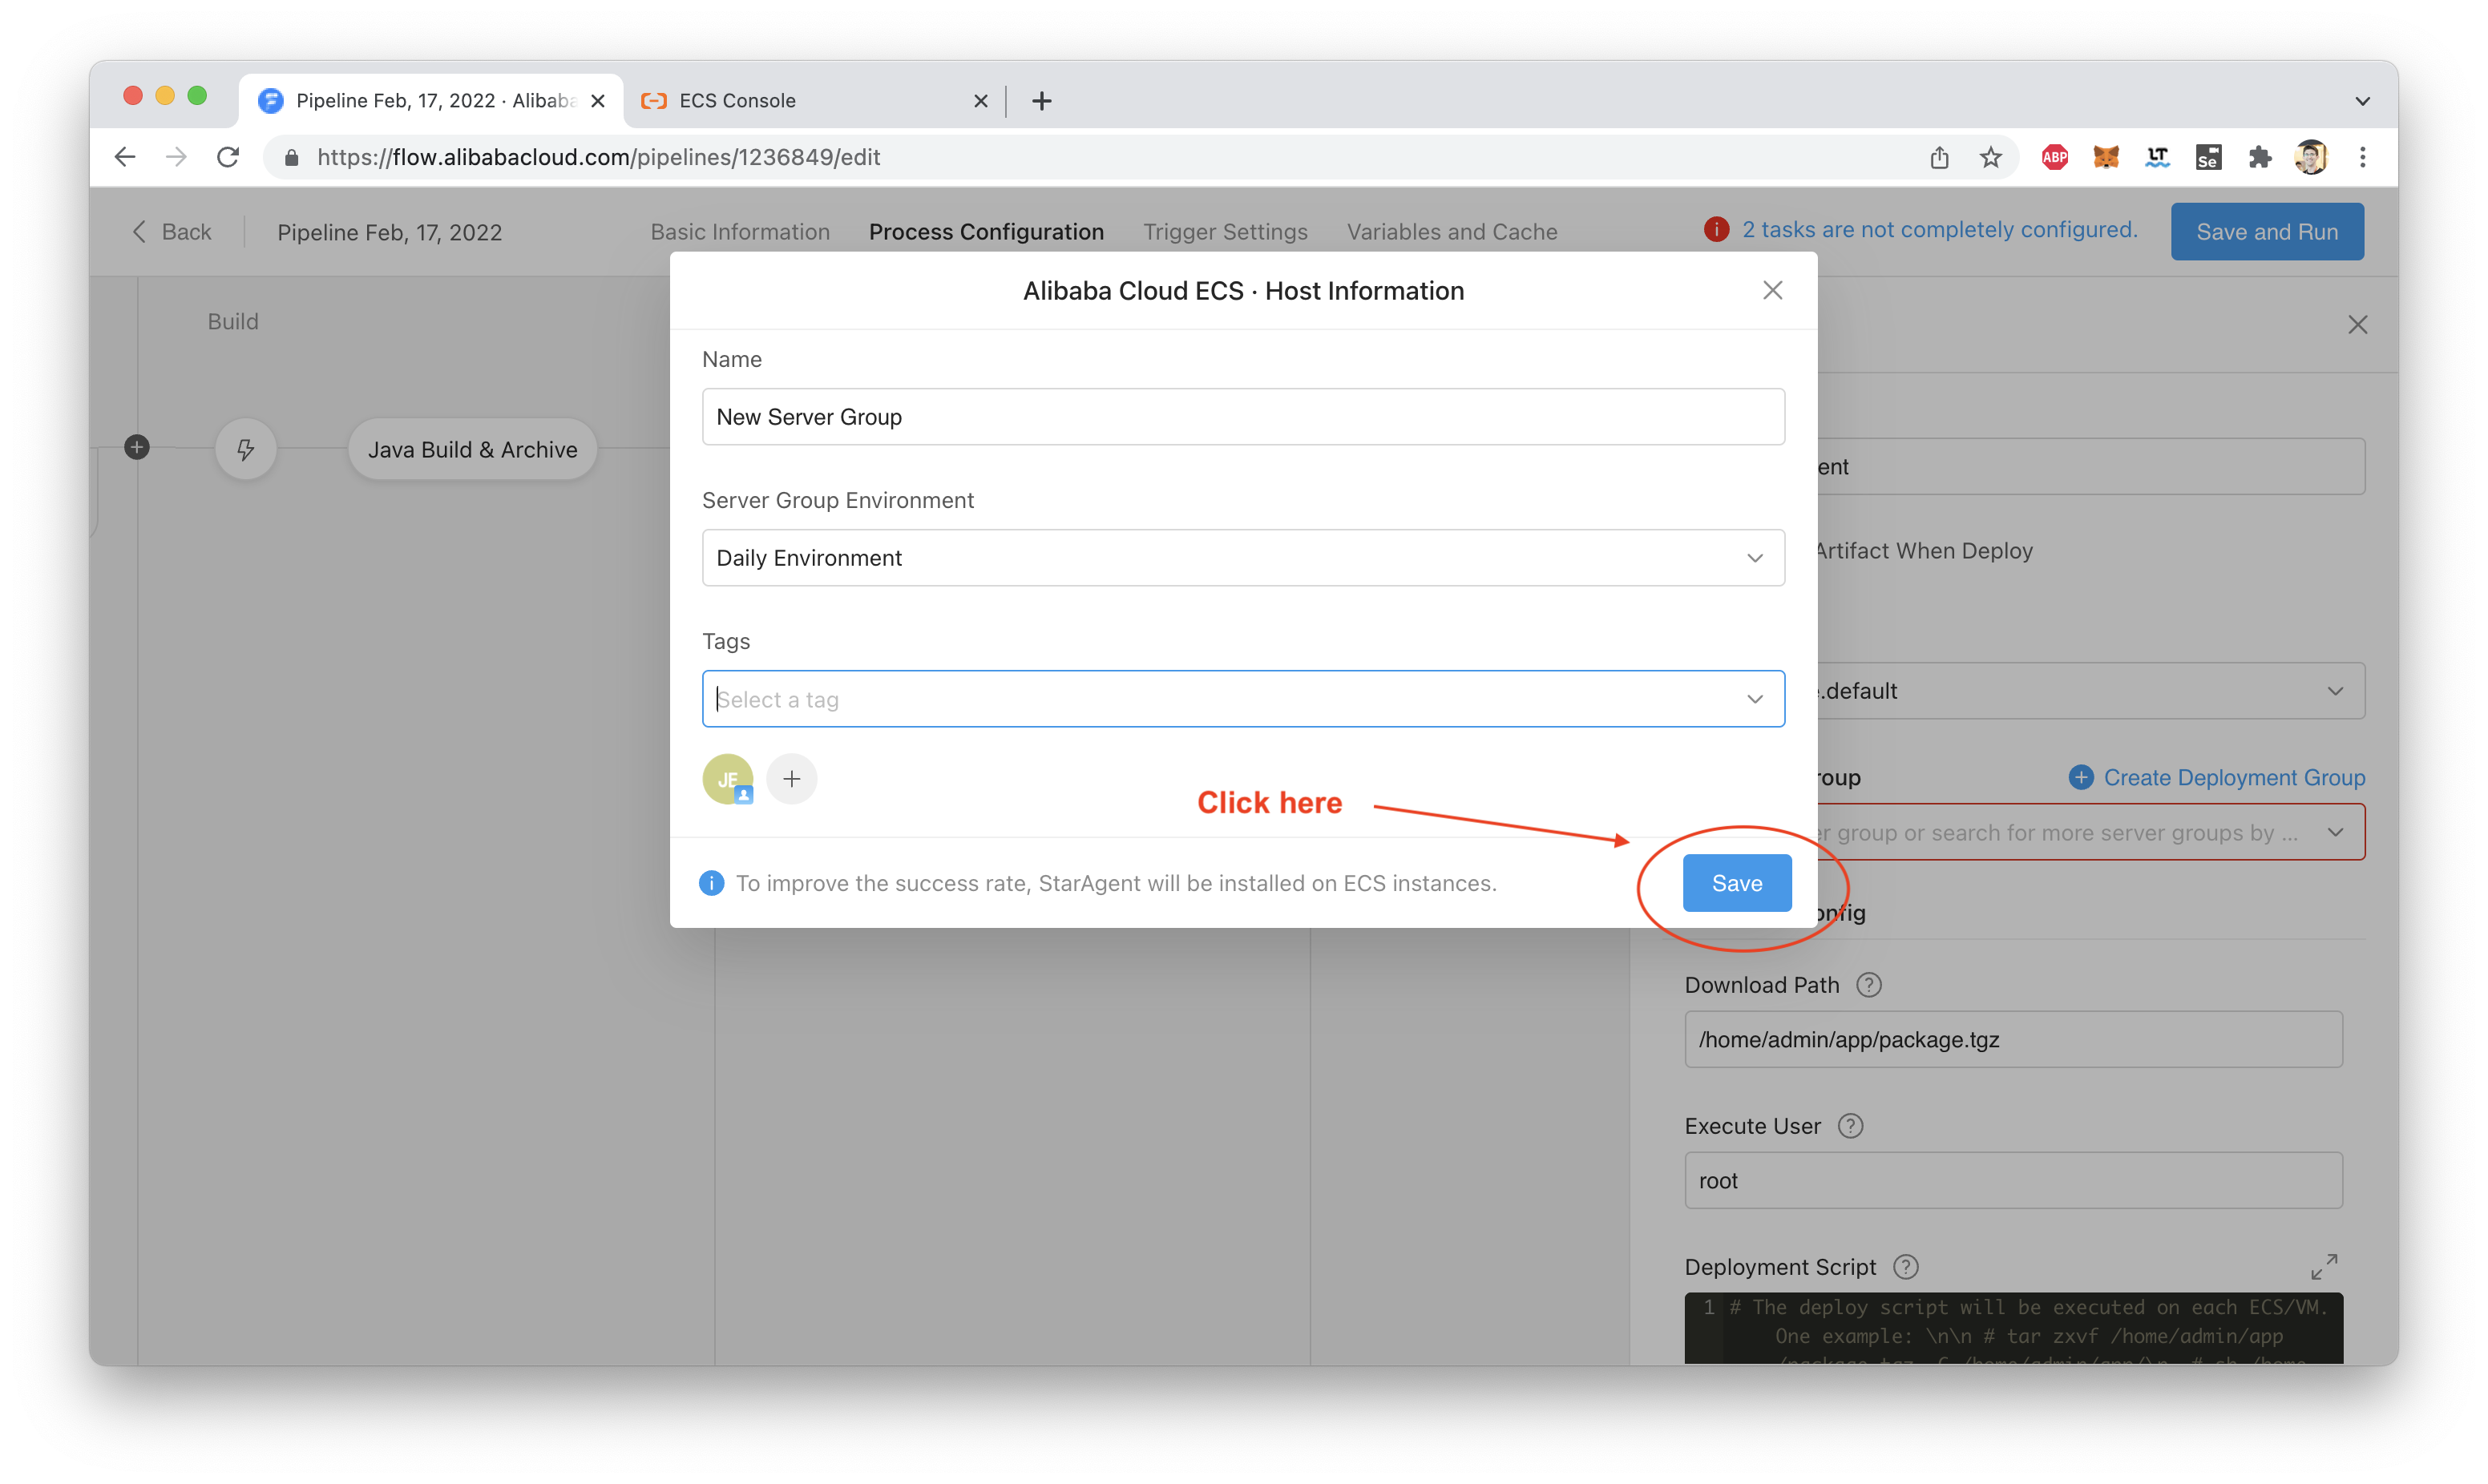
You can accept the defaults for "Artifact", "Download Path", and "Execute User".
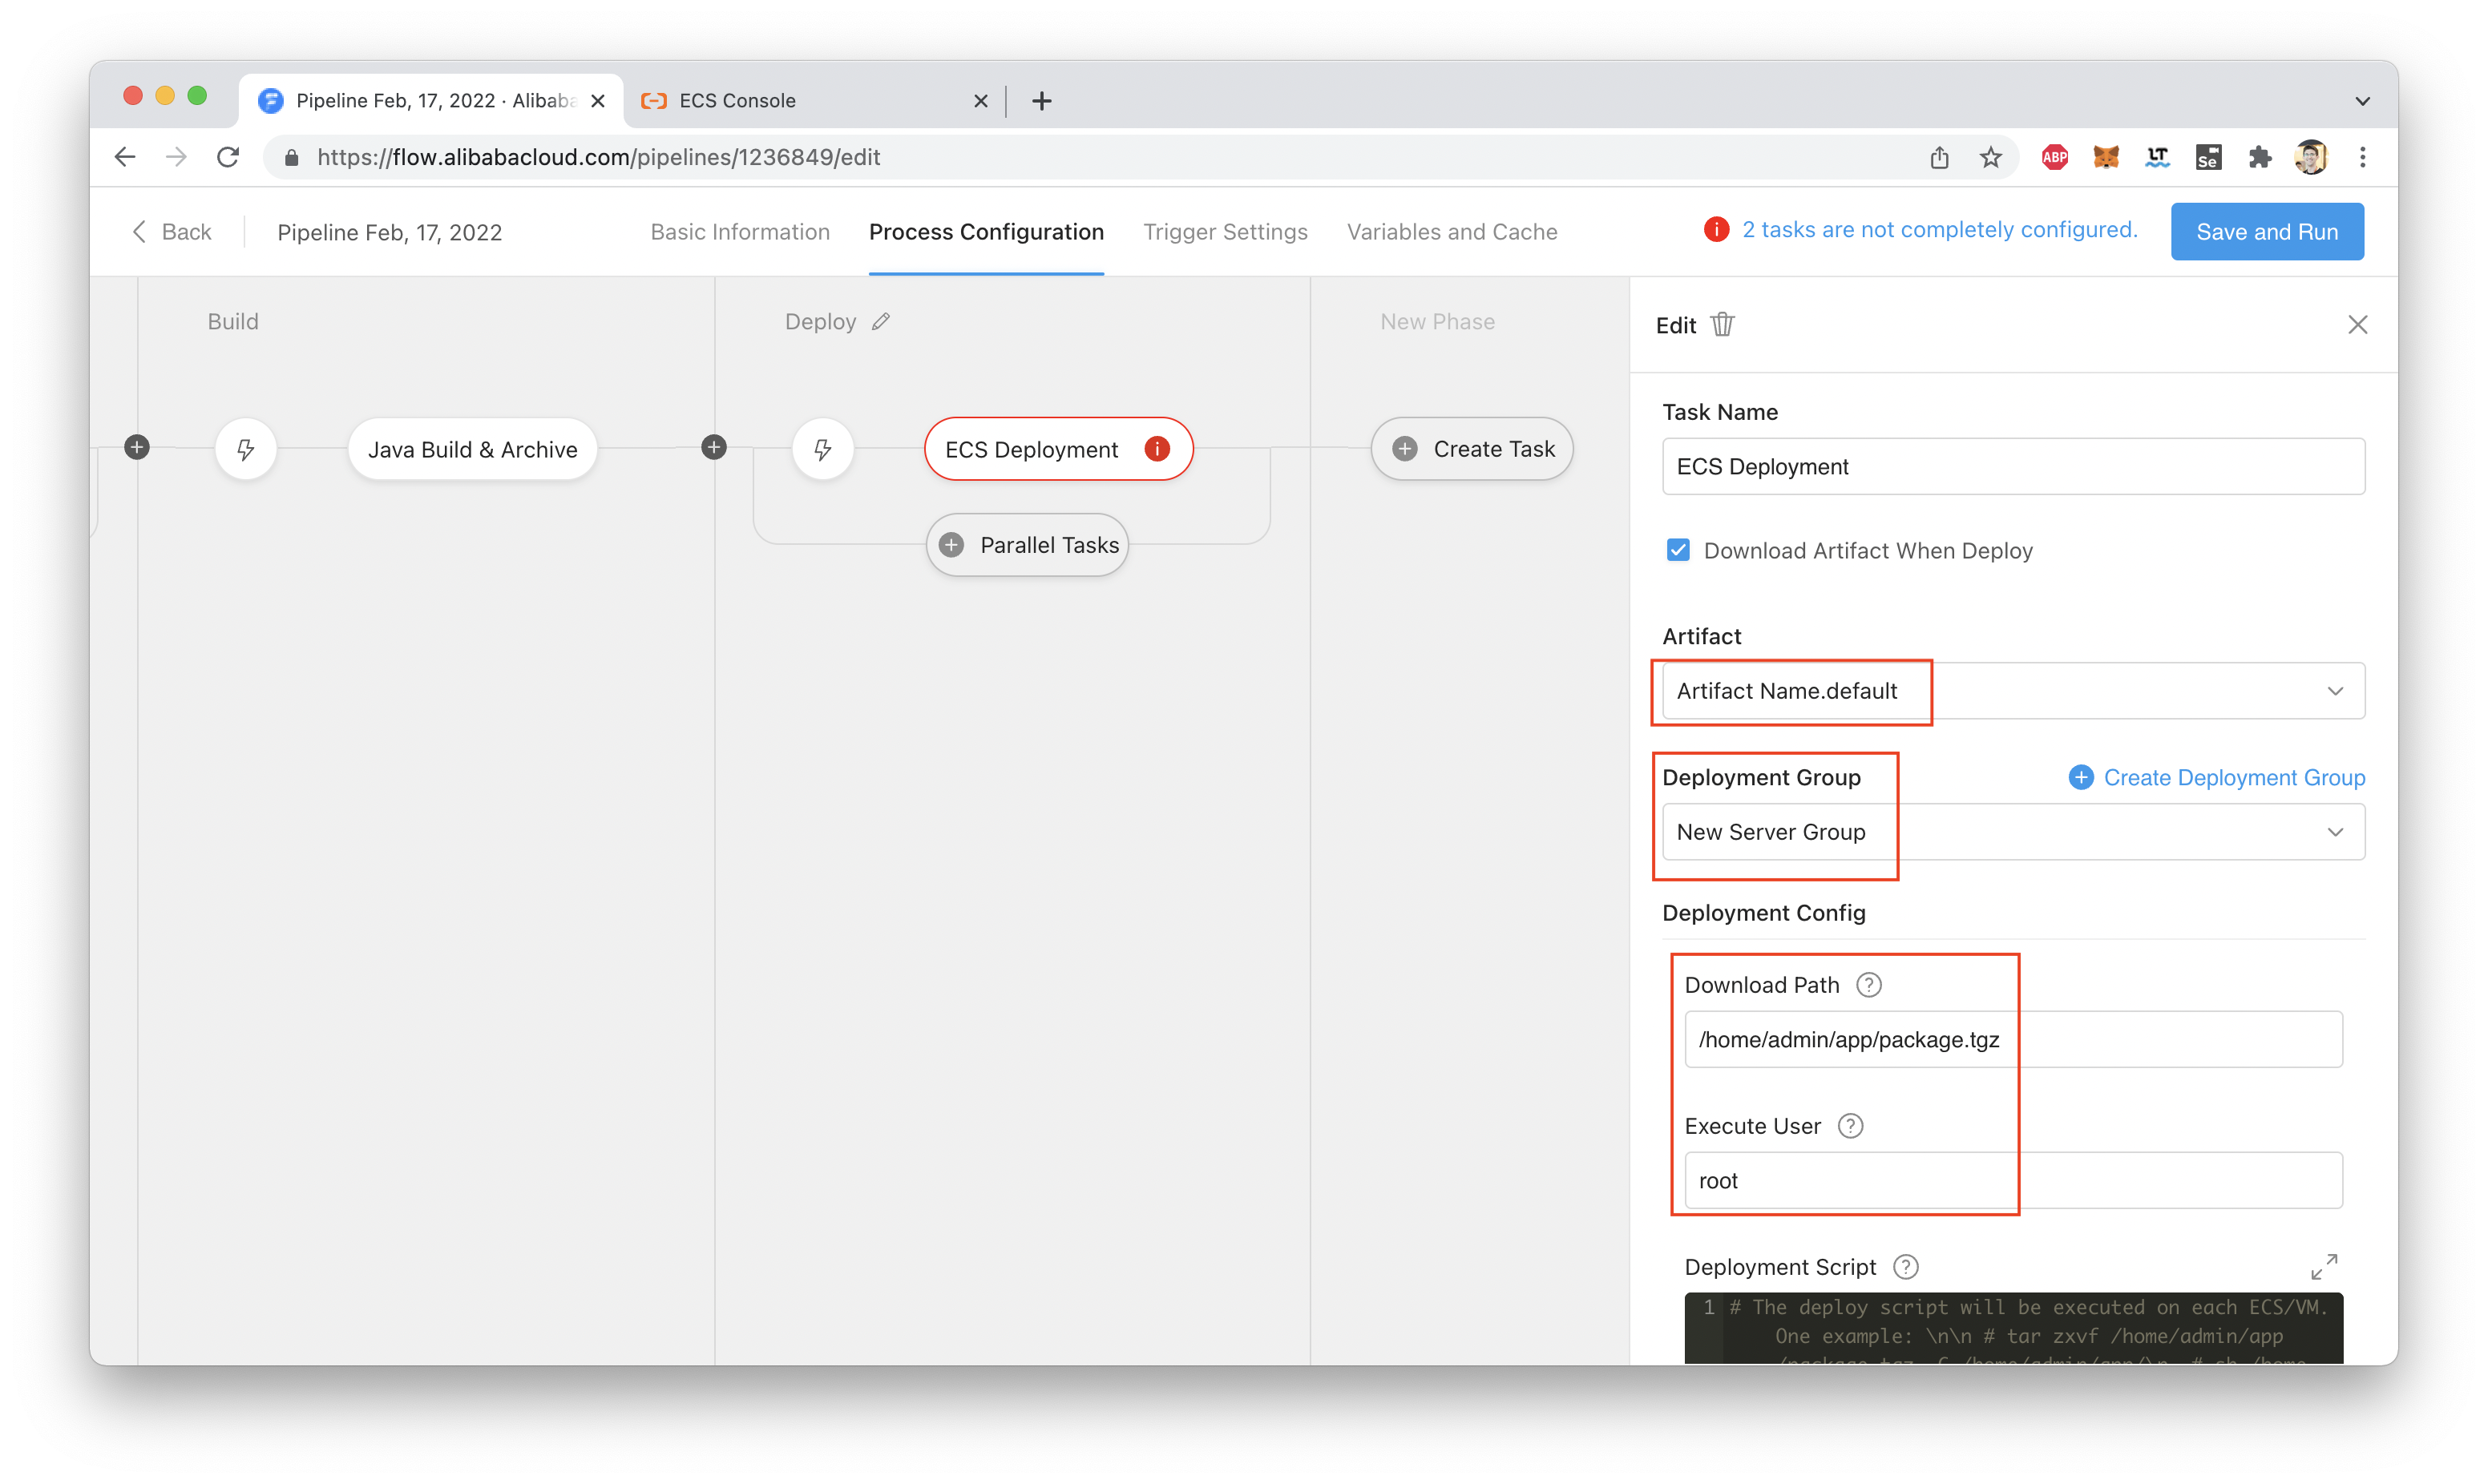
One thing we do need to change is the Deployment Script field, just visible at the bottom of the above screenshot.
Here's a clearer picture:
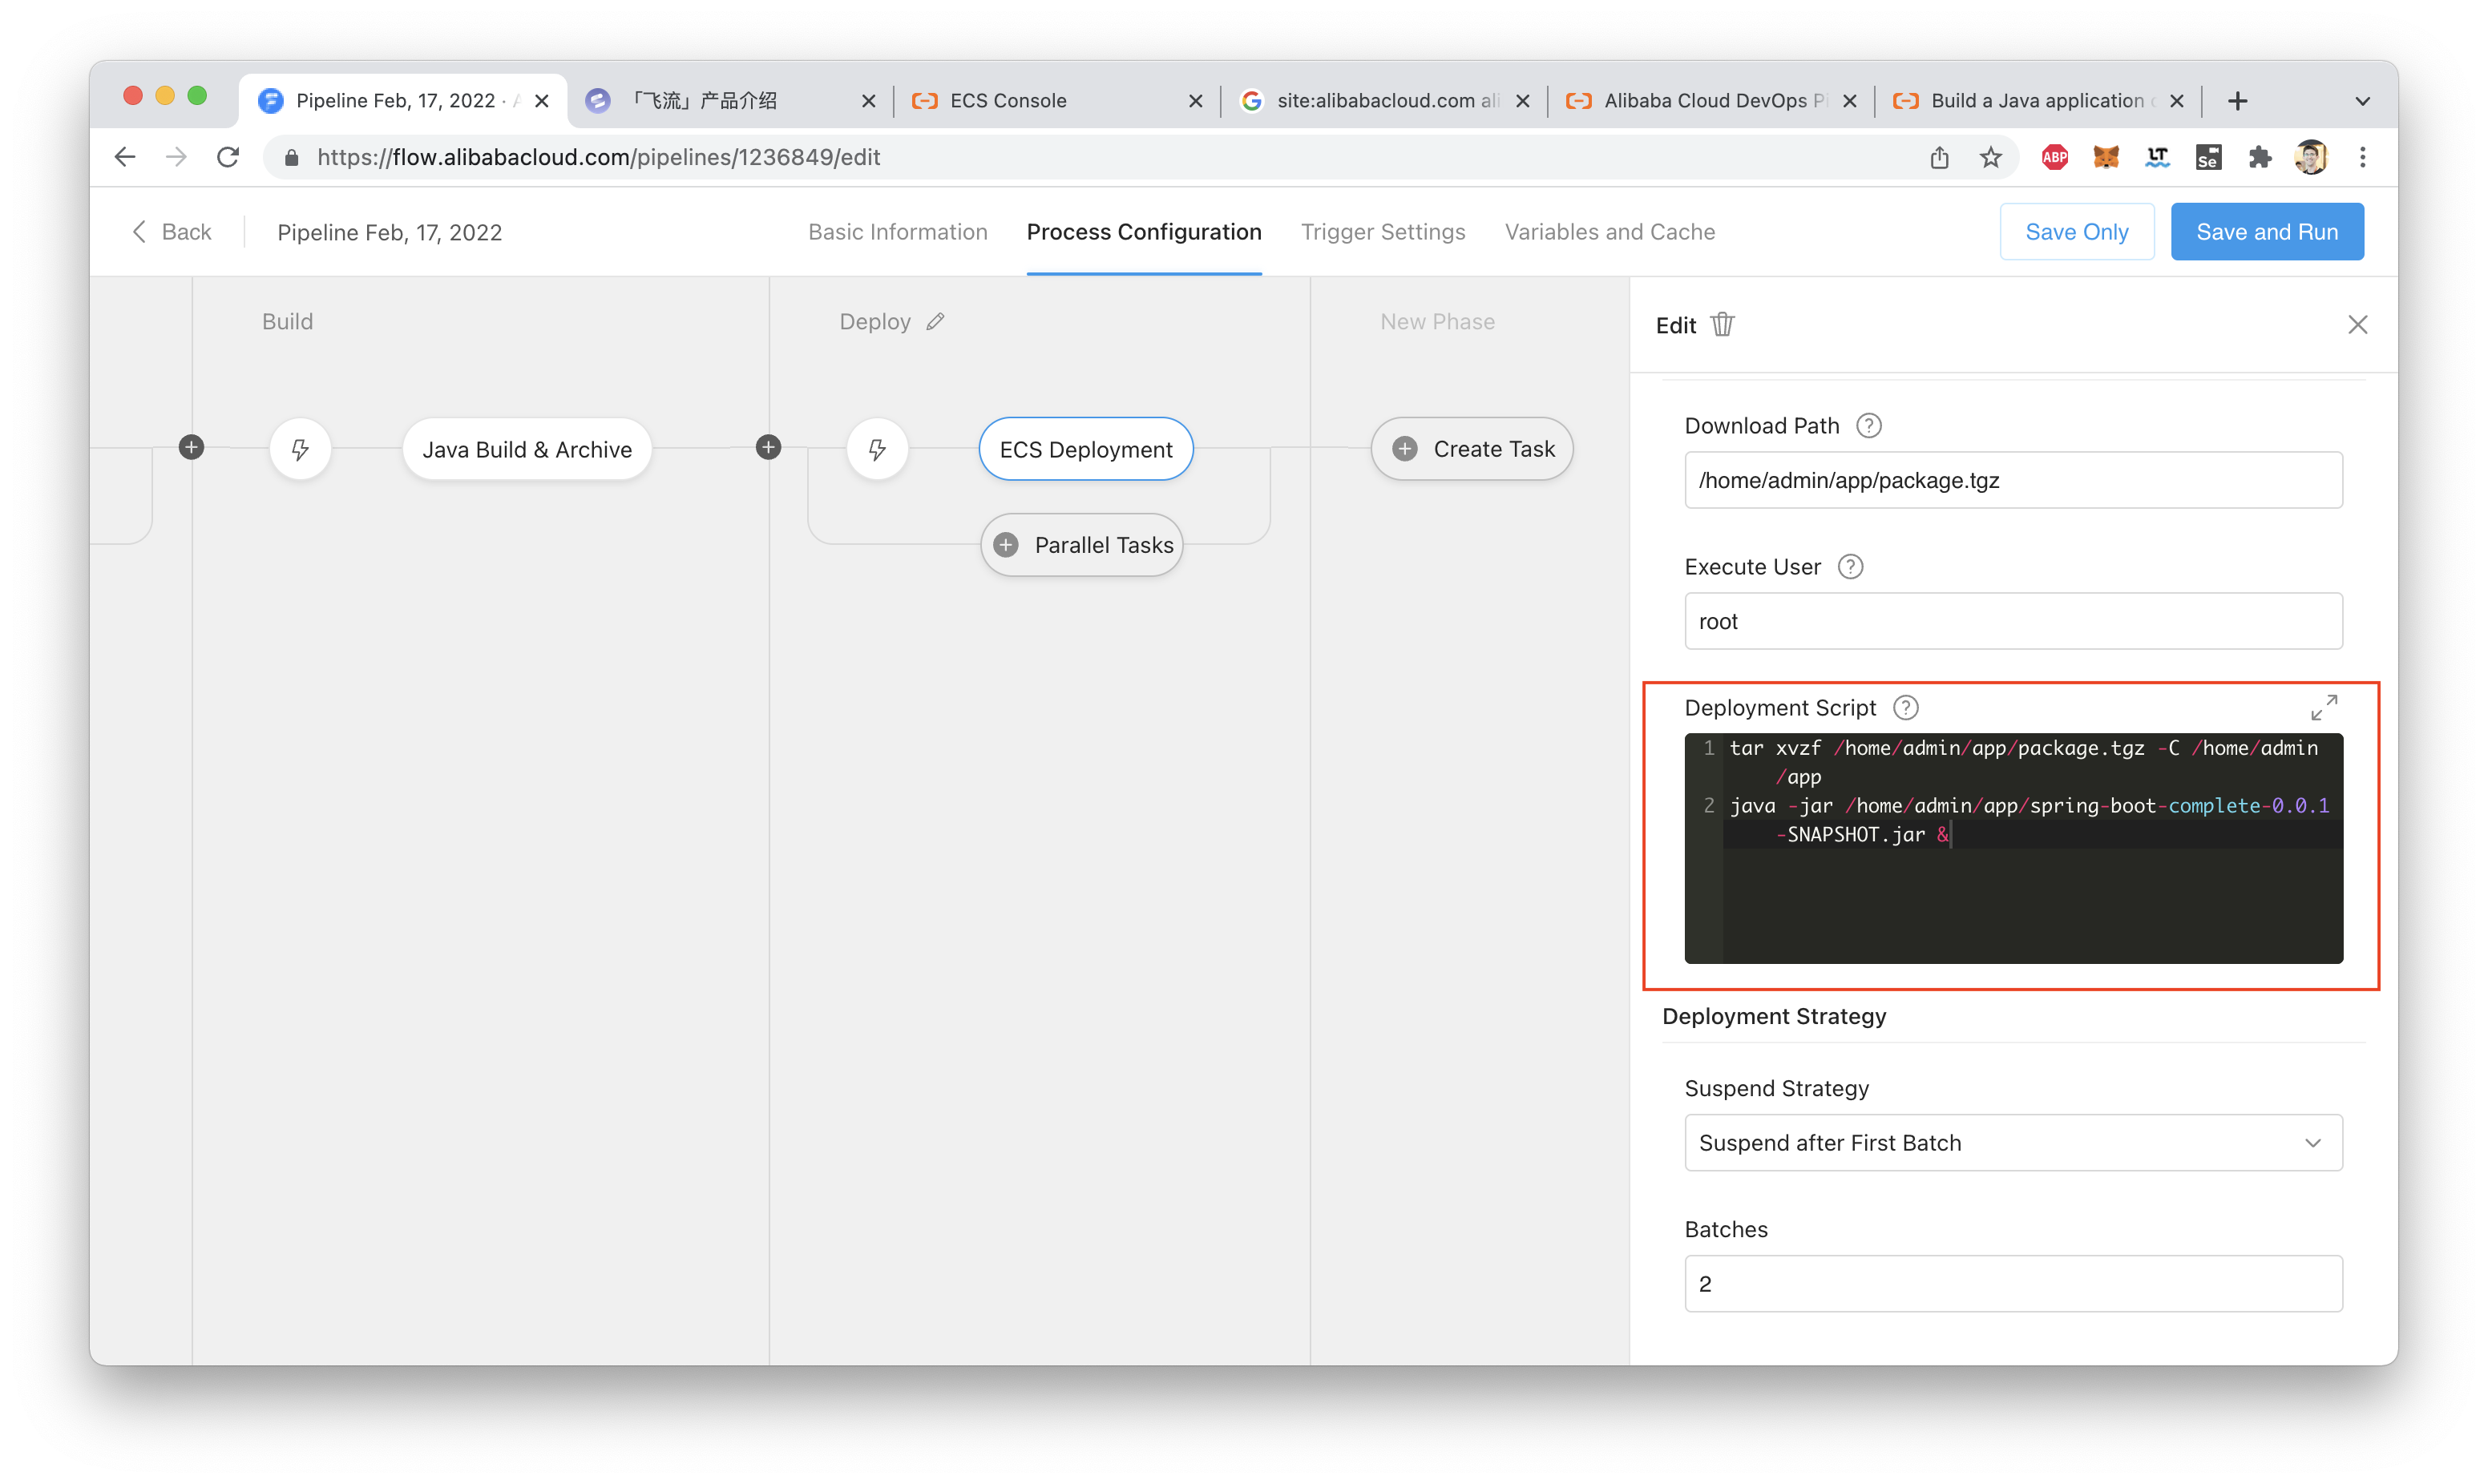
For easy copy-pasting, here's that script:
tar xvzf /home/admin/app/package.tgz -C /home/admin/app
java -jar /home/admin/app/spring-boot-complete-0.0.1-SNAPSHOT.jar &With our configuration done, we can now run the pipeline!
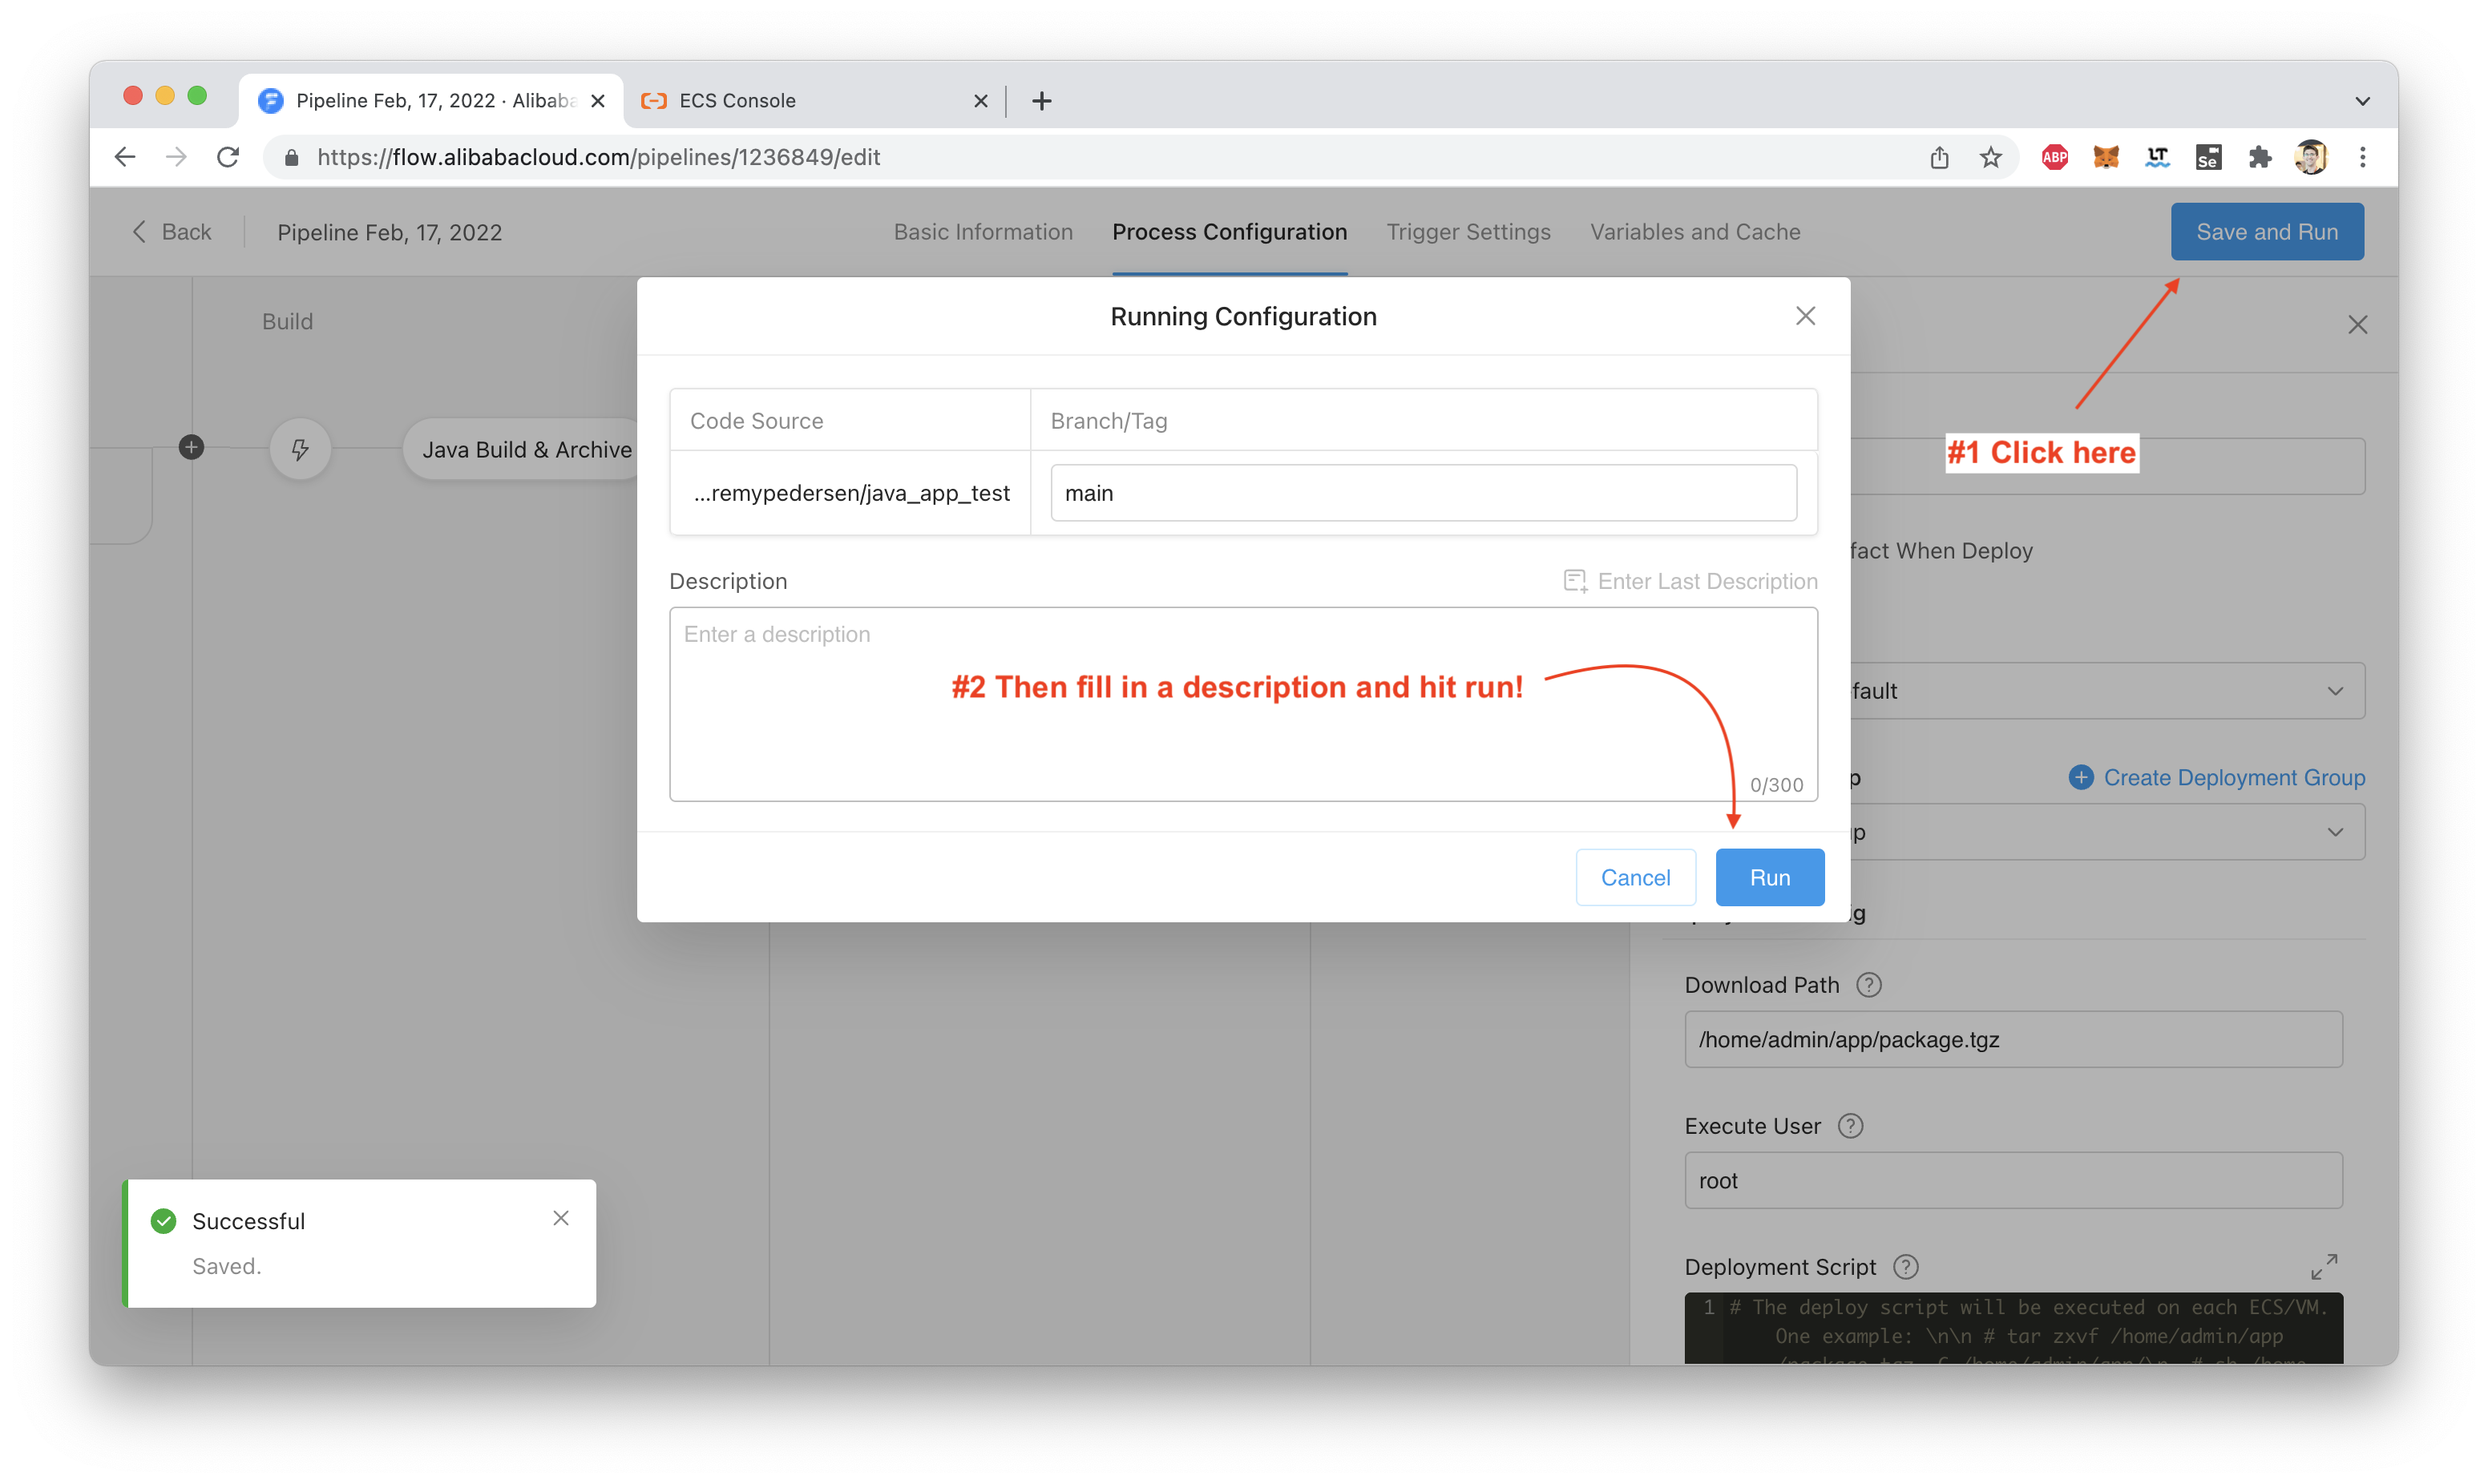
We can see the progress of each stage:
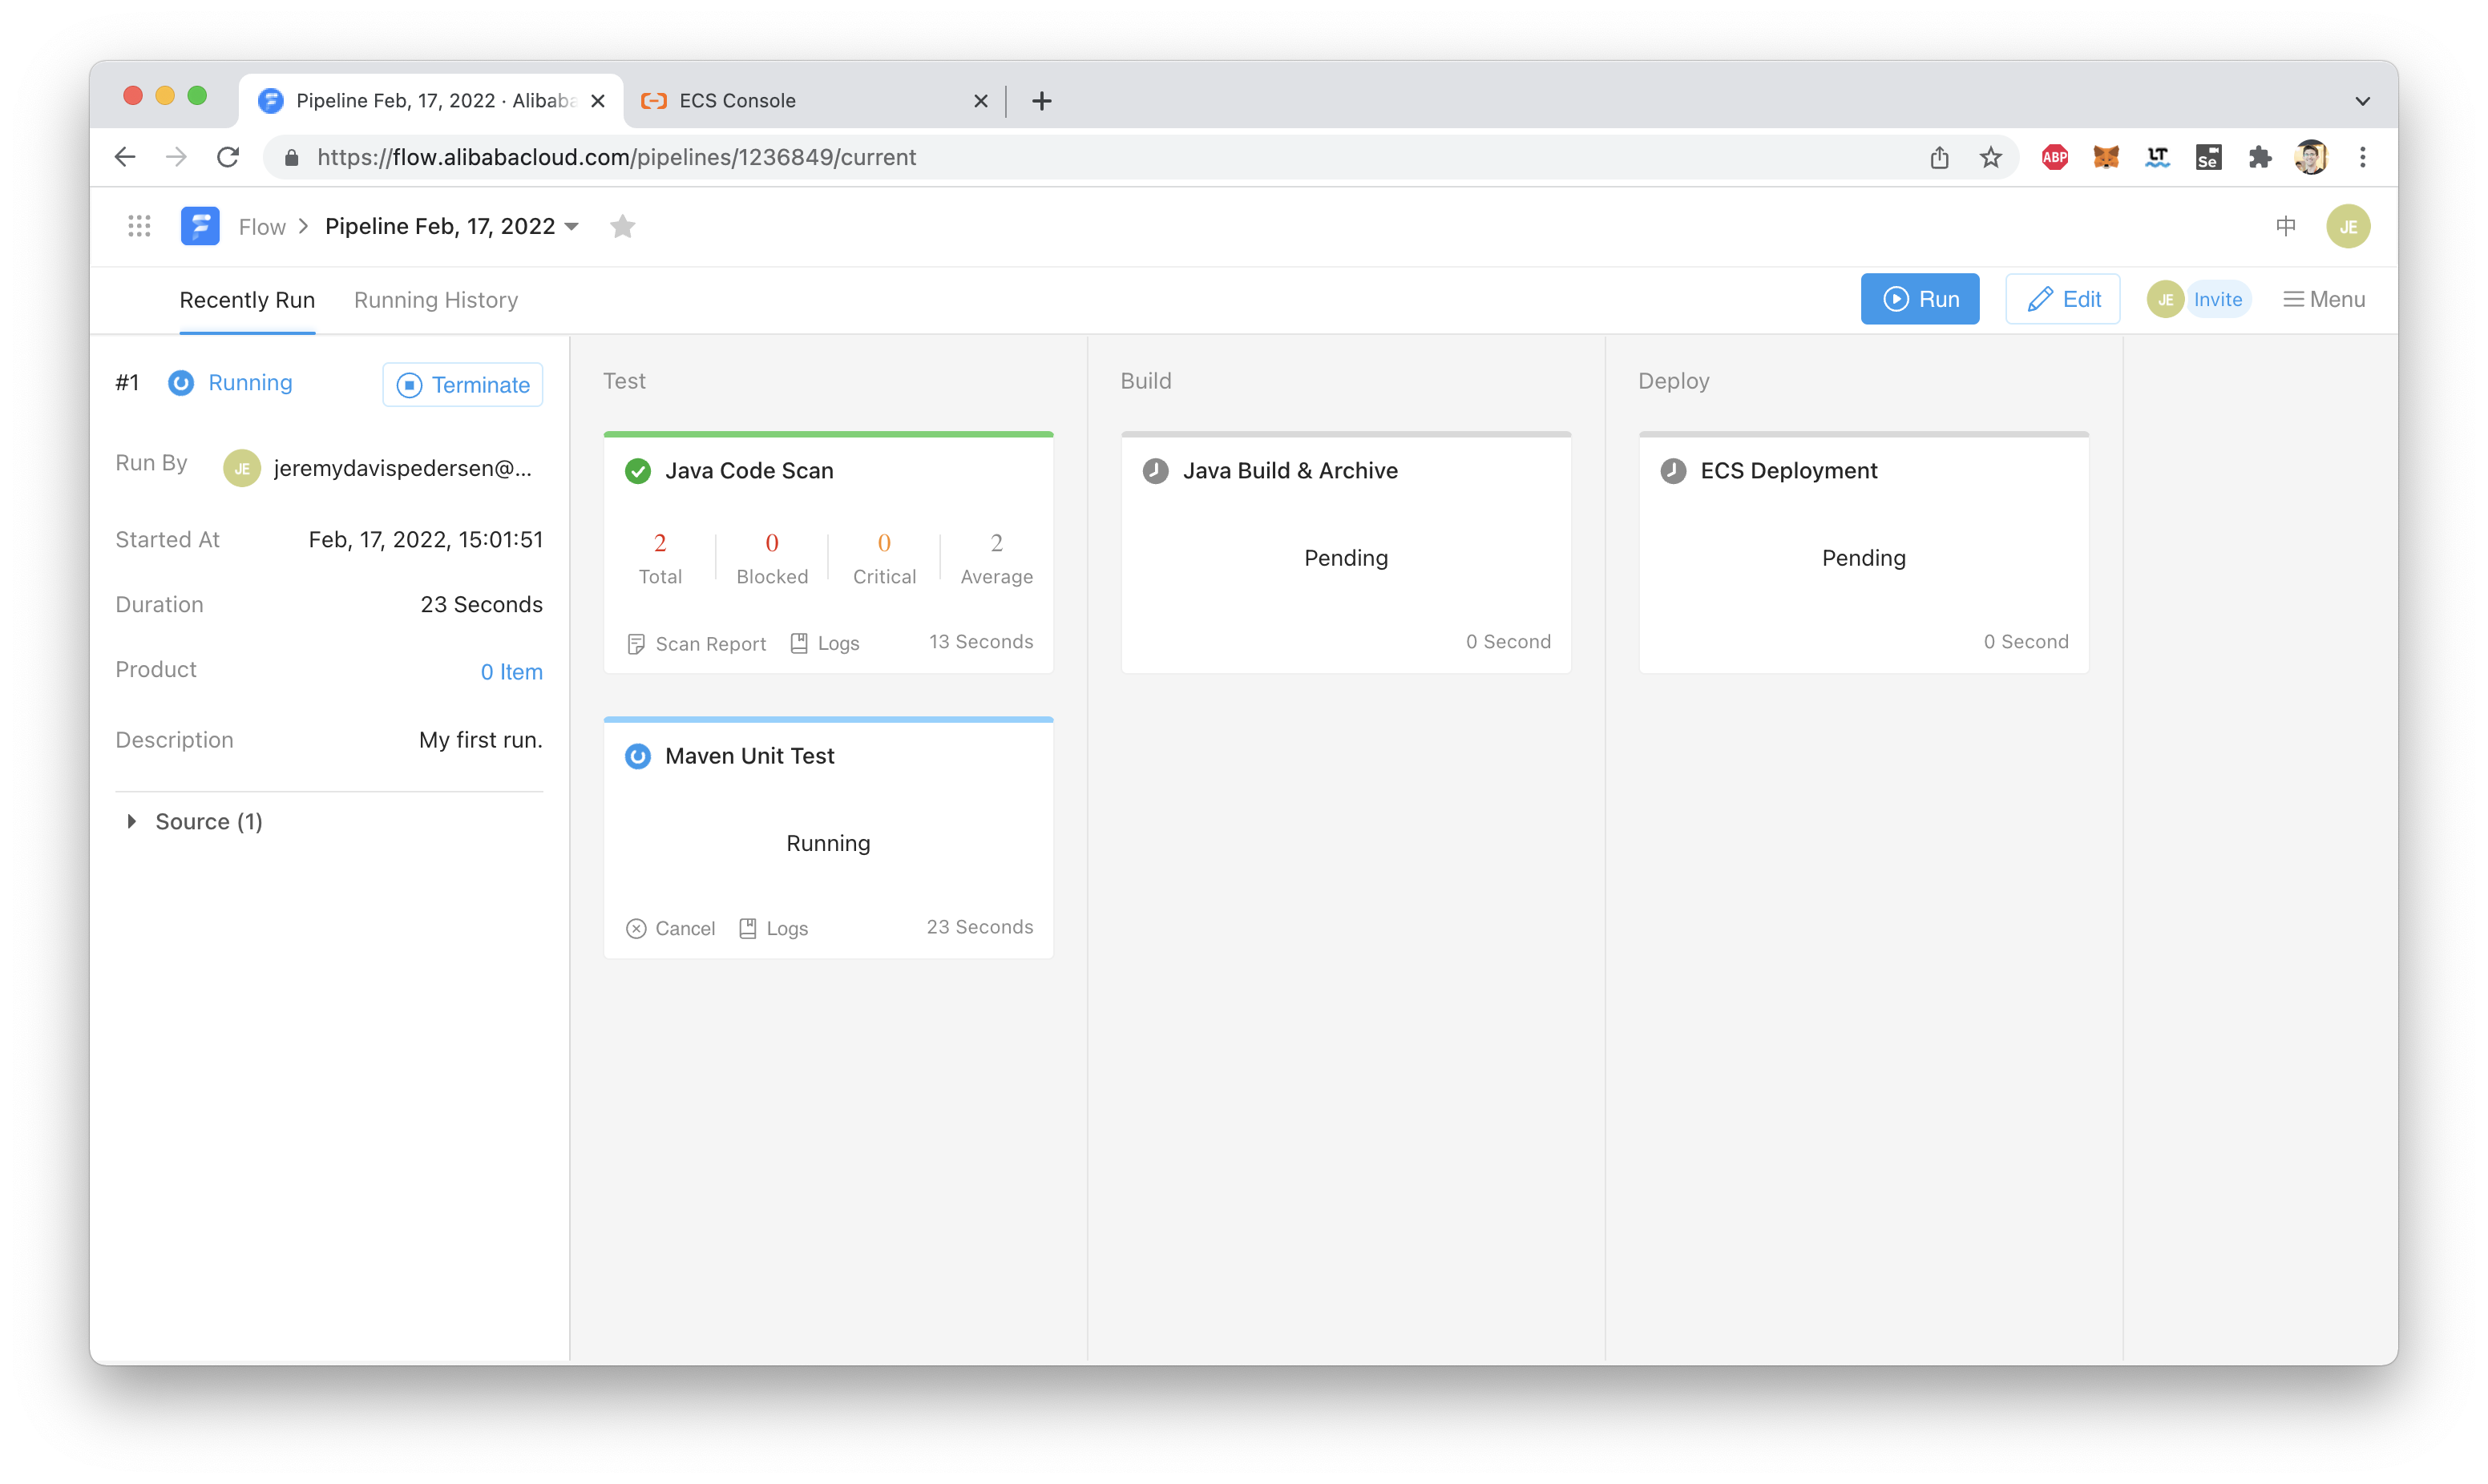
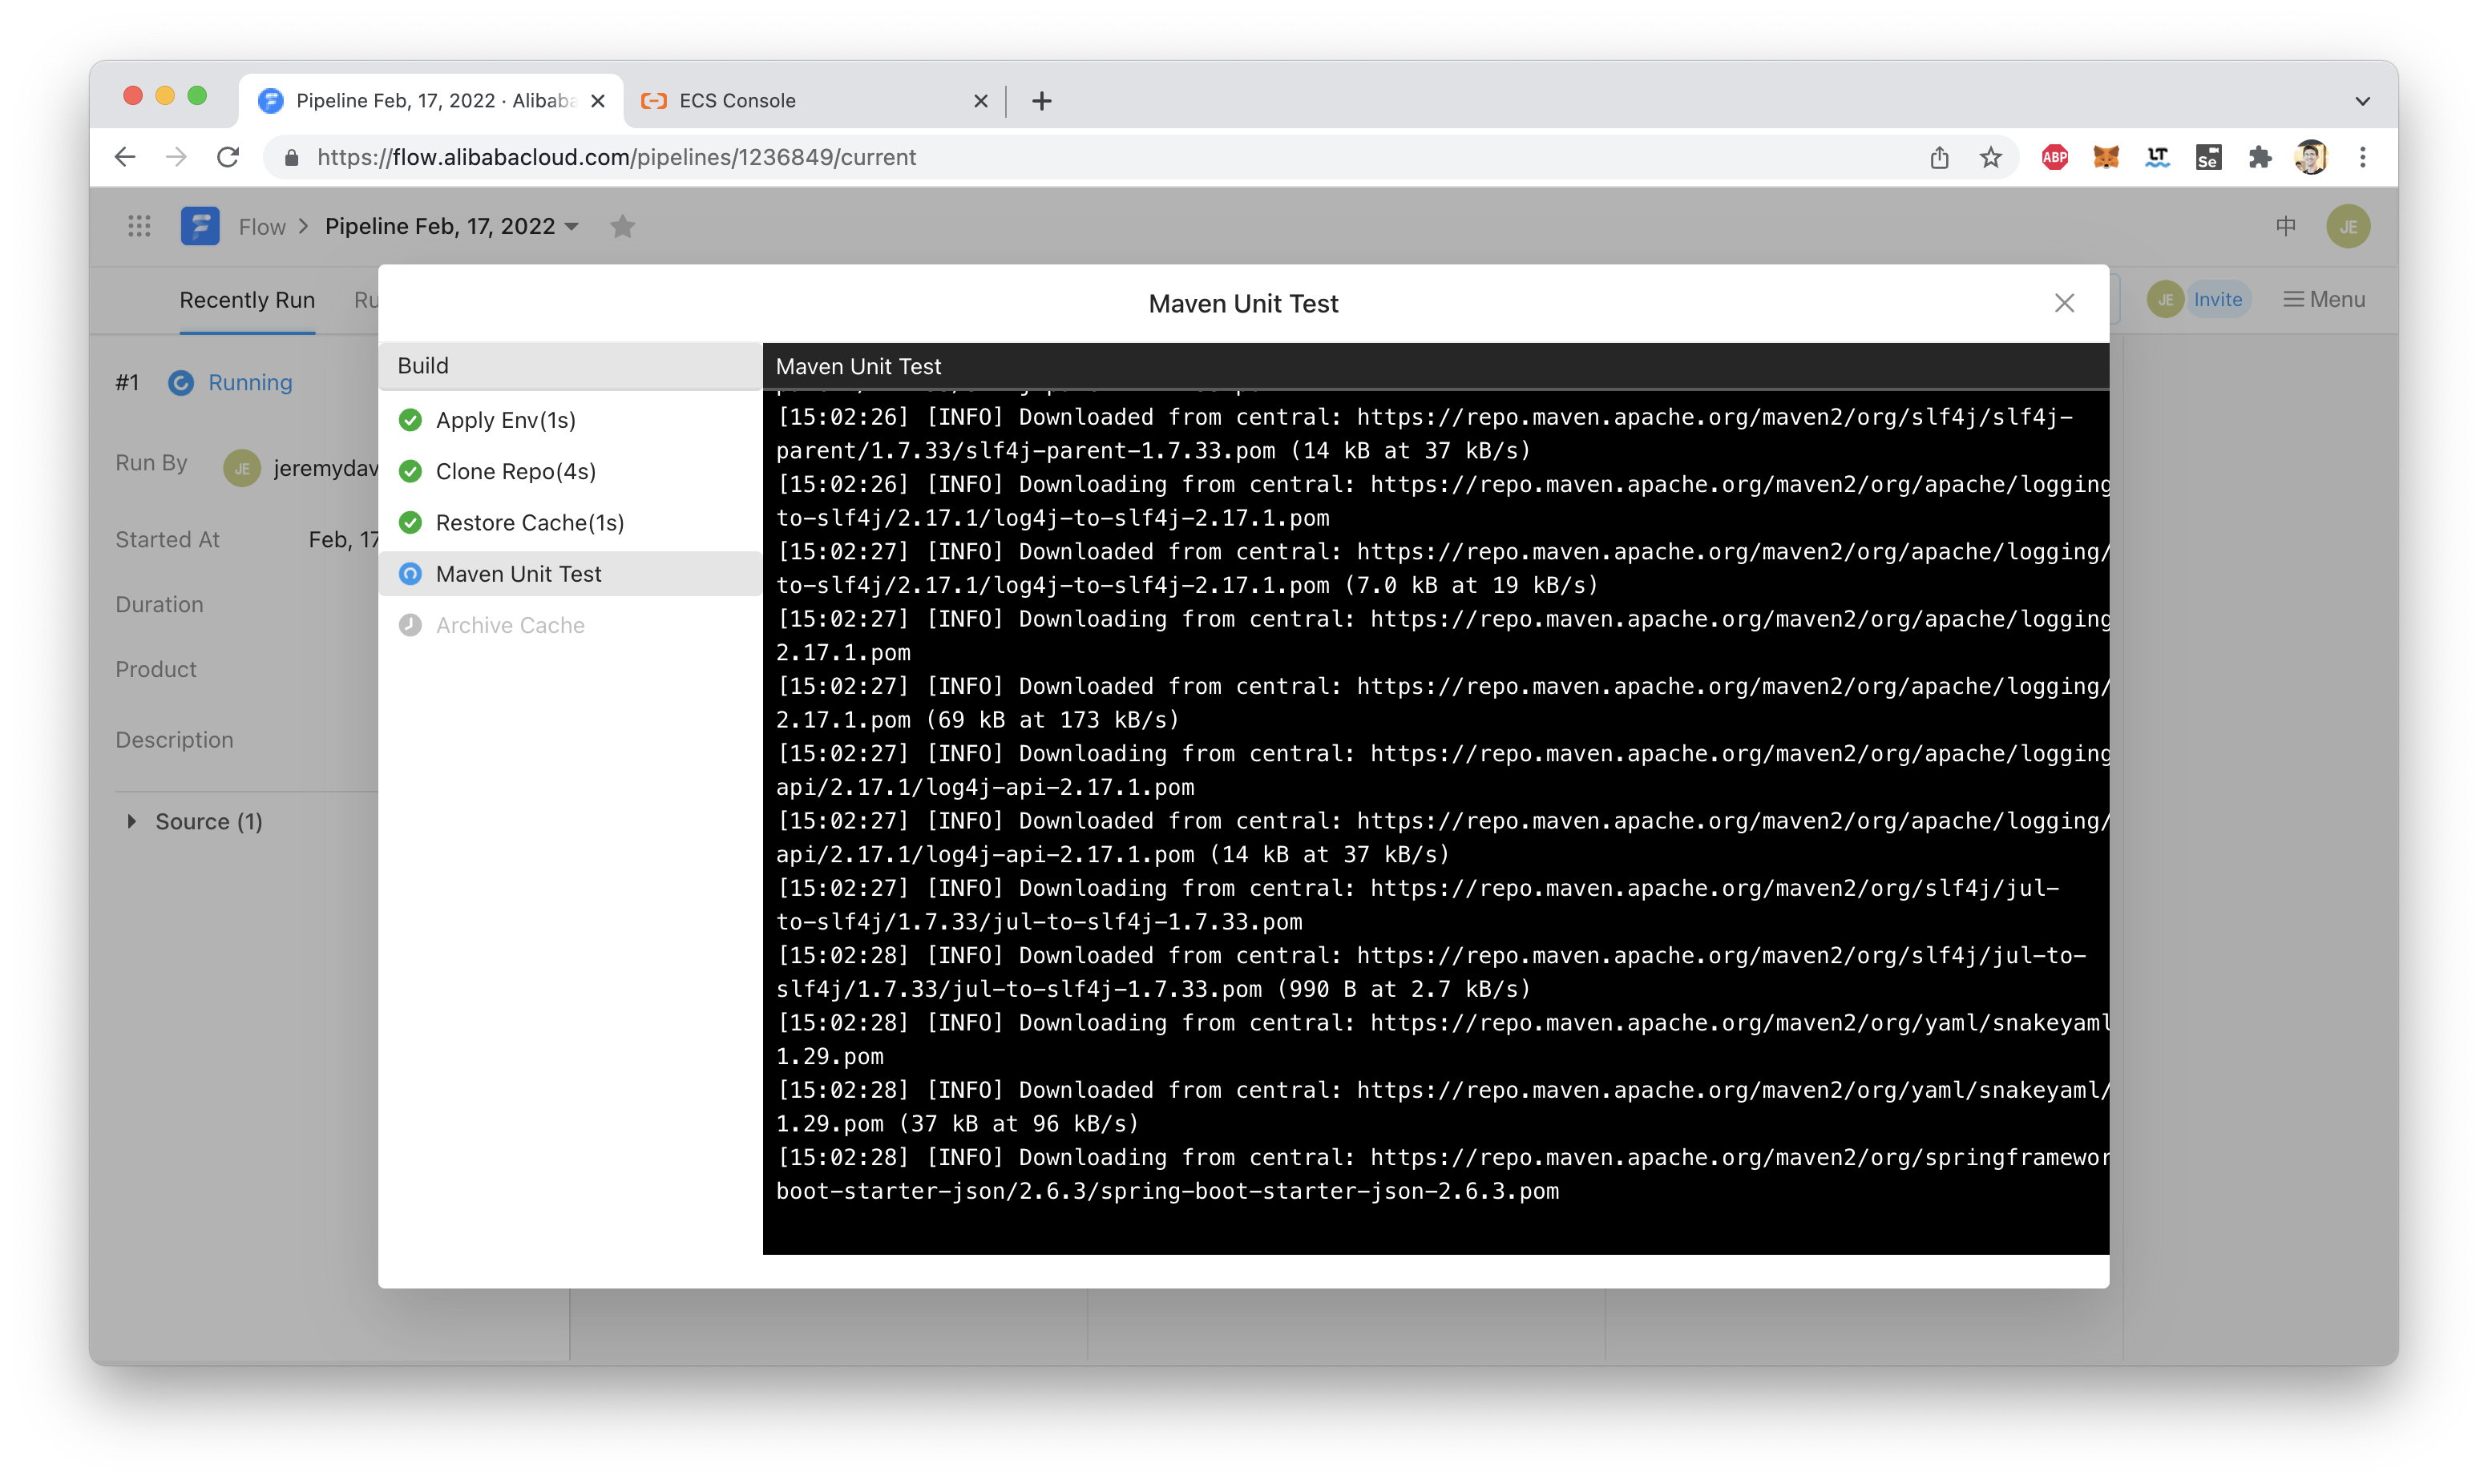
We can also click on "Logs" to see the current state of running jobs:
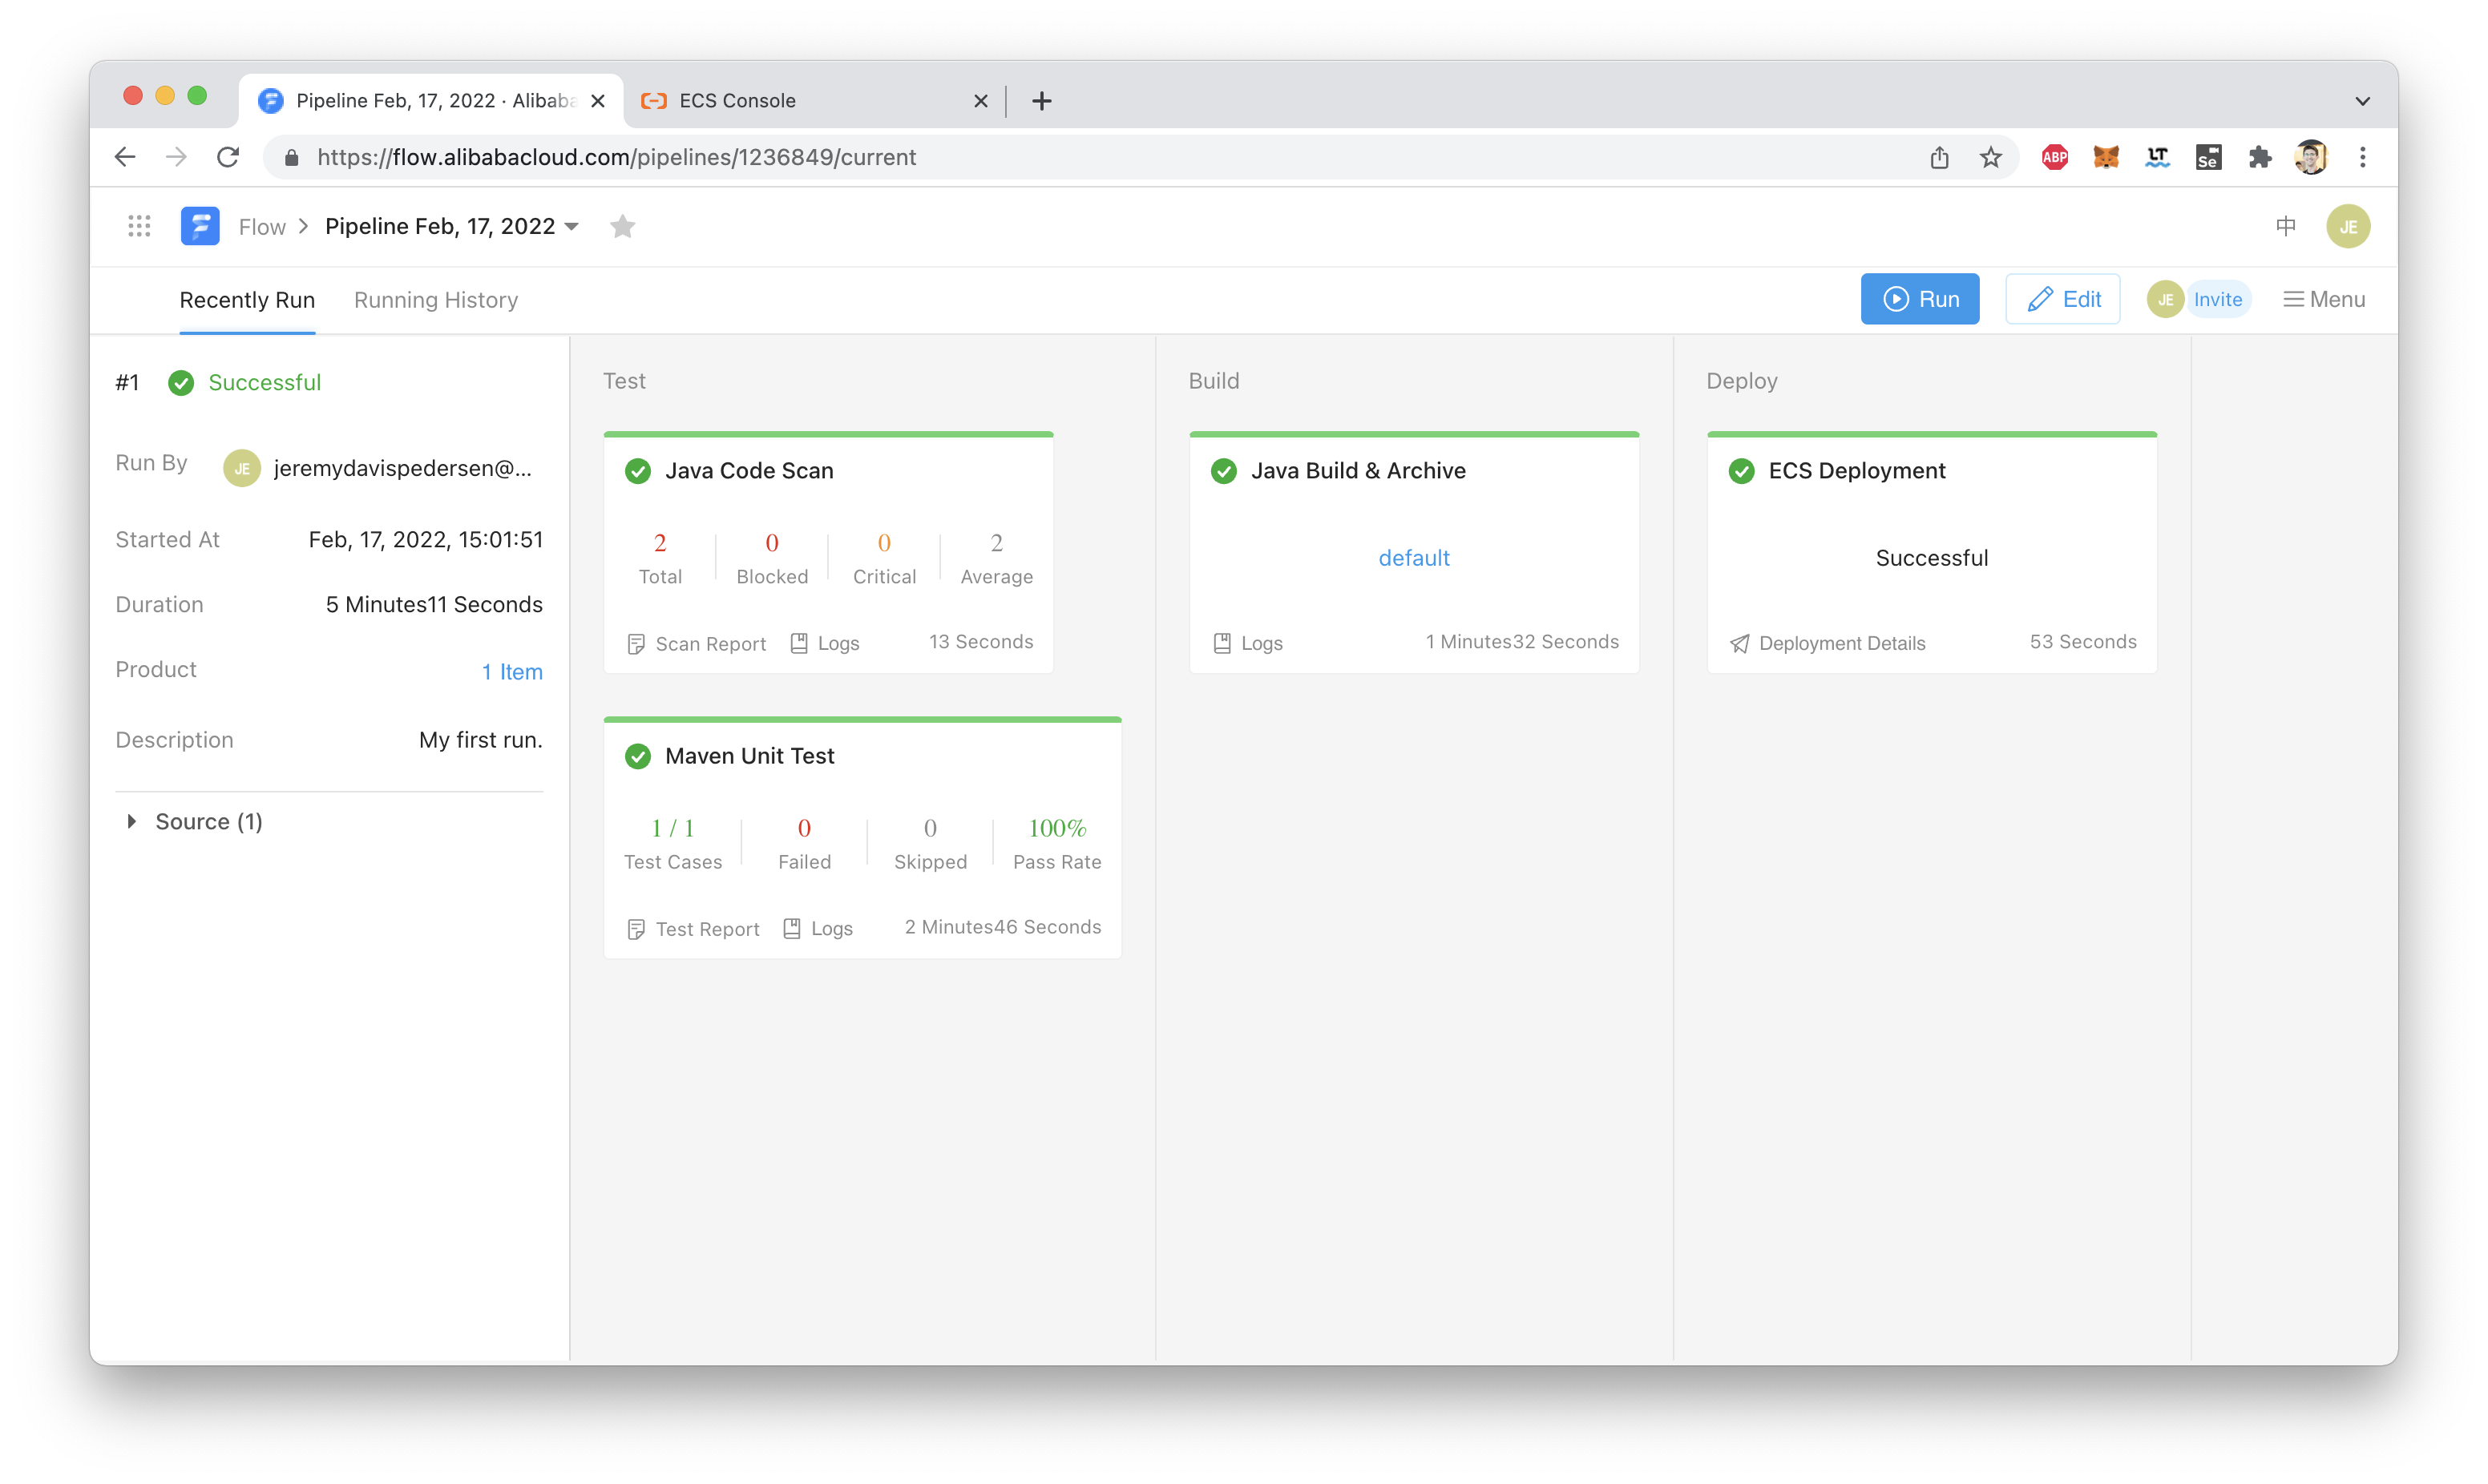
Our build is very simple, so within a few minutes all pipeline stages should complete without errors:
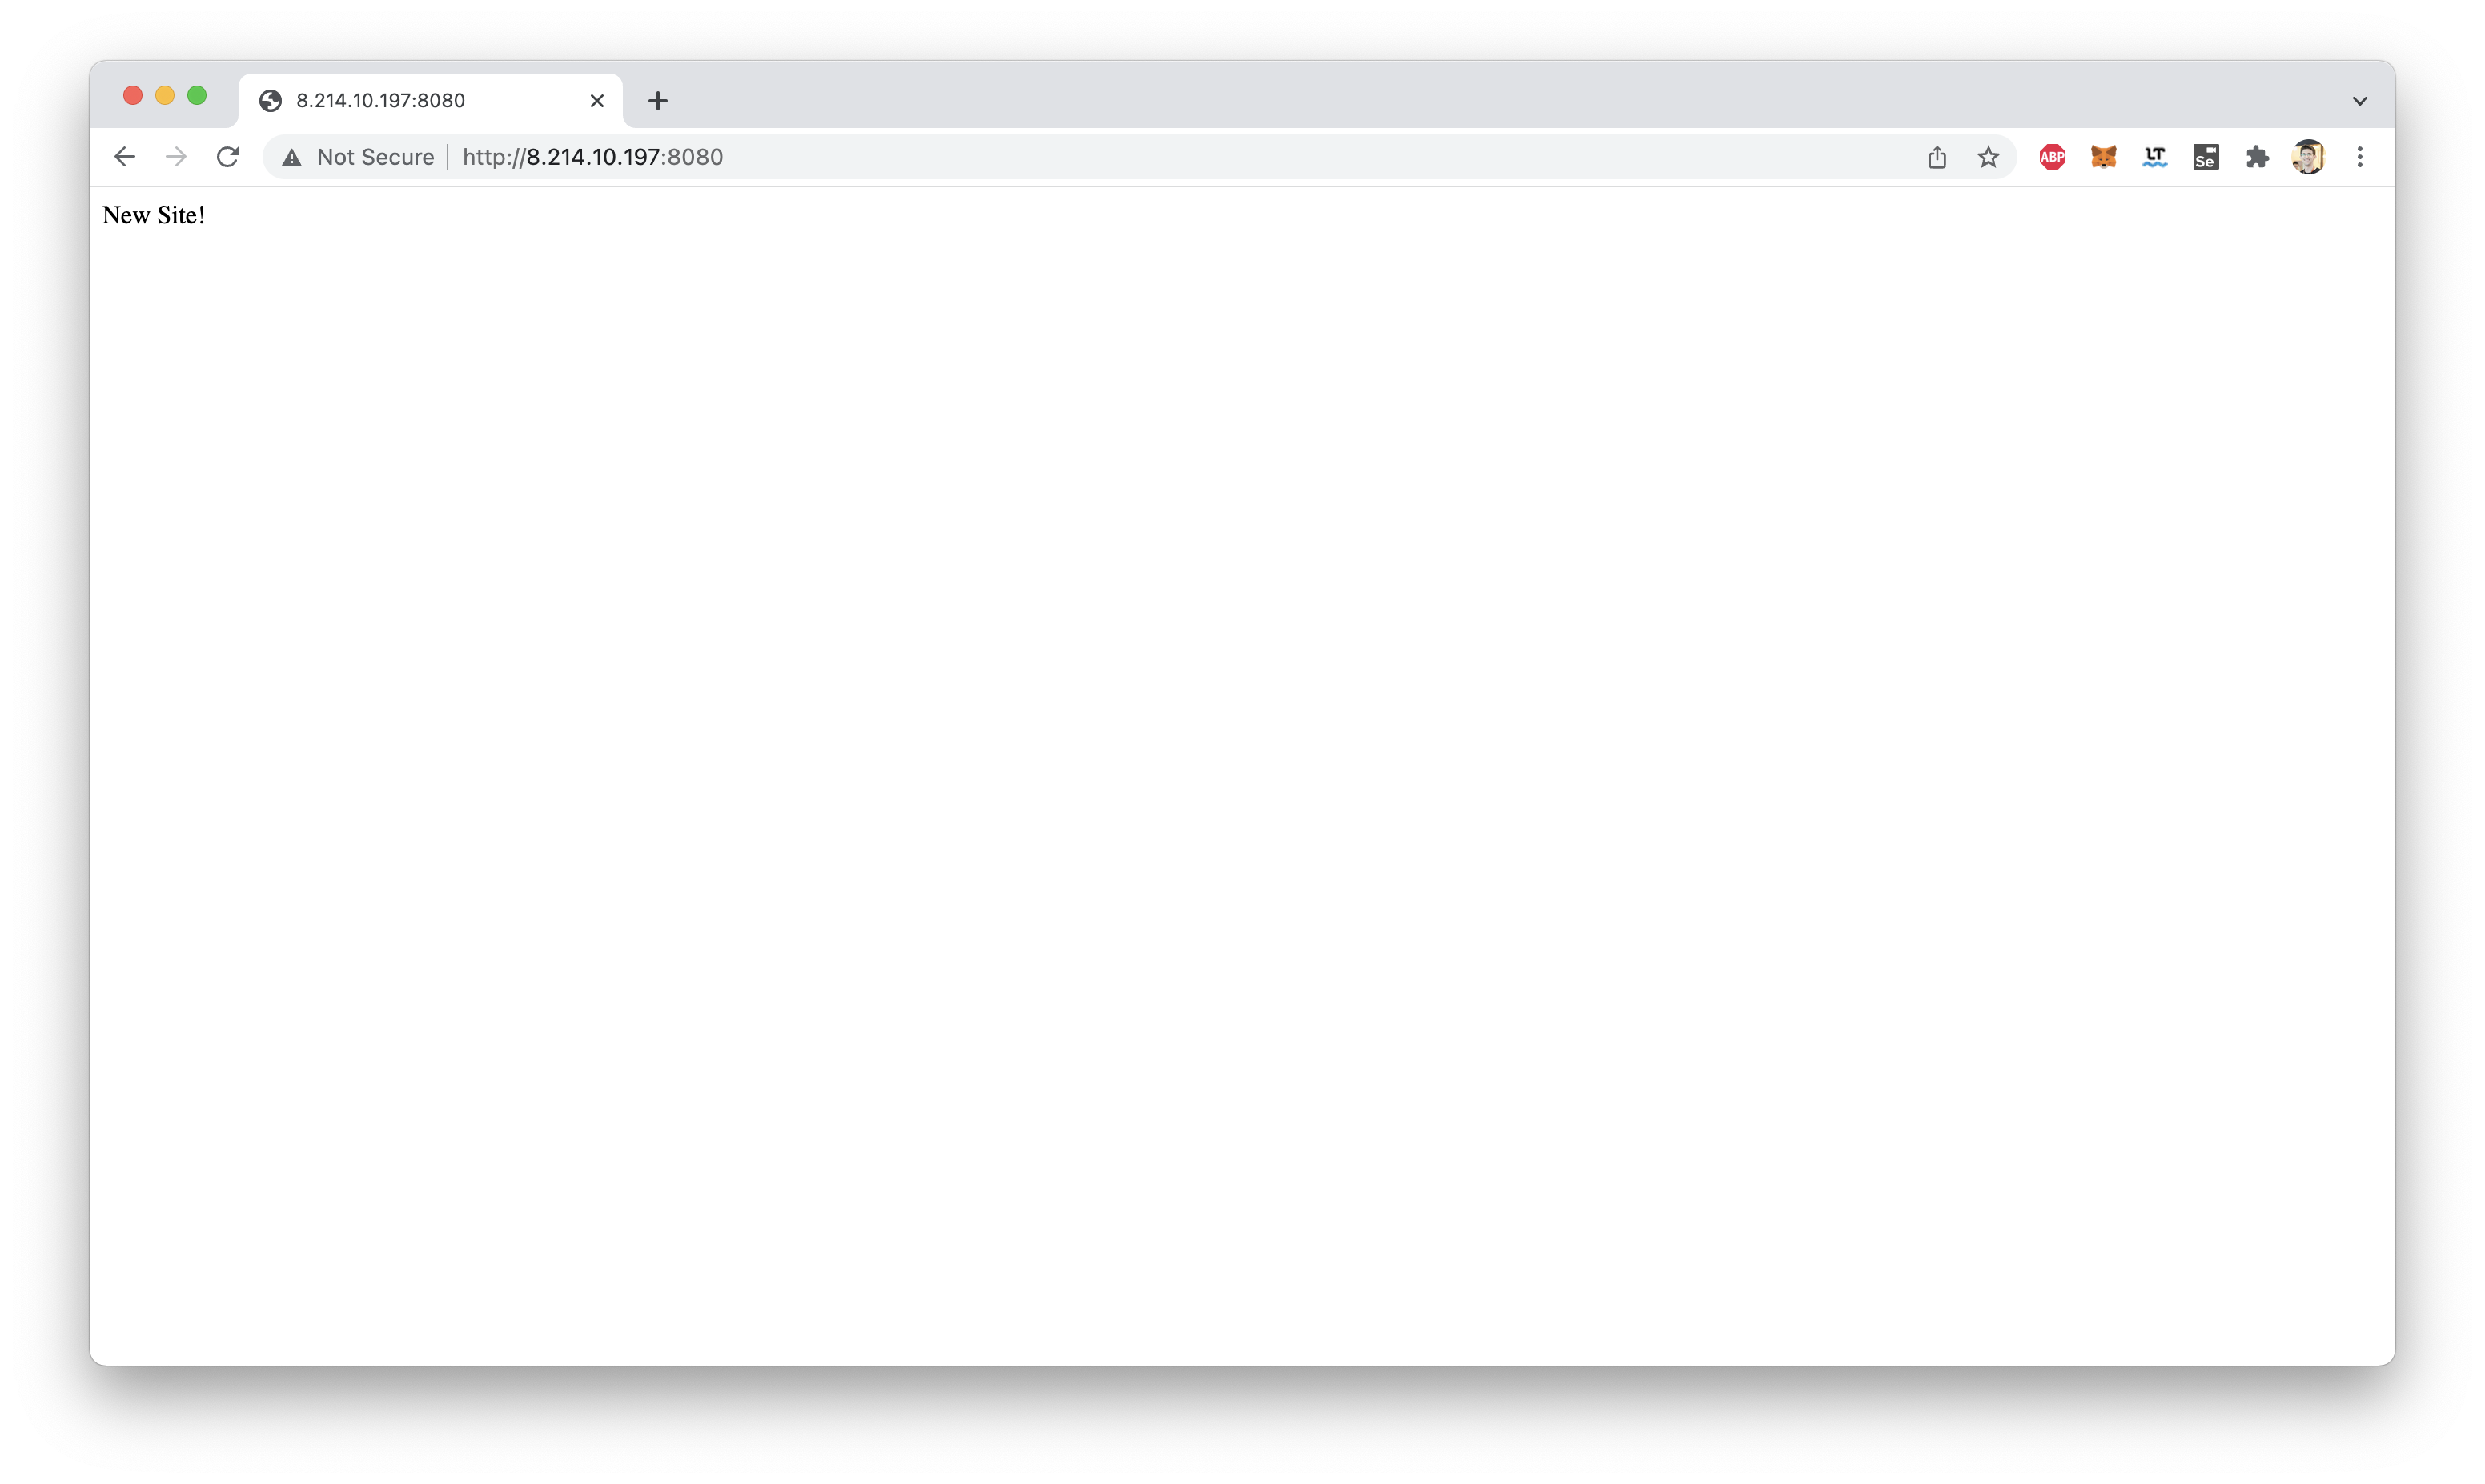
We can now visit our ECS instance's public IP. We should see a working web server on port 8080!
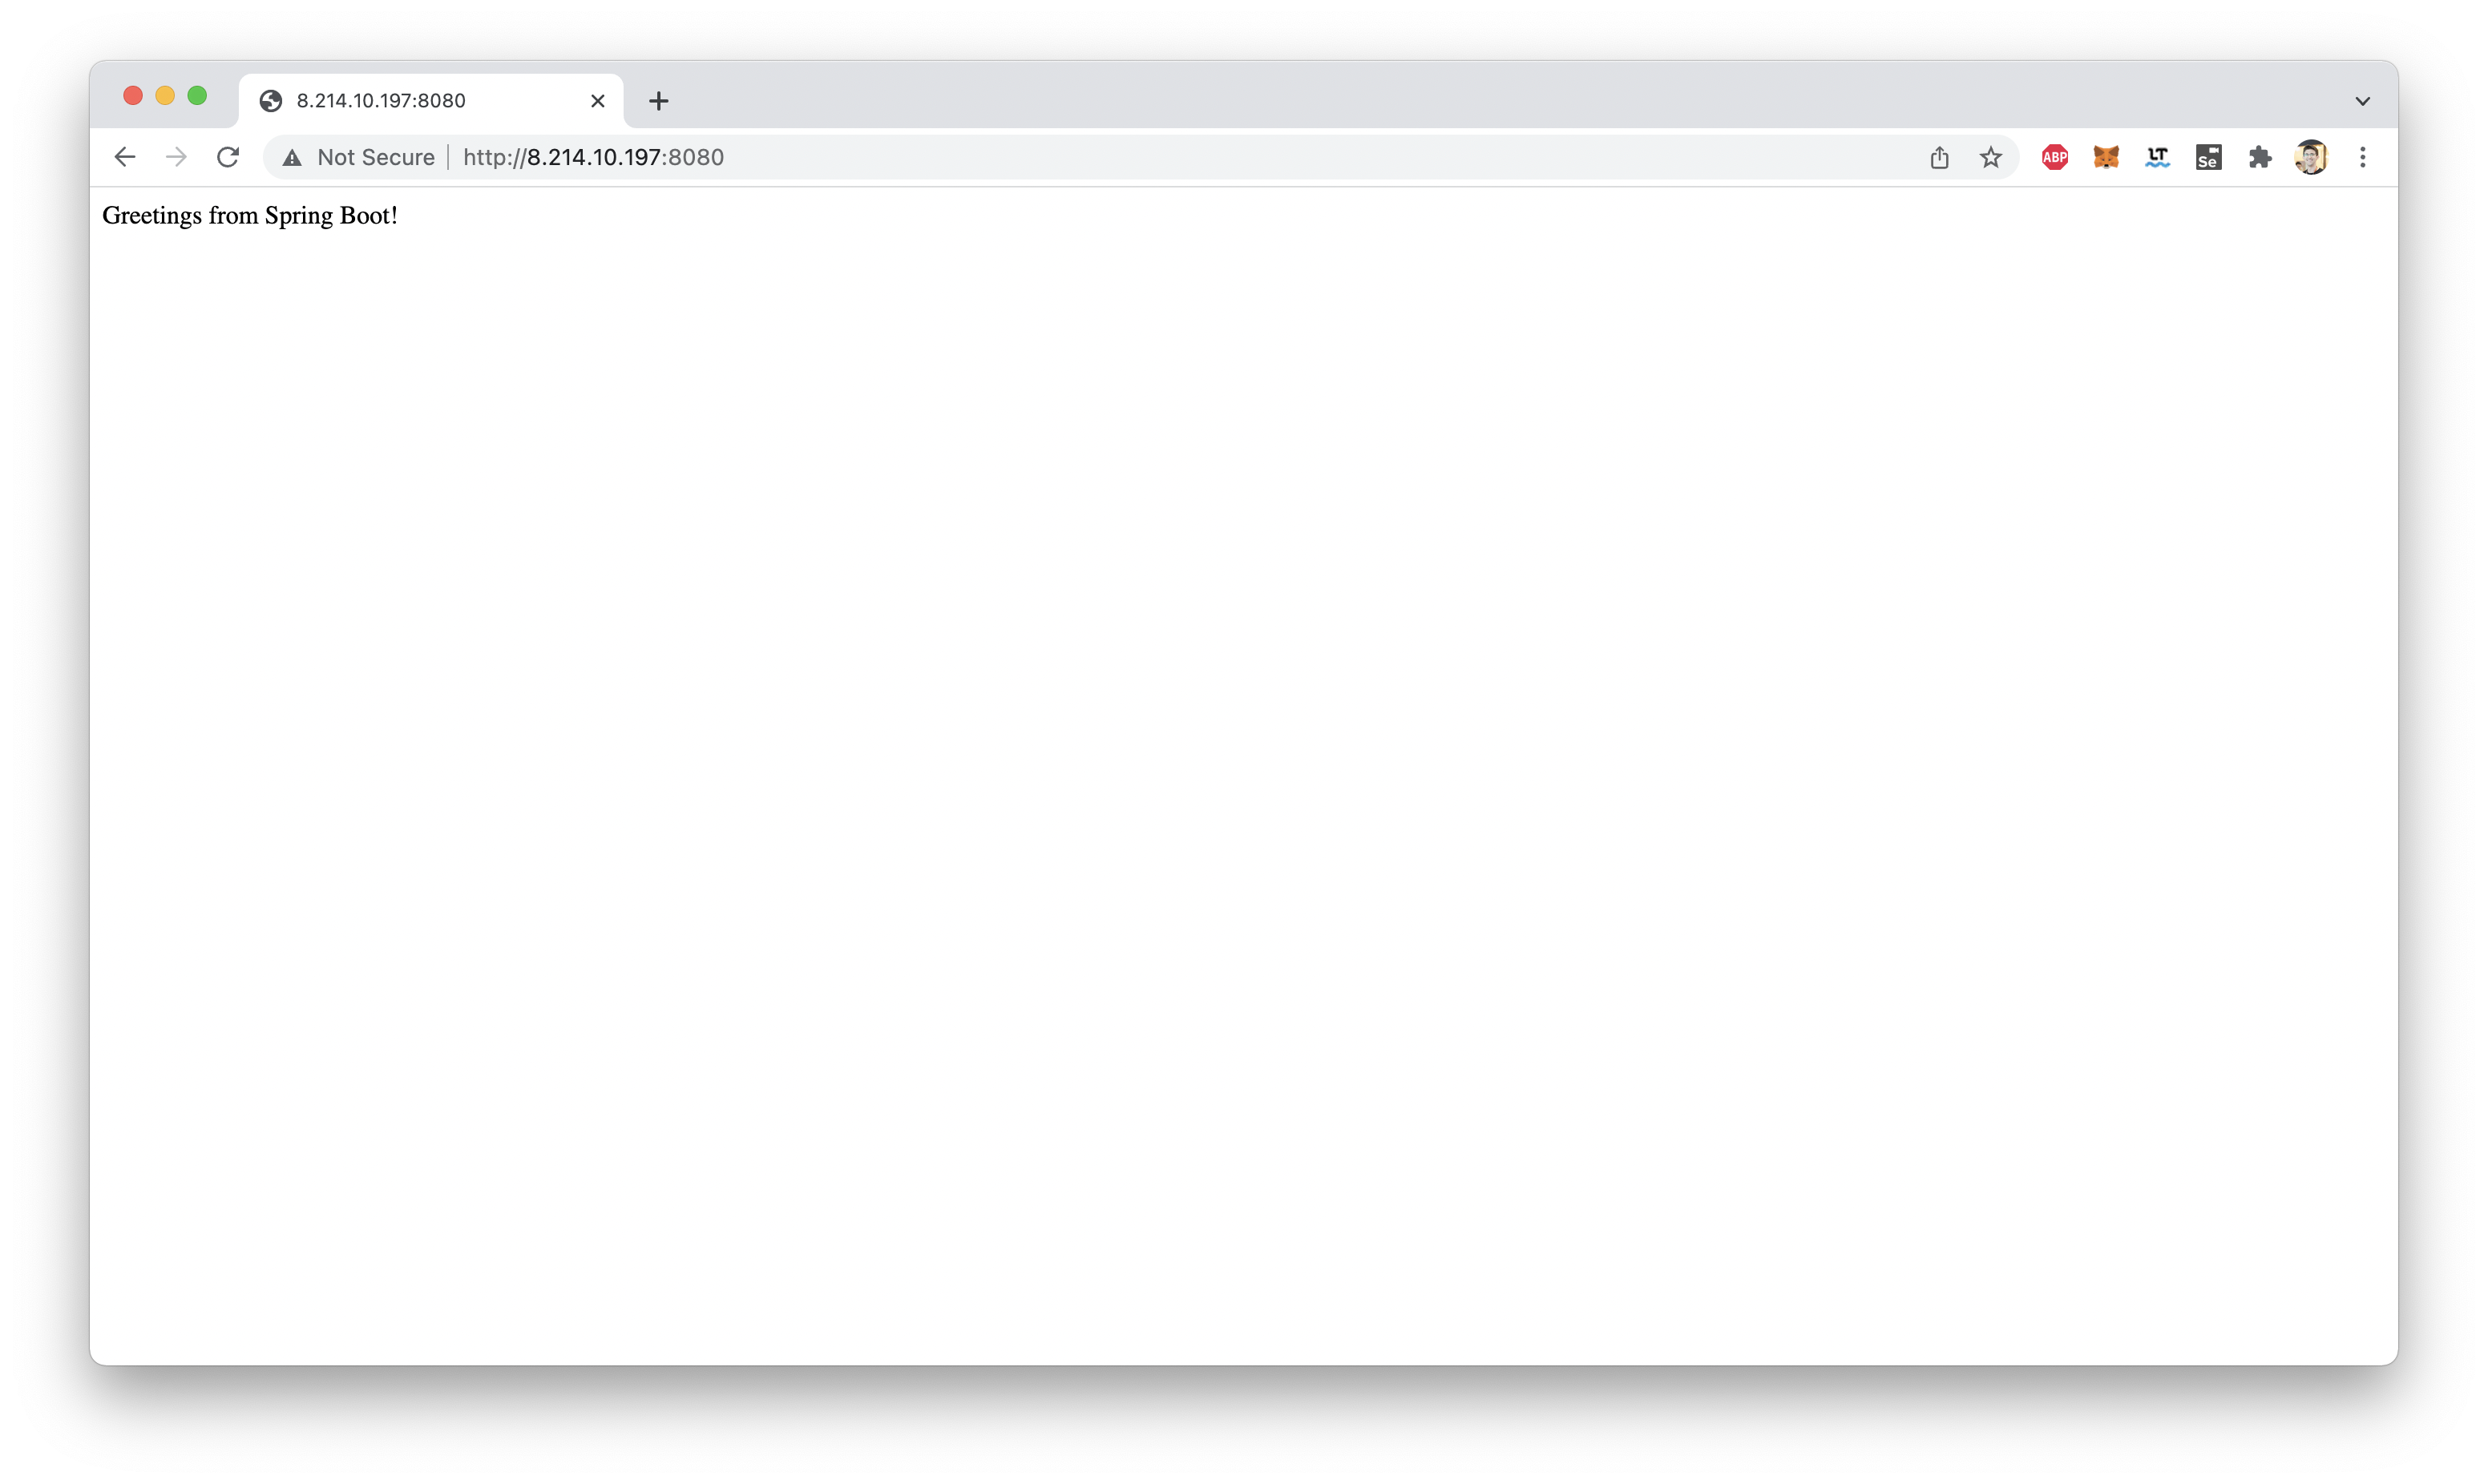
That's it! We have a working build pipeline!
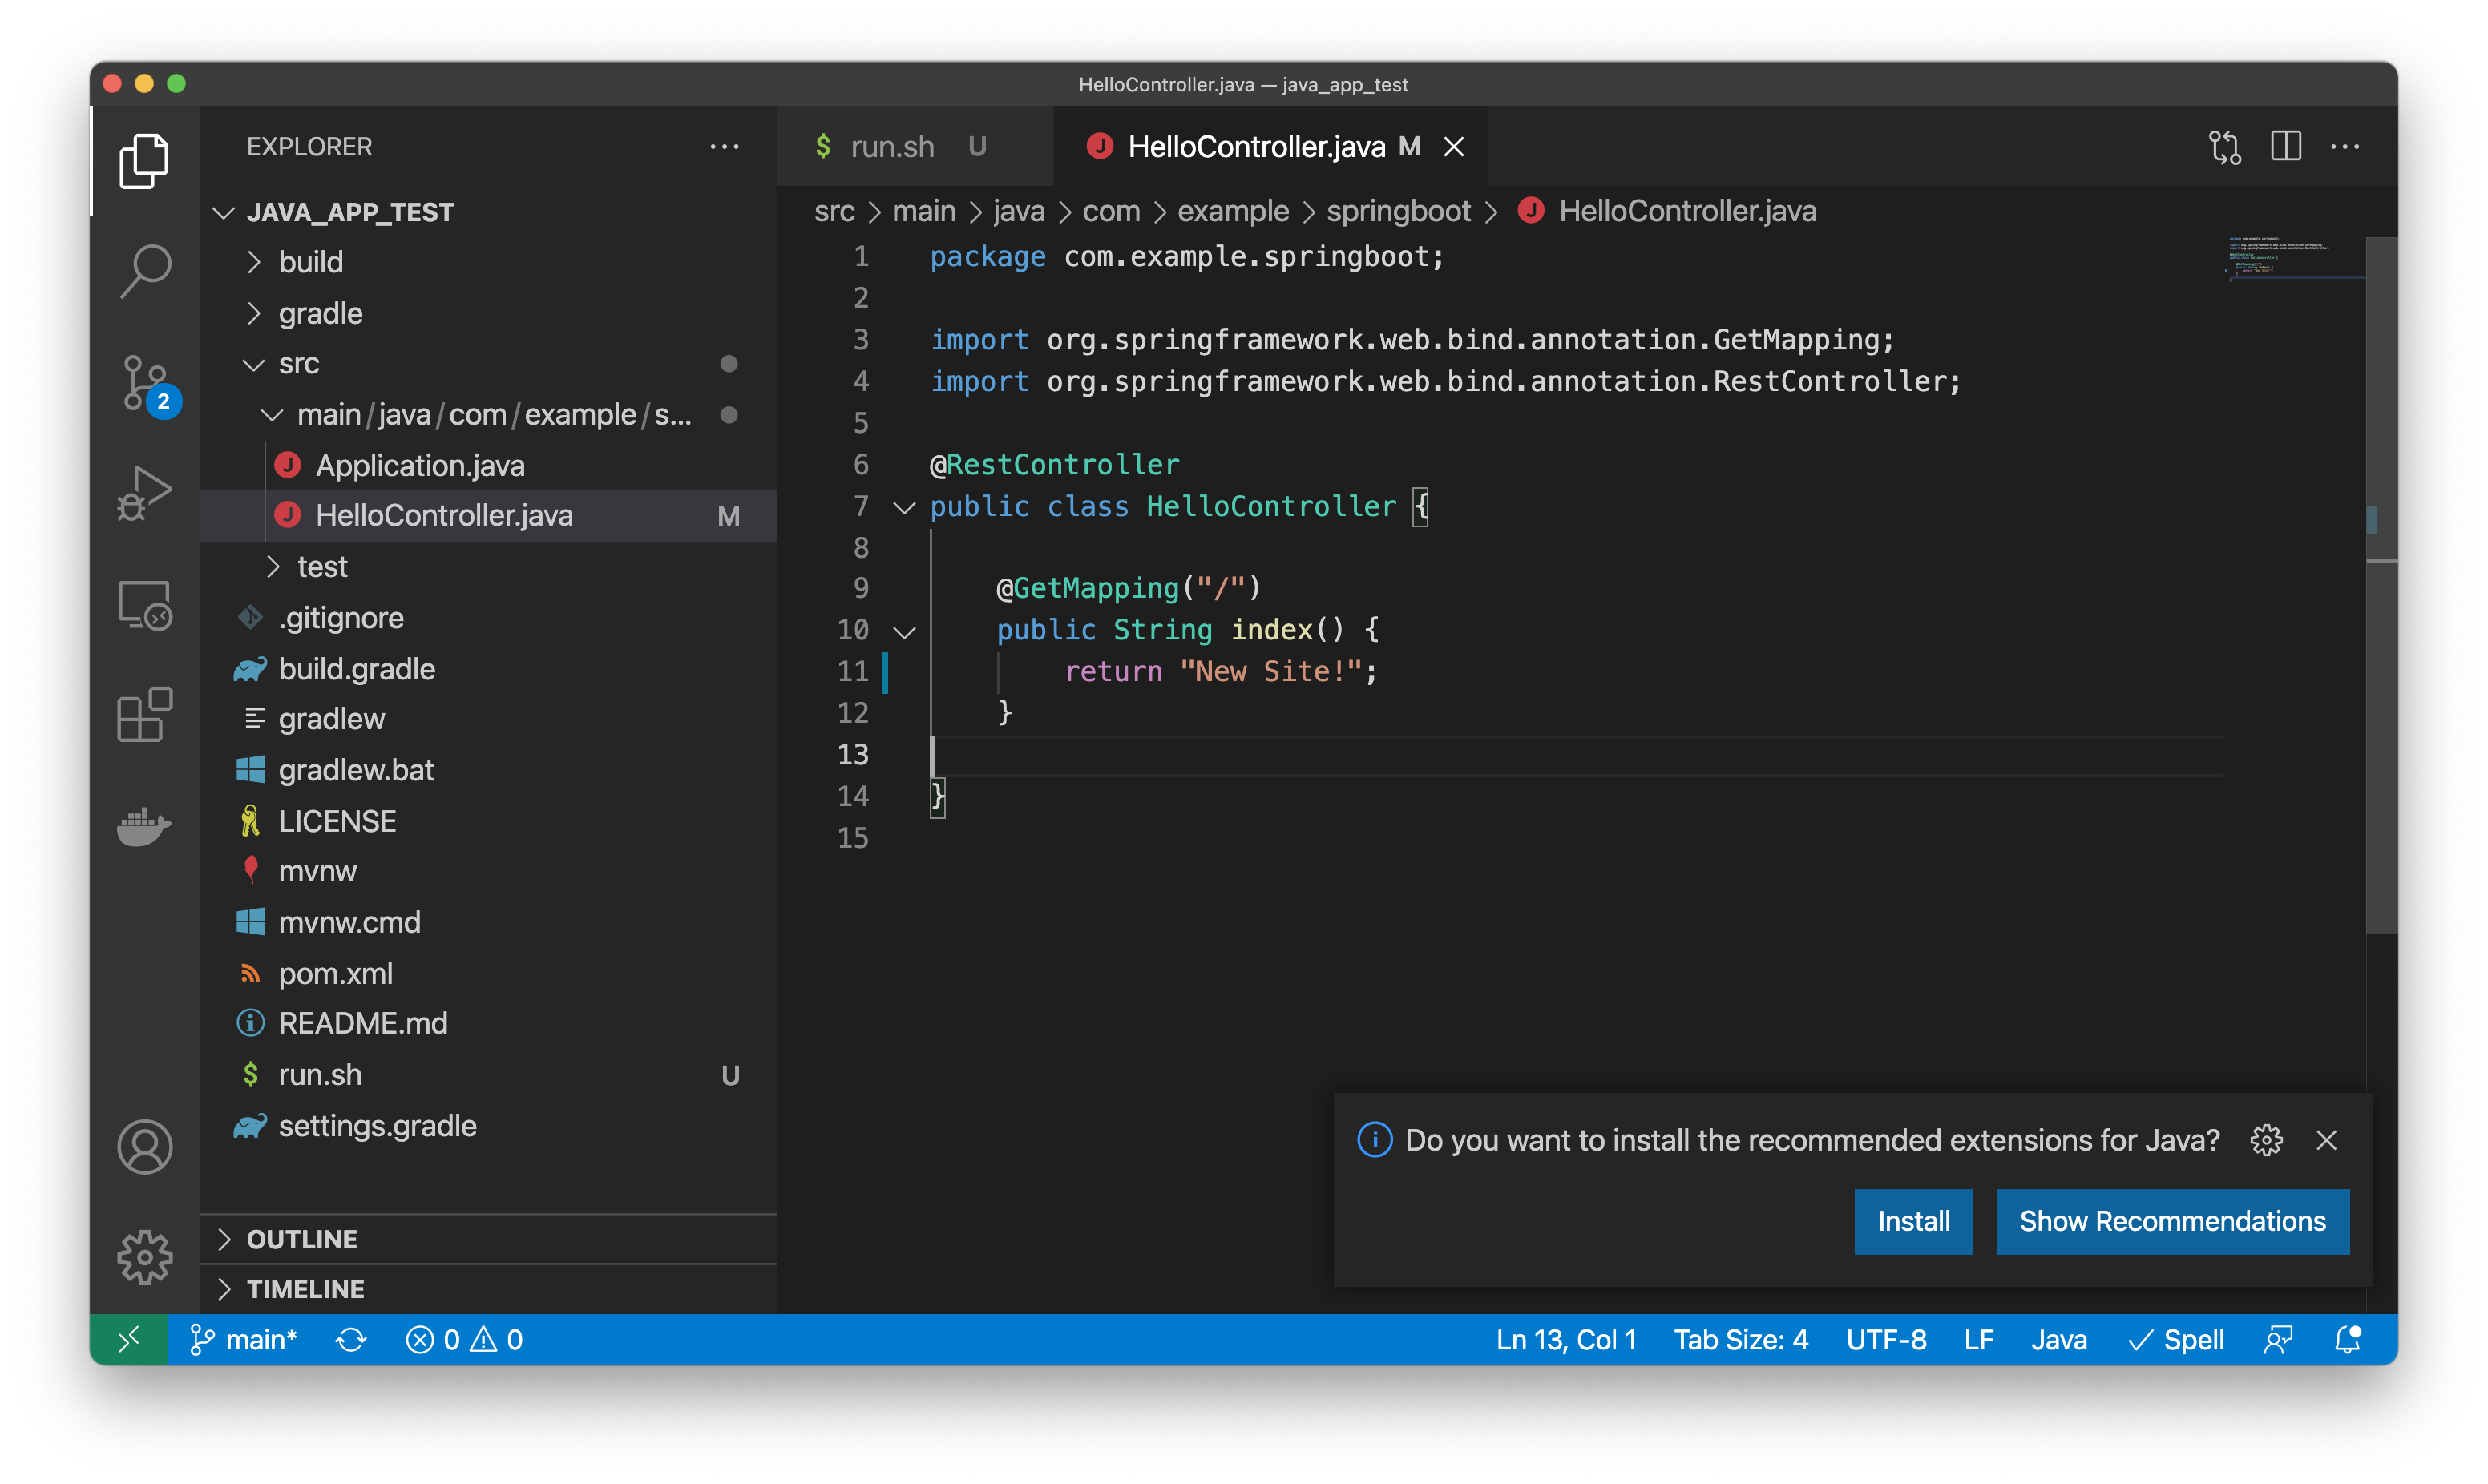
Try changing your code. Maybe update HelloController.java as shown here:
Rerunning your pipeline should then show your new site:
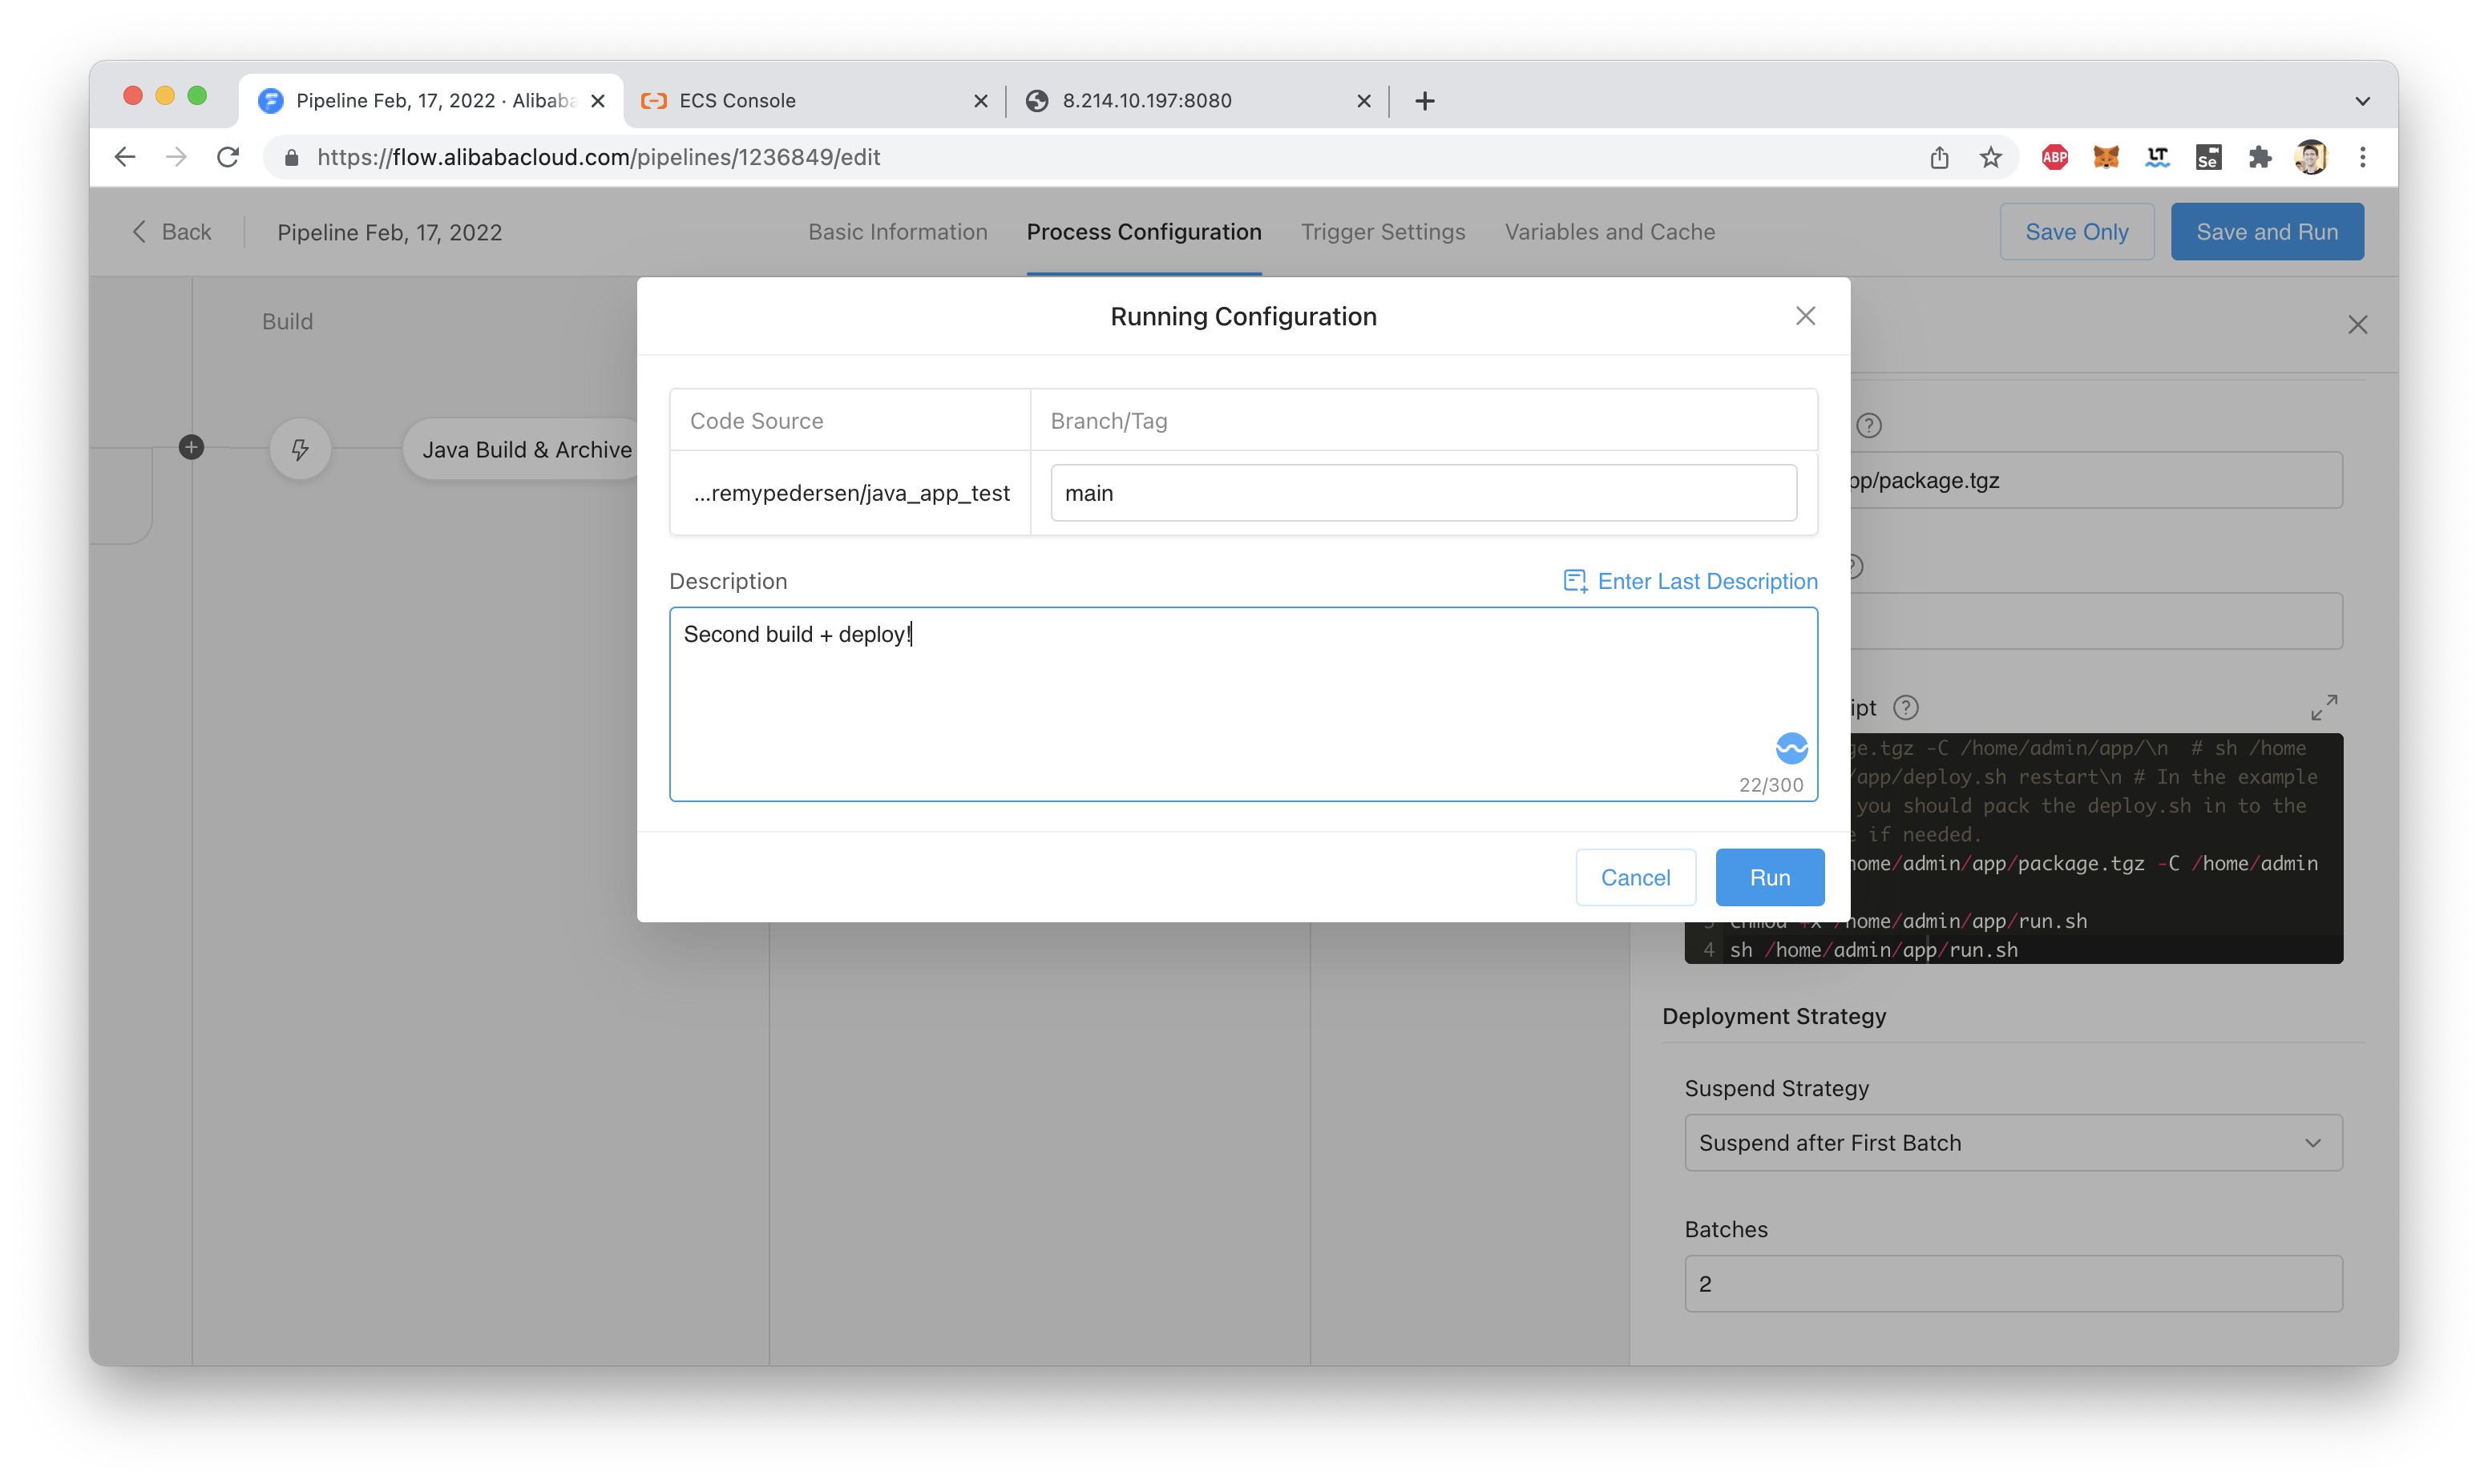
Warning: You might have to update your deployment script to kill the previous "java -jar" process! Otherwise when the deploy script runs, it could fail (since port 8080 will still be in use!).
That's all for this week. See you next time!
Great! Reach out to me at jierui.pjr@alibabacloud.com and I'll do my best to answer in a future Friday Q&A blog.
You can also follow the Alibaba Cloud Academy LinkedIn Page. We'll re-post these blogs there each Friday.
Fiends, Frauds, and Fakes: Better eKYC With ZOLOZ - Friday Blog, Week 49
JDP - September 10, 2021
JDP - April 23, 2021
JDP - September 2, 2021
JDP - April 15, 2022
JDP - August 12, 2021
JDP - July 30, 2021
 Alibaba Cloud Flow
An enterprise-level continuous delivery tool.
Learn More DevOps Solution
Accelerate software development and delivery by integrating DevOps with the cloud
Learn More Serverless Workflow
Visualization, O&M-free orchestration, and Coordination of Stateful Application Scenarios
Learn More Alibaba Cloud Academy
Alibaba Cloud provides beginners and programmers with online course about cloud computing and big data certification including machine learning, Devops, big data analysis and networking.
Learn MoreMore Posts by JDP