By Priyankaa Arunachalam, Alibaba Cloud Community Blog author.
Having dived deep into Big Data with the help of Alibaba Cloud E-MapReduce in our previous articles, it's time for us to take a dive into another set of Alibaba Products, which can be used to allow you to get more out of your data and do so even more efficiently. In this article, we will focus on MaxCompute and DataWorks, the two major products leveraged by Alibaba Cloud specifically designed for Big Data analytics and processing workflows. That is, you will use DataWorks together with MaxCompute for data processing and analysis projects.
This article, part one of a two-part series, will show you specifically how to create tables and analyse data using these two Alibaba Cloud products. When finished reading this article, consider continuing the learning process by reading the next part of this series: Diving into Big Data with DataWorks (Continued) .
Below is a basic introduction to the two products of DataWorks and MaxCompute, which interoperate with each other on Alibaba Cloud.
DataWorks is a product launched by Alibaba Cloud that is specifically designed with big data in mind. With DataWorks, you do not need to worry about cluster and operations. Rather, DataWorks serves as a single, unified solution for the development of data, data permission management and offline job scheduling. DataWorks also features real-time analytics, data asset management, and data quality and security management. One important thing to note is that DataWorks cannot be used alone and it uses the Alibaba Cloud MaxCompute as its core computational engine.
Alibaba Cloud MaxCompute, originally known as Open Data Processing Service (ODPS), is a fully managed data processing platform that supports multiple data importing solutions and distributed computing models. MaxCompute can help users to query huge datasets while also providing ensured security and efficiency at reduced cost.
As a storage computing engine, MaxCompute provides reliable big data table storage and SQL queries execution capabilities. However, MaxCompute cannot stand alone and meet the data processing requirements put forth by the users. As such, you will need to use MaxCompute together with DataWorks. For workflows that involve the interpretation, development and integration of data, you can use these services together to provide a complete solution for all of your big data needs.
To complete the steps in this article, you will need the following:
In reality, in the previous articles, we have already created an account and access key, so these steps are not included here. But below, we will show you how to purchase and activate MaxCompute, if you haven't already.
Before starting with DataWorks, we have to activate MaxCompute because it serves as a computation engine for the DataWorks projects. So let's first purchase Alibaba MaxCompute and then activate the service. To do this, navigate to the MaxCompute product page and click Buy now. Choose Pay As You Go as a billing method and select your target region. Once done, click on Buy now again.
In the page that follows, confirm that you agree with the terms of the service agreement and click on Activate. Then, wait for the Order complete notification to pop up.
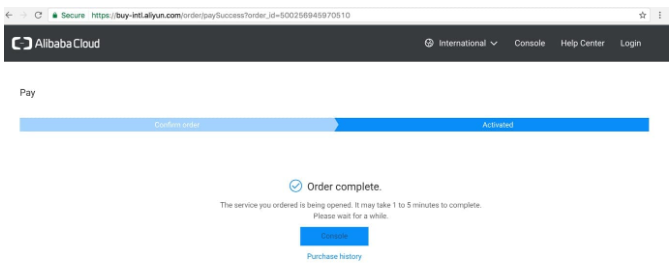
Now being done with the prerequisites, navigate to the DataWorks console by clicking Console. Next, for the region, choose the same region in which you activated MaxCompute.
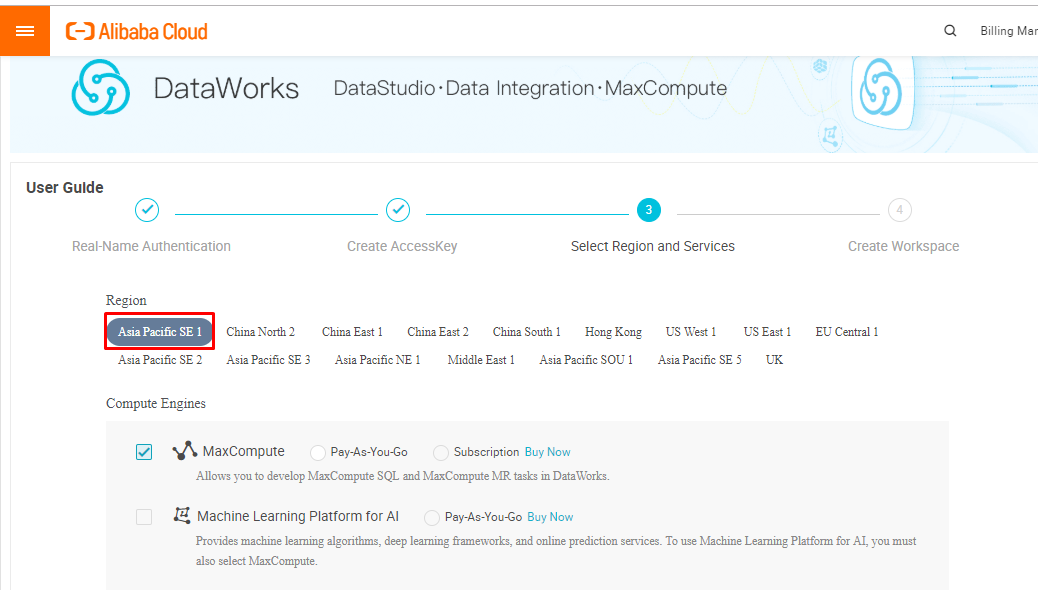
Under the Compute Engines, you can either choose MaxCompute or Machine Learning PAI. For this tutorial, we will use MaxCompute with Pay As You Go as the billing method. Then, after this step, choose one of the DataWorks services, of which there are:
Again, for this tutorial, we will focus on data processing and analytics and so you will want to check in the Data Analytics, O&M and Administration option with Pay As You Go for the billing method. After selecting your target region and service, click Next. This will lead you to the last stage which is the Workspace creation.
Under the Basic Information tab, provide a workspace name, here we wrote demo. If needed, you can also fill in the display name and a description.

In the new version of DataWorks which is DataWorks V2.0, you will have two options for the Mode configuration:
For this tutorial, since we are only creating the environment for demo purposes, we can leave the Single Environment option selected. Under Advanced Settings you will already have the Task recurrence and SELECT Result download enabled. These settings do the following:
For this tutorial, we will leave these two enabled and move to the section where you have to provide with the details such as the MaxCompute Project name, identity and Resource group. In the case of the development and production environments, the names of both of the projects must be specified. The default name of a development environment project name is the project name with _ dev as a suffix, and you can modify this if needed. The default name of the production environment of the MaxCompute project is the same as the DataWorks project. Once you have specified all of these parameters and settings, click on Create Workspace.
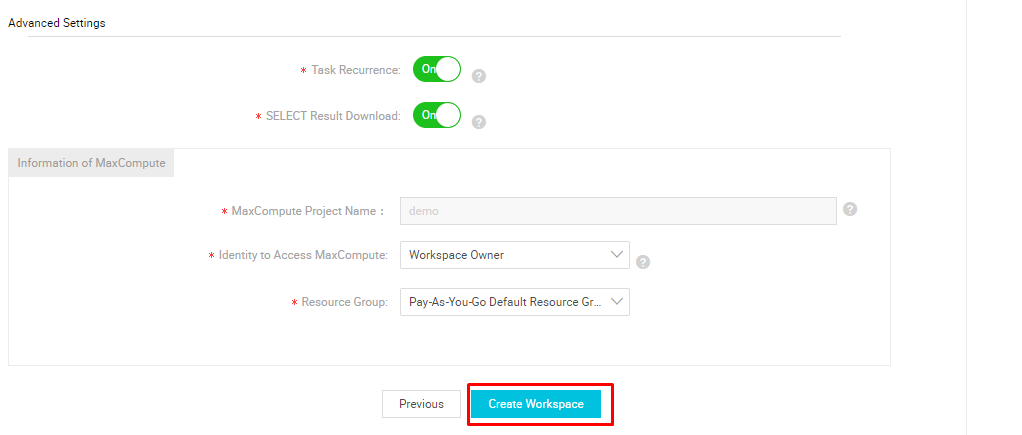
If the workspace name is not unique, you will be prompted with a warning to create a workspace with a new name. Now we have the workspace created. You can view it under the Workspaces tab, shown below.

In many ways, this is similar to the E-MapReduce console where we can manage the workspace with the options to change the settings of the workspace, change the services if needed or even delete or disable a workspace if needed. Click on the workspace name to start with the project. This will prompt you with the terms and service agreement to resize the IDE Kit. Agree to the terms, and you will be redirected to the home page of DataStudio, which consists of various options for Data development, management and analytics.
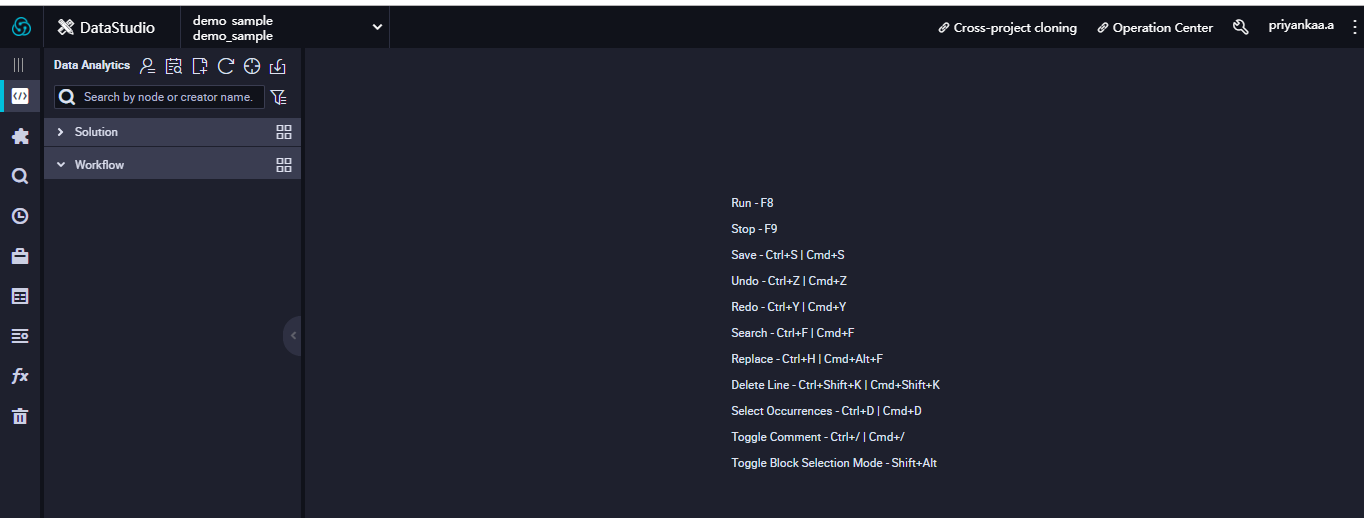
Click the Add icon shown below to view the list of options. Initially, in this article we will take a look on how to create a table and insert data into it.
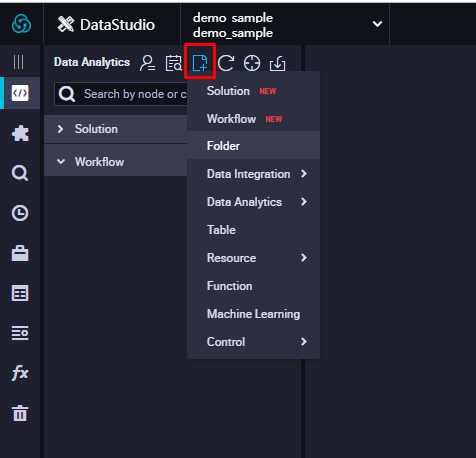
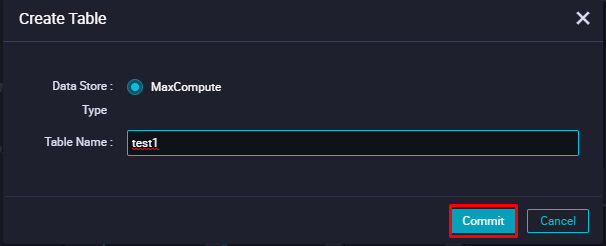
Choosing Table from the list of the options takes us to the Create Table wizard. In this wizard, enter the table name in the Create Table dialog box and click on Commit.
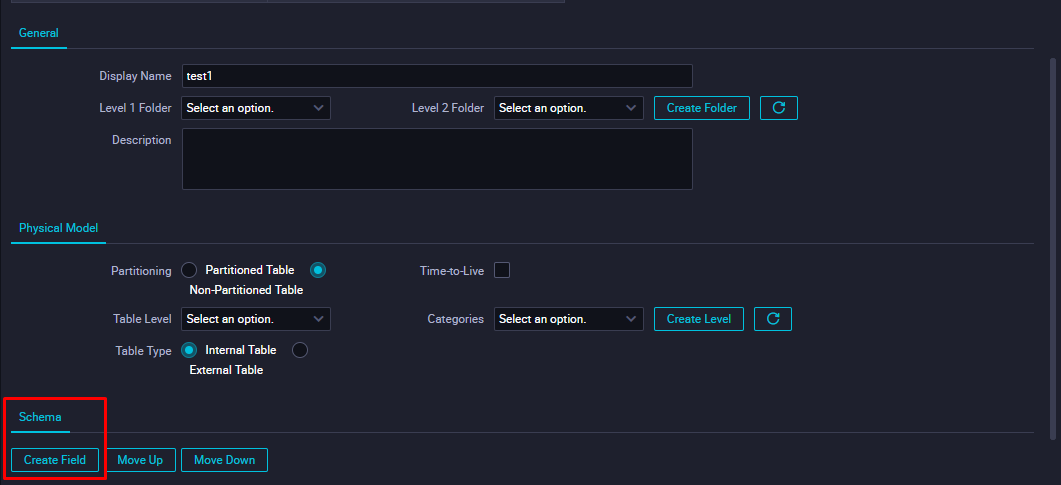
Now it's time to specify the schema. There are two ways of specifying schema. You can either define the schema by creating a field or by using a DDL Statement. We will walk through both methods below.
Click on Create Field under Schema.
In this article, we will look at uploading a flat file into a table. I just have a sample excel file with simple employee details like Name, Gender and Age.

So in the field names give the Name of the columns and the Data Type corresponding to it, and click on save icon next to the fields
If you are good with SQL, then you can carry on with creating the schema by using commands. You can do so by clicking the DDL Statement option. Once the schema is defined, click Commit to Production Environment.
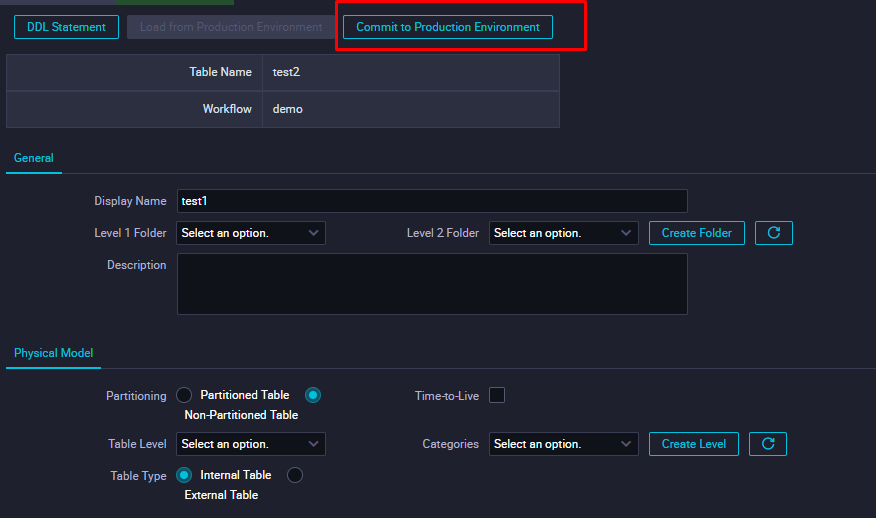
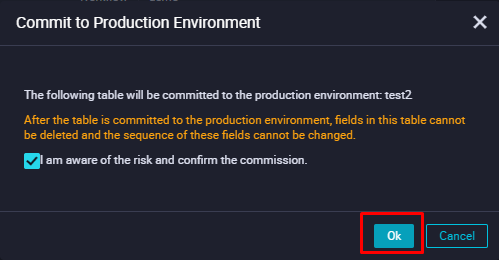
This will prompt for a warning that committing the table to the Production Environment will make the table immutable and you cannot make any changes to the fields. Check the box and click OK.
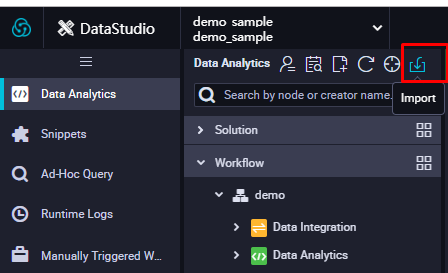
Now the table is created. Click on the Import icon to upload a file into this table.
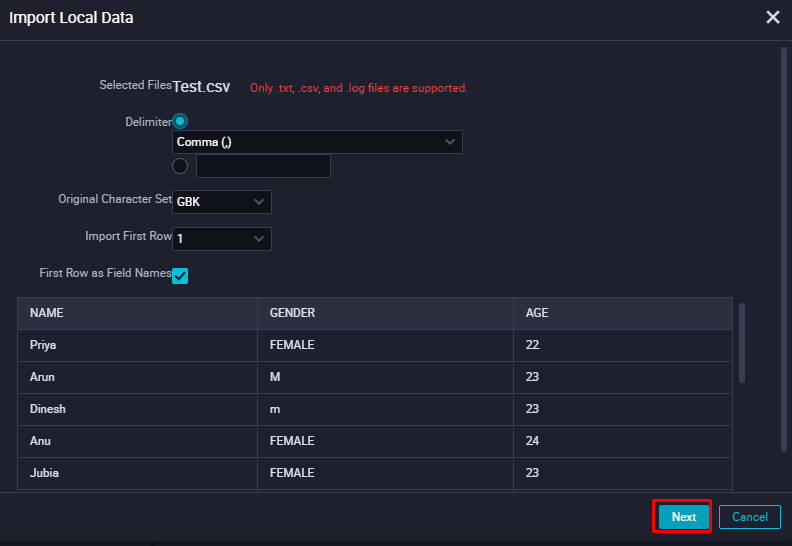
Choose the file from the system, provide a delimiter and encoding technique and click Next.
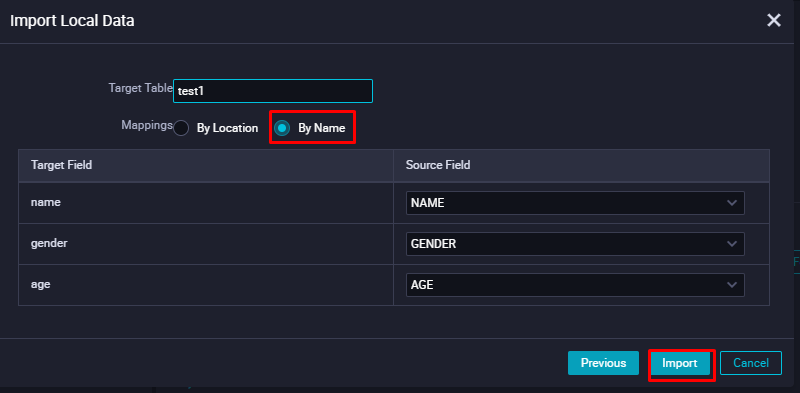
In the Import Local Data wizard, we have to map the columns in the excel file with the fields that we created. Since we have provided the same names as the column names, give the Mappings By Name, which will automatically take up the schema. Then click Import.
On a successful import, you will have a pop up saying import data success with the number of records imported, as shown below.

Now, let's query the table to check whether the data is inserted into the table. To do so, first navigate to Data Analytics on the left pane and choose Create Data Analytics Node > ODPS SQL .
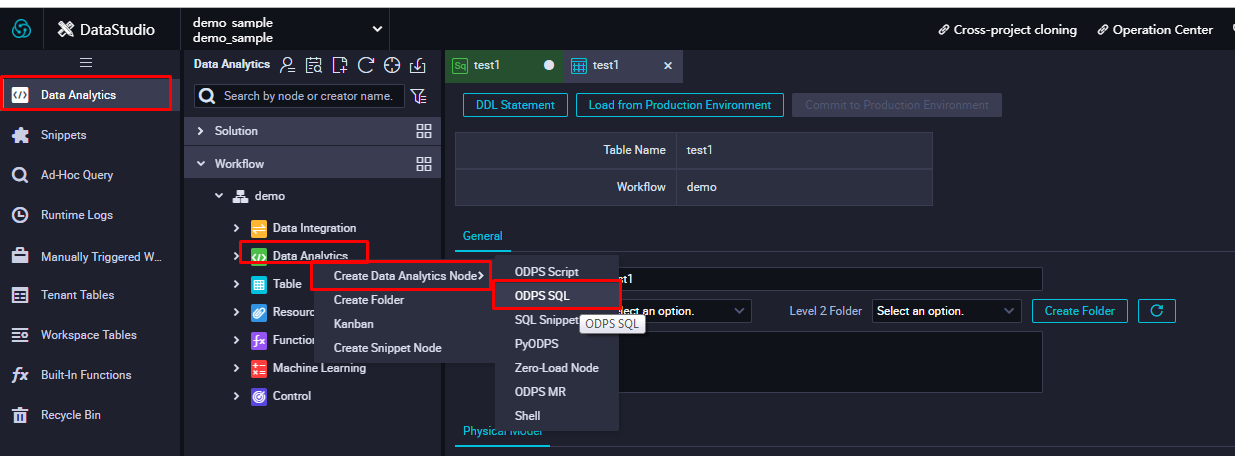
The data analytics node will be created and it will take you the SQL interface where you can start with the queries.

Enter the query and click the Run icon. Do so will provide an Expense Estimate for the SQL statement provided. Based on the estimate, you can optimize the query using filters and conditions. When you are happy with the billing estimate, click Run.
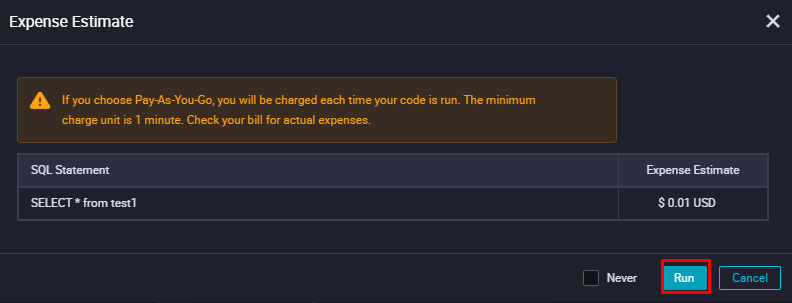
The query will now be run, and you can see the status of the job under Runtime log. If the job is successful, you will be shown with a message similar to the one below. Otherwise, you'll need to look for the logs and refine the query.

On successful execution of the query, a new tab named result will be created near the Runtime log, under which the result of the query will be displayed.
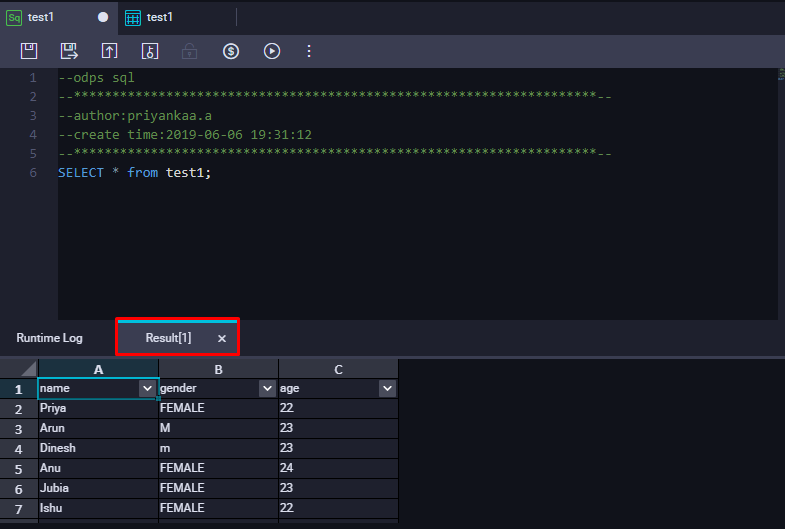
And yes, if you got this far, the data has been inserted successfully! On successful import, we can proceed with various analysis on the data. You can also use the SQL queries to create tables and analyse the data using DataWorks. There are other ways to import data such as data saved in different data source types, including RDS, MySQL, SQL Server, MaxCompute, OSS, Oracle, and so forth, which comes under Data Integration.

2,593 posts | 793 followers
FollowAlibaba Clouder - September 3, 2019
JDP - October 28, 2021
Alibaba Clouder - July 20, 2020
Alibaba Clouder - September 2, 2019
Alibaba Clouder - September 2, 2019
Alibaba Clouder - September 2, 2019

2,593 posts | 793 followers
Follow MaxCompute
Conduct large-scale data warehousing with MaxCompute
Learn More DataWorks
A secure environment for offline data development, with powerful Open APIs, to create an ecosystem for redevelopment.
Learn More E-MapReduce Service
A Big Data service that uses Apache Hadoop and Spark to process and analyze data
Learn MoreMore Posts by Alibaba Clouder