By Arslan Ud Din Shafiq, Alibaba Cloud Tech Share Author. Tech Share is Alibaba Cloud's incentive program to encourage the sharing of technical knowledge and best practices within the cloud community.
Nextcloud is a suite of client-server software for creating and using file hosting services, similar to Dropbox. Nextcloud Talk is an application by Nextcloud, which allows you to organize meetings with colleagues, customers and partners with a single click.
In this tutorial, we will be installing and setting up Nextcloud Talk on an Alibaba Cloud Elastic Compute Service (ECS) with Ubuntu 16.04 installed.
Before proceeding with installation of any kind of package, use the following command to update your Ubuntu system. To execute this command, remember to login from non-root user with sudo privileges.
# sudo apt update && sudo apt upgradeSoftware-properties-common package is required to get the supported files for installation of Docker CE. To install software-properties-common, execute the command.
# sudo apt-get install software-properties-common -y Apt-transport-https is required for installation of Docker CE. To install apt-transport-https, execute the command.
# sudo apt-get install apt-transport-https -y Ca-certificates is required for installation of Docker CE. To install ca-certificates, execute the command.
# sudo apt-get install ca-certificates -y Curl is required for installation of Docker CE. To install curl execute the command.
# sudo apt-get install curl -y To install Docker community edition, follow the steps below.
Step 1:
Add GPG key for Docker by executing command below.
# curl -fsSL https://download.docker.com/linux/ubuntu/gpg | sudo apt-key add –Step 2:
Execute the following command to verify the fingerprint of GPG key.
# sudo apt-key fingerprint 0EBFCD88Step 3:
Add the Docker repository by executing the command below.
# sudo add-apt-repository "deb [arch=amd64] https://download.docker.com/linux/ubuntu $(lsb_release -cs) stable"Step 4:
Update your system by executing command below to load added repository.
# sudo apt updateStep 5:
Execute the following command to install Docker.
# sudo apt install docker-ceStep 6:
Add your username to docker group by executing command below.
# sudo adduser aareez docker Step 7:
Close your current shell session and start a new session. Otherwise, you won't be able to run docker and you may see permission errors.
Step 8:
Execute the following command to check either docker run correctly or not.
# docker run hello-worldTo install NextCloud and Talk, follow the steps below.
Step 1:
Run the following command to download and install NextCloud on Docker.
# docker run -d -p 8080:80 nextcloudTo keep your data consistent through upgrades and automatically handling of all containers on restart, you may use Docker compose. It is easy to launch configuration in separate database container and persistent volume. To download and install Docker compose, follow the steps below.
Step 1:
Execute the following command to download and install latest version of docker compose.
# sudo curl -L https://github.com/docker/compose/releases/download/1.21.2/docker-compose-`uname -s`-`uname -m` -o /usr/local/bin/docker-composeStep 2:
Now set the permissions for file using the command below.
# sudo chmod +x /usr/local/bin/docker-composeStep 3:
Get list of started containers using the following command.
# docker container ls --all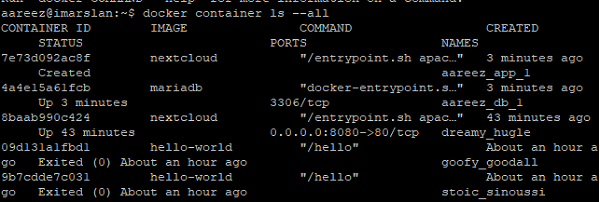
Stop container using port 8080. To do so, get container id, replace it with 8baab990c424 below and execute the command.
# docker stop 8baab990c424Step 4:
If you wish to install SSL certificate, skip the steps below and go to Option 2 – With SSL, and then continue from Step 5 of this section.
Create docker-compose.yaml file, paste the following text for configurations and save the file. Before pasting text, remember to set database name, password and user.
# sudo nano docker-compose.yamlversion: '2'
volumes:
nextcloud:
db:
services:
db:
image: mariadb
restart: always
volumes:
- db:/var/lib/mysql
environment:
- MYSQL_ROOT_PASSWORD=654321Ab
- MYSQL_PASSWORD=654321Ab
- MYSQL_DATABASE=ncdb
- MYSQL_USER=aareez
app:
image: nextcloud
ports:
- 8080:80
links:
- db
volumes:
- nextcloud:/var/www/html
restart: alwaysExecute the following command to launch Docker Compose configuration.
# docker-compose up –dSet Up Firewalls and Ports
If you have activated firewalls, you will have to define a rule in Alibaba Cloud security group for your cloud server to add exception for port 80/tcp and 443/tcp. You can enable these ports while creating ECS instance, but in case if you have forgotten to unblock these ports, you can follow the procedure in this guide: https://www.alibabacloud.com/help/doc-detail/25471.htm
Set Up Reverse Proxy
Get list of started containers using the following command.
# docker container ls --allStop container using port 8080. To do so, get container id, replace it with 8baab990c424 below and execute the command.
# docker stop 8baab990c424In this step, you will setup reverse proxy to access NextCloud Talk so that you can access it via domain name without using any port in the end of address. To do so, you will need to update docker-compose.yml file with the following text.
# sudo nano docker-compose.ymlNow add the following text in the opened file and save it.
version: '3'

services:
  db:
    image: mariadb
    command: --transaction-isolation=READ-COMMITTED --binlog-format=ROW
    restart: always
    volumes:
      - db:/var/lib/mysql
    environment:
      - MYSQL_ROOT_PASSWORD=654321Ab
      - MYSQL_PASSWORD=654321Ab
      - MYSQL_DATABASE=ncdb
      - MYSQL_USER=aareez

  app:
    image: nextcloud:apache
    restart: always
    volumes:
      - nextcloud:/var/www/html
    environment:
      - VIRTUAL_HOST=softpedia.xyz
      - LETSENCRYPT_HOST=softpedia.xyz
      - LETSENCRYPT_EMAIL=arslan@gmail.com
      - MYSQL_HOST=db
      - MYSQL_PASSWORD=654321Ab
      - MYSQL_DATABASE=ncdb
      - MYSQL_USER=aareez
    depends_on:
      - db
    networks:
      - proxy-tier
      - default

  proxy:
    build: ./proxy
    restart: always
    ports:
      - 80:80
      - 443:443
    labels:
      com.github.jrcs.letsencrypt_nginx_proxy_companion.nginx_proxy: "true"
    volumes:
      - certs:/etc/nginx/certs:ro
      - vhost.d:/etc/nginx/vhost.d
      - html:/usr/share/nginx/html
      - /var/run/docker.sock:/tmp/docker.sock:ro
    networks:
      - proxy-tier

  letsencrypt-companion:
    image: jrcs/letsencrypt-nginx-proxy-companion
    restart: always
    volumes:
      - certs:/etc/nginx/certs
      - vhost.d:/etc/nginx/vhost.d
      - html:/usr/share/nginx/html
      - /var/run/docker.sock:/var/run/docker.sock:ro
    networks:
      - proxy-tier
    depends_on:
      - proxy

volumes:
  db:
  nextcloud:
  certs:
  vhost.d:
  html:

networks:
  proxy-tier:
Now create a directory named proxy.
# sudo mkdir proxyNavigate to created directory proxy.
# cd proxyNow create a file named Dockerfile, paste the following text in the opened file and save it.
# sudo nano DockerfileFROM jwilder/nginx-proxy:alpine
COPY uploadsize.conf /etc/nginx/conf.d/uploadsize.confNow create uploadsize.conf, paste the following text in opened file and save it.
# sudo nano uploadsize.confclient_max_body_size 10G;Now navigate to home directory.
# cd ~Now launch Docker compose configuration.
# sudo docker-compose up -dStep 5:
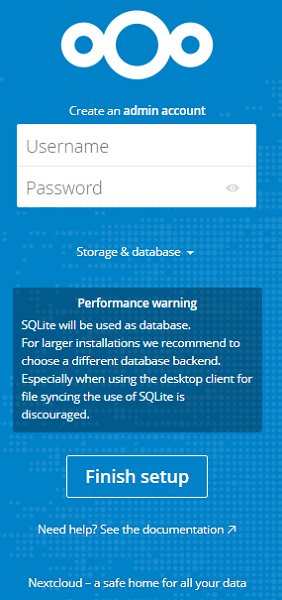
Now open your browser and navigate to http://your_domain.tld:8080 or http://ecs_ip_address:8080 If you see any error while loading page, go to firewall settings section and enable port 8080. After accessing link, you will see the following screen.
Step 6:
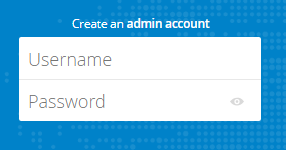
Now create admin account by filling the form below.
Step 7:
Click Storage & database dropdown and fill the database information. Use host value : db
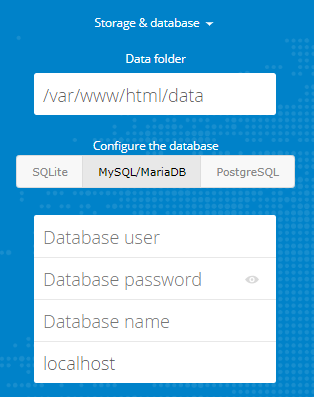
After filling data, click Finish Setup. Now you will be redirected to NextCloud dashboard.
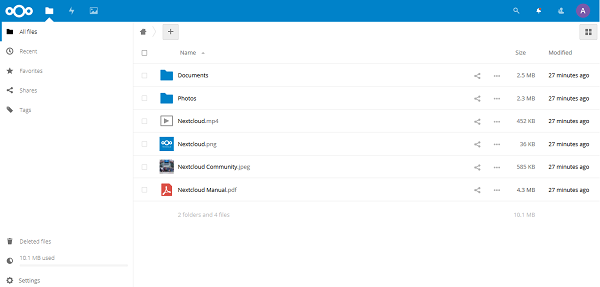
Talk offers you to make text and video chat. It helps you to make calls. To do so, follow the steps below.
Step 1:
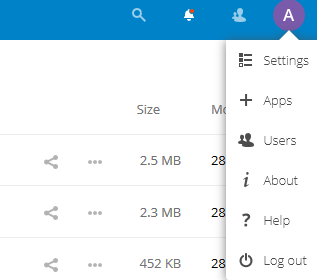
Navigate to profile picture icon on top right corner, a dropdown menu will open. Click +Apps as shown below.
Step 2:
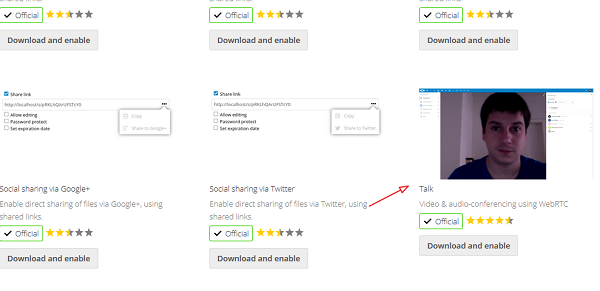
Now navigate to Social & communication section. You will see the list of apps. Select Talk from the opened list as shown below. Click Download and enable option and wait for installation.
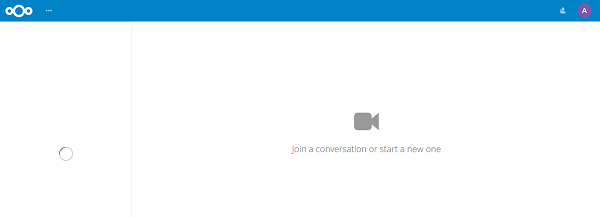
After successful installation, you will see a new icon on top menu bar, click it.
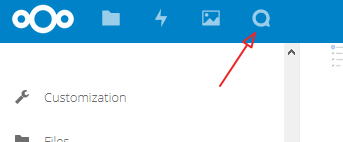
You will see the following screen. You will see the list of users of left side if added. You can make calls and chat with them.

2,593 posts | 793 followers
FollowAlibaba Clouder - June 11, 2019
Alibaba Cloud Indonesia - November 5, 2021
GhulamQadir - January 1, 2020
Alibaba Clouder - January 2, 2019
Alibaba Clouder - May 14, 2019
Alibaba Clouder - January 25, 2018

2,593 posts | 793 followers
Follow ECS(Elastic Compute Service)
Elastic and secure virtual cloud servers to cater all your cloud hosting needs.
Learn More Simple Application Server
Cloud-based and lightweight servers that are easy to set up and manage
Learn MoreLearn More
More Posts by Alibaba Clouder