By Grace Amondi, Alibaba Cloud Tech Share Author. Tech Share is Alibaba Cloud's incentive program to encourage the sharing of technical knowledge and best practices within the cloud community.
This tutorial describes how to create a GIS Django REST framework on an Alibaba Cloud Elastic Compute Server (ECS) instance with Ubuntu 16.04.
In Part 1, we introduction the Django Rest Framework and the initial setup of the Django application environment. Part 2 will involve final steps into bringing the Django REST API to an end. We will be looking at working on creating models, views and populating our database, as well as adding authentication to the REST API. We will also be creating a simple schools listing database system.
You must have completed the steps in Part 1.
A model is the single, definitive source of information about your data. It contains the essential fields and behaviors of the data you're storing. Generally, each model maps to a single database table.
Before we can create our models let us add the mygeoapi application that we created to our INSTALLED_APPS.
Open geoapi/settings.py and add the following to INSTALLED_APPS:
$ sudo nano geoapi/geoapi/settings.pyINSTALLED_APPS = [
# ...
'mygeoapi',
]Open mygeoapi/models.py by typing the following:
$ sudo nano geoapi/mygeoapi/models.pyEdit the file with the following:
# -*- coding: utf-8 -*-
from __future__ import unicode_literals

from django.db import models
from django.contrib.gis.db import models
from django.contrib.postgres.fields import HStoreField

class School(models.Model):
    name = models.CharField(max_length=100)
    county = models.CharField(max_length=100, null=True)
    enrollment = models.IntegerField()
    location = models.PointField(srid=4326)
    electricity_availability = models.BooleanField(default=False)
    emmis_code = models.IntegerField(null=False,default=0)

    def __unicode__(self):
        return self.name

class Link(models.Model):
    """
    Metadata is stored in a PostgreSQL HStore field, which allows us to
    store arbitrary key-value pairs with a link record.
    """
    metadata = HStoreField(blank=True, null=True, default=dict)
    geo = models.LineStringField()
    objects = models.GeoManager()
The school Model(Table) has the columns(attributes) of:
In GeoJSON each feature can have a properties member containing the attributes of the feature. By default this field is filled with the attributes from your Django model, excluding the id, geometry and bounding box fields. It's possible to override this behaviour and implement a custom source for the properties member through the use of HStore.
Remeber to add hstore extension to your database;
$ sudo -u postgres psql -d geoapigeoapi=# create extension hstore;Next we are going to migrate the tables to our database:
$ geoapi/manage.py migrateGeoFeatureModelSerializer is a subclass of rest_framework.ModelSerializer which will output data in a format that is GeoJSON compatible.GeoJSON is file format for representing geodata as JSON. Serializing an object list GeoFeatureModelSerializer will create a FeatureCollection.GeoFeatureModelSerializer requires you to define a geo_field to be serialized as the "geometry".
Create a serializers.py file in the mygeoapi directory and open using:
$ nano geoapi/mygeoapi/serializers.pyLet's start by importing GeoFeatureModelSerializer, serializers and models we created. Add the following to mygeoapi/serialiers.py file:
from rest_framework import serializers
from django.contrib.auth.models import User, Group
from mygeoapi.models import School
from rest_framework_gis.serializers import GeoFeatureModelSerializer
Next let's create serializer classes for our models.
class UserSerializer(serializers.HyperlinkedModelSerializer):
    class Meta:
        model = User
        fields = ('username', 'id', 'email', 'groups')


class GroupSerializer(serializers.HyperlinkedModelSerializer):
    class Meta:
        model = Group
        fields = ('id', 'name')


class SchoolSerializer(GeoFeatureModelSerializer):
    """ A class to serialize locations as GeoJSON compatible data """

    class Meta:
        model = School
        geo_field = 'location'
        auto_bbox = True

        # you can also explicitly declare which fields you want to include
        # as with a ModelSerializer.
        fields = ('id', 'name', 'county', 'enrollment', 'location', 'electricity_availability', 'emmis_code')
Save and close serializers.py file.
A view is a callable which takes a request and returns a response.We will be using @api_view wrapper to write API function based views.These wrapper provide a few bits of functionality such as making sure you receive Request instances in your view, and adding context to Response objects so that content negotiation can be performed.
The wrapper also provides behaviour such as returning 405 Method Not Allowed responses when appropriate, and handling any ParseError exception that occurs when accessing request.data with malformed input. Let's import all dependancies needed and create an api view that will be making get requests.
Open mygeoapi/views.py by typing the following:
$ sudo nano geoapi/mygeoapi/views.pyEdit it with the following:
from django.contrib.auth.models import User, Group
from rest_framework import viewsets
from .serializers import UserSerializer, GroupSerializer, SchoolSerializer
from .models import School
from rest_framework_gis.filters import DistanceToPointFilter
from rest_framework.decorators import api_view
from rest_framework.response import Response


@api_view(['GET'])
def api_root(request, format=None):
    return Response({
        'users': reverse('user-list', request=request, format=format),
        'groups': reverse('group-list', request=request, format=format),
        'schools': reverse('schools-list', request=request, format=format),
    })
Next we will need to create class based views.Class-based views provide an alternative way to implement views as Python objects instead of functions. They do not replace function-based views, but have certain differences and advantages when compared to function-based views:
So let's add the following to mygeoapi/views.py:
class UserViewSet(viewsets.ModelViewSet):
    """
       API endpoint that allows users to be viewed or edited.
       """
    queryset = User.objects.all().order_by('date_joined')
    serializer_class = UserSerializer


class GroupViewSet(viewsets.ModelViewSet):
    """
       API endpoint that allows group to be viewed or edited.
       """
    queryset=Group.objects.all()
    serializer_class=GroupSerializer


class SchoolViewSet(viewsets.ModelViewSet):
    queryset = School.objects.all()
    serializer_class = SchoolSerializer
    distance_filter_field = 'geometry'
    filter_backends = (DistanceToPointFilter,)
    bbox_filter_include_overlapping = True
You will notice that in the SchoolViewSet's filter_backends has been assigned DistanceToPointFilter. It returns results within a certain distance from a given point.This means you need to install django filter:
$ pip install django-filterFinally we need to wire these views up. Create the mygeoapi/urls.py file and add the following:
$ nano geoapi/mygeoapi/urls.pyfrom django.conf.urls import url, include
from .views import UserViewSet, GroupViewSet, SchoolViewSet, api_root
from rest_framework.urlpatterns import format_suffix_patterns
user_list = UserViewSet.as_view({
'get': 'list'
})
user_detail = UserViewSet.as_view({
'get': 'retrieve',
'post': 'create',
'put': 'update',
'delete': 'destroy'
})
group_list = GroupViewSet.as_view({
'get': 'list'
})
group_detail = GroupViewSet.as_view({
'get': 'retrieve',
'post': 'create',
'put': 'update',
'delete': 'destroy'
})
school_list = SchoolViewSet.as_view({
'get': 'list'
})
school_detail = SchoolViewSet.as_view({
'get': 'retrieve',
'post': 'create',
'put': 'update',
'delete': 'destroy'
})
urlpatterns = [
url(r'^$', api_root),
url(r'^users', user_list, name=user_list),
url(r'^user/(?P<pk>[0-9]+)/$', user_detail, name=user_detail),
url(r'^groups', user_list, name=group_list),
url(r'^groups/(?P<pk>[0-9]+)/$', user_detail, name=group_detail),
url(r'^schools', school_list, name=school_list),
url(r'^schools/(?P<pk>[0-9]+)/$', school_detail, name=school_detail),
] # Login and logout views for the browsable API
urlpatterns += [
url(r'^api-auth/', include('rest_framework.urls',
namespace='rest_framework')),
]We started by importing views we had created and then hooking the urls for each of them.We also need to wire up the root urlconf, in the geoapi/urls.py file, to include our snippet app's URLs. Your file should appear like this:
from django.conf.urls import url, include
from django.contrib import admin
from mygeoapi import views
from rest_framework.routers import DefaultRouter

router = DefaultRouter()
router.register(r'users', views.UserViewSet)
router.register(r'groups', views.GroupViewSet)
router.register(r'schools', views.SchoolViewSet)

urlpatterns = [
    url(r'^admin/', admin.site.urls),
    url(r'^api-auth/', include('rest_framework.urls', namespace='rest_framework')),
    url(r'^', include(router.urls))
]Just one thing to do: we need to tell the admin that School objects have an admin interface. To do this, open the mygeoapi/admin.py file, and edit it to look like this:
# -*- coding: utf-8 -*-
from __future__ import unicode_literals

from django.contrib import admin
from .models import School

admin.site.register(School)Let's make sure that our app is functioning well. Run the following command to check our progress then open the development server in your browser and you will see a congratulations message.:
$ geoapi/manage.py runserver 0.0.0.0:8000In your web browser, visit your server's domain name or IP address followed by :8000:
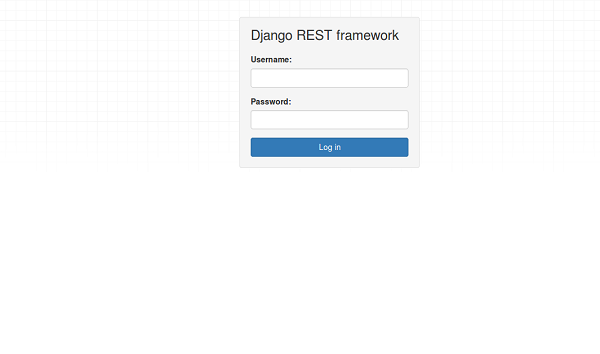
http://server_domain_or_IP:8000Go to http://server_domain_or_IP:8000/admin and you will be welcomed with a new django rest framework admin interface similar to the one shown below.

Log in using the superuser username and password created earlier.
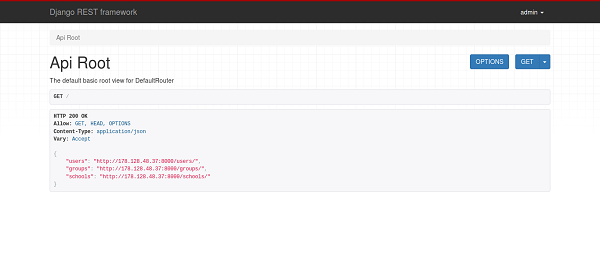
Once logged in you will see the page below:

Three api endpoints exist ie
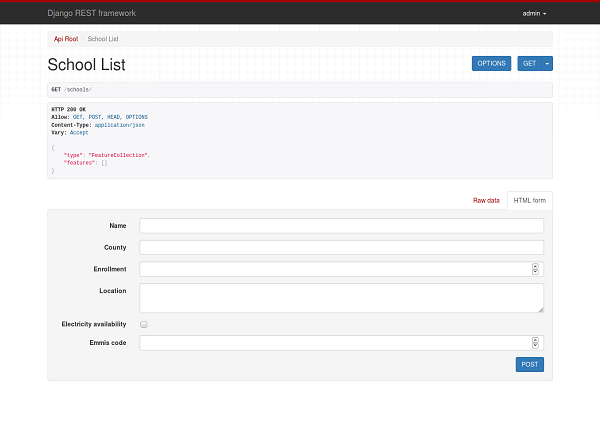
Let's take a look at the schools api endpoint. Use the url http://server_domain_or_IP:8000/schools. You should see something similar to the image below:

You are allowed to make GET, POST, PUT, and DELETE. The names of the methods are self-explanatory. For example GET enables you to retrieve data from the server. POST enables you to add data to an existing file or resource in the server. PUT lets you replace an existing file or resource in the server. And DELETE lets you delete data from the server.
With that in place you are now able to create and run a Django REST Framework -GIS on your ubuntu 16.04 Alibaba Cloud ECS instance.
We are now able to create a Django Rest Framework that is GIS enabled. You can find and clone the source code on my GitHub.
How to Create a Django Rest Framework-GIS on Ubuntu 16.04 Server (Part 1)

2,593 posts | 793 followers
FollowAlibaba Clouder - March 18, 2019
Alibaba Clouder - December 17, 2018
Alibaba Clouder - December 26, 2018
Alibaba Clouder - August 2, 2018
Alibaba Clouder - August 9, 2019
Alibaba Clouder - March 22, 2019

2,593 posts | 793 followers
Follow ECS(Elastic Compute Service)
Elastic and secure virtual cloud servers to cater all your cloud hosting needs.
Learn More OSS(Object Storage Service)
An encrypted and secure cloud storage service which stores, processes and accesses massive amounts of data from anywhere in the world
Learn More Marketplace
Marketplace is an online market for users to search and quickly use the software as image for Alibaba Cloud products.
Learn MoreMore Posts by Alibaba Clouder
5269073515850975 November 11, 2019 at 11:45 pm
Hi, when i do a Distance to Point Filter query, it returns everything from the database and does not sort the result by distance. I installed the filters according to the tutorial and I also tried it by downloading your code from github.