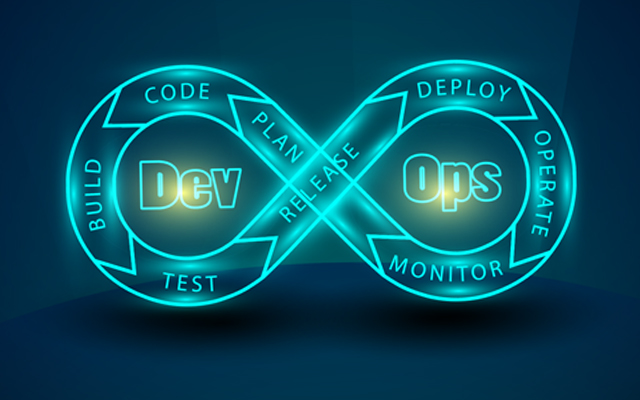
DevOps refers to a set of well-known practices for automating software deliveries. By design, DevOps allows for easier maintenance and updating through continuous testing, code quality improvement, and feature development. One of the primary objectives of utilizing DevOps is to facilitate developers to perform quick, reliable, and automated publishing without any human interference – a feature known as continuous delivery. This document explains how you can implement DevOps with Android apps.
Robust continuous integration is essential for implementing continuous delivery. Although continuous integration is readily available within the Android environment, let us review it again.
All Android apps must support continuous integration. In fact, continuous integration provides modern app development with several significant advantages, such as:
Before implementing continuous integration, you need to prepare an integration server such as Jenkins or Travis. The steps involved in the continuous integration process is as follows.
That is it! As you can see, the entire process is not only simple but also ensures the implementation of all the advantages of continuous integration.
Testing is very important since it is the only way to prove that the apps run as expected. There are plenty of tools that can help you write a great test code, but you still have to make an informed choice.
Also, you must be practical when selecting function libraries for integration into the app. In fact, you must understand that function libraries with higher test coverage facilitate app testing. This is because these libraries take into account not only testing accuracy but also ways to improve development through testing (IMO, OkHttp, and Retrofit are all good examples.)
A function library like Dagger can also boost testability. In fact, it forces you to follow the "Single Responsibility Principle," in which the code is separated appropriately to simplify testing.
Now that we are familiar with implementing robust continuous integration, let us look at an example of the upgrading process.
Trainline EU releases a new version of its booking app, Captain Train, every six weeks. Currently, it is in beta phase, with support for four locales, four language environments, and three types of devices (phones, 7- and 9-inch tablets). The developers create release notes, use the rollout feature, and upload 72 screenshots (6 screenshots 4 locales 3 types). It has an Android Wear companion, currently in test phase.
This upgrading process takes a long time to complete. Recently, the firm made serious attempts to automate the process to accelerate version releases whenever possible. Furthermore, this automation eliminates human errors and ensures consistency among different released versions. Developers can control the entire release process, while the marketing team needs cooperate with them to integrate changes into the different released versions.
Since developers cannot control every aspect of Android, Google has to provide them with the necessary tools. For instance, Google provides developers with HTTP APIs so that they can easily interact with the Google Play console. Also, Google provides clients with various development languages such as Java (this is a must), Python, and Ruby.
This document mainly describes the Java client as it is the best-known client for Android developers.
This process involves two steps: configuring the console to enable the client and then discovering the APIs. Configuration is the hardest part when you try to establish a connection with Google.
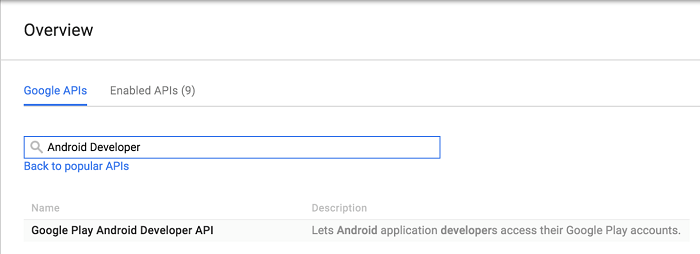
First, you have to create a project in the Google console, that is, if no projects are available. Next, enable Google Play Android Developer API.

Once done, create a credential of type service account key.
Next, create a Service account key type certificate.

Complete the table and download the JSON certificate file. During the process, you need to save the following three values: private_key_id, private_key, and client_email. Save the value of the private_key to its secret.pem file.
Now, the developer console is ready. Next, move to the second console.
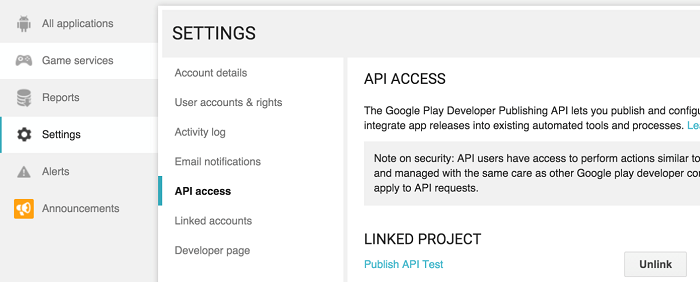
To begin, connect to your Google Play console. To do this, navigate to Settings > API access:

Connect to your project. Authorize the email address that you entered in client_email of the JSON file in Service accounts.
That is all the required steps. Now, you are good to go!
You need to configure the access interfaces through the Java client. To do this, create a Java project in the publisher and add the following dependencies (available in maven central):
compile 'com.google.apis:google-api-services-androidpublisher:
v2-rev20-1.21.0'
Then, create a new AndroidPublisher. To do this, first update GoogleCredential with the following information: the client connection, the JSON factory, the private key ID that corresponds to private_key_id, the account ID that corresponds to client_email, the ANDROIDPUBLISHER range, and the key file that corresponds to private_key and contains private key information.
Then, create an AndroidPublisher instance using the app package.
http = GoogleNetHttpTransport.newTrustedTransport();
json = JacksonFactory.getDefaultInstance();

Set<String> scopes =
      Collections.singleton(AndroidPublisherScopes.ANDROIDPUBLISHER);

GoogleCredential credential = new GoogleCredential.Builder().
                setTransport(http).
                setJsonFactory(json).
                setServiceAccountPrivateKeyId(KEY_ID).
                setServiceAccountId(SERVICE_ACCOUNT_EMAIL).
                setServiceAccountScopes(scopes).
                setServiceAccountPrivateKeyFromPemFile(secretFile).
                build();

publisher = new AndroidPublisher.Builder(http, json, credential).
                setApplicationName(PACKAGE).
                build();
AndroidPublisher is the main entry to Google APIs. It provides the "edits" method that allows you to modify the data that you want to obtain from the console.
To create a new version, you must start with the "insert" request and save its "id", which you will use during each subsequent call.
AndroidPublisher.Edits edits = publisher.edits();

AppEdit edit = edits.insert(PACKAGE, null).execute();
String id = edit.getId();
Now, you can begin modifying console data. For example, you can change the ranking:
Listings listings = edits.listings();

Listing listing = new Listing().
                        setFullDescription(description).
                        setShortDescription(shortDescription).
                        setTitle(title);

listings.update(PACKAGE, id, "en_US", listing).execute();
You can also upload a screenshot:
Images images = edits.images();
FileContent content = new FileContent(PNG_MIME_TYPE, file);
images.upload(PACKAGE, id, "en_US", "phone5", content).execute();
Lastly, you can upload an APK:
// APK upload
Apks apks = edits.apks();
FileContent apkContent = new FileContent(APK_MIME_TYPE, apkFile);
Apk apk = apks.upload(PACKAGE, id, apkContent).execute();
int version = apk.getVersionCode();

// Assign APK to Track
Tracks tracks = edits.tracks();
List<Integer> versions = Collections.singletonList(version)
Track track = new Track().setVersionCodes(versions);
tracks.update(PACKAGE, id, "production", track).execute();

// Update APK listing
Apklistings apklistings = edits.apklistings();
ApkListing whatsnew = new ApkListing().setRecentChanges(changes);
apklistings.update(PACKAGE, id, version, "en_US", whatsnew).execute();
It is advisable that you understand this interface in depth. It is very powerful and with minimal complexity.
Finally, you must submit your version. In fact, Google records all your change requests, but it does not save them unless you have submitted the version. You should verify those changes before submission.
edits.validate(PACKAGE, id).execute();
edits.commit(PACKAGE, id).execute();
As you can see, you can use the ID that you retrieved at the beginning of the code as the transaction ID. By calling insert, update/upload for your changes to start a transaction, you can then validate and commit those changes.
Currently, Android apps support DevOps activities and provide robust continuous delivery capabilities. In the Captain Train example, developers can develop publishing tools to take full control of each step and the content of each key step. Once a release task is complete, they can run it as a script. Similarly, you can also use the Jenkins plug-in or the Gradle plug-in for the same purpose. However, in this method, you must exercise caution and remember to monitor the operation status in the background as you are processing production.
By using such tools and processes, you can release new versions in the production environment simply by pushing the master branch. Such arrangement provides you with high levels of simplicity, efficiency, and reliability.
Obviously, the method that applies to one situation does not necessarily apply to all teams, companies, and apps. As such, you must determine an appropriate method based on your needs and teams' dynamics. Nonetheless, continuous delivery should be the common objective for every development team.

2,593 posts | 793 followers
FollowXianYu Tech - September 11, 2020
XianYu Tech - September 9, 2020
Farah Abdou - February 5, 2026
XianYu Tech - September 3, 2020
Aliware - July 27, 2020
Neel_Shah - August 8, 2025

2,593 posts | 793 followers
Follow DevOps Solution
Accelerate software development and delivery by integrating DevOps with the cloud
Learn More Alibaba Cloud Flow
An enterprise-level continuous delivery tool.
Learn MoreMore Posts by Alibaba Clouder